There is only one week left of the current Stampin’ Up! Catalogue and the Occasions Catalogue. I know there are lots of sneak peeks around of the new Catalogue but today I want to share a special project with you. The Painted Blooms Designer Series Paper in the Occasions Catalogue is just so gorgeous and it saddens me that I haven’t used enough of it yet. I had this idea in my head last week and just had to get this idea working before the week was out.
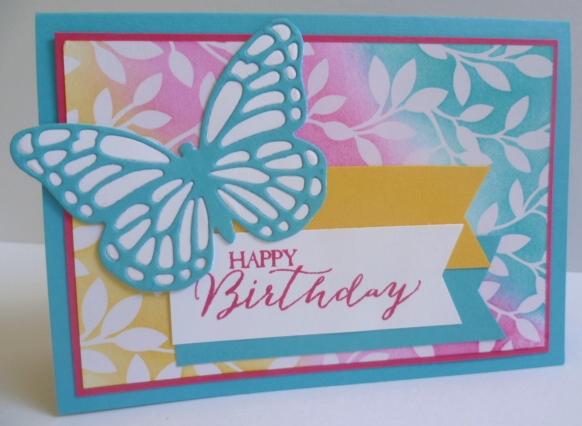
Firstly, I made the cards. In the pack of Painted Blooms DSP there is a sheet with a gorgeous flower garden scene. What could you really do with a sheet like this??? It just seems too nice to cut into it. I saw this idea on Patty Bennett’s blog to cut the sheet equally and make a card set. So I did just that!! Here are my cards.

Laying out all the cards like this you can see the lovely image. It does seem such a shame to cut it up but it does make a gorgeous card set. I changed the sentiments on my cards to the ones Patty had on her blog. The bases for the cards were either Blackberry Bliss, Pool Party, Wild Wasabi or Rose Red. I used ‘Perfect Pennnants’ for the sentiments in the top row. If you have a look under the sentiment, I punched out a circle using the 1 3/8″ circle punch, cut it in half and adhered that under the sentiment to layer it.. The sentiments for the cards in the bottom row were from ‘Wetlands’ set. I cut this out with the smallest banner die in the Banner Framelits set and I hand cut a narrow banner to adhere under that.
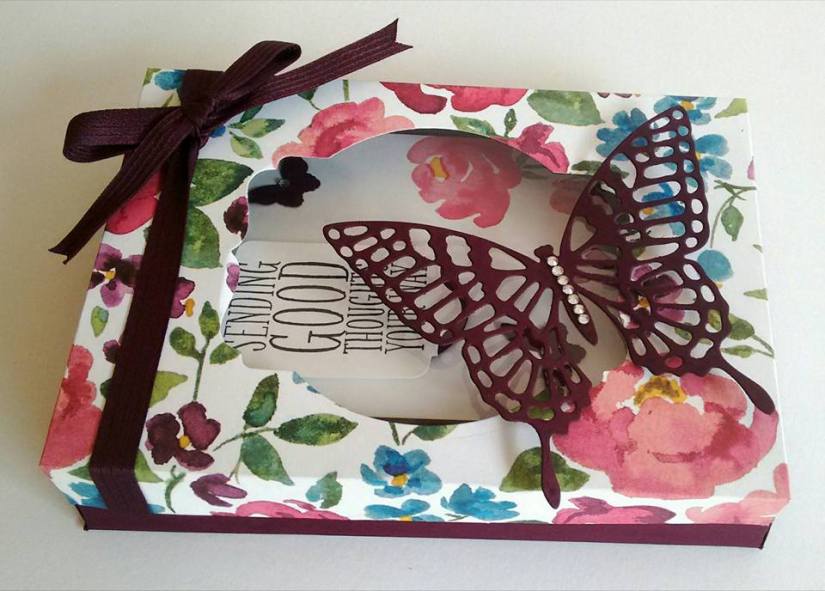
Now after making this card set I needed something nice to put them in. I wanted a window gift box. I came across this idea from Chiaki on Stampingpro. I used the Dressup Card Box listed HERE on the instruction Sheets. I did change the measurements. (It took a little fiddling!). The Australian card bases are larger in size than the US and the envelopes I had were larger too (mine weren’t Stampin’ Up! ones – shh!). I will tell you my measurements shortly but here is the finished box.
ABOUT THE BOX
The lid for the box was made using another sheet in the pack of Painted Blooms DSP. On the bottom of the box inside I adhered a matching piece of that DSP to line the box. I didn’t take a picture of that. The Blackberry Bliss Satin ribbon is not wrapped around the whole box. I wrapped a piece over the lid and tucked the ends just inside the lid. That means the receiver won’t have to undo the ribbon each time they open the box. I tied a bow with the ribbon and attached that to the top.
I cut a window in the lid – BEFORE ASSEMBLING – with the Deco Labels Framelits. The width is a little wider than the Big Shot so I had to fold up one side and lay it over the framelit. I adhered a piece of Window Sheet inside the box lid. That just finishes it off. I cut a large butterfly using the Butterfly Dies and adhered that straight on to the acetate. A little bling never goes astray to finish off a project 🙂
Now for the actual box measurements. I will give you the measurements I used. For those with Imperial measurements you can follow Chiaki’s tutorial. I am sure those measurements will be fine.
THE BOX (Metric)
BOX BASE
Cut card 19cm x 24cm. Score on each side at 3.2cm. Cut up opposite tabs on both ends and adhere.
BOX LID
Cut card 21.5cm x 16.5cm. Score at each side at 1.9cm. Cut up opposite tabs on both ends. Cut your window before adhering together.
Hope you like this project?? Thanks for stopping by,
Jenny