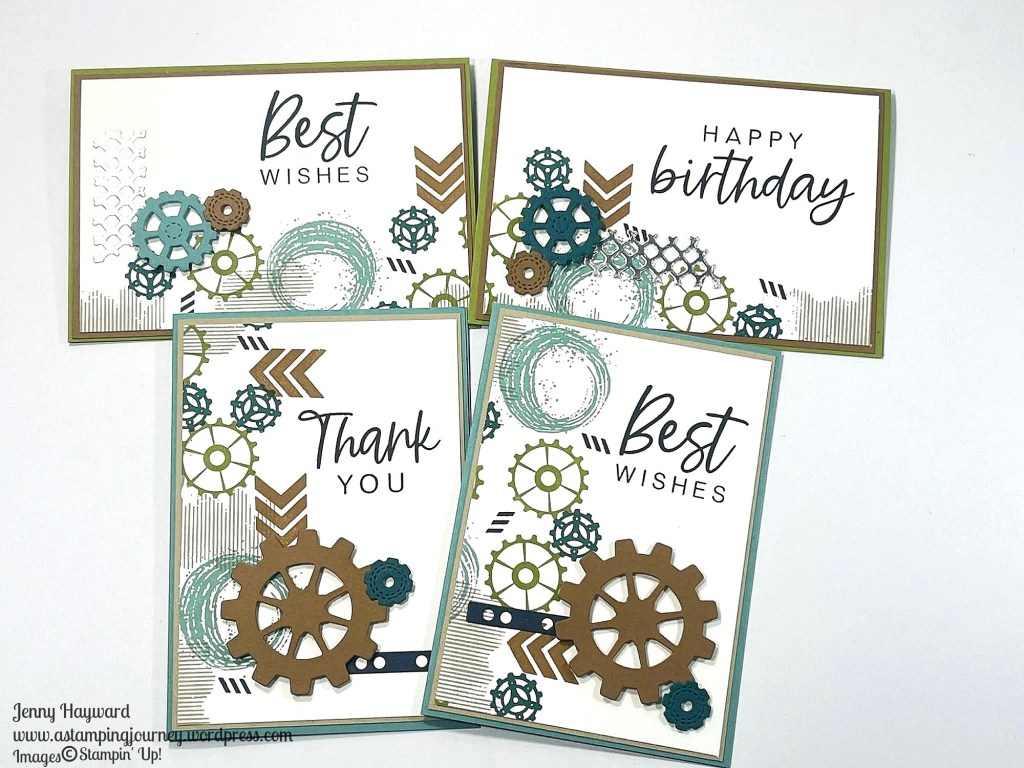
I can finally share these cards with you – and the video. It’s been a busy time over the last few weeks so it has been hard to get time to share them.
These are One Sheet Wonder Style cards. They are so easy to create. Make 4 cards all in one go. Some simple random stamping and cut. Add then add to Card Bases and Card Mats and add diecut pieces and you are done. Oh and add a sentiment too.
These were the cards I created as Swaps for Onstage last month so they were quick to make a lot. I have put together a video to show you how it is done. A written Tutorial will be sent out to my newsletter subscribers tomorrow.
You could use any stamps and dies for this idea – Flowers, Butterflies, Seashells. Use what you have.
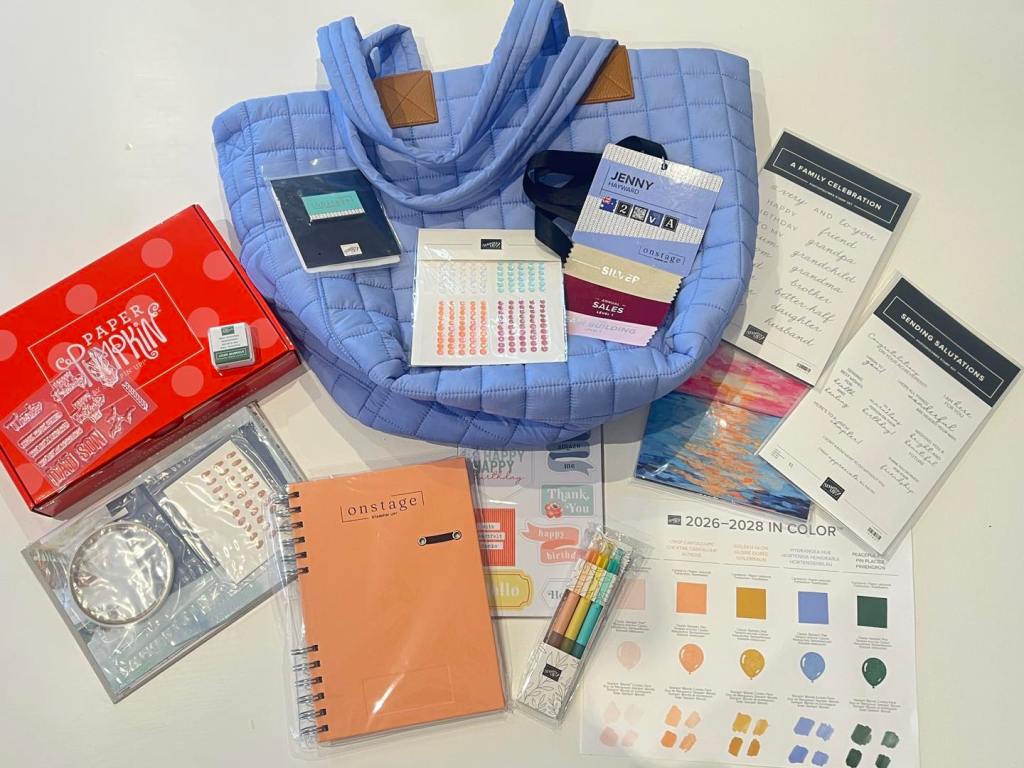
You have probably heard a lot of talk of the Stampin’ Up! Onstage event last weekend. You might have even gone yourself at one of the event centres. I went to the Onstage in Sydney, Australia. It was awesome connecting with all my Stampin’ Up! Friends again rather than see them on a screen or on Social Media. It fills your cup. 🙂
I put together a Video Sharing the Swaps I receive. You could see photos of the Swaps. (And I will share them in the next post later) but showing them in the Video I can look more closely at the details and look at all that extra texture. I share some Sneak Peeks and news too. And What is happening in my World. Changes are coming! (I will add that further below too).
You can see that Video -> HERE (if it doesn’t show below)
Of course going to Onstage we receive a Swag of goodies including a Tote Bag, pens, notebook and other bits. Also some Prize Patrol and … Paper Pumpkin. More on that in another post too.
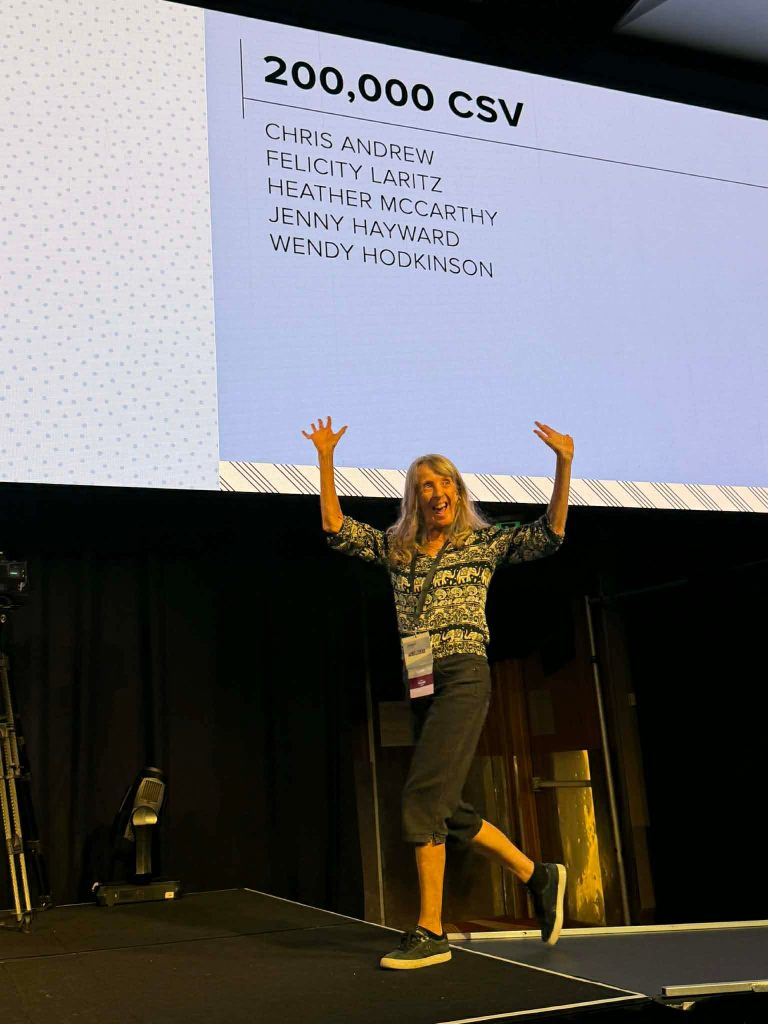
It’s taken a while and finally cracked the 200,000 CSV in Sales (equivalent to just over 300,000 AUD). I got to do a stage walk for that. Pretty exciting!
NOTE: The sales achievements listed here are not representative of typical Stampin’ Up! demonstrators.
So, What’s happening in my World…
Changes are coming. I’m still not 100% sure how I will navigate it but it will work out I am sure. I mention briefly in the video but thought I would give more background.
I have been running Face to Face Classes for nearly all of the 18 years I have been a Demonstrator. It’s been wonderful meeting in person and sharing cardmaking.
We are moving. Soon, my studio, our large shed and our house is being demolished. (Quietly freaking out here now …). We are building a new house so will rent elsewhere during the build. With our rental house I will have a small craft room and when we return to our new house I will have a small craft room also. But the designated Studio will be gone. I still endeavour to hold classes though. You can still have fun around the Dining Table. While I’m renting it may be a little more difficult but I will try.
I’m planning to turn more frequently to Online. Maybe some more regular videos, maybe some Online Classes. What would you like to see more of?
It’s all fun and exciting, scary and overwhelming. But we will work some way to create together.
So I will leave you to watch the video. I will share more of the swaps and news in later posts.
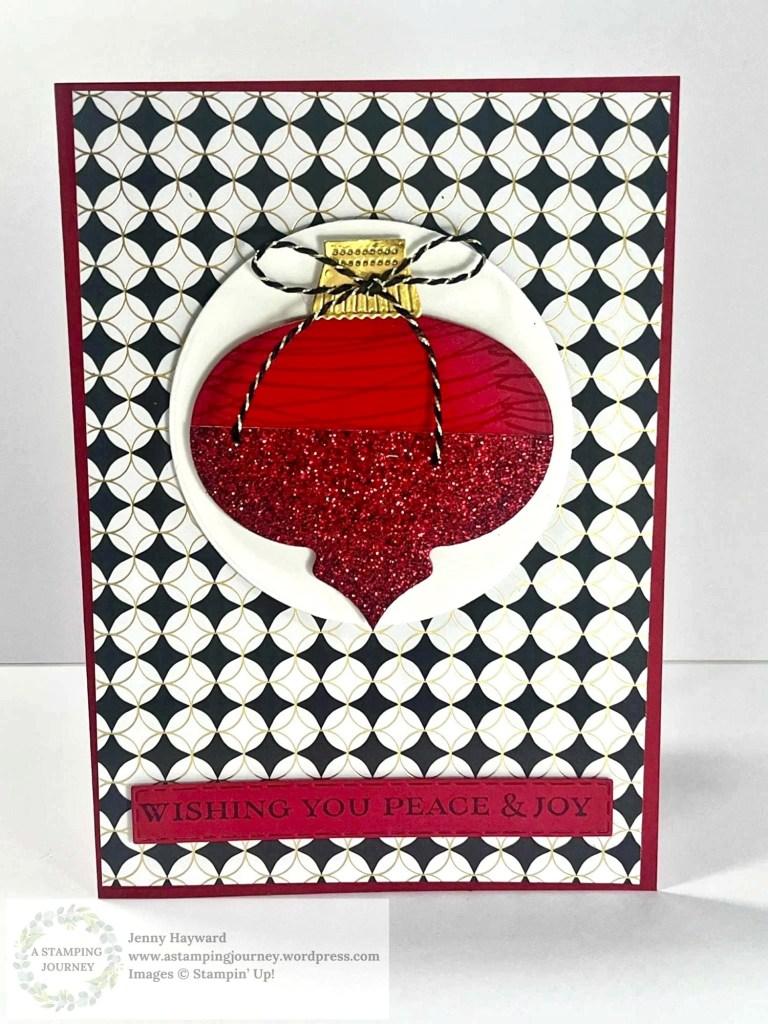
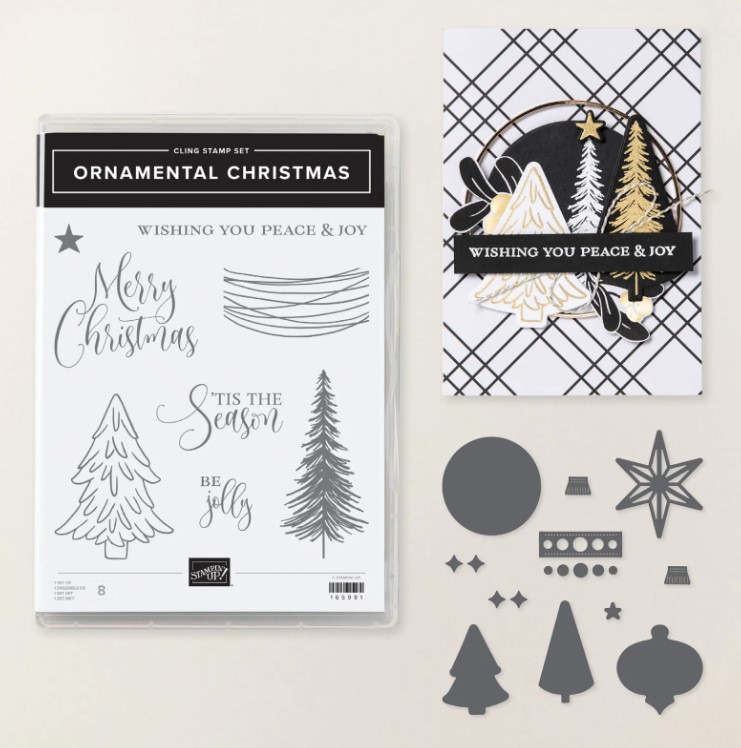
Do you like sparkle for your Christmas cards? On this card I added some red Glimmer Paper for the Ornament to make it sparkly.
The card is using the Ornamental Christmas Bundle. The curvy lines that are in the stamp set I stamped across the top of the diecut ornament for some extra detail. When I diecut the ornament I added a piece of Glimmer Paper with the red card so this would all cut together and would line up with this ornament. You can do it separately though too if you would rather.
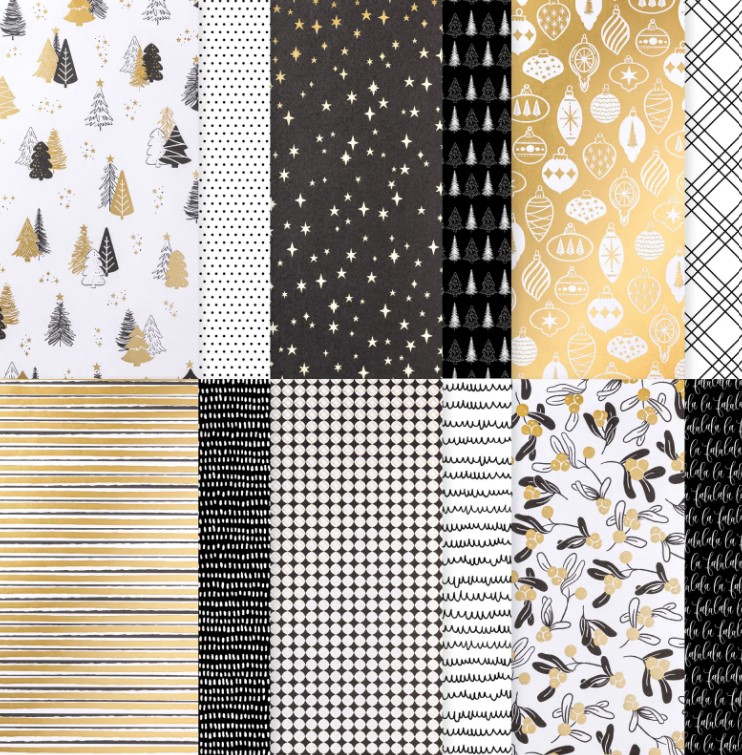
The paper is from the Modern Christmas Specialty Paper.
This is one of the cards we made at our Modern Christmas Class last weekend. I realised I hadn’t shown you all the projects yet.
This is the Ornamental Christmas Bundle. It’s an Online Exclusives so not in the Holiday Catalogue. You can see it more -> HERE.
How is your Christmas creating going?? Time to send those cards out so they can get there in time. I so need to do this myself …
Christmas time is certainly the occasion for some gold and shine. This is a simple card with shine using the Modern Christmas Specialty Paper. And the addition of the Ornamental Christmas Bundle.
Initially I stamped the sentiment in black ink on the Garden Green card. It just felt flat. After a couple of days I came back to it and I redid it and heat embossed the sentiment in Gold. That made it extra shiny and classy.
If a card is not working sometimes it’s just a matter of redoing the sentiment to give it a little WOW! especially with some shiny gold.
I’m loving the Ornamental Christmas Bundle and the Modern Christmas Paper. The paper is not your traditional red and green but you can add those colours as well. It gives you extra class.
Wednesday’s WOW! #170 – Colour your Embossed Card with Ink.
If you have an embossed image on white card sometimes it can be a little plain. You can add a little colour to lift it. Of course you could swipe the Inkpad over the Embossing Folder before or after embossing, but try a little light watercolouring with your Water Painter and Ink Pads. It can really highlight the detail.
This one is with the Traditional Wreath Embossing Folder but you could try it with most folders.
Try it out.
Happy Crafting,
Jenny
If you need supplies for your crafting then I would love to help you. You can stop by my store -> HERE OR Contact me directly.
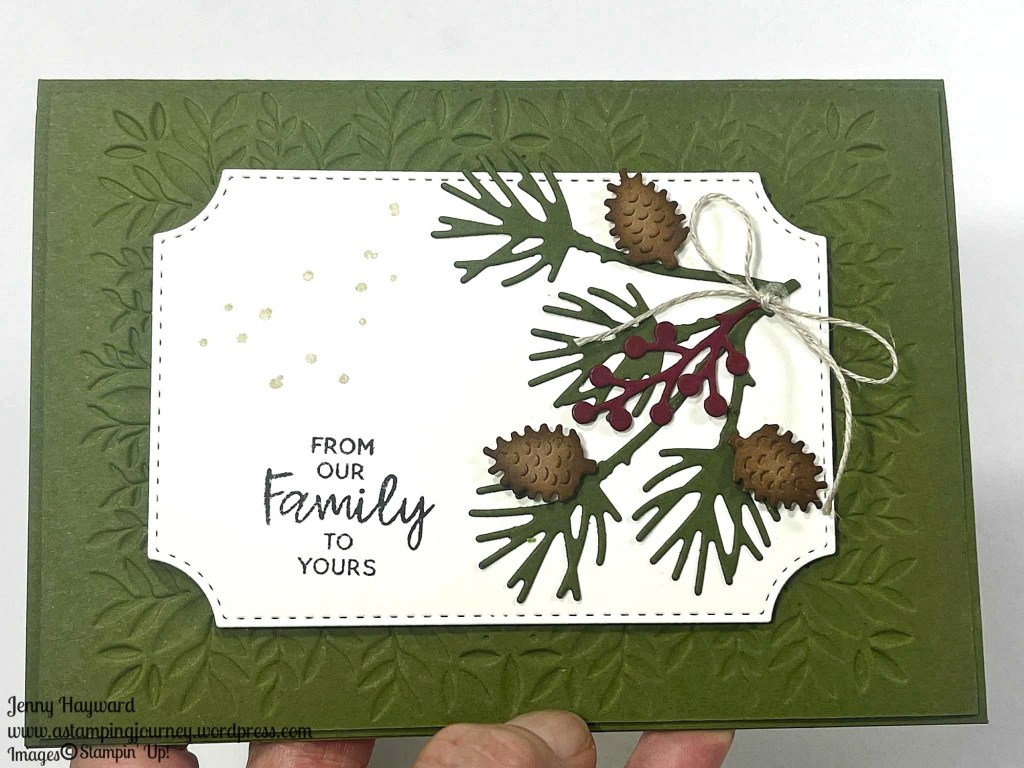
We had our Branching Out Class last week. We made 3 different cards with this Bundle. It is so diverse and I will show you the cards over time but this is one of them.
We embossed the Mossy Meadow Card Mat with the Peaceful Greenery Embossing Folder. Then diecut the leaf stems and the pinecones.
While I was sitting in the class I assembled one of the cards and decided to flip the embossed Card Mat. It gives a different impression but still looks ok I think.
What do you think? I don’t think there is a right or wrong with this folder. It just gives a different impression for your project.
If you are a Wollongong local I would love to see you at our classes. They have a lot of fun. I usually advertise them here on my blog or on my website or Facebook. If you still can’t find them contact me. It would be great to see you.
Hope you get some creative time in soon,
Jenny
If you need some supplies I would love to help you get them. You can shop in my store -> HERE Or Contact me directly.
I made this weeks ago but just remembering to share with you now.
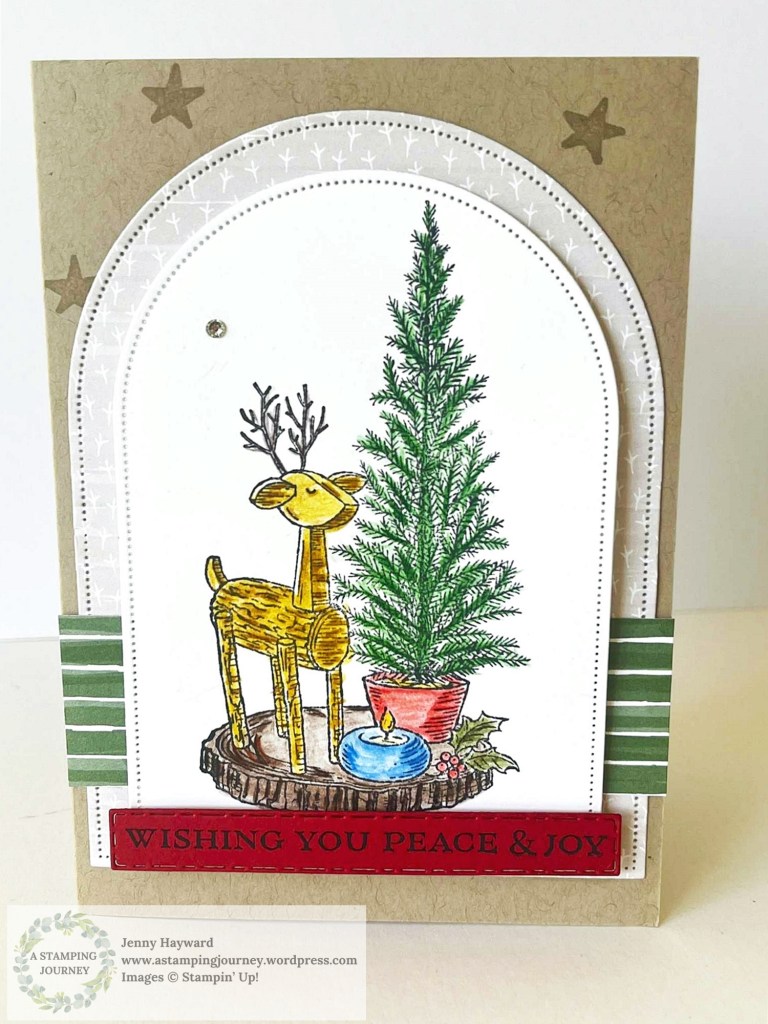
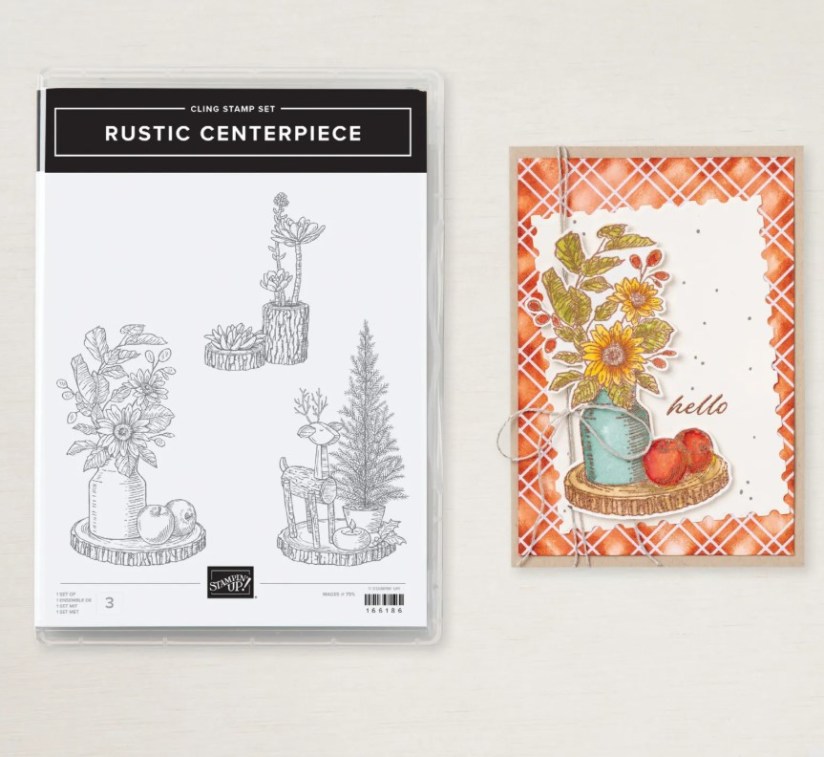
This one is with the Rustic Centerpiece Stamp Set. It’s a set with images that can be used for different occasions through the year.
I like the rustic deer and tree on this one. I coloured it with the Watercolor Pencils. I find them easier to control rather than the Stampin’ Blends or Watercolouring especially when there are finer details.
The sentiment is from the Ornamental Christmas Stamp Set. The paper is with the Nests of Winter Designer Series Paper. It works well for Christmas too.
I realised I haven’t shared the other cards I have made with this set too. I shared them on my Facebook but missed it here. SO… I will be back soon with those projects.
Crafting time is a little sparse at the moment but I hope to be back soon with some more creating. Especially as we start getting in to the busy Christmas season.
Happy Crafting,
Jenny
Do you need some crafting Stampin’ Up! supplies? I would love to help you get them. Head to my store -> HERE OR Contact me directly.
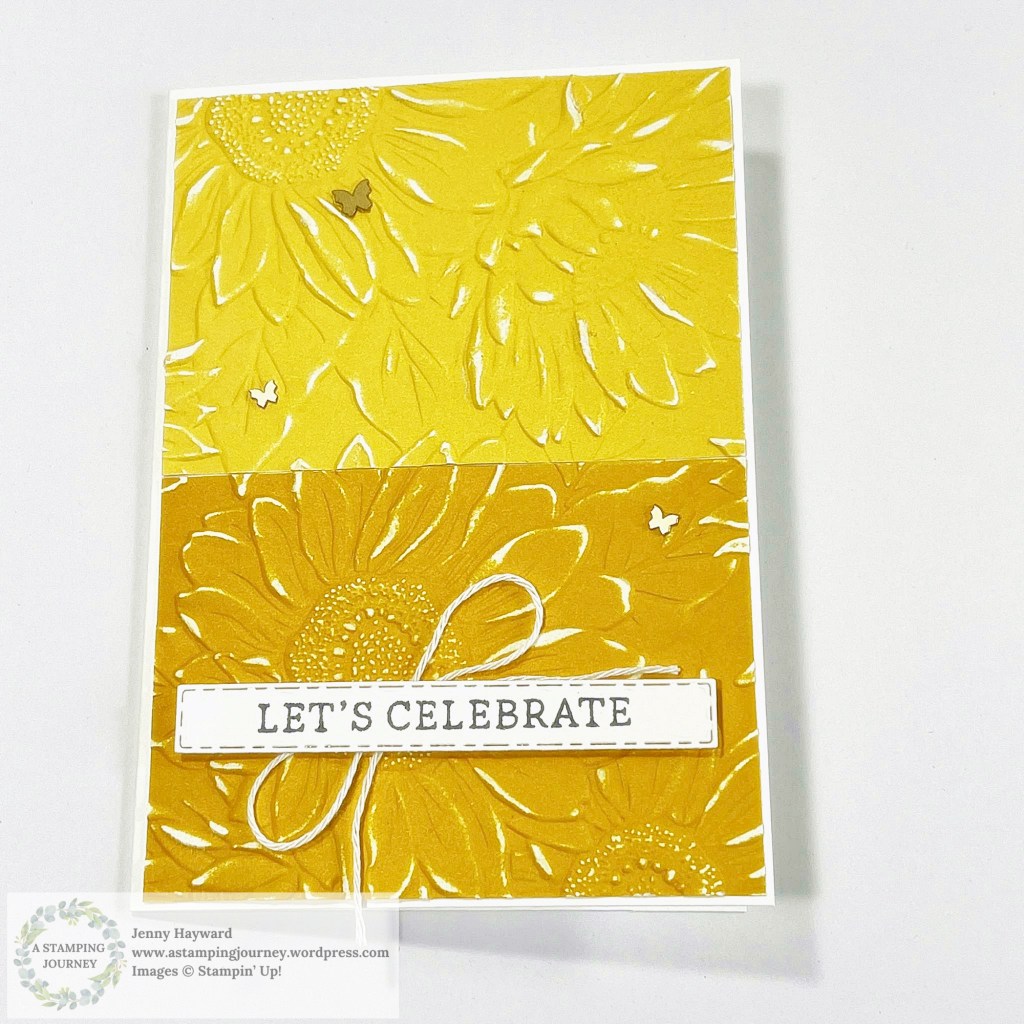
I have been playing a lot with the Sunflower 3D Embossing Folder and experimenting with the Two-Tone cardstock. So I put them together.
Here are 2 cards that I created. Some nice sunshine-y yellow to brighten your day.
For this one below I cut a piece of the Daffodil Delight Two-Tone Cardstock just slightly smaller than the front of the card. Then I cut the piece in half and flipped one half. I put the pieces together in the Embossing Folder and embossed them. I lightly sanded the embossed cardstock to reveal the white. I adhered them to the front of a white Card Base and added a simple sentiment.
We made this card recently in my local class playing with the Two-Tone Cardstock. If you are a Wollongong local I would love you to join in our classes each month. Contact me to find out more about them.
On this one below I cut a piece of the Two-Tone Daffodil Delight and embossed that. I lightly sanded the piece and added it to a white card Base. The sentiment heat embossed in white on black card and the Granny Apple Green leaf gives a ‘POP’ to the card.
You could do this in many other colours too. Hope you get to try it out.
Happy Crafting,
Jenny
If you are in Australia and “need” some supplies I would love to help you out. You can stop by my store -> HERE OR Contact me directly.
Wednesday’s WOW! #169.Some Fresh New Colours for creating Masculine Cards.
Do you find Masculine cards hard to make? I know I do. I resort to the blues, browns, yellows, reds.
Well, I have some fresh new colours to try.
What do you think? What colours will you try out next??
This is good timing with Father’s Day coming up soon here in Australia. But these are great for Birthdays and any other occasion for the boys. Big and Little Ones.
So maybe Pin this Image above or Save it so you can turn to it when you have some cards to make.
Happy Crafting,
Jenny
If you are in Australia and need some crafting supplies I would love to help you get them. You can head to my Store Online -> HERE OR Contact me directly.