cards, Catalogues, Stampin' Up!, Sunday Suites

SUNDAY SUITES – LOVELY AND BEAUTIFUL SUITE!

It’s Sunday Suites time with the Lovely & Beautiful Suite.

This is what is in the Lovely & Beautiful Suite. So much!

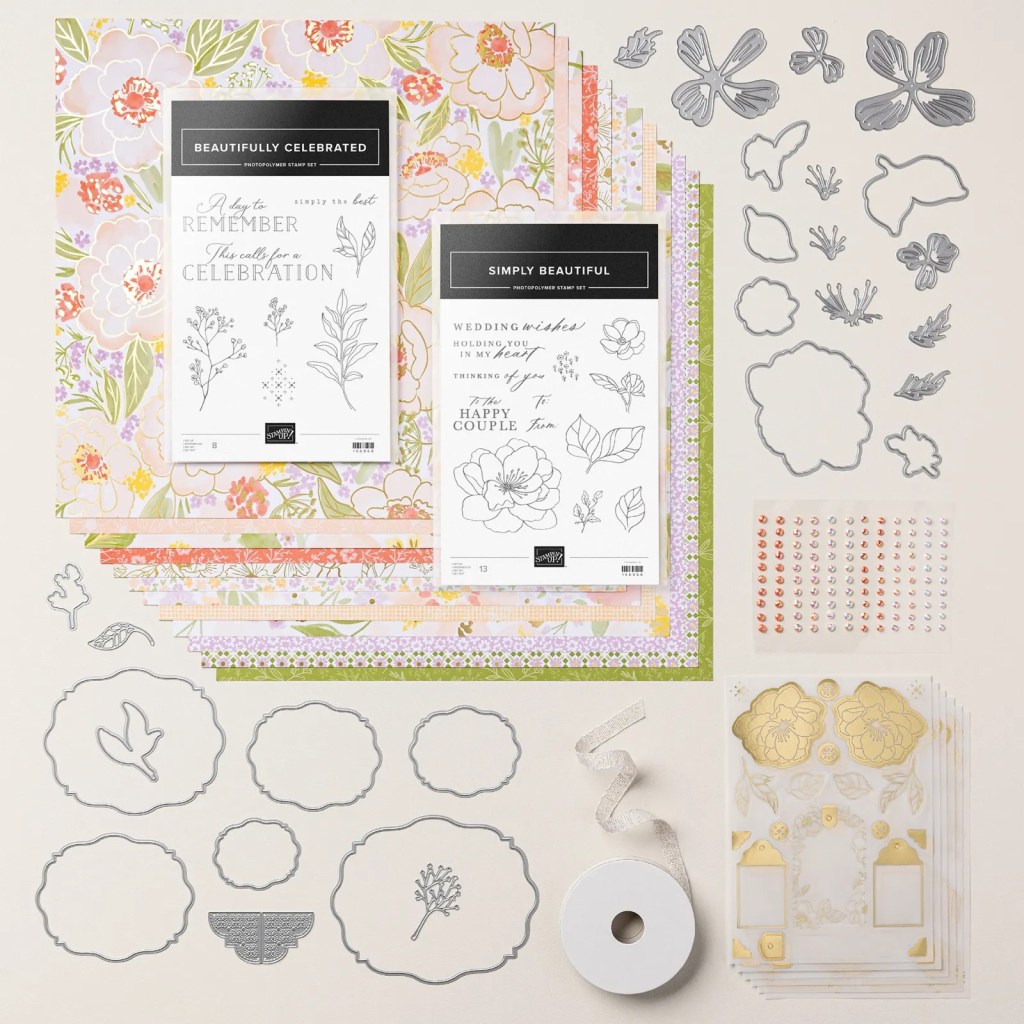
The Suite Collection includes:

  • The Simply Beautiful Bundle
  • The Beautifully Celebrated Bundle
  • The Lovely & Beautiful Specialty Designer Series Paper
  • The Beautifully Adorned Ephemera Pack
  • The White with Gold Ribbon 1cm (3/8″) 9.1 m (10 yards)
  • Pearlized Facted Circles – 120 adhesive-backed pieces. 40 each of 3 colours

Let’s look closer at these.

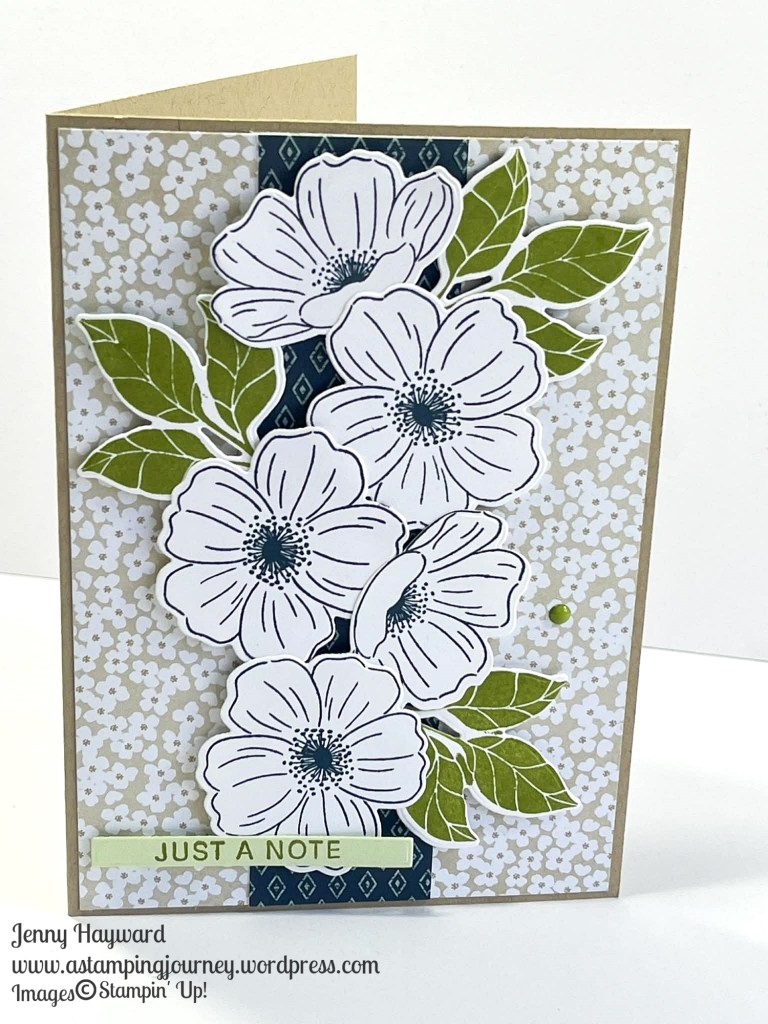
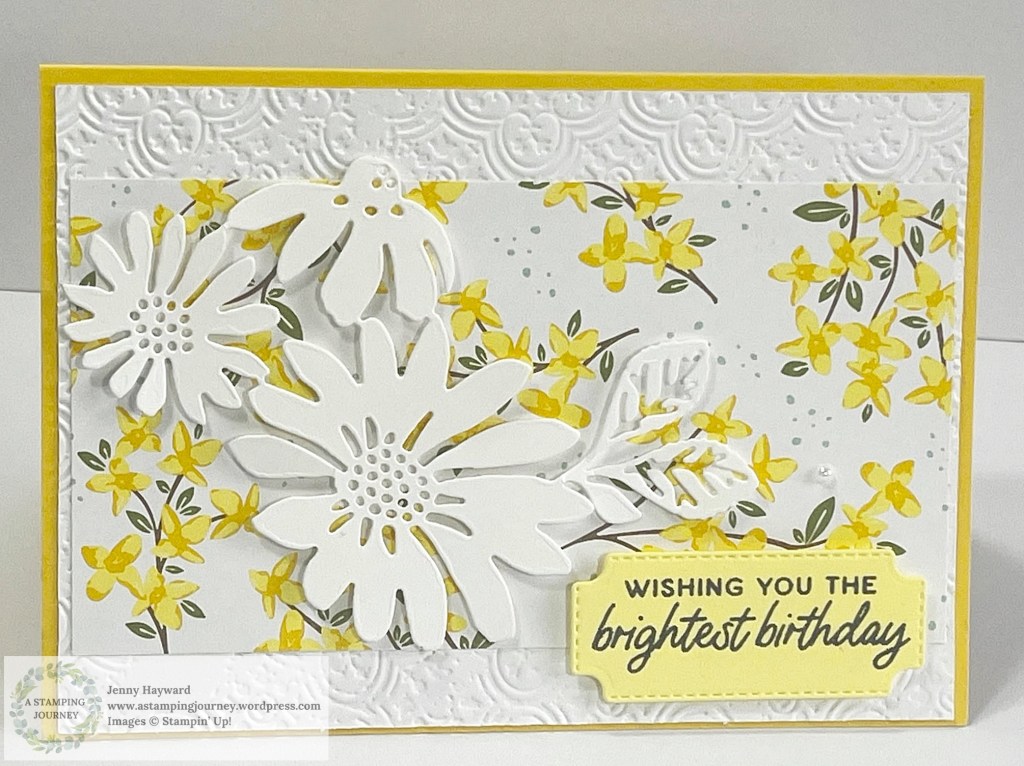
The Simply Beautiful Bundle. I like the flower dies in this set. They are sweet.

The Beautifully Celebrated Bundle.

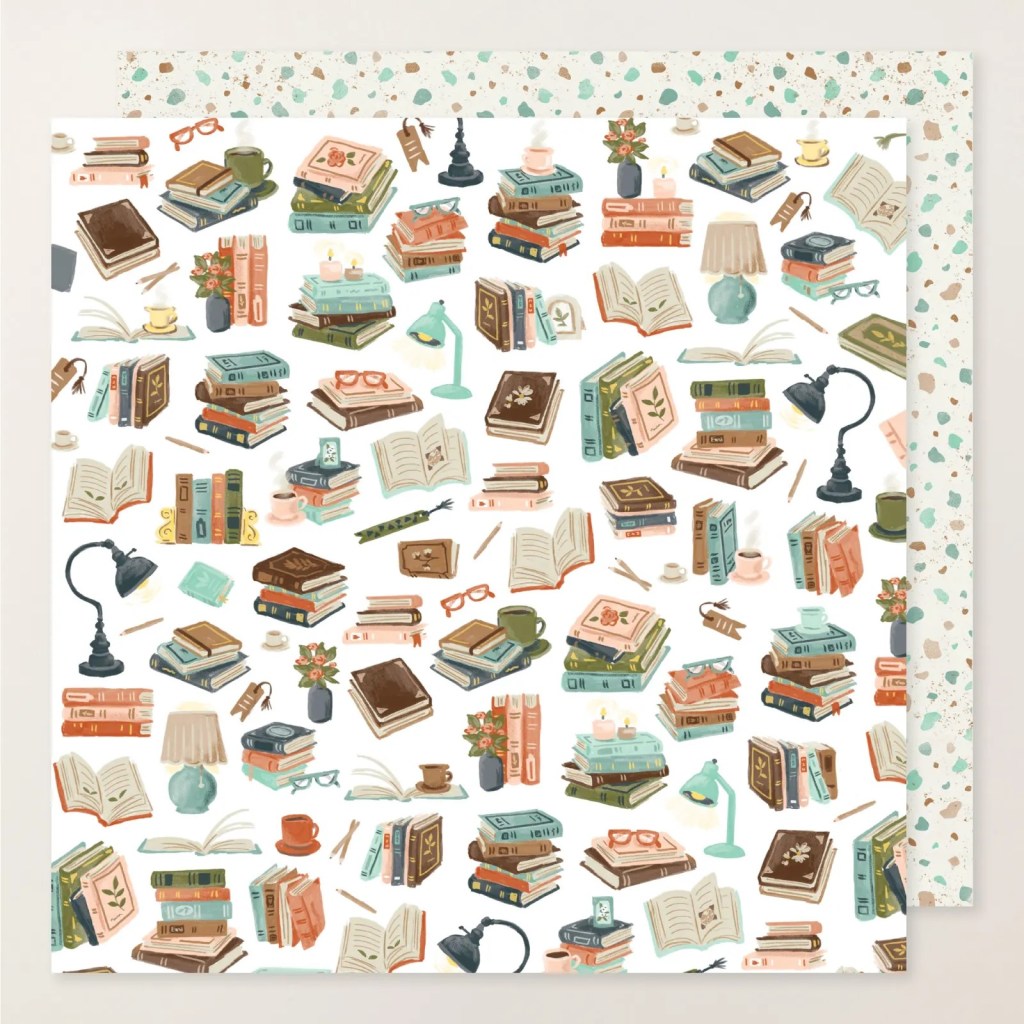
The Lovely & Beautiful Specialty Designer Series Paper. This paper is 12 sheets of 12″x12″. It featues soft pastels, delicate wildflowers, and metallic gold foil details. It is really gorgeous. The colours in this paper are Calypso Coral, Darling Duckling, Fresh Freesia, gold, Old Olive, Peach Pie, Petal Pink.

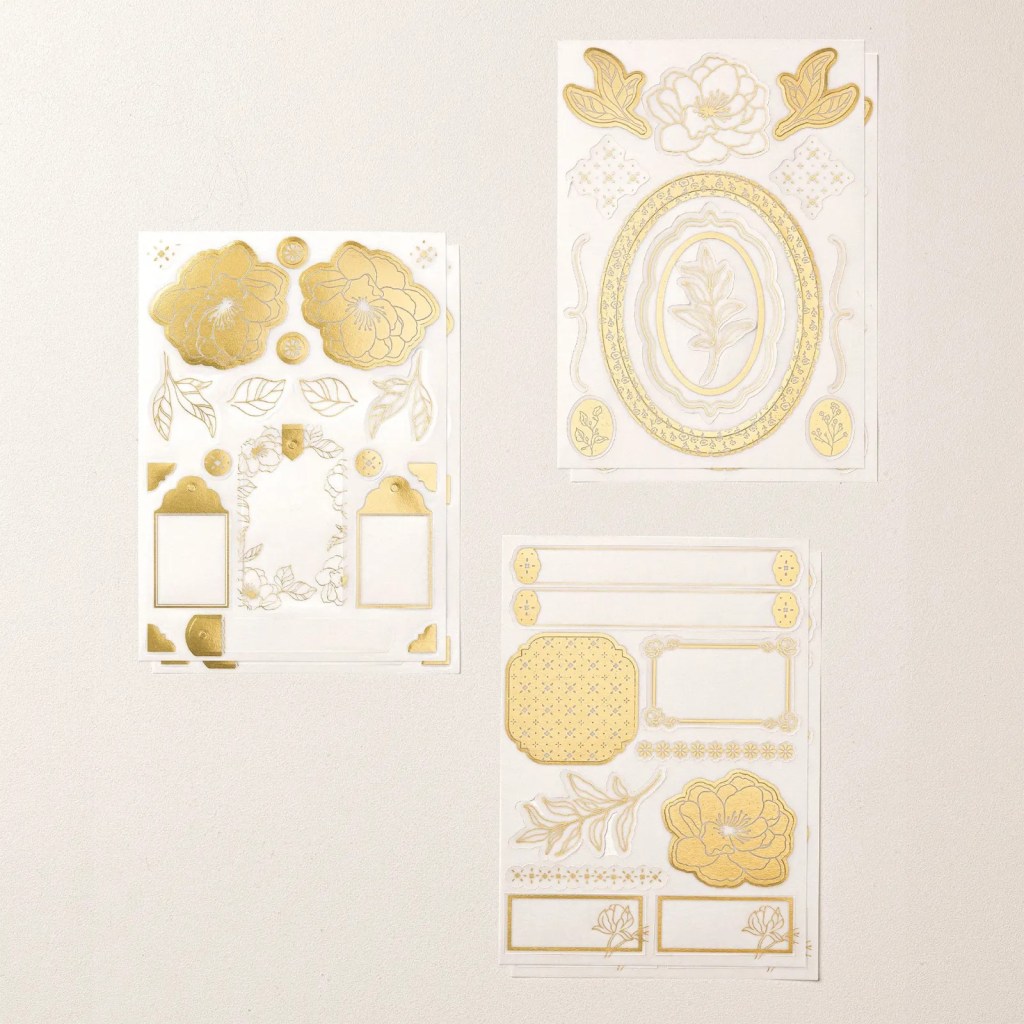
The Beautifully Adorned Ephemera Pack. The precut florals, elegant frames, whimsical tags, and more are all adorned with delicate gold foil on vellum. These intricate designs add a sophisticated touch to your projects.

There are 6 sheets: 2 each of 3 designs.
The Sheet size is 12.7cm x 17.8cm (5″ x 7″).

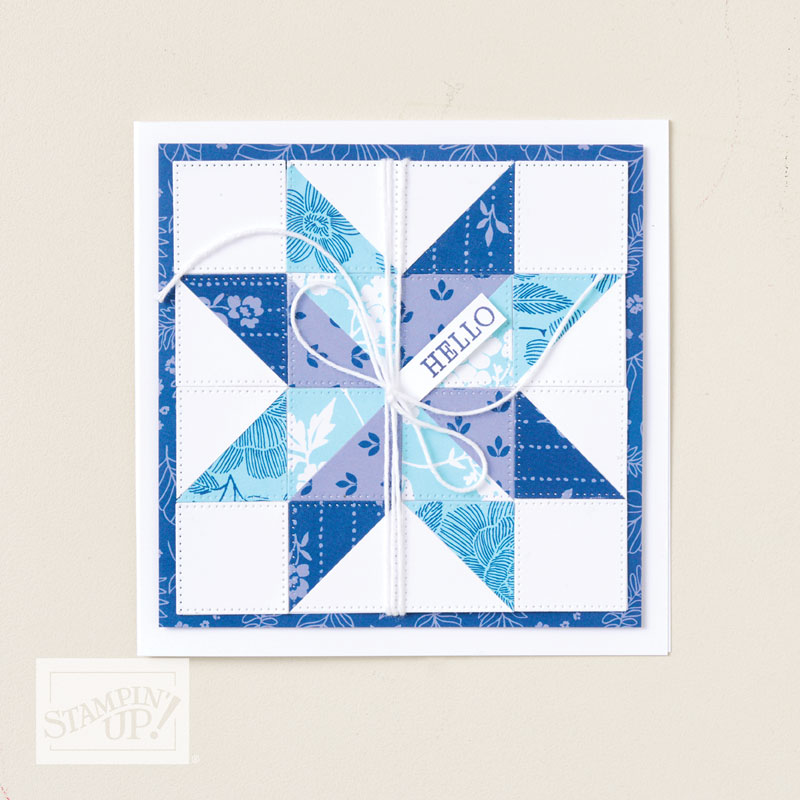
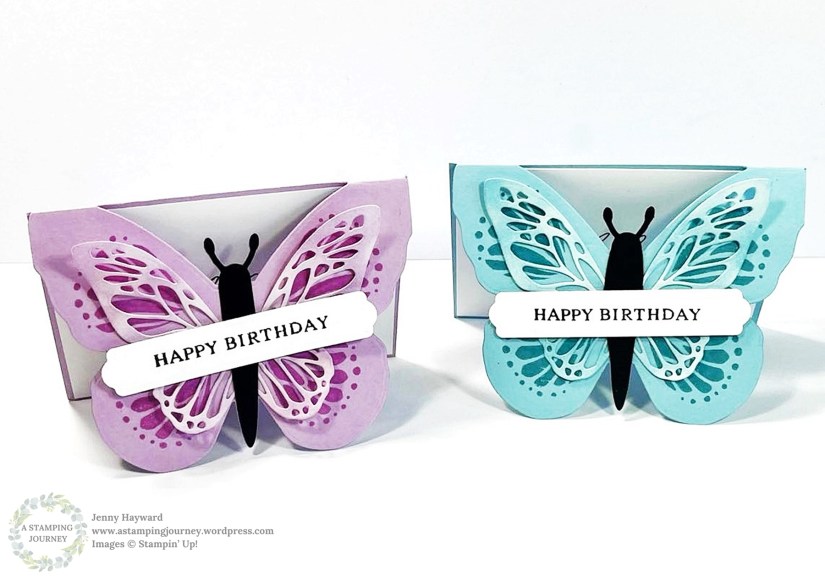
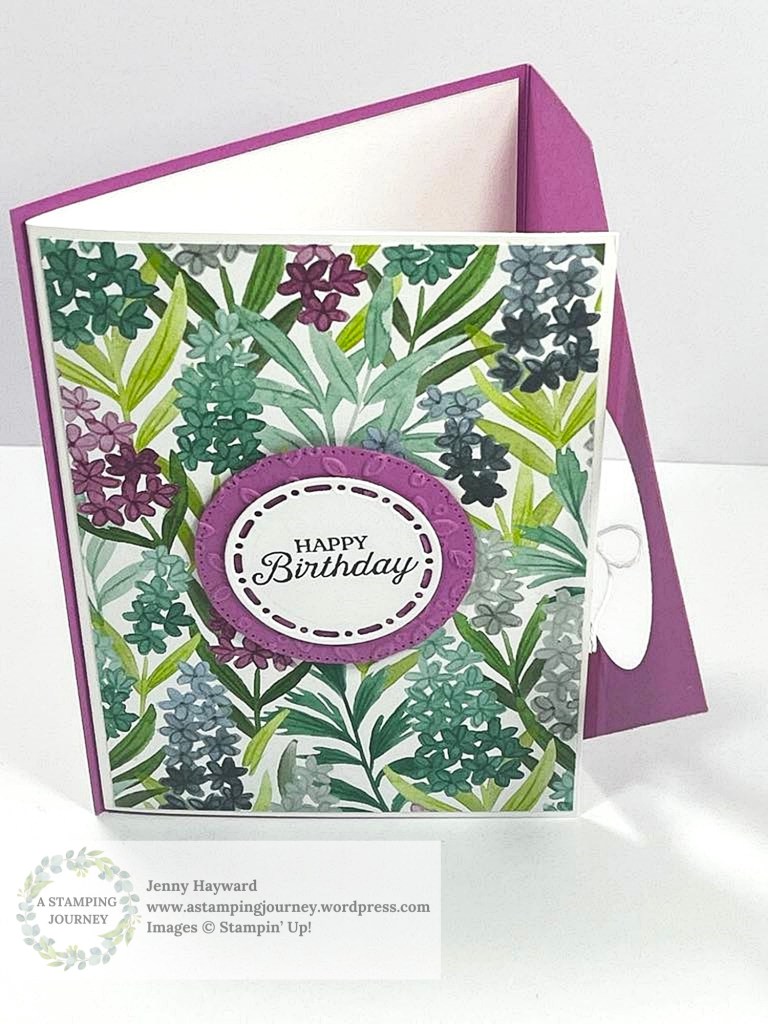
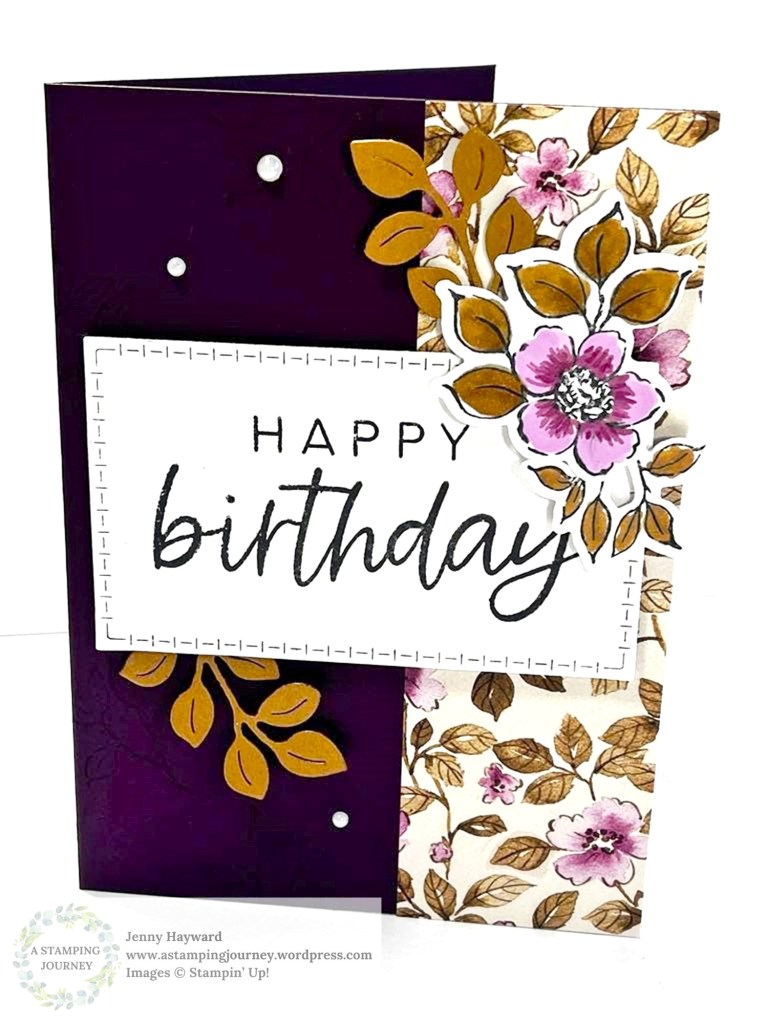
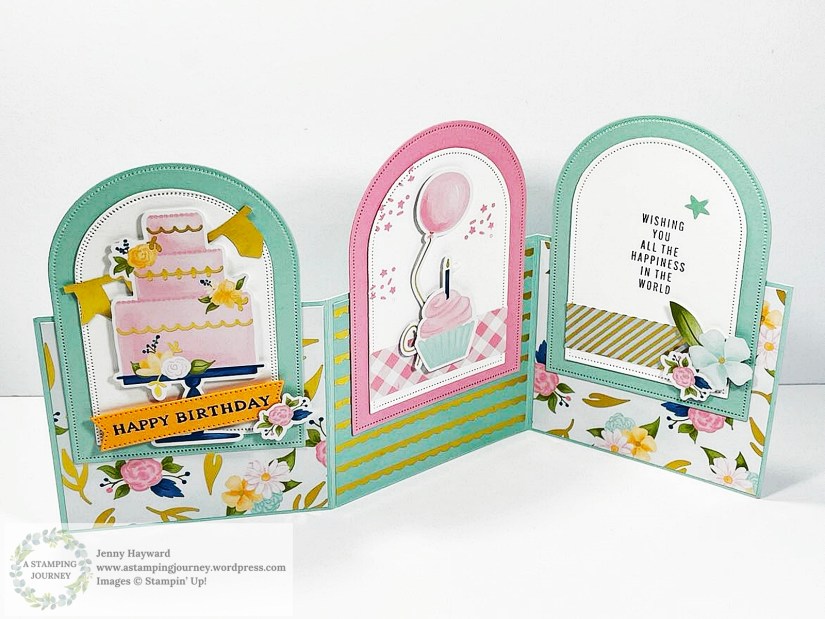
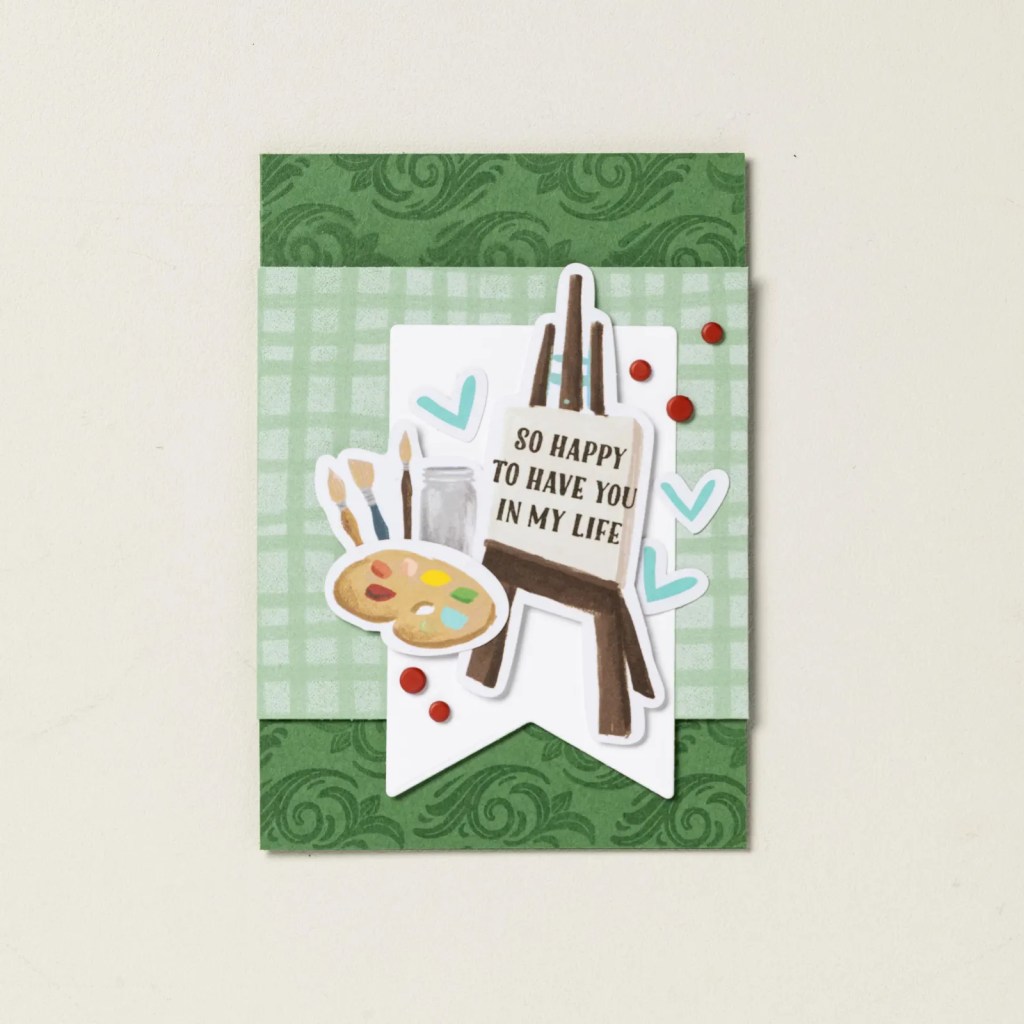
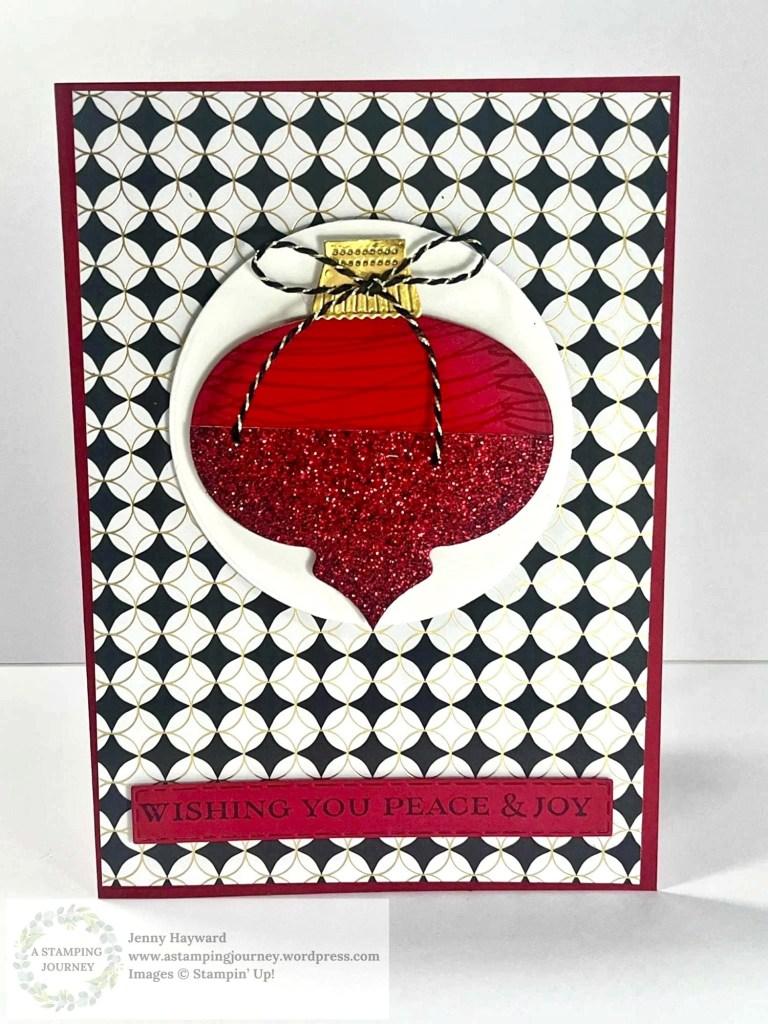
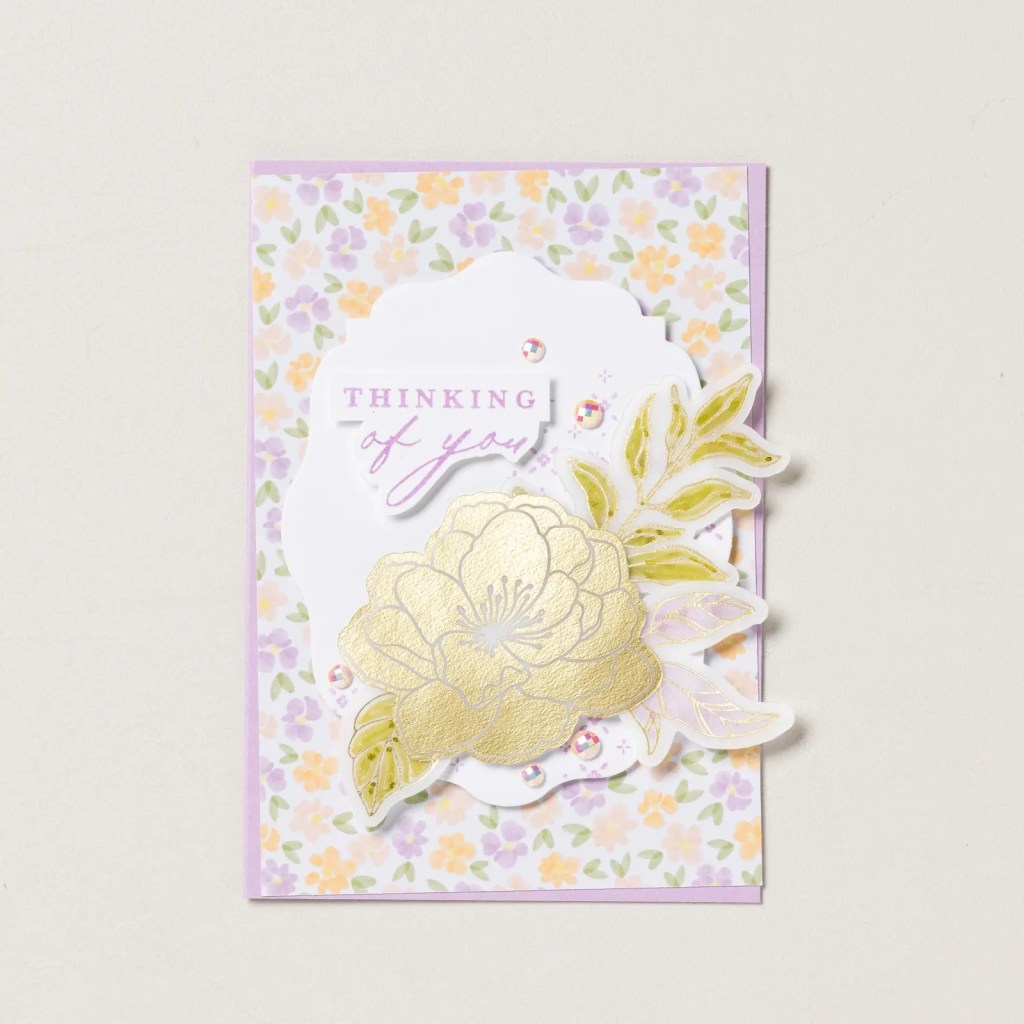
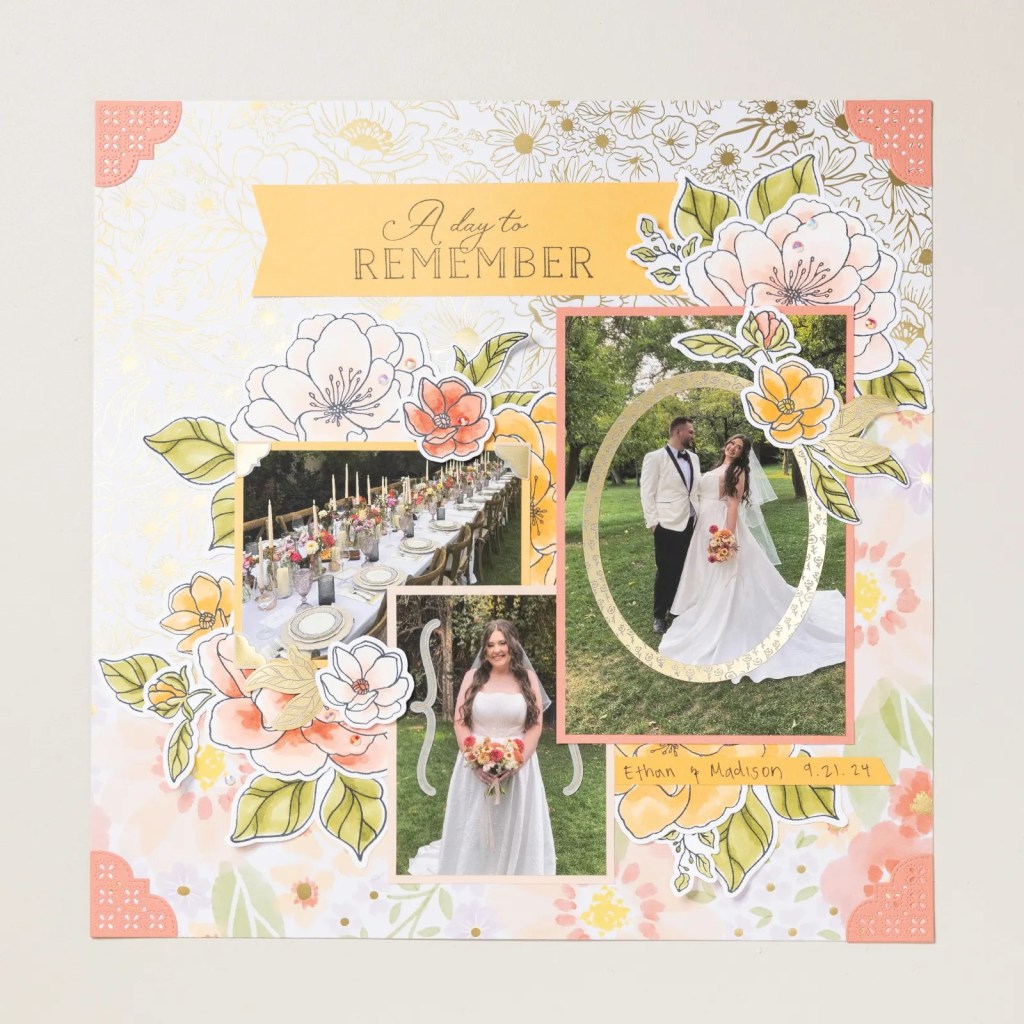
Now some projects to really show these products off. These projects are created by Stampin’ Up! artists.

These products are available now in the 2026 January-April Mini Catalogue. If you would love to get them I might just be able to help you. You can order the full suite or order them separately.

You can see them more in my store -> HERE. Order there or Contact me directly.

If you want just a Share in the gorgeous Specialty Paper I am putting together a share now. So let me know.

Happy Sunday Crafting,

Jenny

cards, Catalogues, Online Exclusives

STAMPIN’ UP! LOVELY ARRANGEMENTS BUNDLE WITH THE LOVELY BLOSSOMS PAPER

Some new crafty products start tomorrow (Tues. 6th January). I have been having lots of crafty fun with these particular ones.

This is the Lovely Arrangements Bundle with the Lovely Blossoms Designer Series Paper. The flowers are easy to colour but for this one I stamped them in the Secret Sea Ink and diecut them and layered them over the card front.

These ones will be available as Online Exclusives. There is so much more starting tomorrow too that I can’t wait to share with you including the January – April Mini Catalogue.

Stay tuned for more.

Happy Crafting,

Jenny

cards, Product of the Month, Stampin' Up!

SWEET SUNDAY WITH A PATCHWORK CARD!

Sweet Sunday with this fun Patchwork card idea. This one is created by Stampin’ Up! Artists with the True Blue Florals Designer Series Paper. You could try with any pretty paper though.

Here’s How:

You would need to cut numerous white squares. Diecutting them with one of the small squares from the Stylish Shapes Dies give you that “stitched edge” look. For a card like this you would need 16 squares. Then diecut some squares with your patterned paper. Cut the squares diagonally. Then you can position the white squares over your card mat and place the cut paper squares in position to create the patchwork look. This card would work best with a Square style card.

Try this idea out for a card. And I would love to see it too if you like.

This paper is the Product of the Month that has been out this month. There is a new exclusive product each month.

You can purchase this True Blue Florals Paper for $9 when your order reaches $125. (AUD)

You can find more about the Product of the Month -> HERE.

If you need any supplies you can order at my store at that link above too.

Happy Crafting,

Jenny

cards, Stampin' Up!, Tutorials, Videos

2025 FAVOURITE CARDS ~

Lots of ink and card flying this year. There has been lots of creating. I picked out some of my favourites from 2025 to share with you. It was hard to pick out just a small number. I have had lots of fun.

So let’s look. I would love to hear what your favourite is. Drop it in the comments.

If you want a closer look and can’t see them if you do a search on my blog let me know and I can direct you to the post or to the video.

Stampin' Up! Cheerful Daisies Card

Trio Arch Fun Fold Card

Flip It Fold Card for Christmas with the Stampin' Up! Festive Friends Bundle

Stampin' Up! Festive Friends card for Christmas

I hope you enjoyed the look back over the past year.

I’m excited going in to 2026 for more creative fun. What will we create this year … 🙂 I hope you can follow along to see. Have fun in your creating in this coming year.

Jenny

cards, Christmas, Classes, Stampin' Up!

CHRISTMAS TAGS INSPIRATION!

Only days out to Christmas but maybe you still need some inspiration for your Christmas Tags. These could be added straight to a Card Front too for Cards if you prefer.

These tags we made at our last Christmas Tag Class recently.

I have used a number of different products on these tags. You could use the same or substitute with what you have.

These tags used: the Ornamental Christmas Bundle. The Festive Friends Bundle. Modern Christmas Specialty Paper. Peaceful Garden Designer Series Paper. The Patterned Tags Dies.

Here are some more Tag ideas that I have created from past years.

If you are still madly creating for Christmas I hope that you get it completed soon. And if it doesn’t get done don’t stress. All will be Ok.

Happy Crafting,

Jenny

cards, Christmas, Stampin' Up!

WATERCOLOUR TREES WITH THE STAMPIN’ UP! ORNAMENTAL CHRISTMAS

I was going to film a video to show you how to make this card. But here we are a week out from Christmas…. So I thought I would tell you about it. It’s easy to follow along really I think.

This is the card.

The trees were given a light watercolour. Ink the “pine” type tree with the Classic Ink. I used Garden Green and then with a Water Painter lightly wipe over the branches spreading outward to wash out the colour. You only need a very light touch.

For the other tree I inked this up in Granny Apple Green and used the Water Painter to spread the ink. Start from the outside line and brush inwards. You will need to pick up more ink from the ink pad to spread enough ink but that’s ok. Add as much as you like.

Let the trees dry before you diecut. I used the Ornamental Christmas Bundle but if you don’t have that then try it with other tree stamps you have. This technique could work too with flowers or other images you want to colour. Give it a try.

To finish the card I stamped the sentiment on white card and diecut with one of the larger Arch dies in the Everyday Arches Set. Before I diecut the arch I added a strip of the Modern Christmas Specialty Paper near the bottom.

Now to go and finish the Christmas shopping. I am so behind. Anyone else like that??

Happy Christmas creating. I hope you’re more organised that I am.

Jenny

If you need supplies and you are in Australia you can head to my store -> HERE. OR Contact me directly.

cards, Catalogues, Online Exclusives

HIDDEN GEM TUESDAY – HOBBY HAVEN PAPER

Are you a:

– Crafter

– Cook?

– Plant Lover?

– Reader?

You might like this Hobby Haven Paper. Check this Hidden Gem Tuesday.

Create cards and projects for any of your fun hobbies. Add a piece straight to your project or cut them. This paper includes 2 each of 5 double-sided designs and 2 each of 1 precut design.

Let’s see some of the prints closer.

What Hobby Lover are you?

These projects are created by Stampin’ Up! artists.

You can see more of this great paper -> HERE.

If you need some of this in your life to create fun “hobby” projects for you or your friends then stop by my store at the above link OR Contact me directly.

Happy Crafting,

Jenny

cards, Techniques, Tutorials

WEDNESDAY’S WOW! 171 – A QUICK, SIMPLE CARD TO IMPRESS ~

Wednesday’s WOW! #171 – Make a quick, simple card to impress your friends.

Do you want a card that’s quick to make yet still want to WOW! your receiver?? Try this idea.

Trim off 2.5cm or 1″ from the Right Hand Side of your card front. Add some gorgeous paper and elements to the front. Inside add a strip of patterned paper that co-ordinates with the front paper that is just slightly smaller than the section. Add some white card so there is a space to write on. This really doesn’t take much more time that creating a full card.

This is great timing if you still have some Christmas cards to make. You can try this for any occasion though.

On this card I used the Stampin’ Up! Modern Christmas Specialty Paper. The Black, White and Gold makes any cards elegant. I also used the Ornamental Christmas Bundle.

Hope your Christmas creating is coming along well. We are nearly at the finish line.

Happy Christmas Creating,

Jenny

Need some supplies and you are in Australia. I would love to help you get them. You can head to my store -> HERE.

Don’t forget it’s Free Shipping the next 3 days so great timing. From 10th-12th December on orders over $65 AUD.

Just a note: It is getting close to Christmas now. There is no certainty that these orders will arrive before Christmas so do keep that in mind.

Catalogues, Stampin' Up!

STAMPIN’ UP! FREE SHIPPING – 3 DAYS ~~~

Just announced. Free Shipping for 3 Days, 10th-12th December over $65.

You can save on all your crafty Stampin’ Up! goodness. Why not get a little Stocking Stuffer for yourself. Go on. You have worked so hard and been a good crafter and you deserve it. (I’m saying that to myself here …)

And don’t forget while you are at it and want to save the Last Chance List has been updated so now there is a lot more reduced. Especially all those lovely products from the current Holiday Catalogue.

You can see the Last Chance List -> HERE.

And while you are at it.

When your order is over $125 you qualify for the Product of the Month. Each month an exclusive product is available for your qualifying orders. Purchase this Product of the Month for an additional $9.

If you need some supplies and in Australia I would love to help you out. Head to my store -> HERE.

Happy Crafting,

Jenny

cards, Christmas

RED AND SPARKLY WITH THE ORNAMENTAL CHRISTMAS BUNDLE

Do you like sparkle for your Christmas cards? On this card I added some red Glimmer Paper for the Ornament to make it sparkly.

The card is using the Ornamental Christmas Bundle. The curvy lines that are in the stamp set I stamped across the top of the diecut ornament for some extra detail. When I diecut the ornament I added a piece of Glimmer Paper with the red card so this would all cut together and would line up with this ornament. You can do it separately though too if you would rather.

The paper is from the Modern Christmas Specialty Paper.

This is one of the cards we made at our Modern Christmas Class last weekend. I realised I hadn’t shown you all the projects yet.

This is the Ornamental Christmas Bundle. It’s an Online Exclusives so not in the Holiday Catalogue. You can see it more -> HERE.

How is your Christmas creating going?? Time to send those cards out so they can get there in time. I so need to do this myself …

Happy Crafting,

Jenny