cards, Catalogues, Product of the Month, Stampin' Up!, Techniques, Videos

5 MINUTES, 5 DAYS, 5 WAYS WITH THE OPULENT OASIS BUNDLE – DAY 4

Day 4 of our series – 5 Minutes, 5 Days, 5 Ways with the Opulent Oasis Bundle.

Have you seen the past videos in this series yet? You can head back to the recent posts if you missed them or would like a refresh.

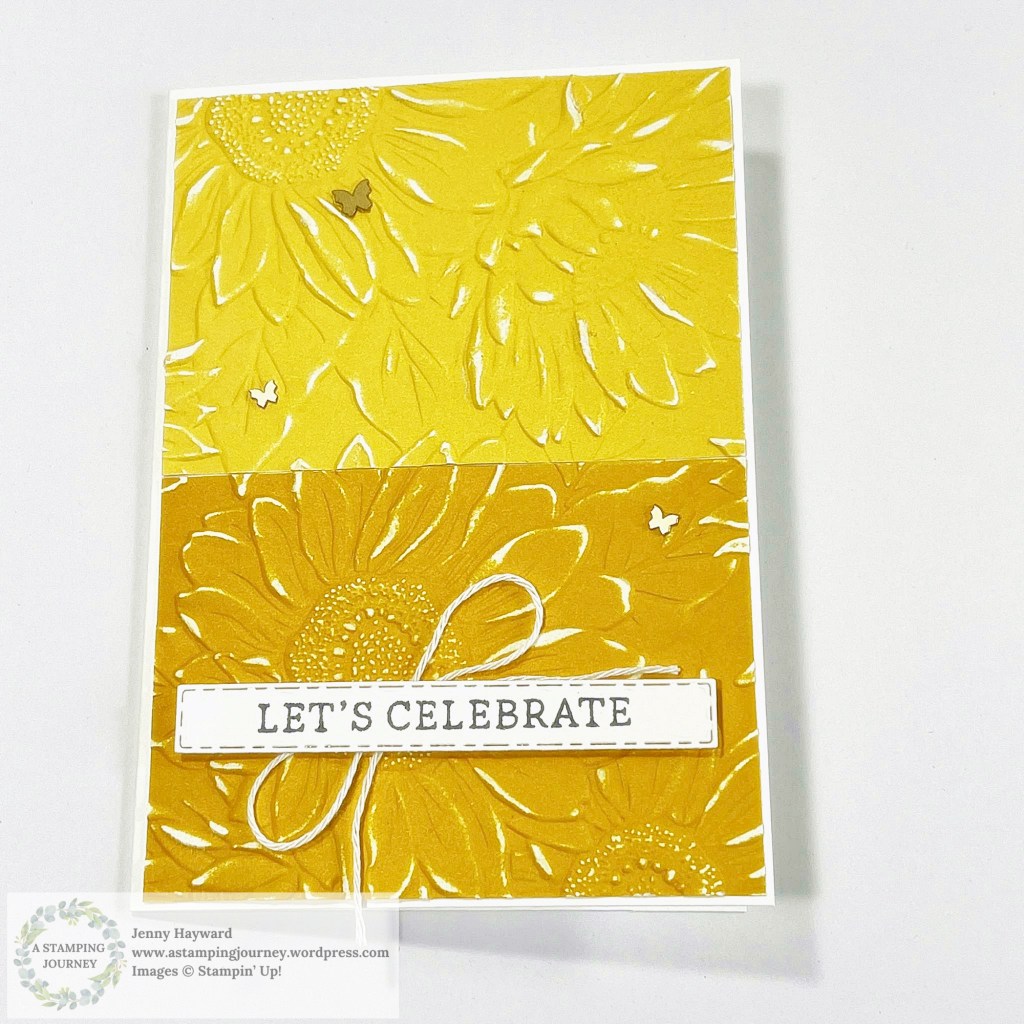
In Day 4 of these videos let’s see what else you can create with this bundle using just the stamps and dies.

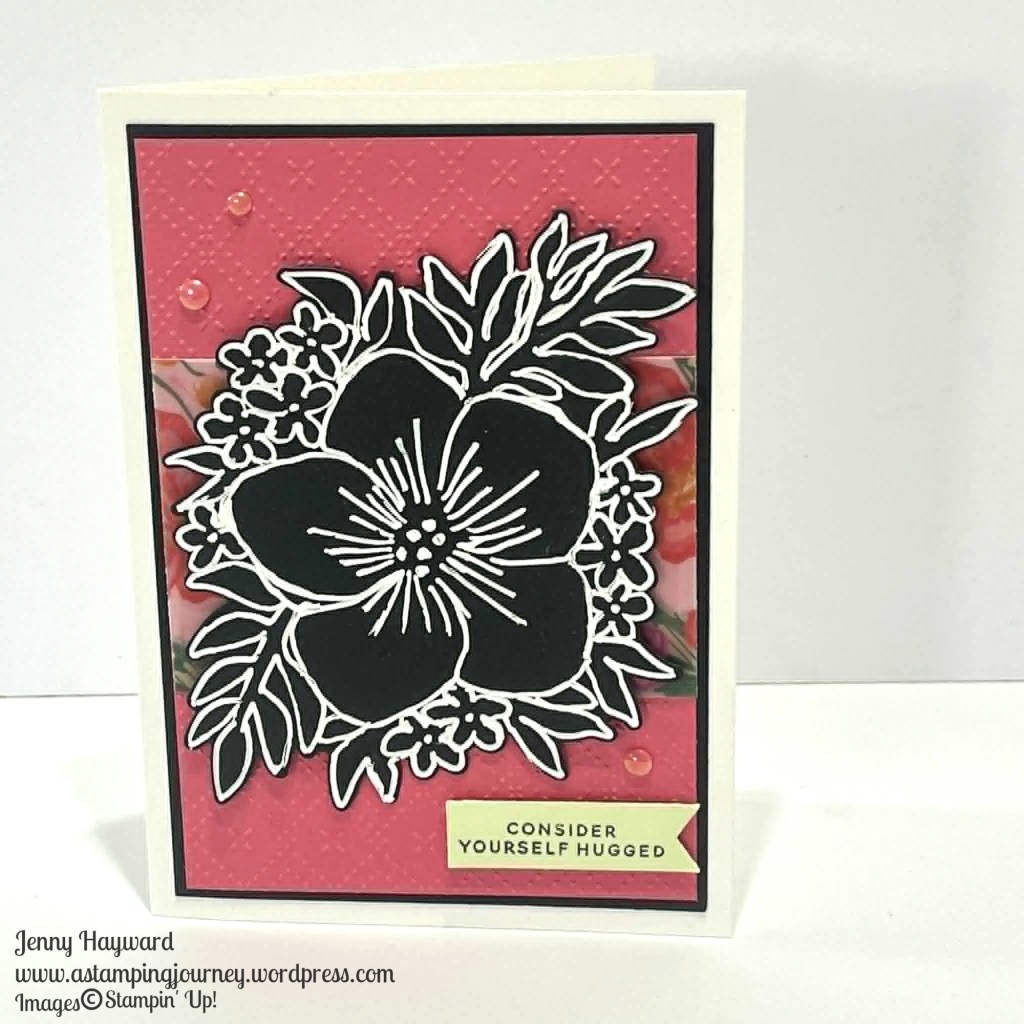
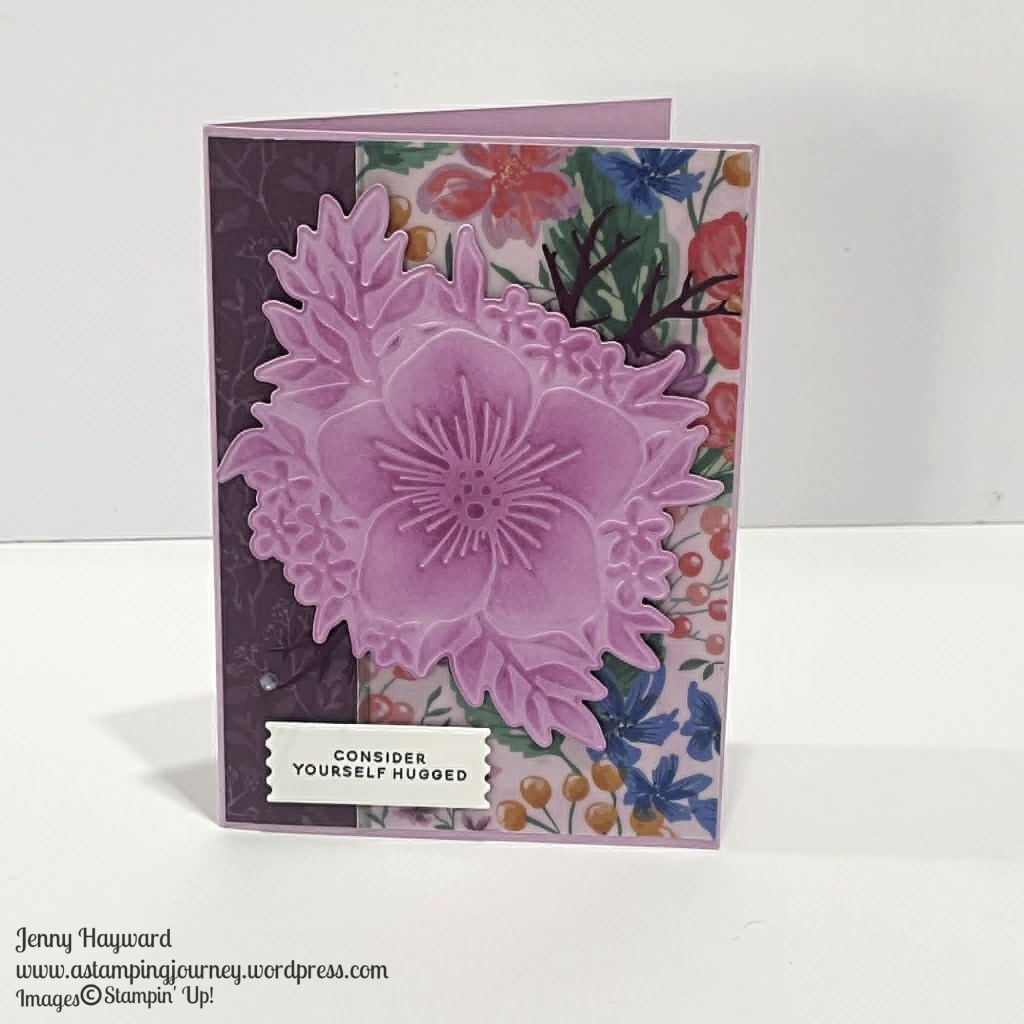
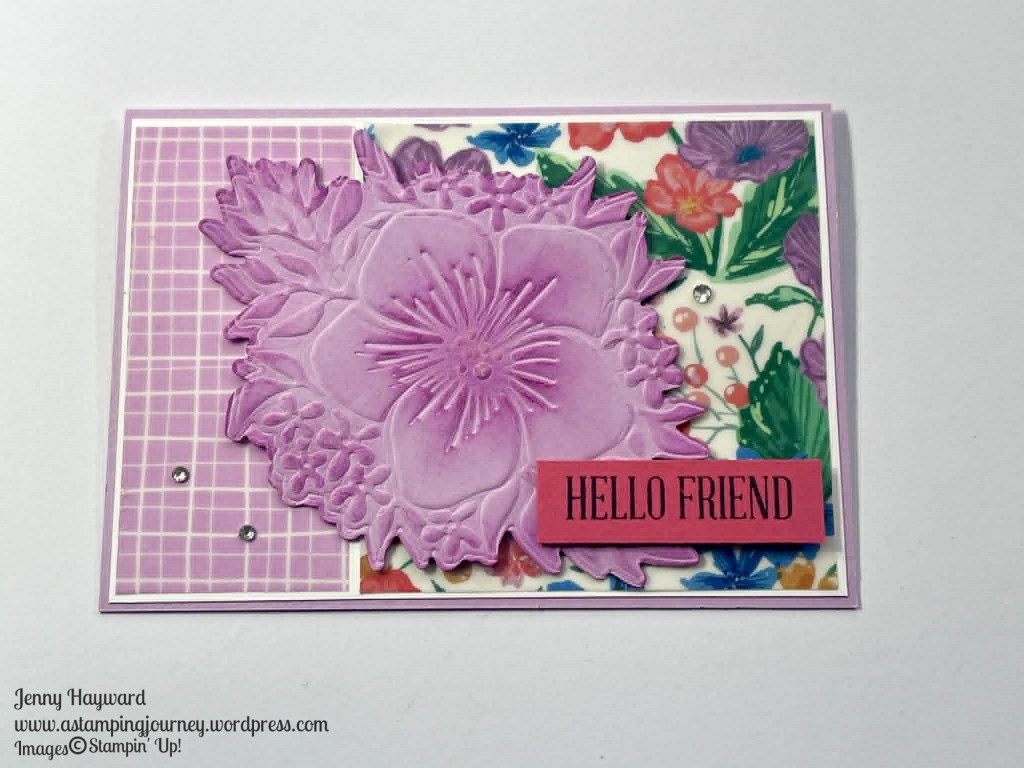
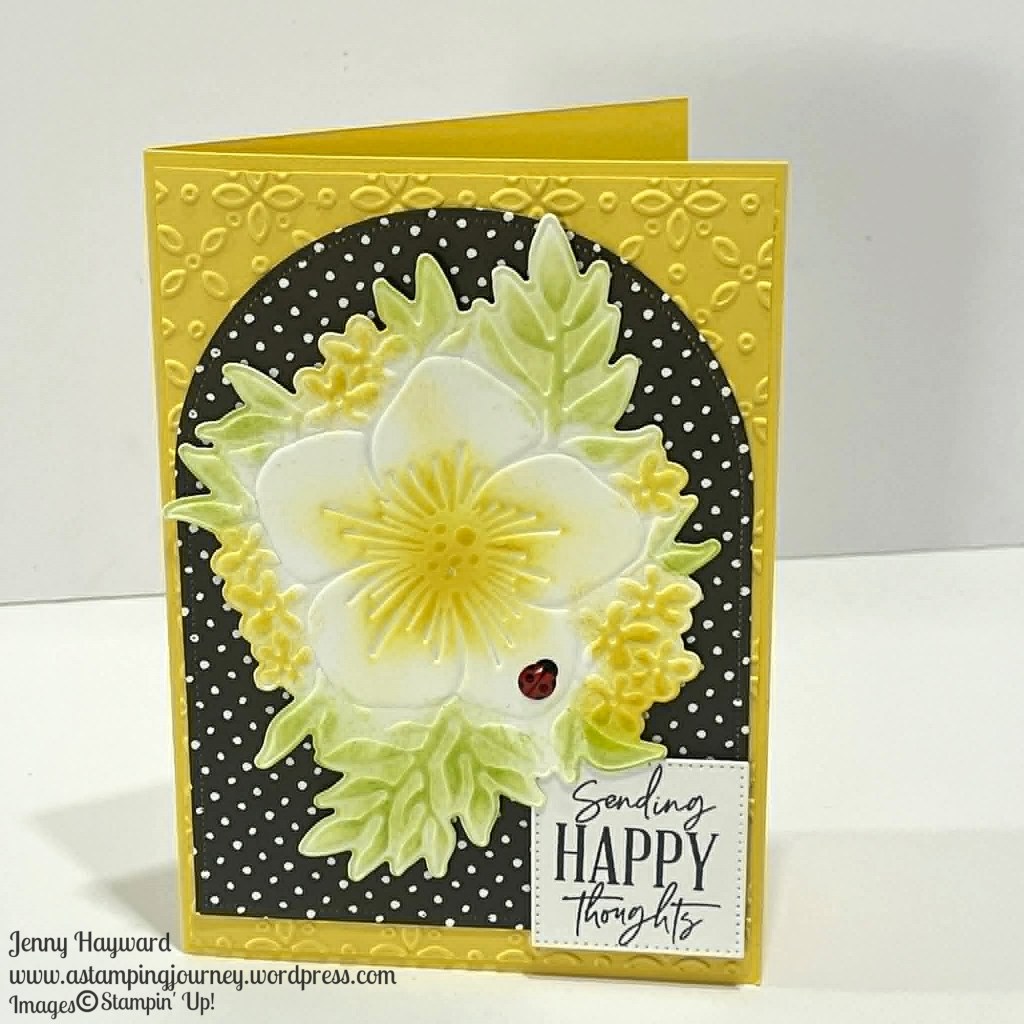
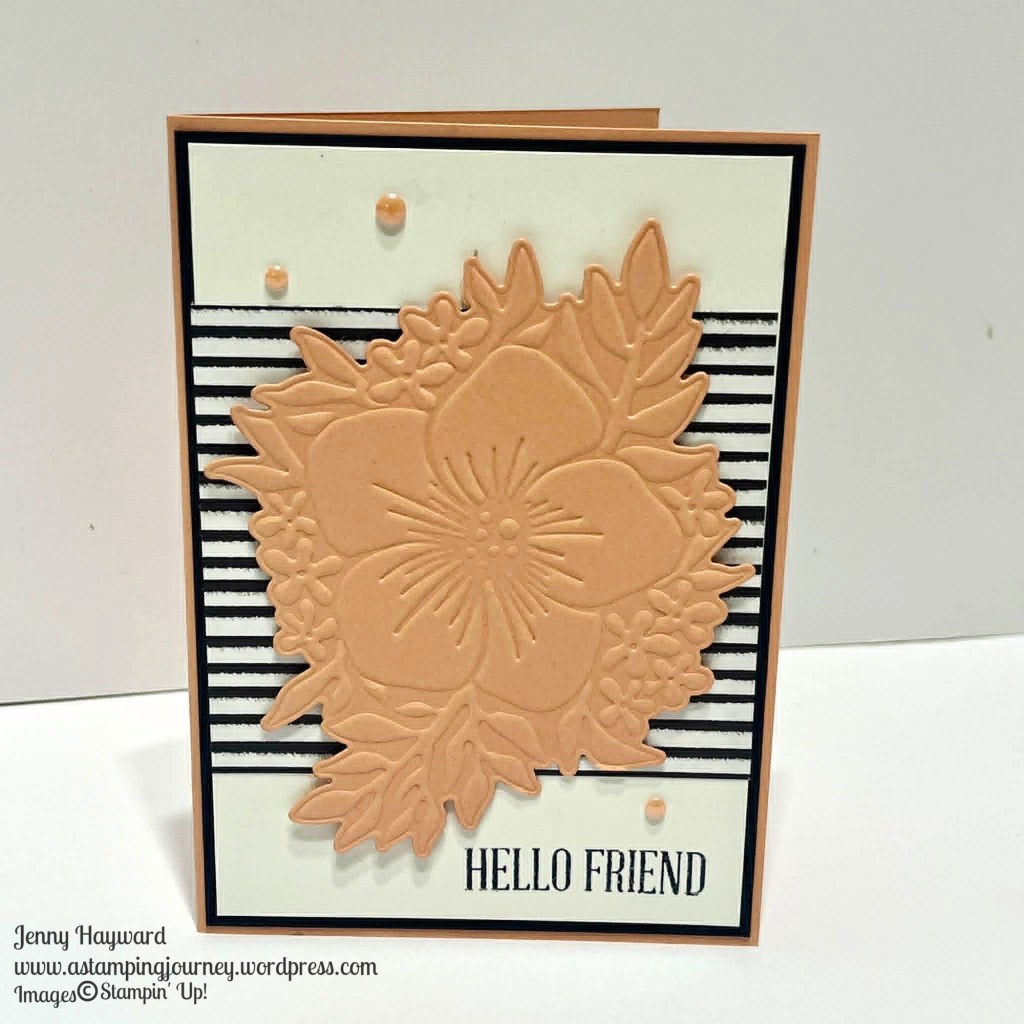
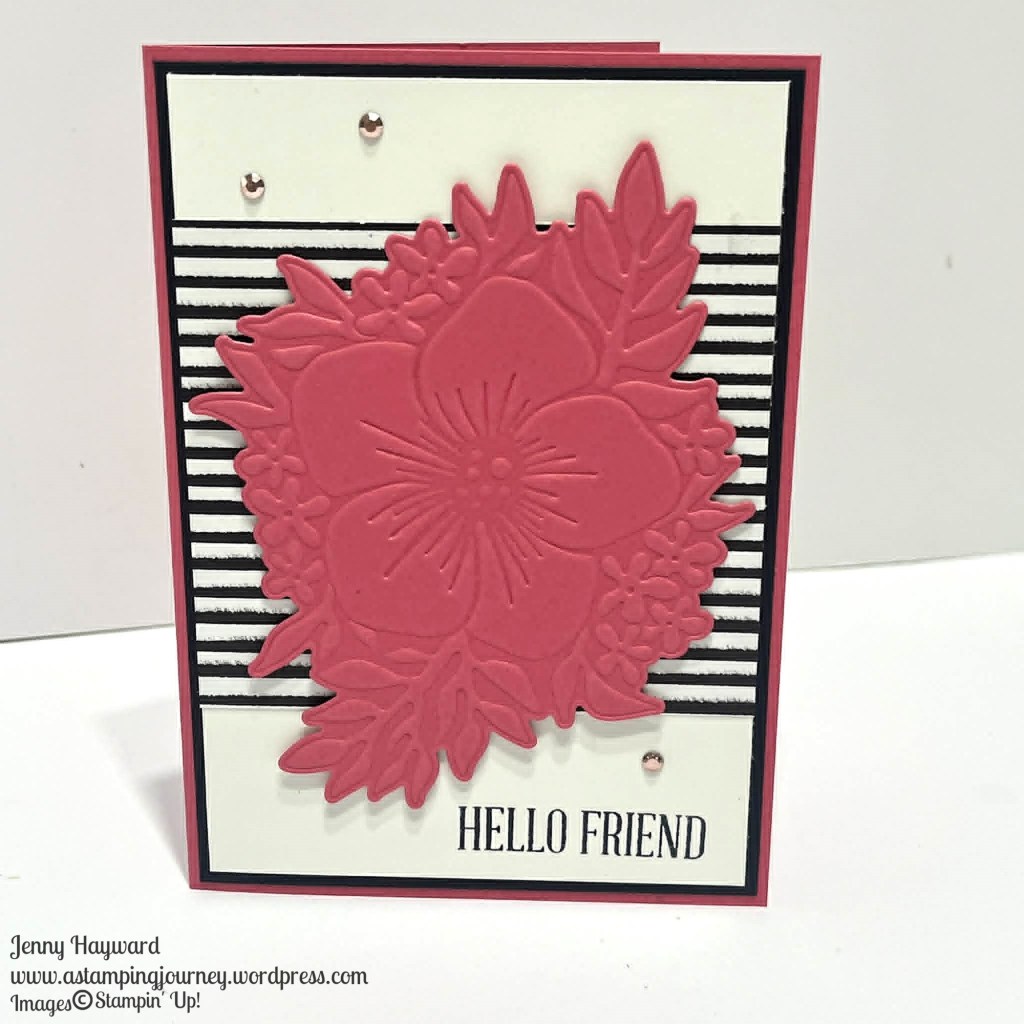
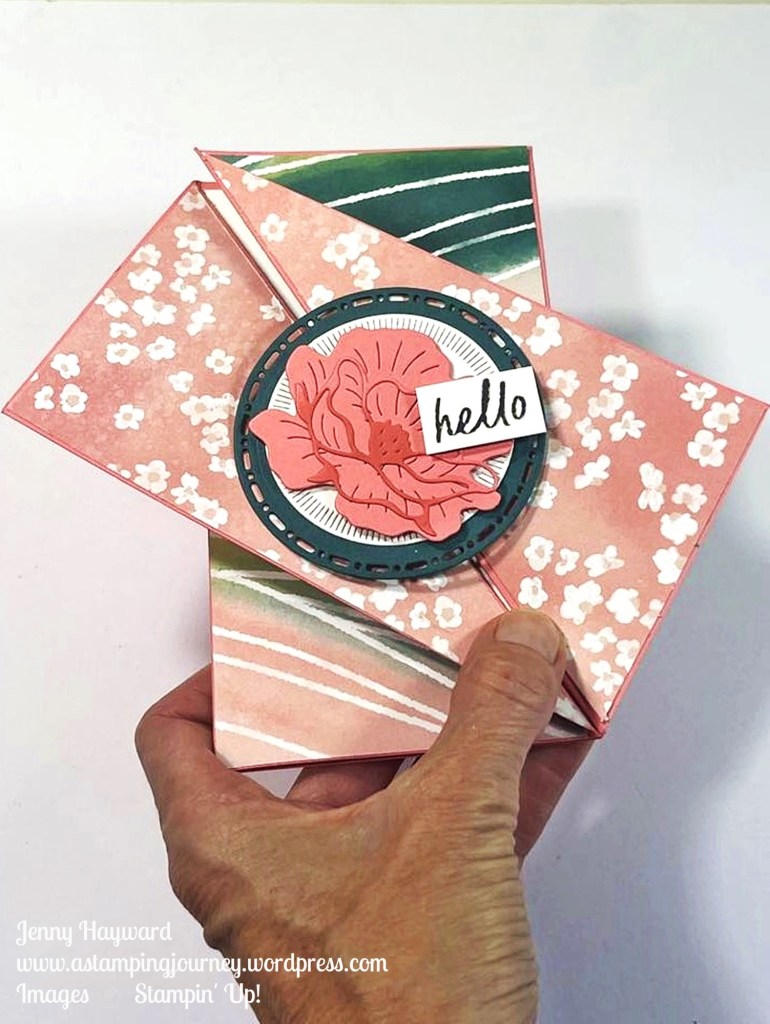
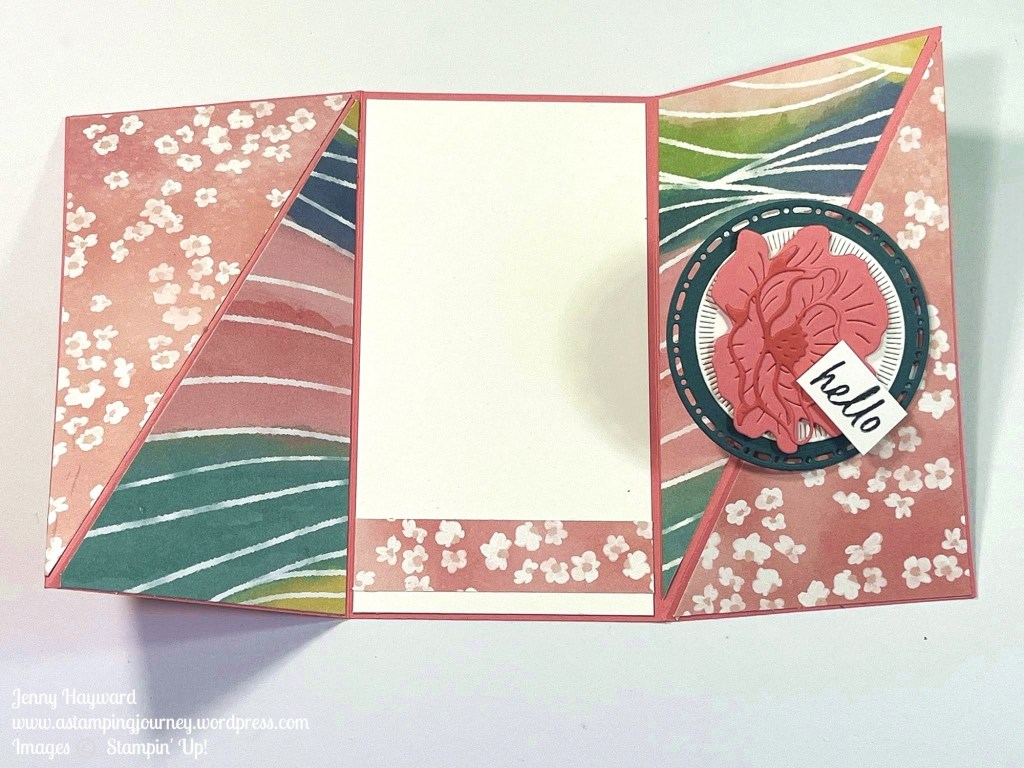
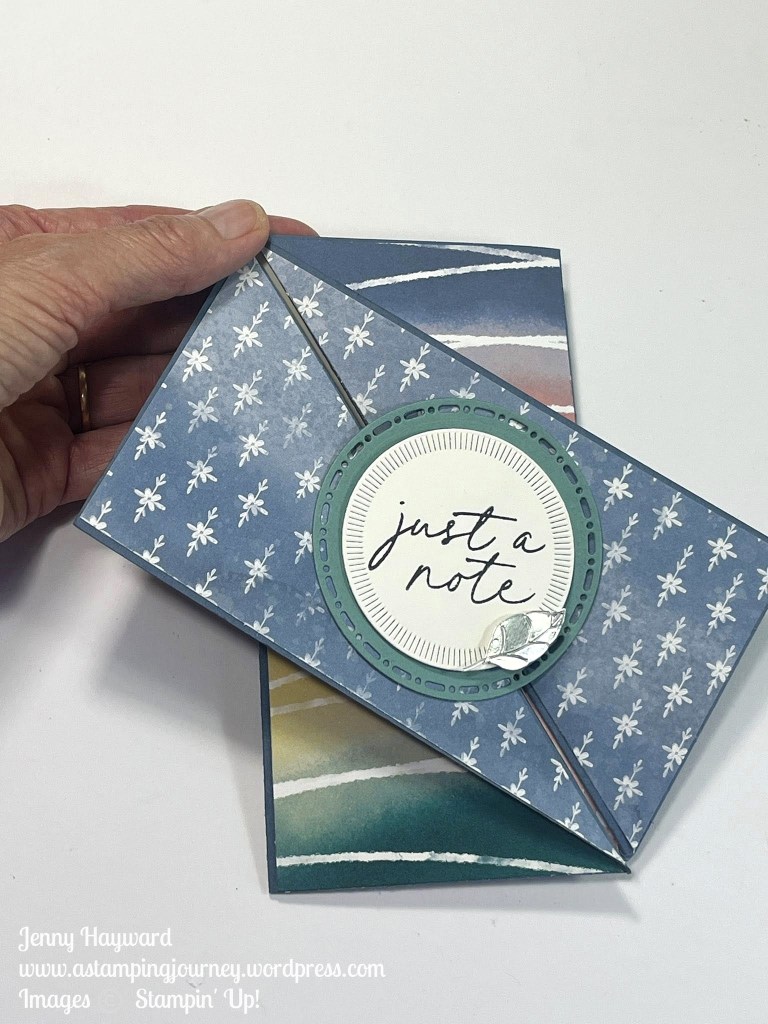
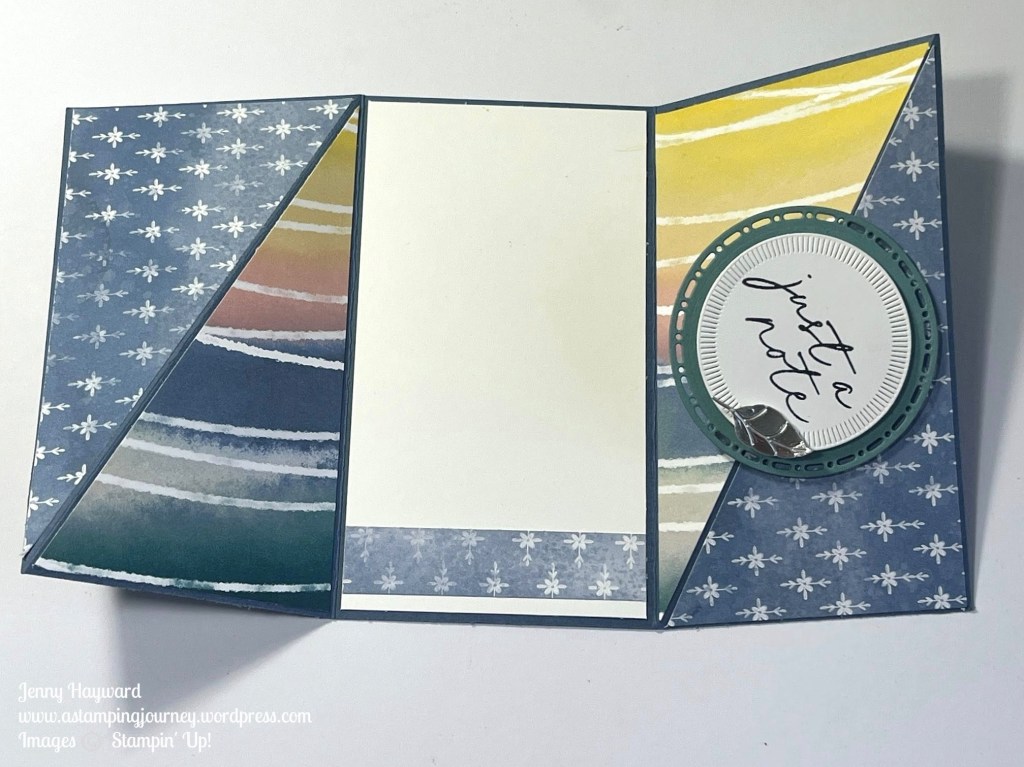
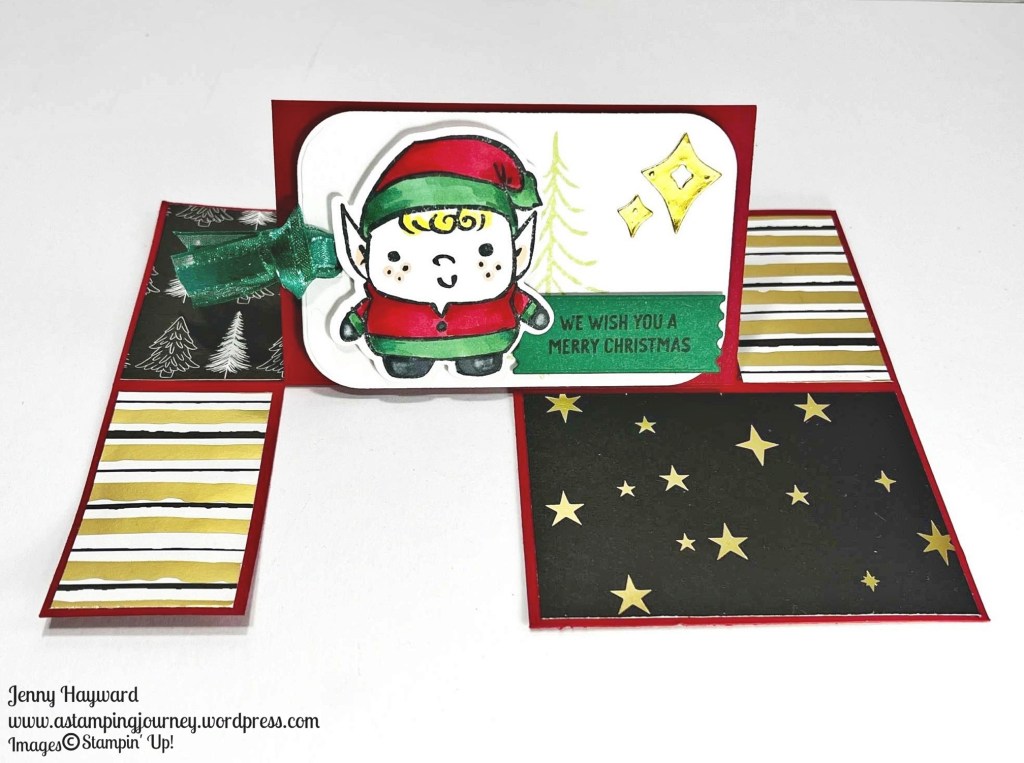
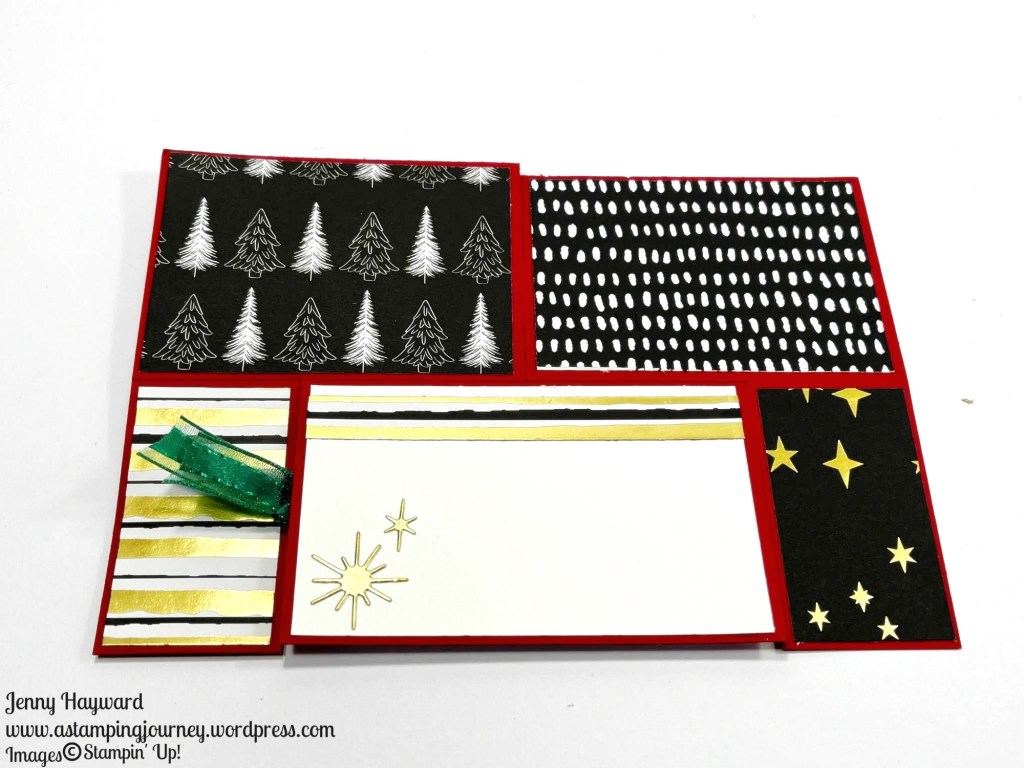
These are the cards I shared in the video.

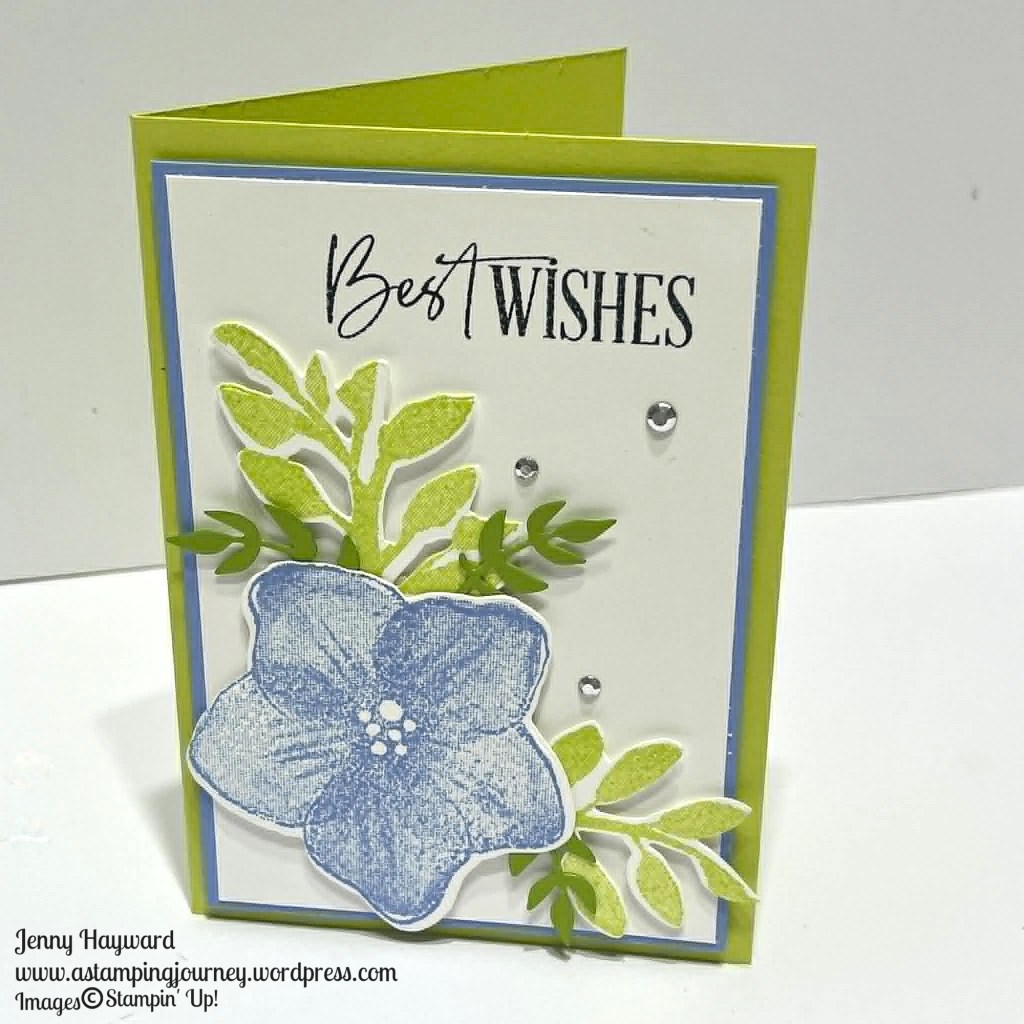
Hydrangea Hue and Lemon Lime Twist have been a favourite combination recently.

Here is another simple card with these colours and using the Berry Botanicals Vellum Specialty Paper.

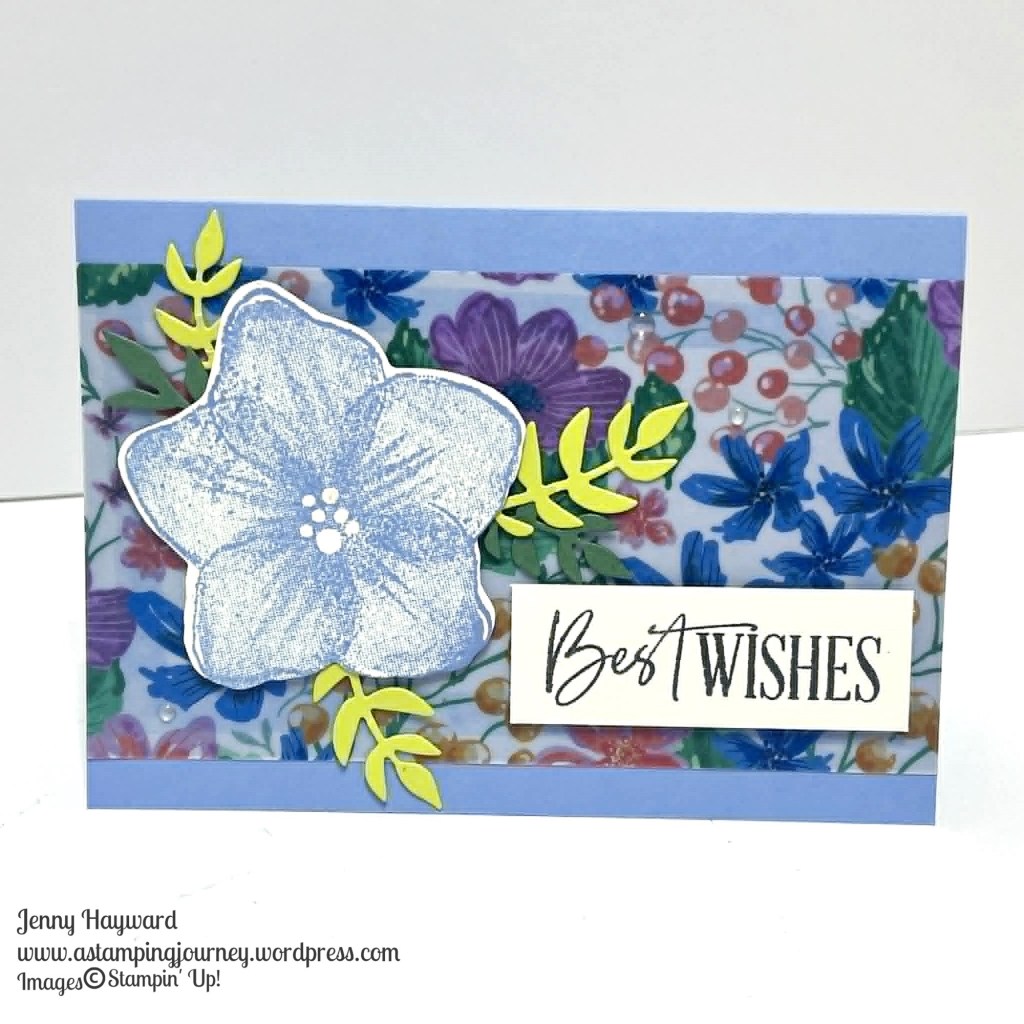
The Opulent Oasis Bundle is available in the May-August Catalogue. The Berry Botanicals Vellum Specialty is available as May Product of the Month.

Last Day tomorrow. Be sure to check back in. Let me know what you think of this series too. Would you like to see other Bitesize video series on a bundle or technique?

Happy Crafting,

Jenny

If you are in Australia and need supplies I would love to help you get them. Head to my store -> HERE. Or Contact me directly.

Happy Crafting,

Jenny

cards, Catalogues, Techniques, Tutorials, Videos

5 MINUTES, 5 DAYS, 5 WAYS WITH THE OPULENT OASIS BUNDLE – DAY 3

Day 3 of our series – 5 Minutes, 5 Days, 5 Ways with the Opulent Oasis Bundle.

These are small Bitesize videos showing how you can use the Stampin’ Up! Opulent Oasis Bundle. Day 1 looked at using the Impressions Mat with the Dies to get that extra puffiness. Then Day 2 looked at different ways of colouring the embossed/diecut images.

Day 3 I share another way of colouring with the Opulent Oasis Flower. It could be my favourite way. Be sure to check that out. If you don’t have this bundle I’m sure this could easily work with some of your other diecut flowers. Or even an embossed image. Try it out and see.

Here is the Video for Day 3.

Do you want to see more of the card.

The white outlined flower just POPS in Black. Especially against the Strawberry Slush colour. This is easy to create using the White Gel Pen. I embossed the Strawberry Slush card with the Beautiful Pattern Embossing Folder.

I love the effect of the diecut flower but there is lovely stamped images in the set too. See how to create with these in the next 2 videos.

Happy Crafting.

Jenny

If you would like to get the Opulent Oasis Bundle yourself and you are in Australia I would love to help you get them. Head to my store -> HERE. Or Contact me directly.

cards, Catalogues, Techniques, Videos

5 MINUTES, 5 DAYS, 5 WAYS WITH THE OPULENT OASIS BUNDLE – DAY 2 

Day 2 of our series – 5 Minutes, 5 Days, 5 Ways with the Opulent Oasis Bundle.

The first video I showed using the Impressions Mat. If you missed that head back a post. This video I showed some different ways of colouring the embossed/diecut flowers.

Hope you get to try these cards out. But if you don’t have the Opulent Oasis Bundle see what you have similar.

Try highlighting the flowers and leaves with Ink and a Dauber.

These 2 above used the Berry Botanicals Vellum Specialty Paper.

Or add some extra colour using Inks and Daubers. Do you think this looks like a Frangipanni Flower?

This one uses the Artisan Sketched Garden Designer Series Paper.

See another way of colouring in the next video.

Happy Crafting,

Jenny

cards, Catalogues, Stampin' Up!, Techniques, Tutorials, Videos

5 MINUTES, 5 DAYS, 5 WAYS WITH THE OPULENT OASIS BUNDLE – DAY 1

I’m bringing you a new series this week. 5 Minutes, 5 Days, 5 Ways with the Opulent Oasis Bundle. Small bitesize videos to help inspire you when creating with this bundle. But if you don’t have this bundle you might just be able to create these with other stamps/dies you have.

In this video I show you how to use the new Impressions Mat. The mat helps give a little more “puffiness” to the Impressions Dies.

Here is the video for you to follow along.

These are the cards I showed how to make.

Which colour do you like – the Crisp Canteloupe or the Strawberry Slush?

Be sure to check back with the other videos this week as I share more with this Bundle.

Happy Crafting,

Jenny

cards, Onstage, Stampin' Up!, swaps, Techniques, Tutorials, Videos

ONE SHEET WONDER STYLE WITH THE STAMPIN’ UP! GEARS AND TEXTURES ~

I can finally share these cards with you – and the video. It’s been a busy time over the last few weeks so it has been hard to get time to share them.

These are One Sheet Wonder Style cards. They are so easy to create. Make 4 cards all in one go. Some simple random stamping and cut. Add then add to Card Bases and Card Mats and add diecut pieces and you are done. Oh and add a sentiment too.

These were the cards I created as Swaps for Onstage last month so they were quick to make a lot. I have put together a video to show you how it is done. A written Tutorial will be sent out to my newsletter subscribers tomorrow.

You could use any stamps and dies for this idea – Flowers, Butterflies, Seashells. Use what you have.

Here is the video to follow along.

Follow along. I hope you get to make them.

Happy Crafting,

Jenny

cards, Product of the Month, Stampin' Up!, Techniques, Tutorials, Videos

DIAGONAL GATEFOLD CARD + A VIDEO

This card might look complicated but it’s really not. It’s called a Diagonal Gatefold Card. You can create it with the card and paper you like. For this one I have used the Painted Illusions Designer Series Paper.

You open it out. This is the inside. I love the angled look.

Here is another one using the same paper pack, but just doing that that can change it up a lot by using different colours.

It really is easy and I can show you. I share the measurements in Metric and Inches for you.

Follow along with the Video -> HERE.

Hope you get to try one yourself.

The Painted Illusions Paper is this month’s Product of the Month.

Happy Crafting,

Jenny

cards, Techniques, Tutorials

WEDNESDAY’S WOW! 171 – A QUICK, SIMPLE CARD TO IMPRESS ~

Wednesday’s WOW! #171 – Make a quick, simple card to impress your friends.

Do you want a card that’s quick to make yet still want to WOW! your receiver?? Try this idea.

Trim off 2.5cm or 1″ from the Right Hand Side of your card front. Add some gorgeous paper and elements to the front. Inside add a strip of patterned paper that co-ordinates with the front paper that is just slightly smaller than the section. Add some white card so there is a space to write on. This really doesn’t take much more time that creating a full card.

This is great timing if you still have some Christmas cards to make. You can try this for any occasion though.

On this card I used the Stampin’ Up! Modern Christmas Specialty Paper. The Black, White and Gold makes any cards elegant. I also used the Ornamental Christmas Bundle.

Hope your Christmas creating is coming along well. We are nearly at the finish line.

Happy Christmas Creating,

Jenny

Need some supplies and you are in Australia. I would love to help you get them. You can head to my store -> HERE.

Don’t forget it’s Free Shipping the next 3 days so great timing. From 10th-12th December on orders over $65 AUD.

Just a note: It is getting close to Christmas now. There is no certainty that these orders will arrive before Christmas so do keep that in mind.

cards, Techniques, Tutorials, Videos

FLIP IT FUN FOLD CARD + VIDEO

Today’s video is a Flip It card. I don’t know what it’s actual name is but that’s what I call it. I’m going to show you how.

This is the card.

The front panel stands up when you Flip It.

Then when it lays flat.

It is a little larger than a standard card so you may need to make an envelope to fit or give it directly to your special person. You may want to explain how it flips too so they can see the fun of it (and give you a WOW!)

I used the cute Festive Friends Stamps and Dies. You can create this for any occasion whether it is Christmas or Birthday or some other special event.

Here is the video to create your own Or head straight to my Youtube.

Hope you get to make one. As always I will send the writtent tutorial to my Newsletter Subscribers next week. I send out a Tutorial each week. If you would like to receive my Tutorials then you can subscribe to them. The Tab is on the Right Hand Side Bar on my blog.

Happy Crafting,

Jenny

If you need supplies and you are in Australia I would love to help you get them. You can stop by my Store -> HERE or Contact me Directly.

cards, Catalogues, Techniques

WEDNESDAY’S WOW! 170 – ADD COLOUR ON YOUR EMBOSSED CARD

Wednesday’s WOW! #170 – Colour your Embossed Card with Ink.

If you have an embossed image on white card sometimes it can be a little plain. You can add a little colour to lift it. Of course you could swipe the Inkpad over the Embossing Folder before or after embossing, but try a little light watercolouring with your Water Painter and Ink Pads. It can really highlight the detail.

This one is with the Traditional Wreath Embossing Folder but you could try it with most folders.

Try it out.

Happy Crafting,

Jenny

If you need supplies for your crafting then I would love to help you. You can stop by my store -> HERE OR Contact me directly.

cards, Stampin' Up!, Techniques

STAMPIN’ UP! TWO-TONE SUNFLOWERS ~

I have been playing a lot with the Sunflower 3D Embossing Folder and experimenting with the Two-Tone cardstock. So I put them together.

Here are 2 cards that I created. Some nice sunshine-y yellow to brighten your day.

For this one below I cut a piece of the Daffodil Delight Two-Tone Cardstock just slightly smaller than the front of the card. Then I cut the piece in half and flipped one half. I put the pieces together in the Embossing Folder and embossed them. I lightly sanded the embossed cardstock to reveal the white. I adhered them to the front of a white Card Base and added a simple sentiment.

We made this card recently in my local class playing with the Two-Tone Cardstock. If you are a Wollongong local I would love you to join in our classes each month. Contact me to find out more about them.

On this one below I cut a piece of the Two-Tone Daffodil Delight and embossed that. I lightly sanded the piece and added it to a white card Base. The sentiment heat embossed in white on black card and the Granny Apple Green leaf gives a ‘POP’ to the card.

You could do this in many other colours too. Hope you get to try it out.

Happy Crafting,

Jenny

If you are in Australia and “need” some supplies I would love to help you out. You can stop by my store -> HERE OR Contact me directly.