Wednesday’s WOW! #170 – Colour your Embossed Card with Ink.
If you have an embossed image on white card sometimes it can be a little plain. You can add a little colour to lift it. Of course you could swipe the Inkpad over the Embossing Folder before or after embossing, but try a little light watercolouring with your Water Painter and Ink Pads. It can really highlight the detail.
This one is with the Traditional Wreath Embossing Folder but you could try it with most folders.
Try it out.
Happy Crafting,
Jenny
If you need supplies for your crafting then I would love to help you. You can stop by my store -> HERE OR Contact me directly.
I have been playing a lot with the Sunflower 3D Embossing Folder and experimenting with the Two-Tone cardstock. So I put them together.
Here are 2 cards that I created. Some nice sunshine-y yellow to brighten your day.
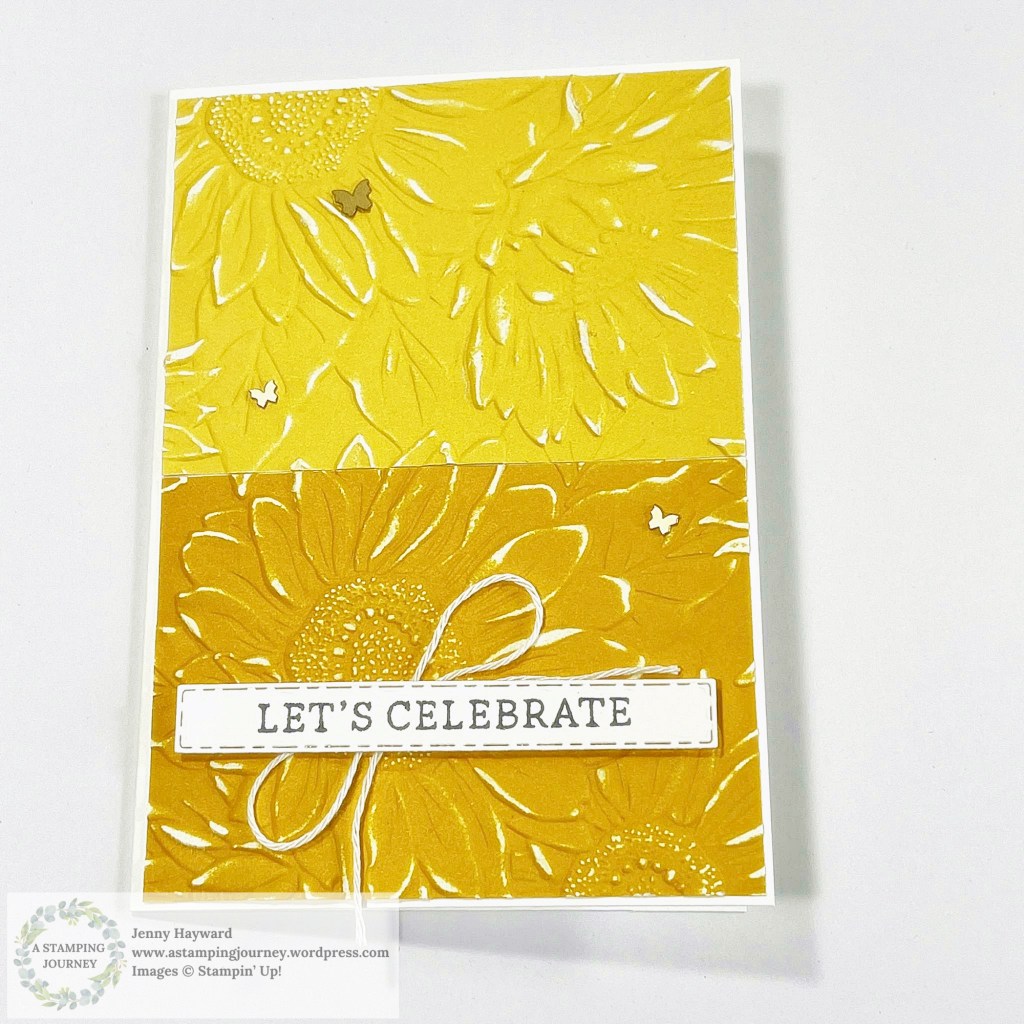
For this one below I cut a piece of the Daffodil Delight Two-Tone Cardstock just slightly smaller than the front of the card. Then I cut the piece in half and flipped one half. I put the pieces together in the Embossing Folder and embossed them. I lightly sanded the embossed cardstock to reveal the white. I adhered them to the front of a white Card Base and added a simple sentiment.
We made this card recently in my local class playing with the Two-Tone Cardstock. If you are a Wollongong local I would love you to join in our classes each month. Contact me to find out more about them.
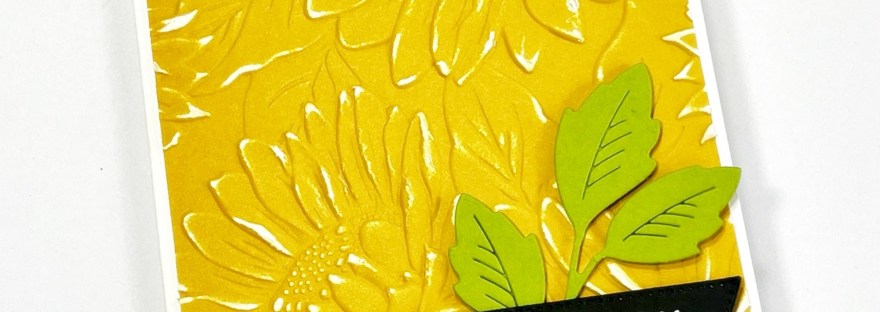
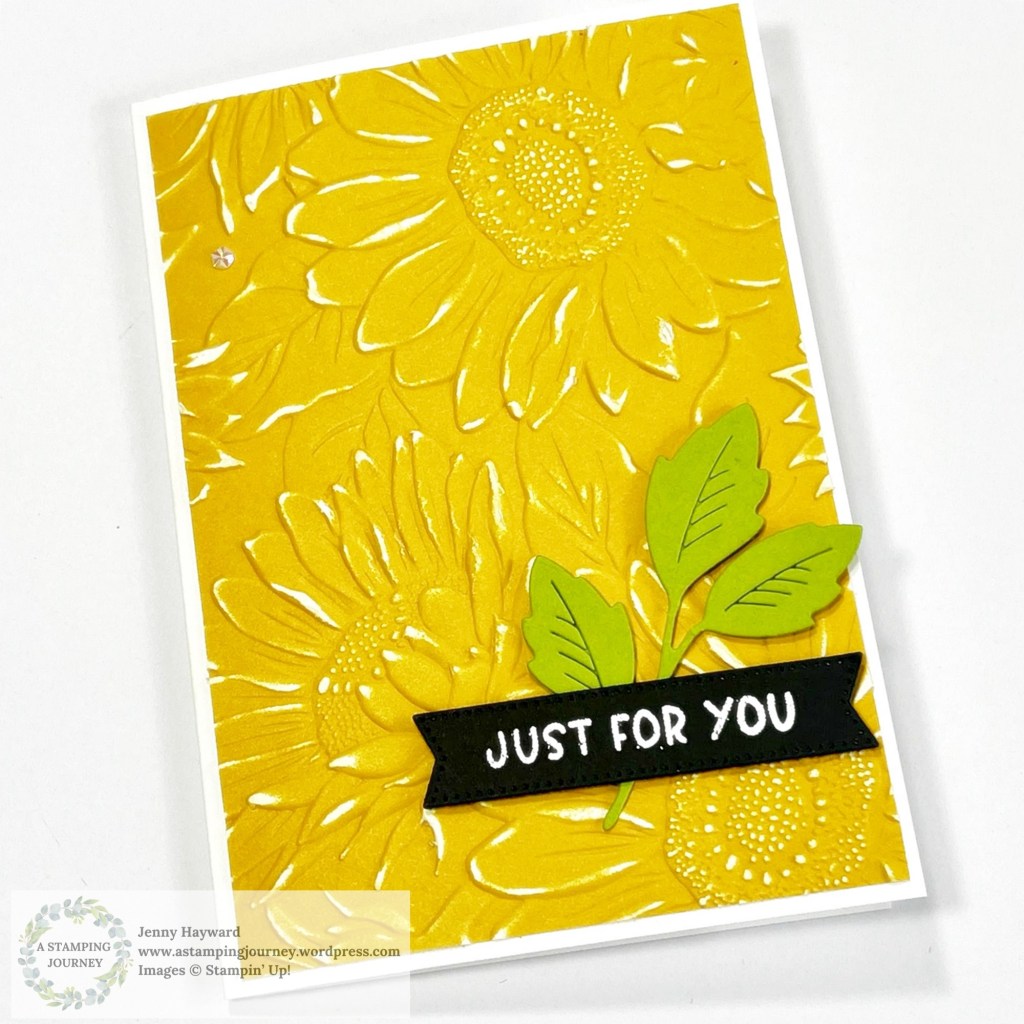
On this one below I cut a piece of the Two-Tone Daffodil Delight and embossed that. I lightly sanded the piece and added it to a white card Base. The sentiment heat embossed in white on black card and the Granny Apple Green leaf gives a ‘POP’ to the card.
You could do this in many other colours too. Hope you get to try it out.
Happy Crafting,
Jenny
If you are in Australia and “need” some supplies I would love to help you out. You can stop by my store -> HERE OR Contact me directly.
This week’s video I am featuring the Stampin’ Up! Sunflower Embossing Folder with more than 5 Different Techniques with this folder. If you don’t have this folder you can use another one with similar detail with flowers or leaves.
The Techniques I feature are:
Distressing
Colouring
Ink Wipe
Double Embossing
Plain Embossing
White Ink Swipe (This one is my favourite)
You can follow along with the video here below Or it is now on my Youtube Channel. Save it for later so you can come back and try them later. I would love to know what your favourite Technique is.
If you head to Youtube I would love it if you Subscribe to my Channel. I share videos each month with Fun Folds and Techniques.
Have a great day,
Jenny
If you are in Australia and need supplies I would love to help you get them. You can stop by my store -> HERE OR Contact me directly.
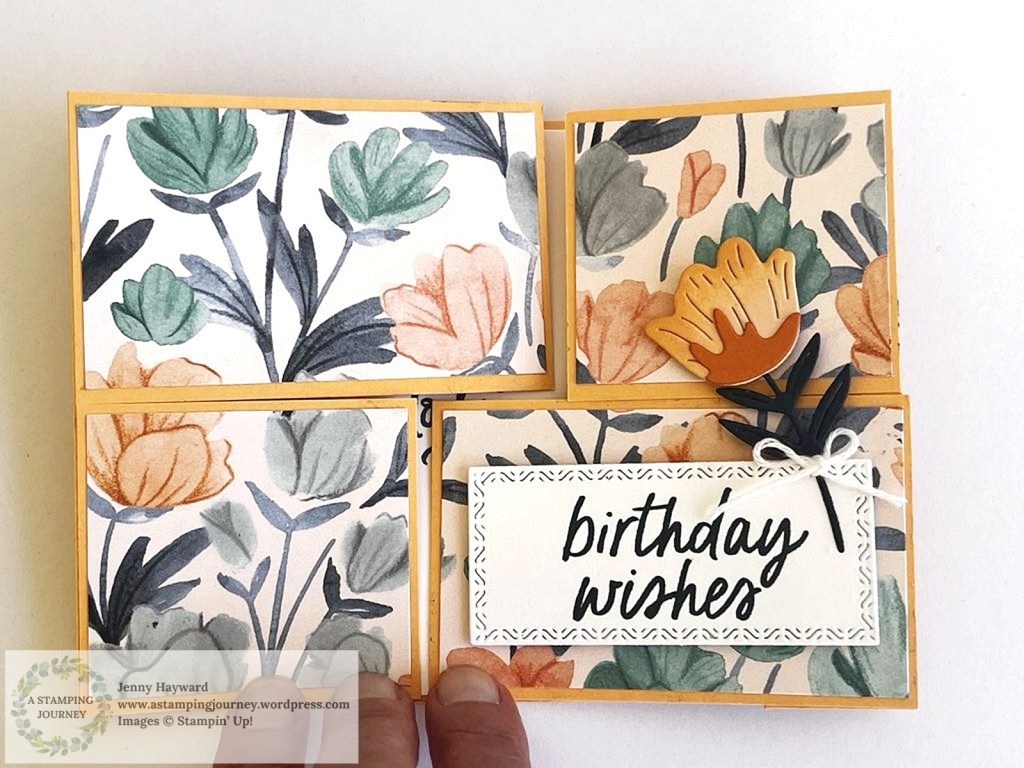
Have you seen the Puzzle Slider Fun Fold Cards? I saw them recently and just had to create one myself. The one I saw was created by Sue Stampfield.
I couldn’t find one in Metric measurements so I worked in inches. I adjusted those measurements and then worked out the Metric for my lovely crafters who prefer centimetres.
I put together a video for you. I used the Florals in Blooms Paper but you can use whatever you have. It’s a cool card. Even if you don’t like to do puzzles I think you will like to create one of these.
Here is the Video for you. The card is shown further below.
This is the card I had created earlier.
Don’t forget the inside.
Follow along with the video.
The Written Tutorial will be sent out for my Newsletter Subscribers next week. Are you a subscriber? I send out a project Tutorial each week. You can head to the Side Bar on my blog and click on the tab.
Happy Creating a Puzzle Slider Card,
Jenny
If you are in Australia and need supplies for your creating I would love to help you. You can head to my store -> HERE. Or Contact me directly.
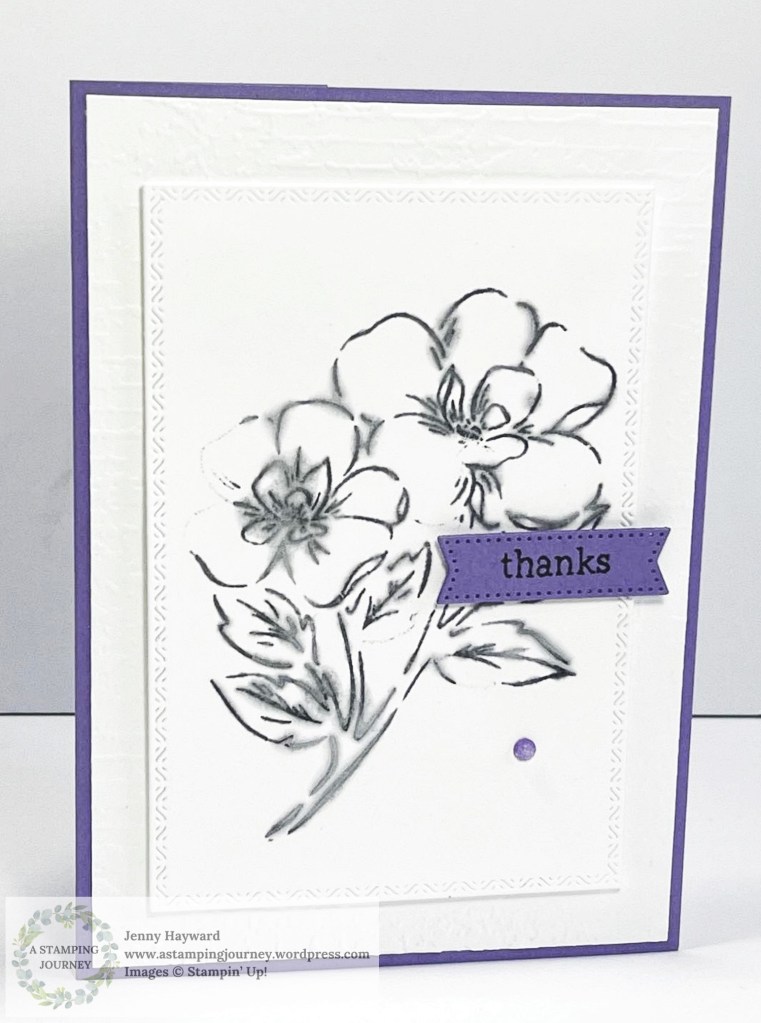
I made this card recently. It resulted from a Happy Accident. I thought I would show you for our Wednesday’s WOW #168.
This is one of the flowers from the Thankful Garden Stamp Set. You could use any image though.
I was using it with Stazon and after I had stamped I wiped over the stamp with Stazon Cleaner and stamped it on scrap paper. It made the lines bleed but it looked cool. So I tried it again and this time I stamped on White card resulting in this effect giving it a washed out look.
I have tried it a few times since to replicate it. The results are different all the time. Some tips – Wipe over the stamp with the Stazon Cleaner. Stamp it off on to scrap paper very lightly first. Press firmly on to your card. Let it dry completely before finishing the card.
Be sure to clean your stamp carefully after you have stamped it.
Give it a go and see what you come up with.
If you would like other helpful tips click on the tag – Wednesday’s WOW! and find them.
Happy Crafting,
Jenny
If you need supplies and you are in Australia I would love to help you get them.
This week for our video we have … aTrifold Arches Card.
You can make them any shape you like though if you don’t have the Everyday Arches Dies. Try with Oval or Rectangle Dies or cut your Rectangles with the Paper Trimmer if you don’t have any.
Here is the card folded up.
You can also decorate it as you like. I have used the Wildflower Birthday Specialty Paper which has the gorgeous paper with gold touches and the Diecut pieces so no colouring involved.
The card is very easy to make. In the video I show you the measurements in Metric and Imperial. If you would like the written Tutorial I will be sending that out to my newsletter Subscribers next week. (Tuesday 15th April).
I send out a Tutorial each week to my lovely Subscribers so be sure to be on the list. You can find the link in the Right Hand Side Bar on my blog.
Here’s the video for you.
I hope you get to make one. If you have any questions then don’t hesitate to contact me.
These are the Everyday Arches Dies. There are 10 Dies in total you can use one on their own or layer them together.
If you need any supplies for your crafting and you are in Australia I would love to serve you. You can head to my store -> HERE Or Contact me directly.
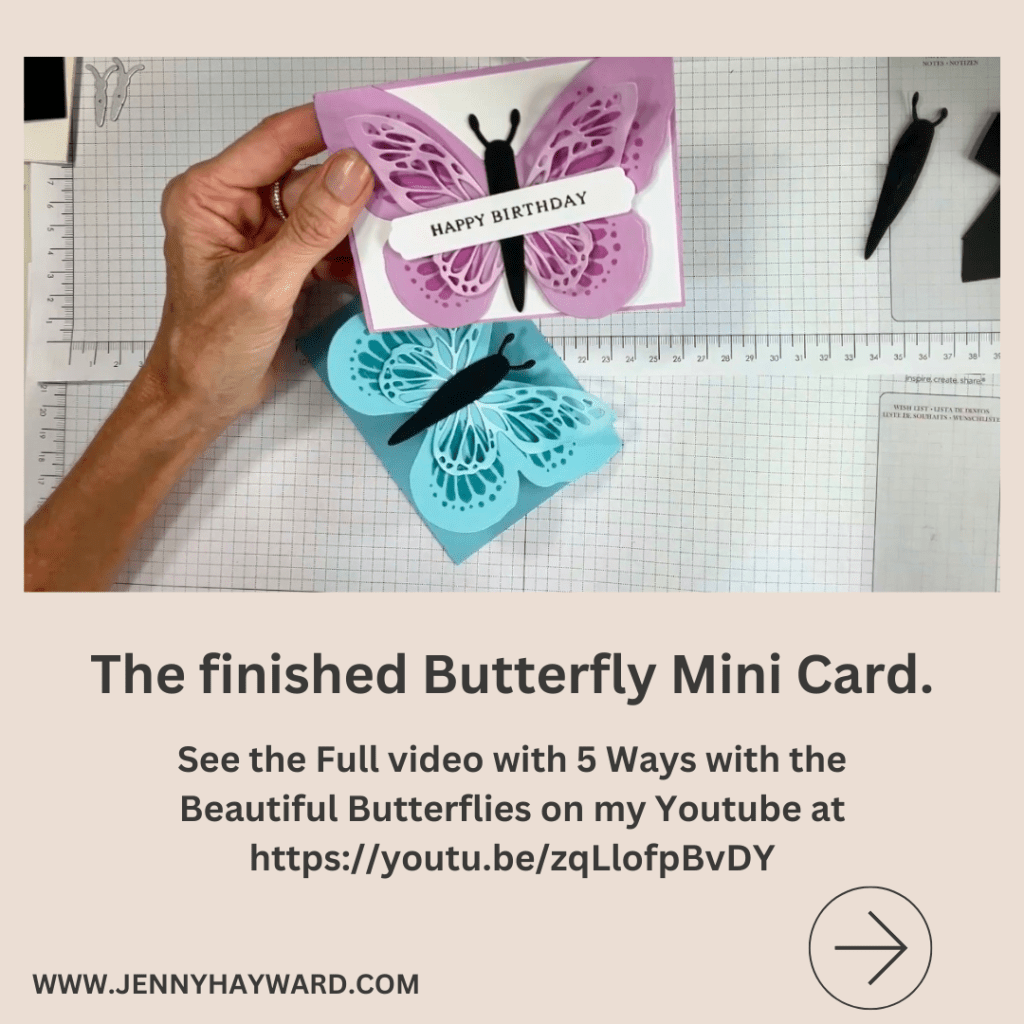
I have been sharing a lot with the Beautiful Butterflies Bundle. It is a gorgeous one. You might have caught the 5 Ways with the Beautiful Butterflies Video I posted just recently. You can find this in a previous post on my blog or now on Youtube. But I will also have the link below if you missed it.
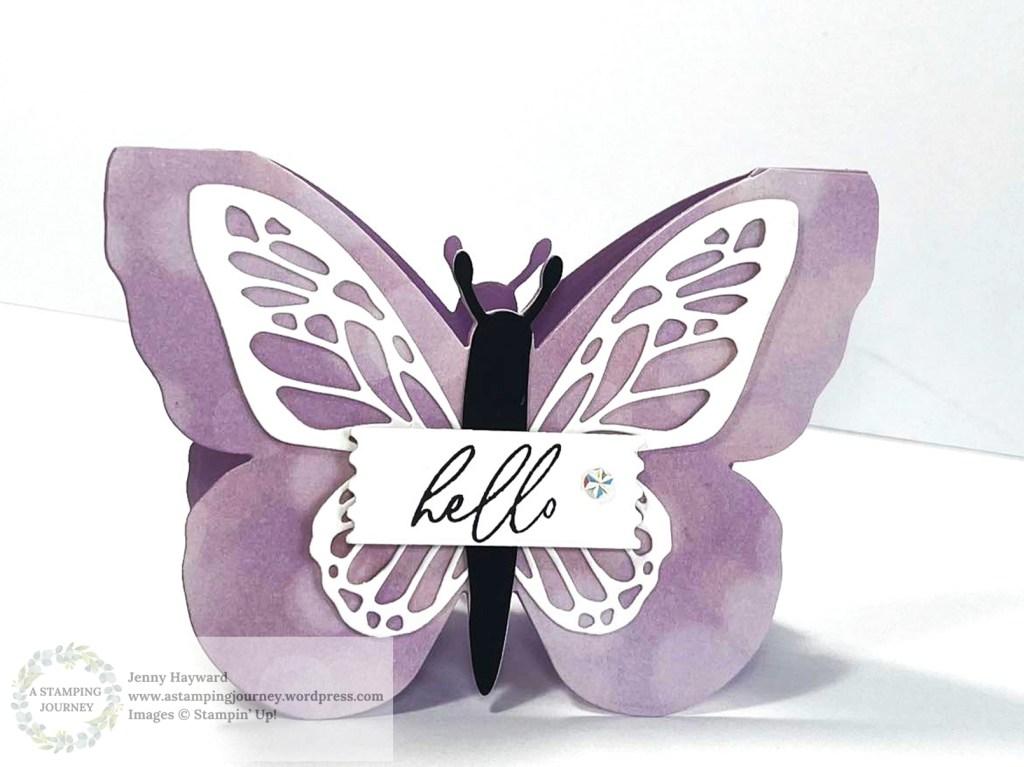
This is one of the cards I created. It is a Mini Beautiful Butterflies folded card in Fresh Freesia.
MAKE IT YOURSELF:
To create this place your die on the fold line of your card base with the little score marks on the die lining up on the fold. Diecut it out. You will have a fold card. If you want some pretty paper on the butterfly adhere your paper to the front of the card first. I used the Beautiful Bokeh paper for this one.
I added a detailed diecut body in white on the front of the card.
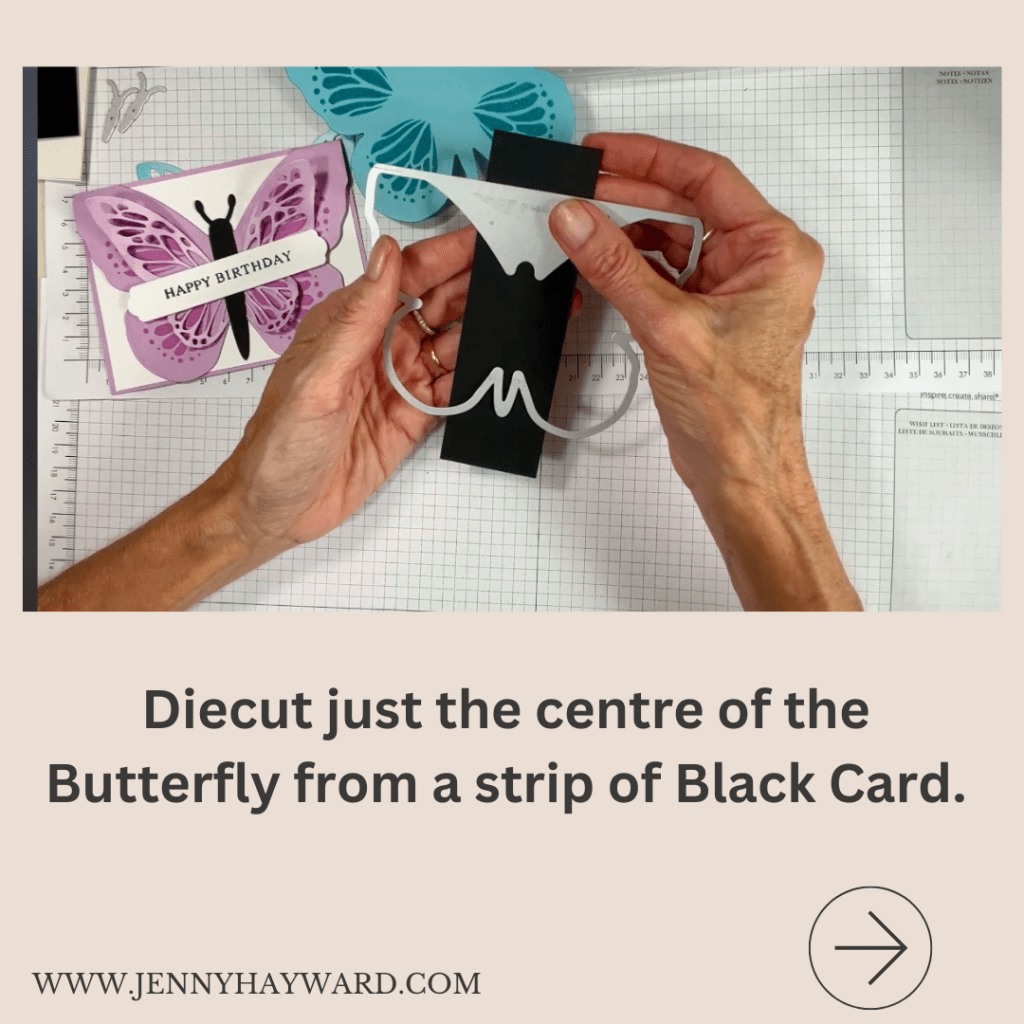
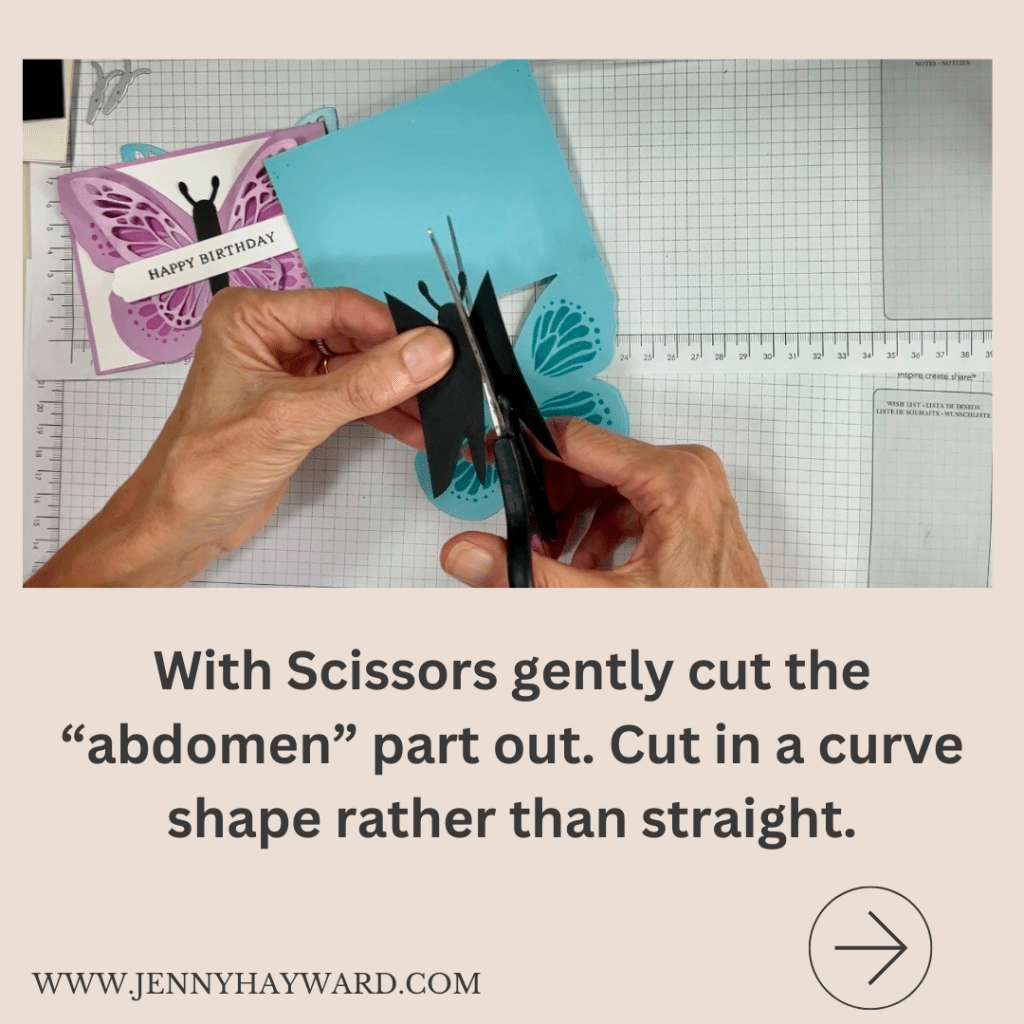
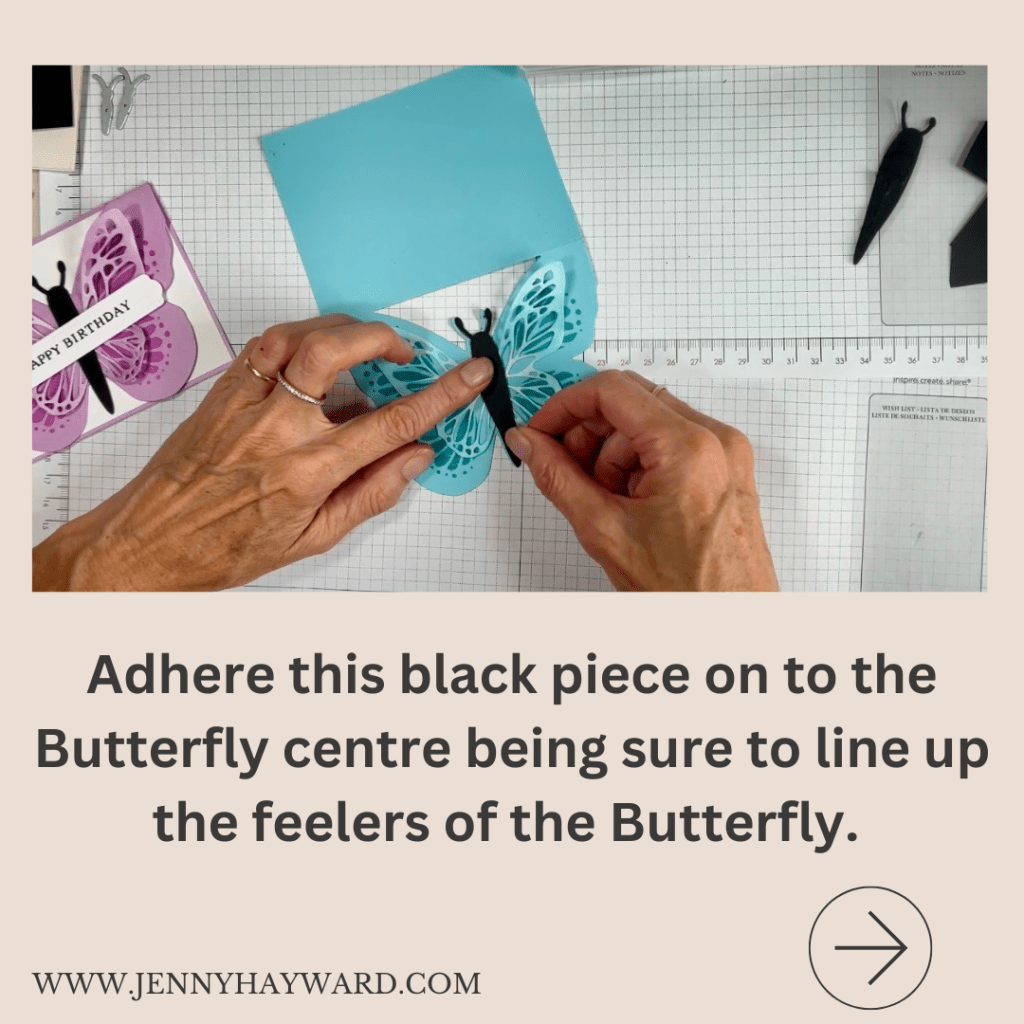
If you missed the tip on how to cut the black body then be sure to check on my page or on the video ->HERE.
If you have the Beautiful Butterflies I hope you get to make one similar. Have a play with it. It’s lots of fun.
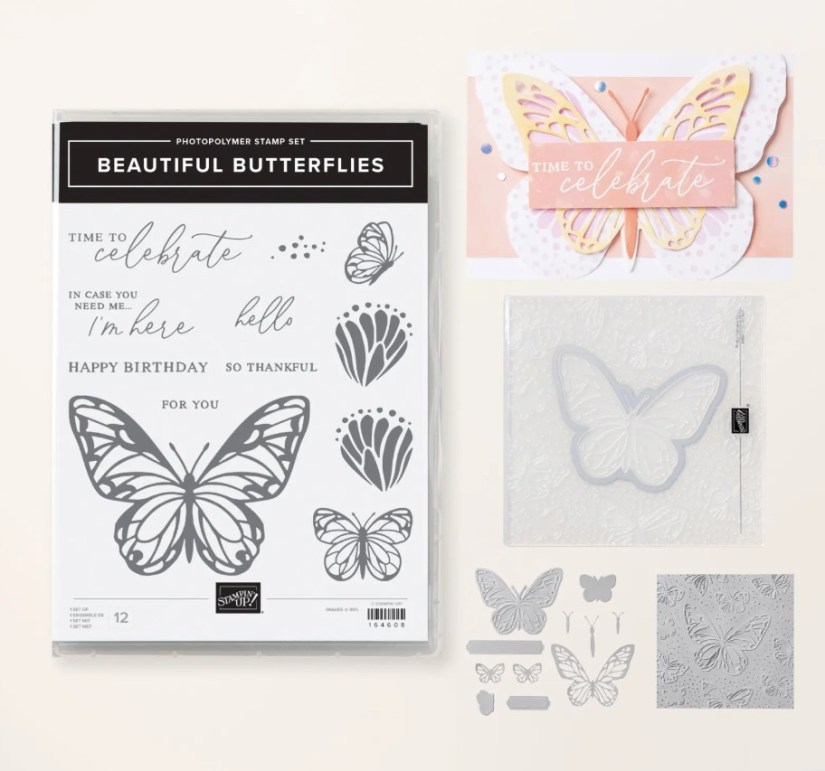
This is the Beautiful Butterflies Bundle. You can see it more in my store -> HERE.
If you are in Australia and need some crafty supplies, please stop by my store -> HERE. OR Contact me directly.
I came across the Faux Watercolour Technique recently. I was intrigued and had to try it. I thought you might like it too so I put together a video. You can follow along and give it a try.
As you watch you might see it is a bit like the Smooshing Technique. But there are some differences.
Here is the video.
Here is the card I created.
The Thankful Garden Bundle includes Stamps, Dies and Masks and is an Online Exclusives.
If you have missed it you can see it online -> HERE.
I have also used the Soft Waves 3D Embossing Folder which adds a nice, curvy texture. Also, using the Arched Dies for the sentiment adds a different element.
Hope you like it and get to try the technique yourself.
Happy Crafting,
Jenny
If you are in Australia and need some supplies I would be happy to help you. You can visit my store -> HERE OR contact me directly.
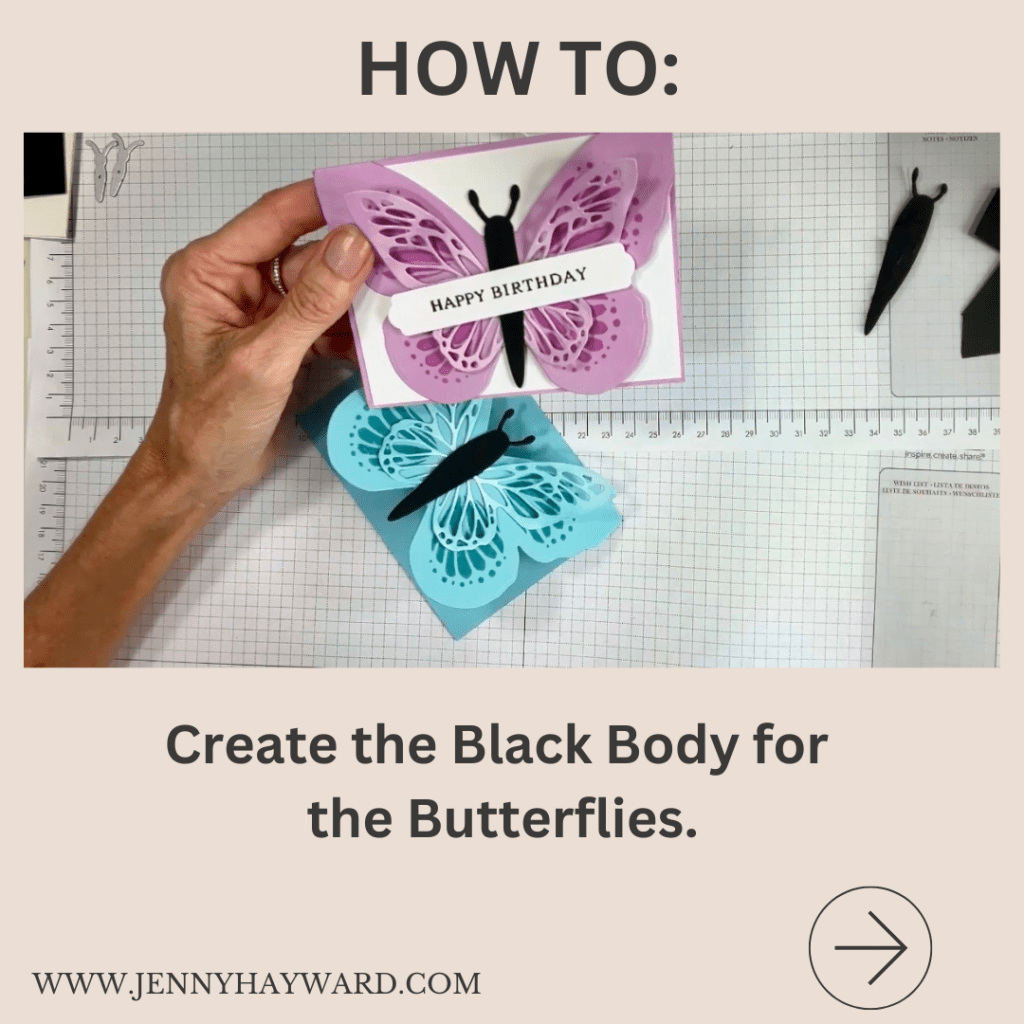
I have been sharing the Beautiful Butterflies. They are gorgeous. I recently shared a video of 5 Ways with the Beautiful Butterflies. You can head back a post or 2 to see that.
But how did I create the Black centre of the Butterfly. Let me show you below. (If the images don’t show head to the blog directly to view them).
I hope you find this helpful when you create with the Beautiful Butterflies.
Happy Crafting,
Jenny
Are you in Australia and need crafting supplies yourself? I would love to help you out. Head to my store -> HERE. Please use the Host Code: 32KKQAX6
Or Contact me Directly.
Don’t miss out on the bonus Sale-A-Bration gifts you can choose from with your orders over $100 or $200 AUD.
I have been playing with the gorgeous new Beautiful Butterflies Bundle. There are so many ways creating with this bundle and I discovered some Tips that might help you when creating with this yourself.
I put together a video to share 5 Ways creating with these Stamps, Dies and Embossing Folder and point out some things to look out for when using them.
If you don’t have the Beautiful Butterflies Bundle some of the ideas may work with other Butterfly stamps and dies you have so check them out.
I will share the cards more over the coming weeks in separate but for now follow along with the video.
The Tutorial for the mini card I shared in the video will be sent out to my newsletter Subscribers in next week’s newsletter. Are you a subscriber yet? Check the side bar on my blog to see how to receive them.
If you are in Australia and need some supplies for your crafting I would love to help you out. You can head to my store -> HERE Or Contact me directly.










 A Stamping Journey