cards, Catalogues

SCENIC COAST PART FRONT CARD ~

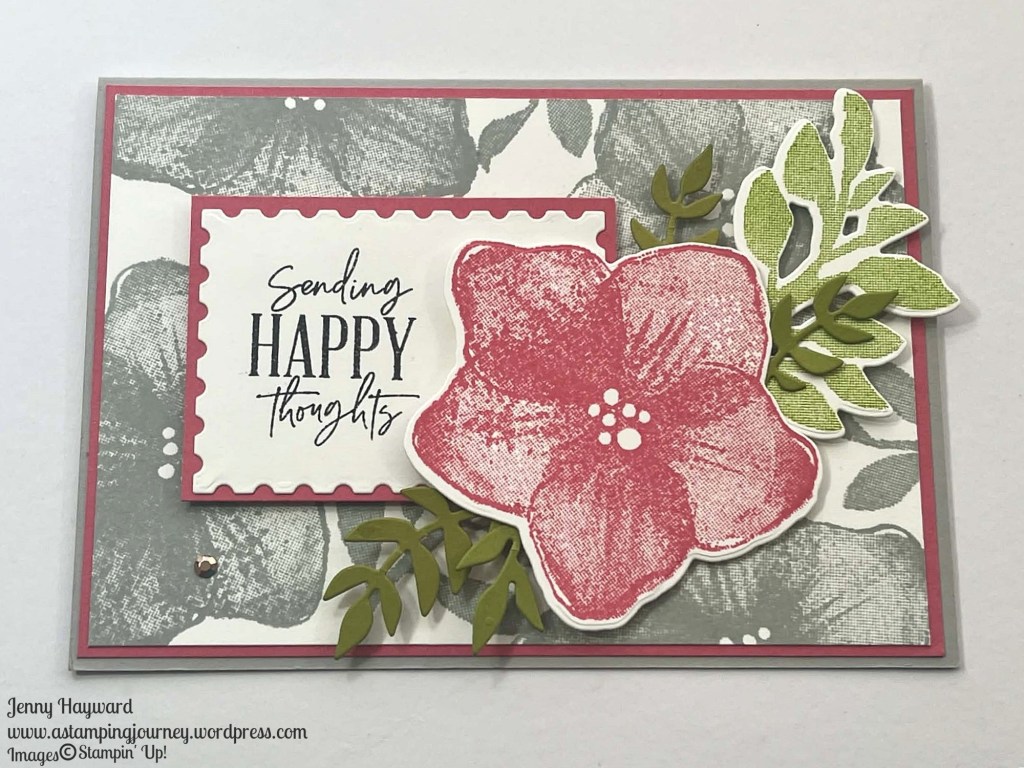
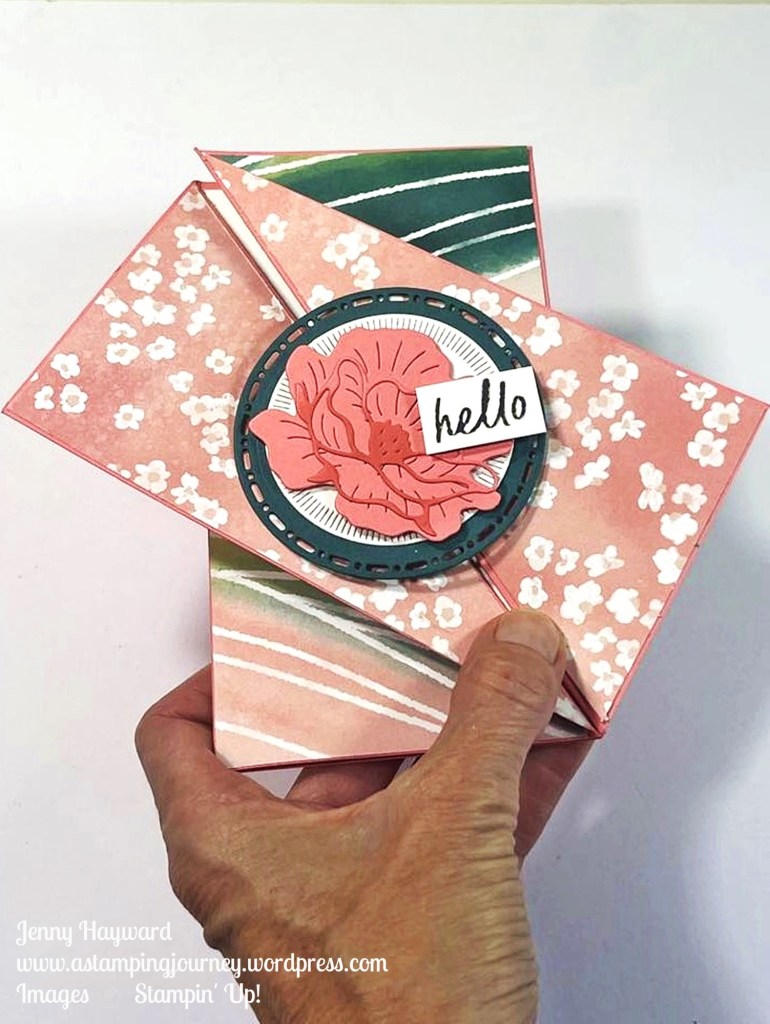
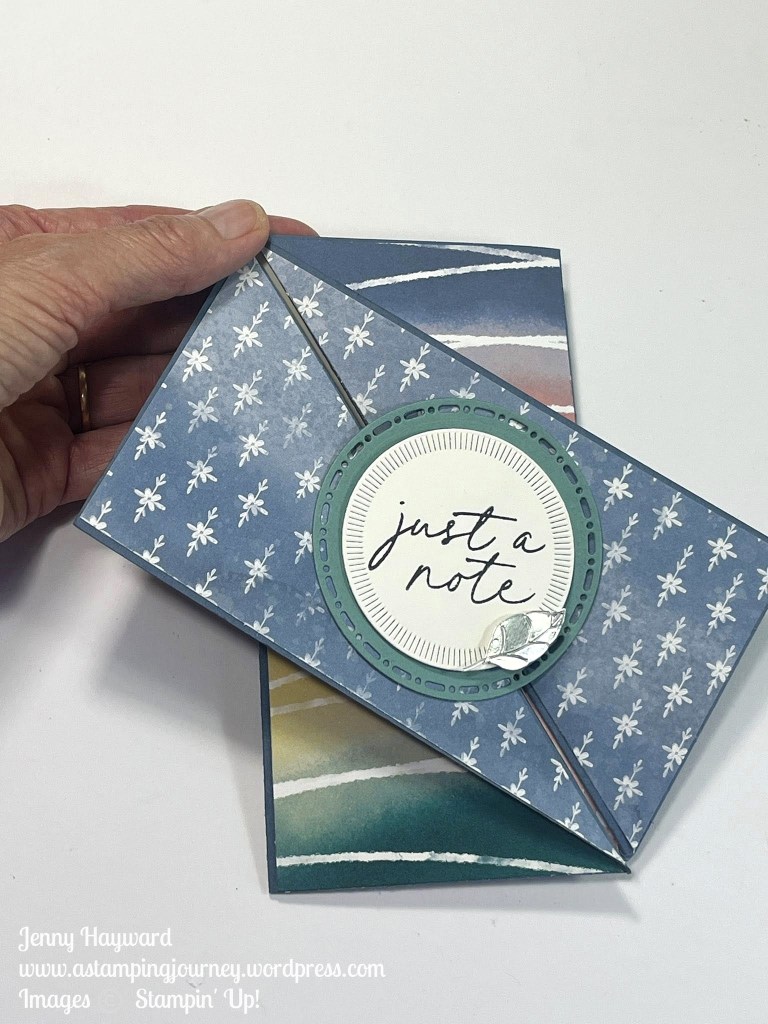
Back with another Scenic Coast card. Sometimes when I want to do a card a little differently but I don’t have a lot of time to do the whole complex Fancy Fold Card I do this. It’s an easy effect. I call it a Part Front Card.

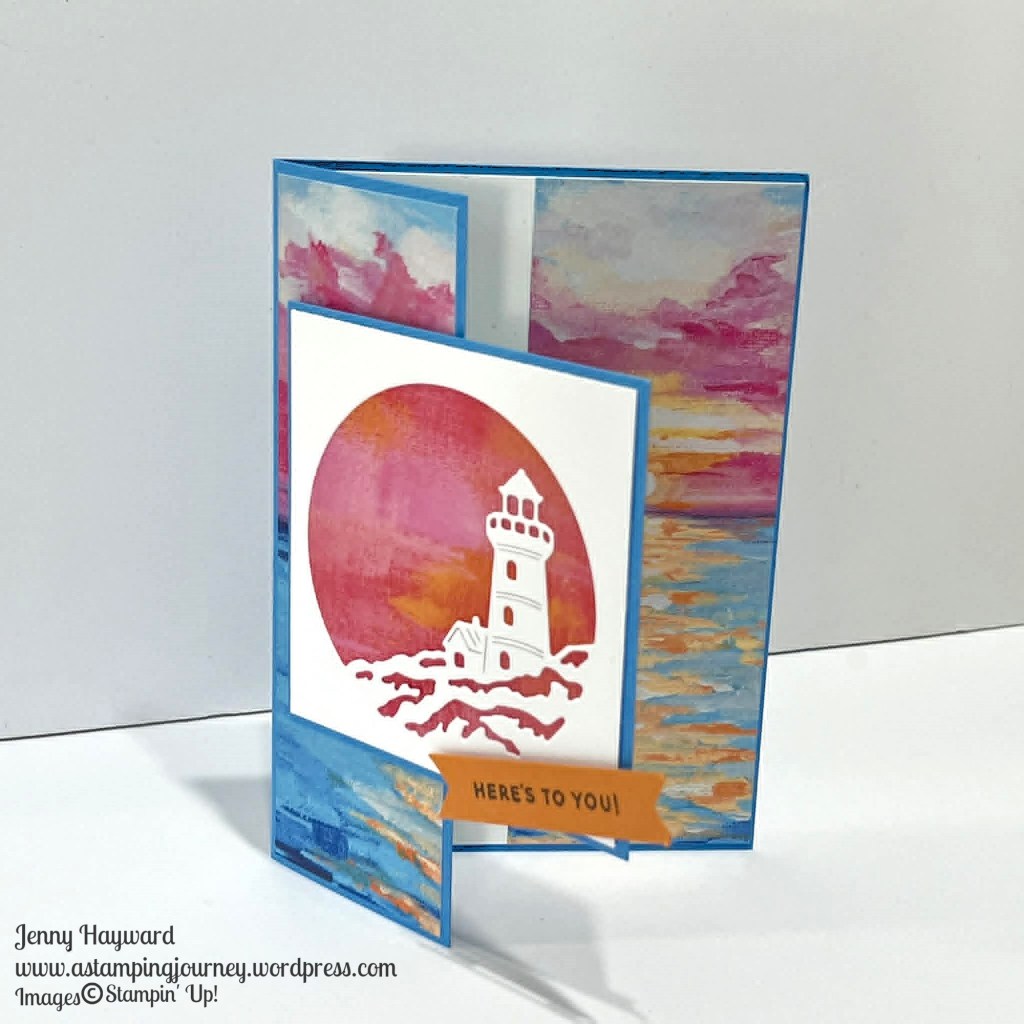
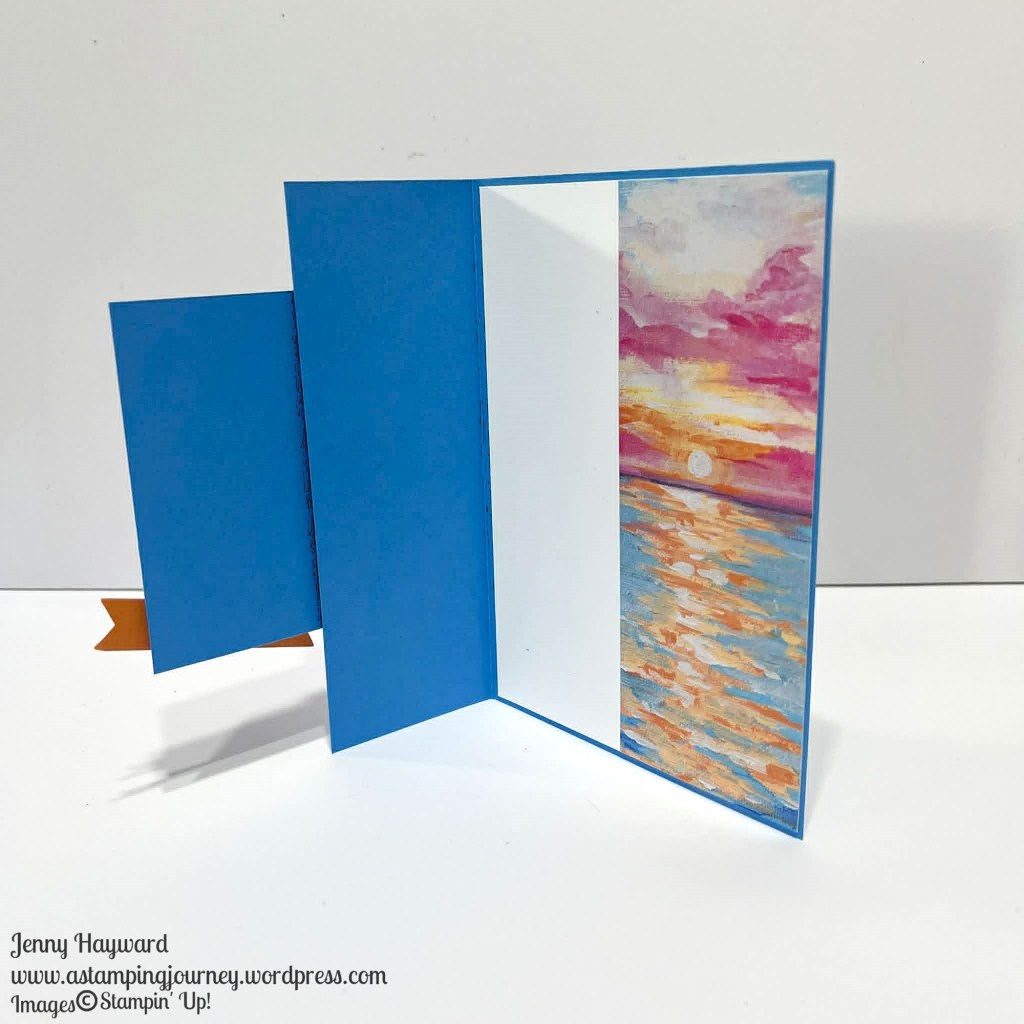
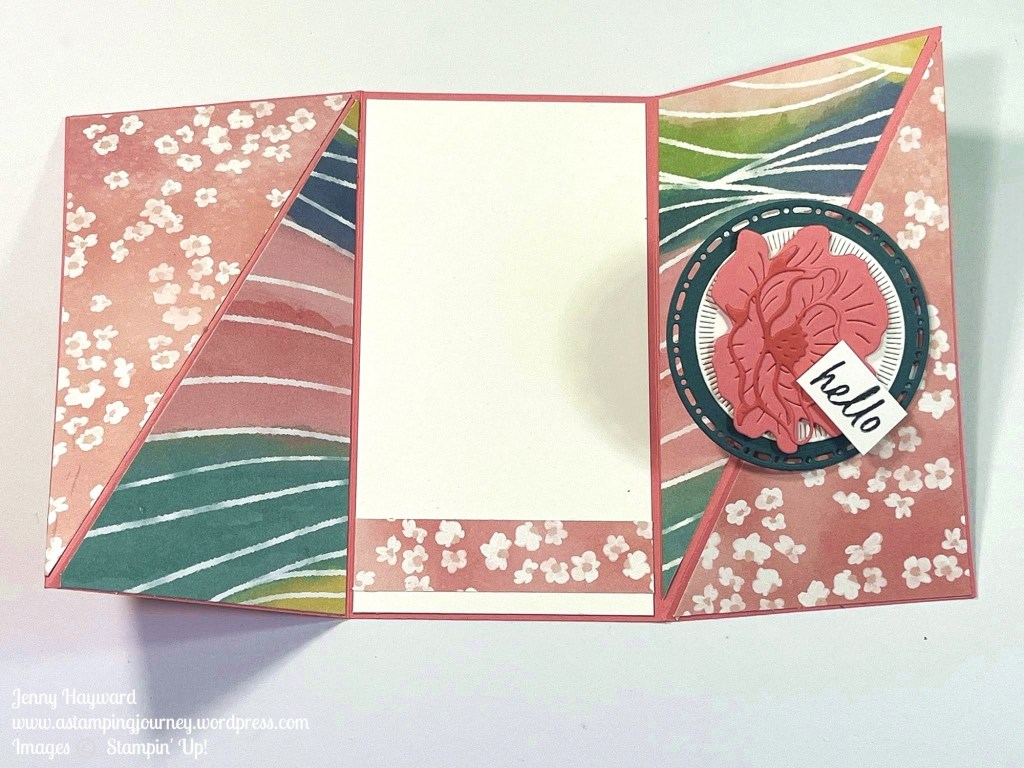
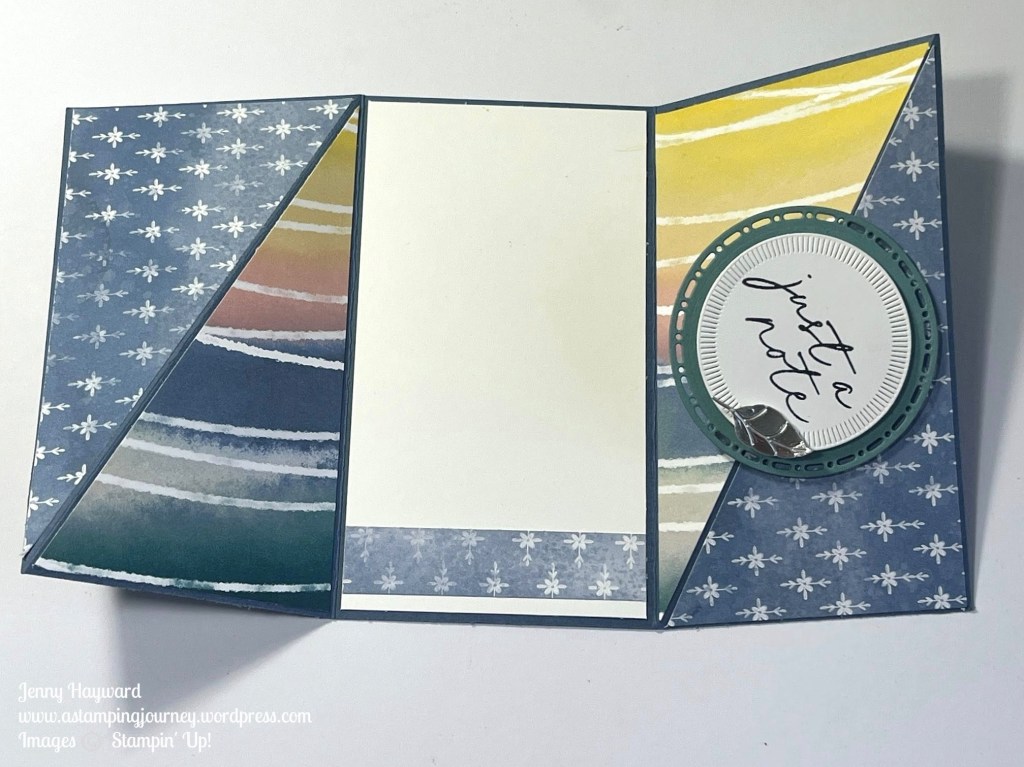
I cut off half of the front of the card. Added some pretty papers. They could be the same or co-ordinating papers. Then add a front panel. This panel could be any size depending on what you want to add.

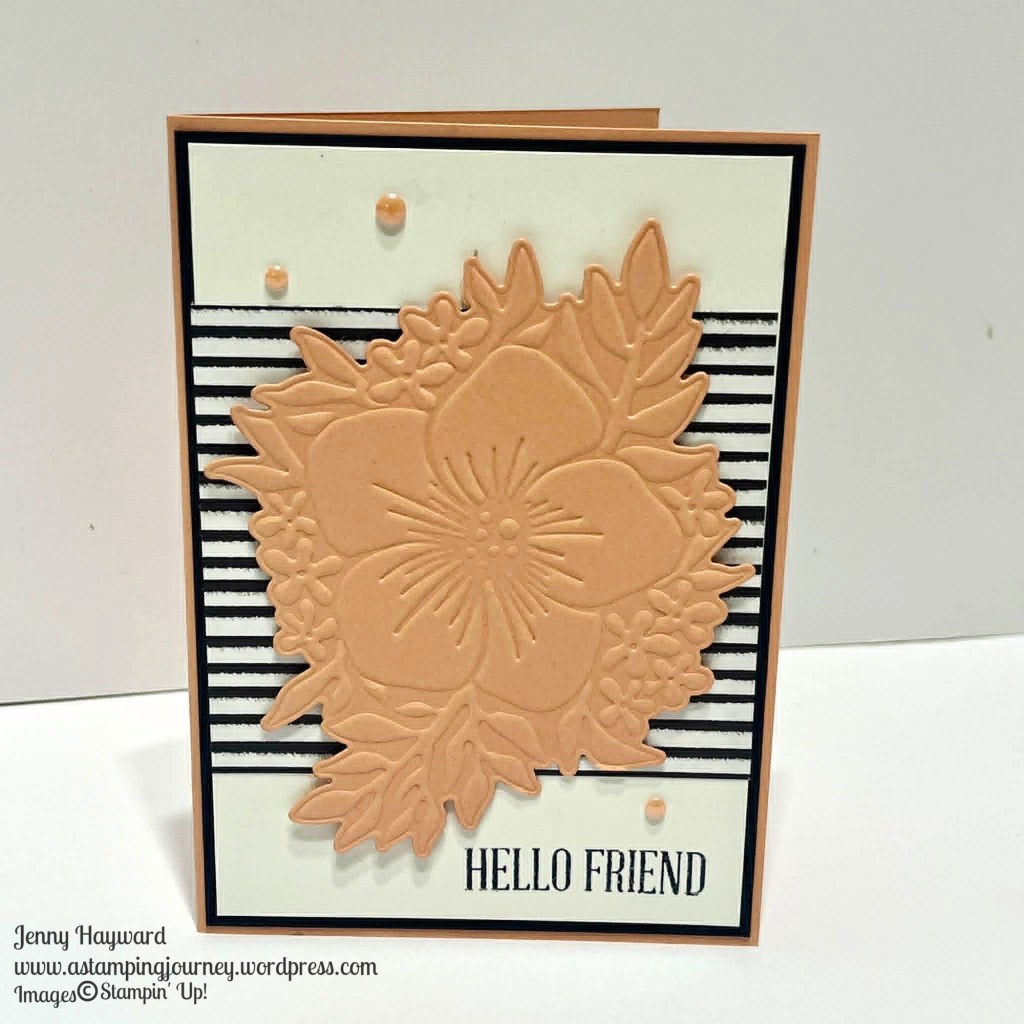
This particular card I cut a square of white card to diecut the lighthouse. Then layered some paper behind it. It kind of looks like a sunset perhaps. Then added it to a card mat panel.

Try it out when you want to cheat and do something differently. Especially if Fun Folds cards are not your favourite to do as they can be complex.

Have fun creating and exploring new things.

Jenny

Are you in Australia and “need” some supplies? Let me help you. You can jump over to my Online store -> HERE OR contact me by email or commenting here and I will get back to you.

Stampin' Up!

5 MINUTES, 5 DAYS, 5 WAYS WITH THE OPULENT OASIS BUNDLE – DAY 5

Last day of this Mini Series. 5 Minutes, 5 Days, 5 Ways with the Opulent Oasis Bundle.

See some other ways to stamp with the stamps and dies in this set.

This is the card I created.

You can make your own background paper. You could use different colours for the stamps and dies or as I have using one colour. I chose Smoky Slate as a subtle background.

The flower was stamped in Strawberry Slush and the leaves in Granny Apple Green. The smaller diecut leaves were in Old Olive.

Thanks for following along with this mini Series. Let me know what you think? Would you like to see more like this?

If you missed them head back to the past posts or Head to my Youtube channel and you can find them there.

If you are in Australia and need supplies I would love to help you get them. Head to my store -> HERE. Or Contact me directly.

Happy Crafting,

Jenny

cards, Catalogues, Product of the Month, Stampin' Up!, Techniques, Videos

5 MINUTES, 5 DAYS, 5 WAYS WITH THE OPULENT OASIS BUNDLE – DAY 4

Day 4 of our series – 5 Minutes, 5 Days, 5 Ways with the Opulent Oasis Bundle.

Have you seen the past videos in this series yet? You can head back to the recent posts if you missed them or would like a refresh.

In Day 4 of these videos let’s see what else you can create with this bundle using just the stamps and dies.

These are the cards I shared in the video.

Hydrangea Hue and Lemon Lime Twist have been a favourite combination recently.

Here is another simple card with these colours and using the Berry Botanicals Vellum Specialty Paper.

The Opulent Oasis Bundle is available in the May-August Catalogue. The Berry Botanicals Vellum Specialty is available as May Product of the Month.

Last Day tomorrow. Be sure to check back in. Let me know what you think of this series too. Would you like to see other Bitesize video series on a bundle or technique?

Happy Crafting,

Jenny

If you are in Australia and need supplies I would love to help you get them. Head to my store -> HERE. Or Contact me directly.

Happy Crafting,

Jenny

cards, Catalogues, Stampin' Up!, Techniques, Tutorials, Videos

5 MINUTES, 5 DAYS, 5 WAYS WITH THE OPULENT OASIS BUNDLE – DAY 1

I’m bringing you a new series this week. 5 Minutes, 5 Days, 5 Ways with the Opulent Oasis Bundle. Small bitesize videos to help inspire you when creating with this bundle. But if you don’t have this bundle you might just be able to create these with other stamps/dies you have.

In this video I show you how to use the new Impressions Mat. The mat helps give a little more “puffiness” to the Impressions Dies.

Here is the video for you to follow along.

These are the cards I showed how to make.

Which colour do you like – the Crisp Canteloupe or the Strawberry Slush?

Be sure to check back with the other videos this week as I share more with this Bundle.

Happy Crafting,

Jenny

cards, Product of the Month, Stampin' Up!

FRAMED BERRY BOTANICAL VELLUM PAPER

Here is another project with the Berry Botanical Vellum Specialty Paper. Although you could create with look with any pretty paper.

Stampin' Up! Berry Botanical Vellum Specialty _ Framed

This is a great way to highlight the patterns of your paper rather than covering much of it up. Create a frame by diecutting some layering (or Nested) shape Dies. On this one I used the Nested Essentials Dies. You could use any shape though. Try square or circles or even rectangles. See what you have.

Hope you get to try this way out. It is a very quick, simple card but can be effective.

Happy Crafting,

Jenny

The Berry Botanical Vellum Specialty Paper is available as this month Product of the Month. Available to you for an additional $9 when your order reaches over $125 (Australian market. Check your own market).

Are you in Australia and “need” some Stampin’ Up! Supplies for your collection? I would love to help you get them. You can head through my Online Store -> HERE OR Contact me directly.

cards, Product of the Month, Stampin' Up!, Techniques, Tutorials, Videos

DIAGONAL GATEFOLD CARD + A VIDEO

This card might look complicated but it’s really not. It’s called a Diagonal Gatefold Card. You can create it with the card and paper you like. For this one I have used the Painted Illusions Designer Series Paper.

You open it out. This is the inside. I love the angled look.

Here is another one using the same paper pack, but just doing that that can change it up a lot by using different colours.

It really is easy and I can show you. I share the measurements in Metric and Inches for you.

Follow along with the Video -> HERE.

Hope you get to try one yourself.

The Painted Illusions Paper is this month’s Product of the Month.

Happy Crafting,

Jenny

cards, Online Exclusives, Product of the Month, Stampin' Up!

DON’T DITCH THOSE HEARTS FROM THE STAMPIN’ UP! CUTEST CREW SET ~

I have just received the Cutest Crew Bundle that will be starting in March. It is very cute. And I discovered something fun when I was using it.

Firstly, the card and I will tell you about it.

I’m not much for colouring but I am trying to work on it. I coloured the cute dogs with Stampin’ Blends. The paper circle is from the Painted Illusions pack.

The Cutest Crew has a row of dogs like this, a row of cats and then 3 birds. It has some cute dies for them all. It will be available as an Online Exclusives starting in March. I think it is going to be popular.

Something I discovered though. When I diecut the red paw print strip those larger “bits” looked like hearts. So I added them to the card. It just adds to the cuteness. Don’t waste those little hearts.

You can see the Cutest Crew Bundle in March. I will play with it more very soon too. So much to play with not enough time. Do you find that?

If you need supplies and you are in Australia head to my store and you can grab your goodies. Head -> HERE. OR contact me directly and I can help you out.

If you would like the Painted Illusions Paper. That is this month’s Product of the Month. You can receive that when your order reaches the qualified amount. In Australia that is $125 and purchase the paper for $9. Check your market for your own amount.

Happy Crafting,

Jenny

cards, Catalogues, Product of the Month

PAINTED ILLUSIONS PAPER + WITH YOU IN MIND!

More with the Painted Illusions Designer Series Paper. I kept it simple again highlighting the wavy paper and bold colours.

The Happy Birthday is from the ‘With You In Mind’ Stamp Set. I stamped it on white card (it is white…) and then diecut it with one of the Textured Notes Dies. It was wider than the width of the card so I trimmed it down. Having the edging top and bottom of that piece adds some extra detail and texture.

Take a closer look at the “flowery” shape in the circle. Rather than just simply stamping it I added extra colour. Firstly, it was inked in Granny Apple Green and then I used a dauber to add some Pretty in Peacock in areas over it. You only need a little dab of ink. Then it was diecut with one of the small circles in the Stylish Shapes Dies.

Then I added some Rhinestones for the finish. You could add more to this card if you like to but I just kept it simple for the paper.

The Painted Illusions Paper is February Product of the Month.

With Product of the Month you can receive this with your qualifying order. In Australia when your order reaches $125 then you can purchase the Product for $9. There is only One per person. And While Supplies Last. Check your market for the qualifying amount.

You can see the Paper more -> HERE.

If you need supplies and you are in Australia stop on by my store and order there. OR you can contact me directly and I can help you out.

Happy Crafting,

Jenny

cards, Catalogues

PAINTED ILLUSIONS PAPER FOR FEBRUARY PRODUCT OF THE MONTH!

It’s a new month which means a new Product of the Month.

February Product of the Month is the gorgeous Painted Illusions Paper. I love the colours and the wavy patterns. Here it is.

The pack of paper consists of 12 – 12″x12″ sheets. There are 3 sheets of 4 Double sided patterns. One side has more simple prints and the other side the waves of colour.

The colours in this paper are Darling Duckling, Flirty Flamingo, Granny Apple Green, Lost Lagoon, Misty Moonlight, Petal Pink, Pretty Peacock.

I have actually been playing with this paper the last few weeks. I received this early as part of the Product of the Month Demonstrator Coucil I am on. It has been fun to play with. I will share those projects I created soon.

Here are some projects that Stampin’ Up! have created with this paper.

With Product of the Month you can receive this with your qualifying order. In Australia when your order reaches $125 then you can purchase the Product for $9. There is only One per person. And While Supplies Last. Check your market for the qualifying amount.

If you order another qualifying amount later in the month you can still select a different month if you haven’t already chosen this.

I hope you can get this great Paper. You will enjoy it.

Happy Crafting,

Jenny

cards, Product of the Month, Stampin' Up!

SWEET SUNDAY WITH A PATCHWORK CARD!

Sweet Sunday with this fun Patchwork card idea. This one is created by Stampin’ Up! Artists with the True Blue Florals Designer Series Paper. You could try with any pretty paper though.

Here’s How:

You would need to cut numerous white squares. Diecutting them with one of the small squares from the Stylish Shapes Dies give you that “stitched edge” look. For a card like this you would need 16 squares. Then diecut some squares with your patterned paper. Cut the squares diagonally. Then you can position the white squares over your card mat and place the cut paper squares in position to create the patchwork look. This card would work best with a Square style card.

Try this idea out for a card. And I would love to see it too if you like.

This paper is the Product of the Month that has been out this month. There is a new exclusive product each month.

You can purchase this True Blue Florals Paper for $9 when your order reaches $125. (AUD)

You can find more about the Product of the Month -> HERE.

If you need any supplies you can order at my store at that link above too.

Happy Crafting,

Jenny