I have been wanting to create another Tote Bag for a long time but I haven’t had a chance – until now! The ‘Large Tote Bag’ has been my most popular post over the last 2 years but I wanted to freshen it up. Here is my new Tote. Below I will share all the details for you.
Here are a few other views.


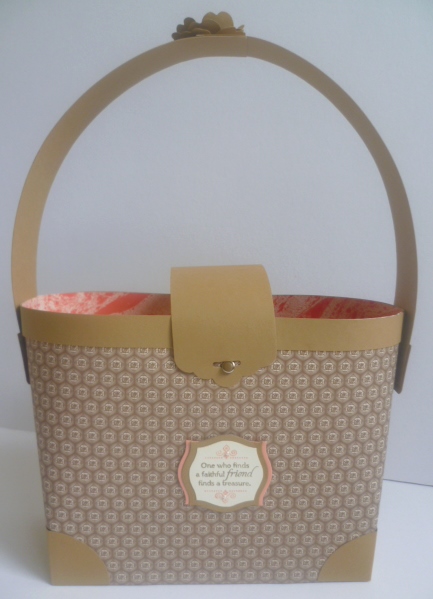
I have used the lovely Venetian Romance DSP and Baked Brown Sugar Cardstock. I added the Soft Suede Candy Dots to the tabs. They match in so well I think. I added a flower to the top to hide the join. I will tell you about that below. The greeting is from ‘World Treasures’. I coloured the words with markers (Baked Brown Sugar and Crisp Canteloupe) and cut around the inside of the border. I cut a piece from Baked Brown Sugar with the Apothecary Framelits and layered this under the greeting and then cut another in Crisp Canteloupe and cut this one in half to layer underneath.
Let’s move on with ‘HOW TO MAKE THE TOTE BAG’
The original post for the Tote Bag with step-by-step instructions is HERE. These are in metric.
** Edited to add: I have since updated that post to have Imperial measurements as well.
If you would like the tutorial emailed to you then drop me a comment.
Let me tell you the modifications.
1. Omit the card strip for along the bottom edge. Punch 2 circles in Baked Brown Sugar with the 2 1/2″ circle punch. Cut them in half. You then have 4 pieces. Fold each one in half and then adhere these to the corners of your bag.
2. For your handle, Omit the 2 card strips and the steps to prepare your handle.
Cut 2 pieces 3.5cm x 25cm (1 3/8″x10″). Join the 2 strips. Adhere the handle to each end of the bag. I used Sticky Strip for strength. Cut small tabs to add to your handles. Cut 2 pieces 4cm x 3cm (1 5/8″ x 1 3/8″). Round the corners on the bottom edge. Adhere these to the ends of your bag. Add the Candy Dots or Brads for decoration. (If you are using Brads then place them on your tabs before you add the tabs to your bag).
3. For your Bag Closure: Cut your card 5cm x 16cm ( 2″x 6 1/4″). Punch one end out with the Scallop Tag Topper Punch. Adhere the other end to the back of your Tote Bag. Gently bend the closure over and mark the point on the front. Place a Brad on the front to that will hold your closure. I used a Candy Dot on a Brad.
4. To cover the join in the handle I added a punch flower. I punched out 3 flowers using the Pansy Punch and curled them a little. Join these together by overlapping a little and adding Sticky Strip. Add a small flower punched from the Boho Blossoms punch. Adhere a large Adhesive Pearl to the middle.
I hope you like this version. I hope you can go and make a Tote Bag yourself. I hope the instructions are clear. If you have any problems then please don’t hesitate to contact me.
Have a great day. 🙂
Jenny