cards, Catalogues, Classes, Stampin' Up!, Workshops

LAUNCHING THE NEW OCCASIONS CATALOGUE!

On Saturday I had my Occasions and Sale-A-Bration Launch.  I know that the catalogue has been around for nearly a month but with our School Holidays on it is a bit hard to get people together.  So it was Launch day on Saturday.  It was fun!  Thanks to all the lovely ladies who came and it was nice to see some new faces and some regular ladies too.

So what did we do?? Well, it was a party of course.  With all the fun party products in the catalogue, why wouldn’t we.  There was balloons and cake and treat bags for everyone. You know I got so busy and I forgot to take photos of everything. 😦  I will share what we did though.

I can show you the Treat Bags I made.  I was inspired by a couple of projects I had seen recently on Pinterest and shared by Stampin’ Up! too.

treat bags

These are 2 versions of them.  I have used some lunch bags and cut part way down the front and folded down the flap.  I added a strip of the ‘It’s My Party’ DSP and then cut a strip of card with the star Thinlets from the Mini Treat Bags.  The cake from ‘Party Wishes’ was stamped on white card and then it was cut with a mid-size Circle Thinlets. I added a punched flower from the Itty Bitty Accents Punch pack, a Dot from the ‘It’s My Party’ Enamel Dots pack and finished off with a bow from either the Melon Mambo or Mint Macaron Baker’s Twine.  The greeting from ‘Party Wishes’ was stamped down the bottom of the bag.

I filled the bag with some 6″x6″ pieces of the ‘It’s My Party’ DSP stack and a square of the Blushing Bride Glimmer Paper.  Of course there may have been some chocolate and other treats in there too. 😉

I had some different products set up to have a test run like the ‘Bloomin’ Heart Thinlets Die and Die Brush and the Confetti Embossing Folder and ‘Wink of Stella’ Brush. All good fun too.

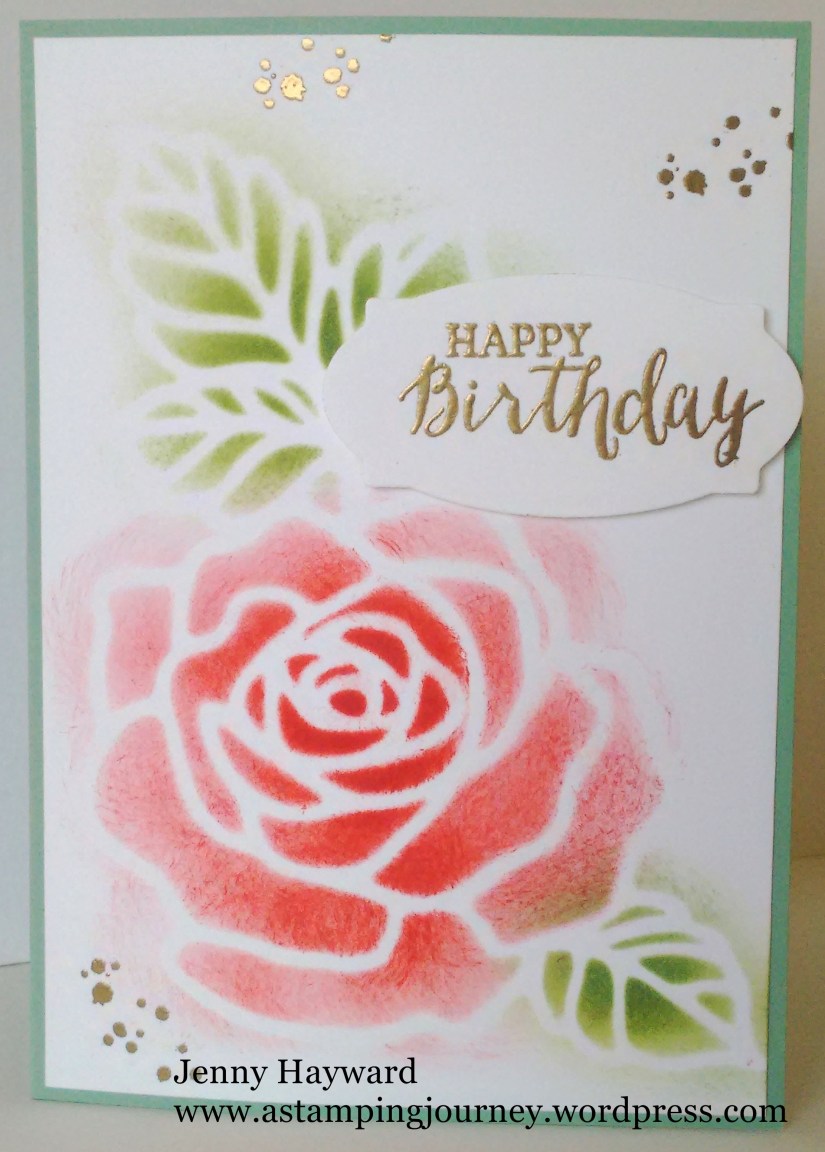
Now for the Make and Take. I can’t take credit for these cards.  I CASED them from Janet HERE.  I loved how you can use the Rose Garden Thinlets as a mask. Everyone loved the idea too and started thinking of other dies that they could do this with.
sponged rose

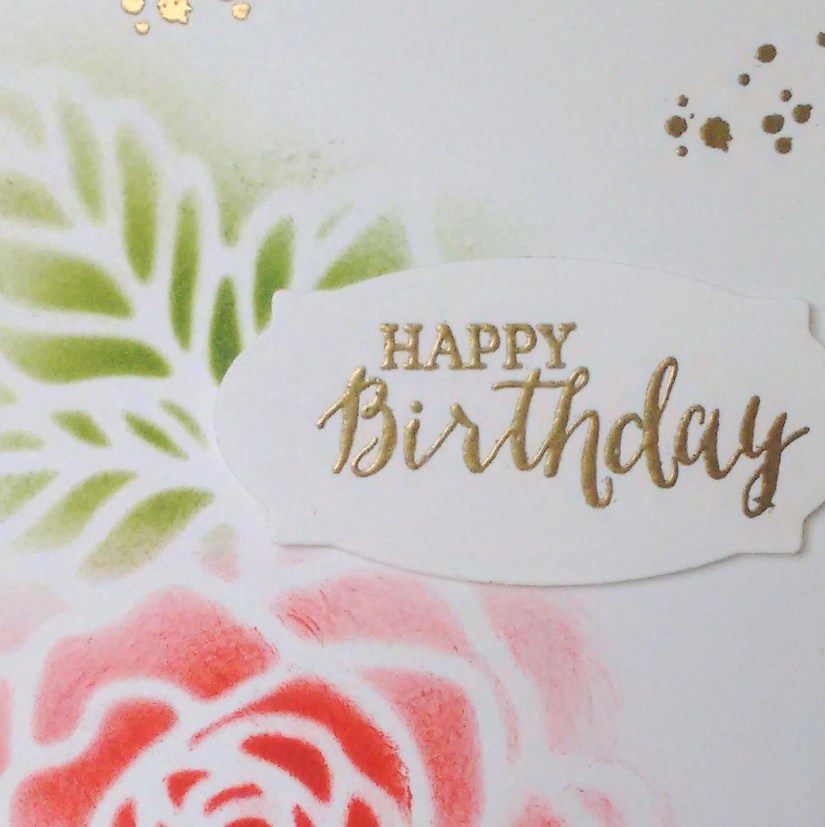
For this card we cut the rose and leaves out from some Whisper White card. Then placing it on to a Whisper White card mat carefully sponge the Watermelon Wonder ink over the rose adding more ink to the centre.  Sponge the leaves with Mint Macaron. It doesn’t matter if the ink merges with each other or goes out of the lines.  It’s all part of the effect. We then embossed some dots in gold from ‘Timeless Textures’ and heat embossed the greeting from ‘Rose Wonder’ in gold too. The card piece was adhered to a Mint Macaron card base and the greeting was raised up with dimensionals.

I showed everyone then how to use the mask you have sponged. Don’t waste it, you can create another card. I have used ‘Timeless Textures’ again stamping in Sahara Sand on white card.  The greeting was stamped in black, cut with the framelit and sponged around the edge. This was all adhered to a card base in Watermelon Wonder.

sponged offcut

Here they are together.  A nice matching pair.
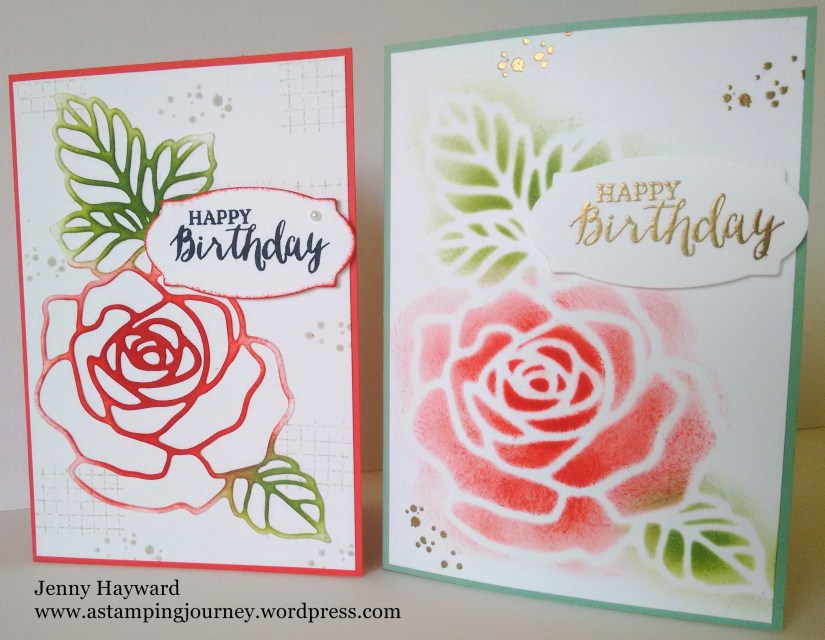
two cards

If you would like me to come and share some fun, creative ideas with you and your friends then let me know.  OK maybe not my international visitors. 🙂 With Sale-A-Bration there are lots of extra free products you can receive. Let’s fix a date now!

Thanks for visiting me today.  Visit again soon,

Jenny
cards, Catalogues, Classes

IT’S TIME TO PARTY. COME AND PLAY!

I am officially kicking off the stamping year this weekend with my Catalogue Launch.   By now you would have seen it??? Or have you been hiding under a rock this past month. 🙂 So if you are local in Wollongong come by and try out some of the fun new products and get to make a card and chat and have a great time.  That’s what it is all about really, hey!

Here are the details.

OCCASIONS AND SALE-A-BRATION CATALOGUE LAUNCH!

WHEN: Saturday 30th January at 2pm


COST: $10 which includes catalogues, make and take,
Product playground, Thank You gift and Afternoon Tea.

** RSVP: Thursday 28th January. Message me or leave a comment to reply.

Here is a sneaky peek of what we will be making,
so make sure you join us. 

sponged rose - Copy (2)

So what do you think?  Come on and join us.  We don’t bite and we don’t have 2 heads really. 😉  So if you haven’t been before you will be fine.

Jenny

cards, Stampin' Up!

WORLD TRAVELER IN BERMUDA BAY!

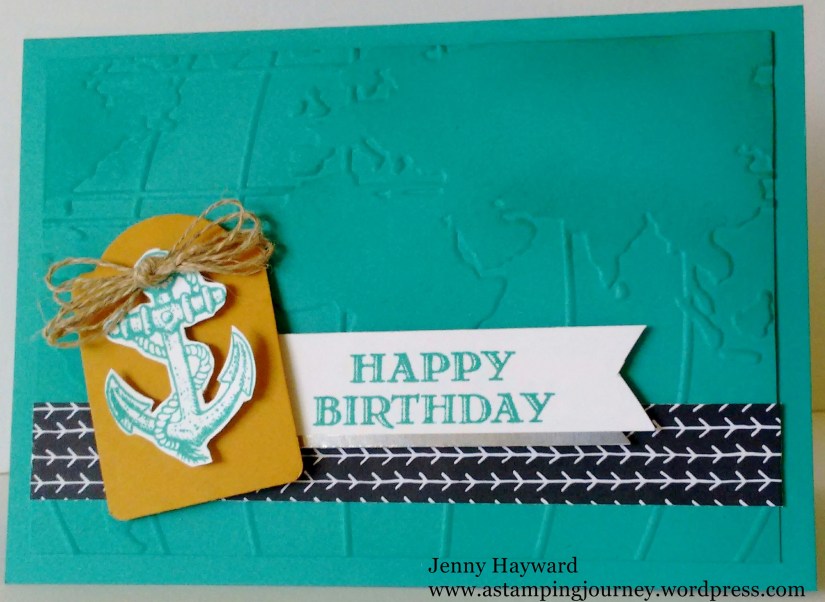
When I was creating the other day I thought I would CASE a few cards from the catalogue for my upcoming Launch next week.  This card started out as a CASE of a card on page 39 of the Occasions catalogue.  It took a life of it’s own very quickly though.

This is the original card if you haven’t got your catalogue handy and then I will show you my card – and the thought process that went behind the making of it. 🙂

Occasions16_p39_a

IMG_20160120_175157

When I started to emboss with the World Traveler Embossing Folder I realised that the orientation of the World map on the folder was different to the card, and I didn’t want to double emboss the map to cover the card front. That’s what I would have to do to cover my size card front. I just couldn’t get my head around doing that.  To me that is not how the world map is depicted.  Petty I know but …. ??

So I thought I would change the orientation of my card but that’s when the whole card changed.  I didn’t have the ‘Going Global’ stamp set but I could use ‘Guy Greetings’. That’s all good. But now that it was landscape what was I going to put on the front? It needed more than just a greeting.  I stamped the anchor in Bermuda Bay but I couldn’t have it just floating there. I punched a tag with the Note Tag punch in Delightful Dijon. That colour was chosen after looking at the colours in the ‘Bohemian’ DSP.  I looped up some Linen Thread and tied it in a bow and adhered that on.

The greeting is from ‘Guy Greetings’ and I stamped that on a piece of Whisper White and flagged the ends.  But still it needed something more! I added a strip of the black arrow paper from the ‘It’s My Party’ DSP stack.  It still needed more!  I added just a strip of the silver Foil under the greeting.  I just finished it off by sponging some Bermuda Bay ink over the embossed edges. OK, I think it was done now. I was going to brush over some Wink Of Stella in the Clear but decided to leave it.

See how you can take a card and use it as a springboard to create a completely different card.  Sometimes you just need a little inspiration to get it going.

I hope I didn’t bore you with the whole creating process of this card.  It just shows you what goes into creating at times.  Maybe that will help you when you are in a rut.

Thanks for visiting today,

Jenny

cards, Sale-A-Bration

HELLO HONEY FOR BOTANICALS FOR YOU!

We had a HOT day today.  Phew! I felt I was melting.  A change in the weather has come through now which has lowered the temps a bit.  I still managed to get a little stamping in. The fan was roaring but I was in a creative mood.  I did have to stop though in the end after 3 cards because it just got a little too much.

I will share all the cards over time but I thought I would show you the last card I made today.  Maybe it was my favourite from the day, then again I don’t know. 🙂

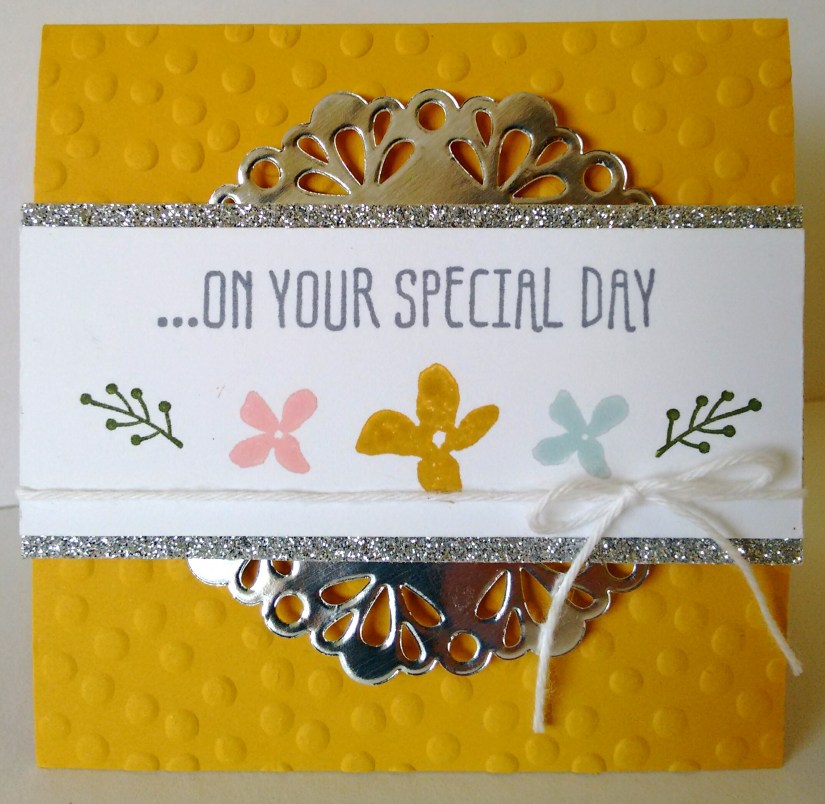
As I was melting the brain got a little foggy so I CASED this card.  This is a sample of the card on page 5 of the Sale-A-Bration Catalogue using ‘Botanicals For You’.

IMG_20160120_175332

It is a cute little 10cm x 10cm (4″ x 4″) card.

I wasn’t sure what colour it was in the catalogue.  We have so many yellows to choose from. I have made mine in Hello Honey.  The colours for the images are Hello Honey, Soft Sky, Mossy Meadow and Blushing Bride. A little sparkle with Silver Glimmer Paper and Silver Doily.  I realise just now that I forgot to add the Pearls to the centre of the flowers.  I will go back and do that now but just imagine they are there. 😉

This cute set is one of the free choices you can get with your $90 order during Sale-A-Bration.  I hope you have had a chance to check out the catalogues now.  (The links are in the side column).

Thanks for visiting me today.  I hope the weather is kind to you wherever you are.  It will be another hot one here tomorrow but then I guess it is Summer and it has been slow coming this season.

Jenny

3D projects, cards, Classes, Stampin' Up!

KIDS CLASS WITH PARTY WISHES!

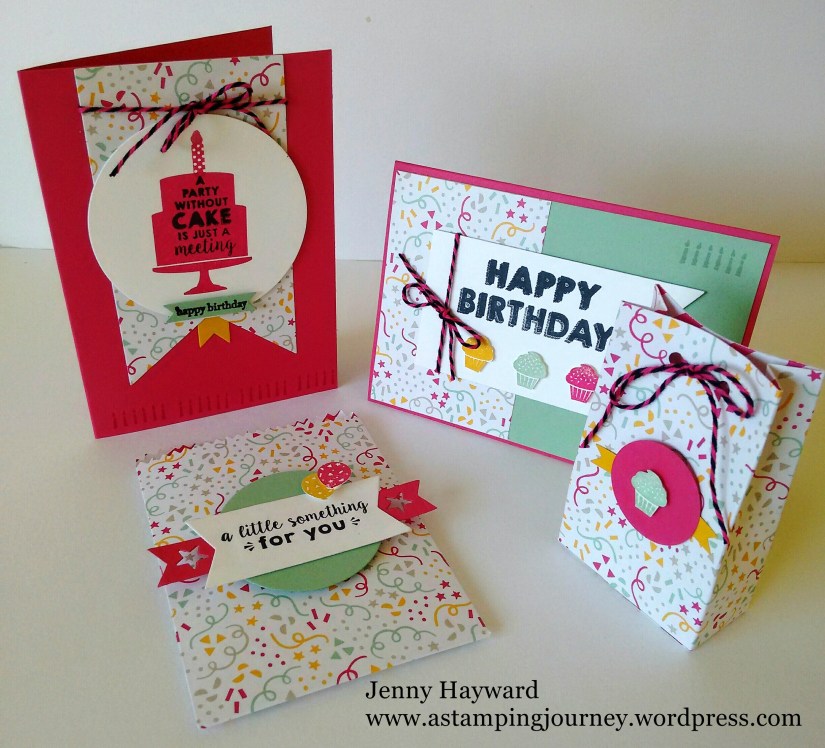
OK Kids 6-12 years old, this one is for you.  I have 2 cool cards and matching bags for you to make in this fun class.  Come and join the fun. Bring a friend along for more fun.

This is what we will make.

144

It’s on THIS FRIDAY 22ND at 10.30am in East Corrimal.  (I will let you know the address when you book).

Please RSVP by Thursday morning. 

I can’t wait to show you how to make these.

Jenny

cards, Catalogues, Stampin' Up!

TIMELESS TEXTURES IN SUEDE!

I had overlooked the ‘Timeless Textures’ stamp set in the Occasions Catalogue.  I really couldn’t see how I would use it but then at our Team Stamping Day last weekend I saw a card that my friend Leonie made and I wanted to CASE it.  I soon discovered what a great set it was.  Lots of little elements that could be used on their own or to create backgrounds with other stamps.  It’s a great alternative to ‘Gorgeous Grunge’. So since then I may have purchased this set myself. 😉

Here is the card.  This was originally CASED from Pinterest.  I made mine in Soft Suede.  I am keen to try this in other colours to see how it would look.

P1180229

I used Crumb cake for the “speckly” edge and for some of the “dots”. The rest of the images were stamped in Soft Suede. The greeting is from ‘Rose Wonder’ set and cut with the matching framelits.

Here is a tip to create a mat for the framelit from my friend Leonie.  Trace around the outside edge of the framelit with pencil on to some scrap card.  Then cut it out with scissors and rub out the pencil marks.  Clever idea!!  I added some Linen Thread loops behind the greeting too. This might be good for a masculine card??

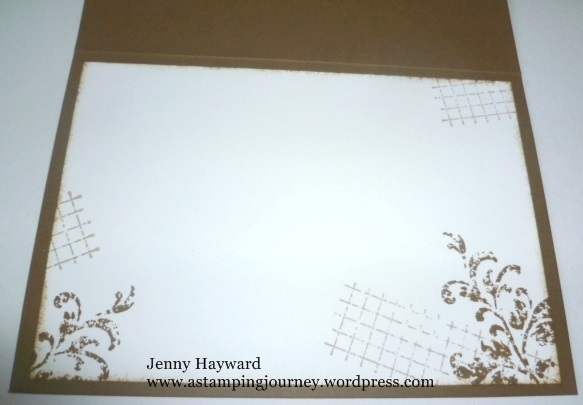
This is the inside.

P1180235

So I think this is a good addition to your stamps.  Here is the set so you can see all the different elements.

 timeless textures

It is $49 for Wood mount and $35 for Clear mount.  I think you will find this set very useful.  Stay tuned for some more projects with this set.

Jenny

cards, Challenges, Stampin' Up!

RAZZLEBERRY COLOUR CHALLENGE!

Our team (Inky Fingers) has challenges every couple of weeks.  Sometimes I join in.  I thought I would have a go at this week’s colour challenge.  The colours were Rich Razzleberry, Daffodil Delight, Basic Black and Whisper White.  I don’t use Daffodil Delight very much and I haven’t used Rich Razzleberry for a while since we have had Blackberry Bliss.  So it was good to drag out these colours.

I went through my stamp sets to see what would work well with these colours but I wanted to use something new.  I inked up this gorgeous Sale-A-Bration set ‘What I Love’.  

Razz flowers

This stamp set is a 2 step set (or you could say 3 step) but it is very easy to use. I stamped the outline flower over the Whisper White card and then stamped some small Rich Razzleberry flowers in between these.  I stamped the large flower again on scrap white card in Razzleberry and then inked up the solid image in the set and stamped it off lightly on scrap paper then stamped it over the outline stamp. Yes there is Daffodil Delight there in the centre.  I brushed over it with the Clear Wink of Stella brush to make it sparkle. It’s a shame you can’t see that too well. I am loving this brush.  You can add sparkle without a glittery mess! The Designer Series Paper is from the ‘It’s My Party’ Designer Series Stack.  I added some Black Stitched Satin Ribbon. The greeting is from the stamp set and I cut it out with the label that is with the Mini Treat Bag Thinlets.

It’s just a simple card but I hope you like it. 🙂

This is the stamp set.  This is one of the Free choices with a $90 order.

What I Love

Have you caught up with what Sale-A-Bration is all about yet??  It’s a great time for you to get Freebies when you Shop, Host or Join.  If you want to know more then you can read about it on my Blog post HERE.  You won’t want to miss out on the Sale-A-Bration offerings.  They are only available for a limited time.  Why not invite me around to your place if you are local and I can share some fun projects with you and your friends.

Thanks for stopping by,

Jenny


cards, Classes, Stamp At Home Kits

PARTY WISHES BIRTHDAY CARD CLASS!!

Join us for this fun Birthday Card Class using the Party Wishes Bundle.  If you can’t make it, then you can order the kit and have it sent to you. Here are all the details.

BIRTHDAY CARD CLASS WITH PARTY WISHES

Saturday January 16th 2pm.  Birthday Card Class.  We will use the Party Wishes Bundle to make a set of birthday cards.  We all need birthday cards right?? Here they are for you.  


COST: $15 class only

OR

Party Wishes Bundle 

Get the Party Wishes stamp set and the Party Punch Pack. Get the Class FREE.
$68.50 Wood Mount or $56.00 Clear Mount. (Prices include shipping and handling).

BYO: Scissors and adhesives.

Please RSVP: Thursday 14th

TO ORDER THE KIT (Australian residents only).

If you can’t attend the class then order the card kit.  Includes all cardstock and twine.  Stamped images are not included.  You can order the Bundle separately or substitute the stamps.

COST: Card kit Only $15

Order the Bundle:     $15 (kit) + Wood Mount $71.20   or    Clear Mount:    $59.45             (Includes shipping and handling).

Jenny


cards, Stampin' Up!

ROSE WONDER – IT’S A WONDER!!

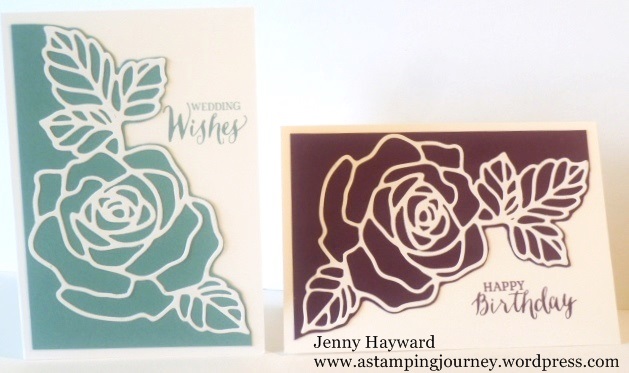
So I have given you a few days for you to peruse the new Occasions Catalogue.  So what do you think?? What is your favourite on the list??  I mentioned one of mine was the Rose Wonder stamps and thinlets.  I thought I would show you another card with these.

P1180210

The one on the left I CASED from Pinterest.  I made mine in Lost Lagoon.  Then I thought I would change the orientation and make a birthday one.  This one is in Blackberry Bliss.

The base card is the Thick Whisper White.  I cut the Rose Thinlets from Whisper White card and adhered this to the card mat. I then cut around the rose shape leaving a thin border.  I stamped the greeting on the front.  It is a very basic card but I like the effect.  I did consider whether to add some Adhesive Pearls but still not sure on that one.

I did stamp the inside with some of the images from the set but I didn’t take a photo of that though.  It was just one of the greetings with some of the leaves stamped. Nothing too dramatic. 🙂

Thanks for stopping by,

Jenny

Book your Party now to see more fun projects with the new products in the Occasions Catalogue and Sale-A-Bration.  Lots of free products on offer whether you SHOP, HOST OR JOIN!

cards, Stampin' Up!

BEFORE THE BIG SHOT!!!

Sometimes at classes when we are talking about the Big Shot we wonder what we did before we had the Big Shot.  I love the Big Shot and everyone who sees it loves it too – and wants one!!! Isn’t that right?  I was sorting through one of my big boxes of cards today and I came across some very early cards I had made.  I don’t have many left but sometimes it is good to look back at them.  I thought you might be interested.  Now I am a little embarrassed to share these but well, we have to start from somewhere don’t we.  I made these cards back in late 2008 and in 2009 in my very early days as a Demonstrator.  I remember being so proud of these at the time.  I had never done any stamping until just before I joined.  So I share these with you.  You can laugh, you can cringe or you can just ignore them completely BUT here they are for the blog world to see ……………..

This was one of my very early cards.  This was the first stamp set I bought with Stampin’ Up! that came with my Starter Kit and I must admit the first stamp set I ever owned.  This was a favourite set though ‘Baroque Motifs’.

P1180198

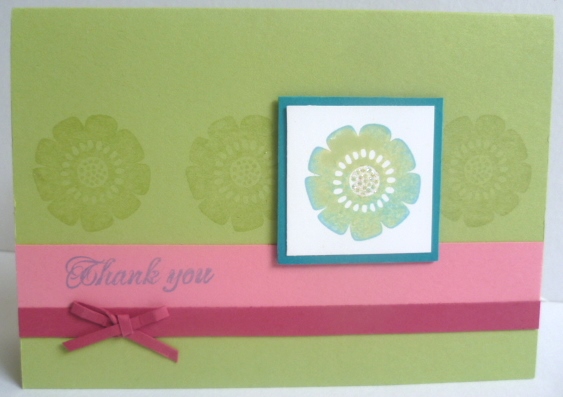
I hardly every use Chocolate Chip now.  This is teamed with Certainly Celery.  I even added a little dazzle with Dazzling Diamonds.  No Rhinestones back then. 🙂

P1180200

I don’t mind this card really but well I didn’t even own any ribbon.  I just used a thin strip of cardstock tied in to a bow.  This card was for a workshop a long time back showing the Rock and Roll Technique.  Once again using Certainly Celery. I used a lot of that colour back then.  It’s not available now and no that is not Bermuda Bay it is with.  This is Taken with Teal (retired). My first inkpad I bought.  The light flowers were stamped in Versamark onto the base card.  I had used Regal Rose (not available now) and Rose Red.

P1180202

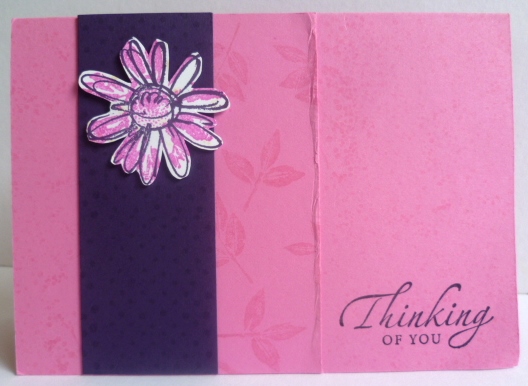
I still love the layout of this card.  I think I will have to try this one again with some new stamps. 🙂  I think I CASED this from the Stampin’ Up! Catalogue at the time??? There was no Pinterest back then either.   I used Pink Passion (no not available now either) and Elegant Eggplant.  I don’t think I have used that colour combination since.  The greeting was from ‘Sincere Salutations’ (retired).

As I think on these cards and other earlier ones I realised that I used more stamping techniques where now I rely on the Big Shot to cut and add texture.  I think I need to get back to some more stamping techniques.

But enjoy your chuckle as you look at these.  We shall move on now to new products and new catalogues.

Only 2 more sleeps until the new catalogues begin.  I am excited about this. 

See you again very soon.

Jenny