cards, Personal Ramblings

A 16TH BIRTHDAY!!

I know I said I would show you some Pop-Up cards from our recent stamping weekend but I have to interrupt the posting.  I hope you don’t mind.  🙂  Yesterday was Josh’s 16th Birthday.  He has been hanging out for this day for so long.  It means now he can get his Learner’s Permit to drive!  I wanted to show you the card I made him – and Carlie’s cards she made him.

Josh is really in to Vinyl records at the moment.  Now I have to say, I thought they went out years ago.  Apparently they never left.  Anyway, we bought him a record player for his Birthday and he has been collecting records.  He is in to Hardcore music. Now it is not just any records.  It is cool for them to be coloured.  When I went looking for inspiration for his Birthday Card I came across a card on Pinterest that I thought would be great.  (Seriously, how much inspiration is there on Pinterest!!).  Anway, I digress again.  I tracked down the original card here by Gill.  I changed this around a bit to suit Josh’s card.  I created coloured records and added a ’16’.  By the way, Josh thought it was really cool.  He already has a green record along with all the other colours he has.  A pink one is on order and he will be getting a blue one soon.  Isn’t it great when you make a card, especially for the male species, and they take note of the details.

So, here is the card.

The circles are punched out with the 1 3/8″ circle punch and the black centres are punched with the 3/4″ circle.  I punched the centres of the black circles with the Crop-A-Dile.  The coloured circles are sponged and spritzed just the way they would be on the records.

I have to show you Carlie’s card she made too.  I think she did a fantastic job and she did it completely by herself.

Carlie has used a retired stamp set ‘Play Ball’ and some retired Brilliant Blue and Orchid Opulence Cardstock.  The balls are stamped in Crumb Cake.  Don’t you love the splodge effect from ‘Extreme Elements’???

Carlie wanted to make another card too and I have to show you.  She drew this one and I think it is very clever.  (Big Brother said it was “the best”!!)

On the front of the card it says “I love you this much….”.  Now this is a standard card size to give you an idea of the size. I will show you it opened up.

It is a bit hard to see the picture but she made it on a HUGE piece of paper and it just opens out and out and out….  It shows her long arms outstretched.  I thought she was very clever, and very special, to make this for her Big Brother.

Ok, Thanks for indulging me in a little personal family post.  I will get back to the Pop-Ups next post.

See you next time,

Jenny x
cards

SOME MORE CREATIVITY!!!

Just a quick post to show you some more cards we made at our stamping weekend a few weeks back.  These were some fun cards to create.

This first one I CASED from Leonie using the cute set “I Dig You”.  This is a great set.  I think I need to add it to my collection.  I just don’t have too many little boys to use if for, but then again I have a few “young boys at heart”!

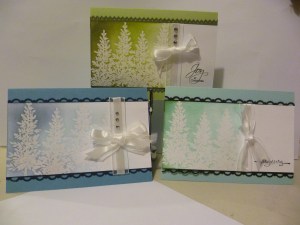
This one was CASED from Renee Van Stralen here. I love the emboss resist effect with the tree from ‘Lovely as a Tree’.  The layout is kept simple so the effect stands out – I hope??? I used Pool Party for most of the sponging and along the left hand edge I added just a touch of Garden Green.

We each made one of these so I thought I would show you a group shot.  It is funny how they look in different colours.  Andrea made hers in Old Olive (top), Leonie’s was in Marina Mist (bottom left), and then mine.  I really should have tied a bow on mine rather than just knotted the organza ribbon, and added some rhinestones.  It really makes them look more classy!

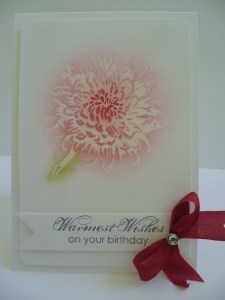
Now this card below is a sneak of a new set coming in the new catalogue.  This set is called “Blooming with Kindess”.  I got to have a play with Leonie’s set.  She got this set from Convention at the Manager’s reception.  I love the detail in this flower.  It is really gorgeous.  I love the font in the greetings in this set too.  We CASED this card but I can’t tell you from where at the moment.  I will get back to you on that if I can find out.

This card is done with the Emboss resist technique again. I have used Pretty in Pink around the flower with Cherry Cobbler sponged in the centre.  Then I sponged Old Olive along the stem of the flower.  I added a bow with Cherry Cobbler Seam Binding Ribbon.

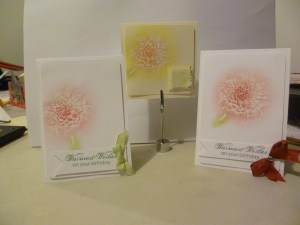
Here are the 3 together of this card.  (Sorry about the mess around the photo).  Left is Leonie’s with the Certainly Celery bow. Centre is Andrea’s.  She went for a square card. Sorry the photo is not very clear. Mine is on the right.

I hope you liked them.  I have some fun Pop-Up cards still to show you in next post, so stop by again very soon.

Jenny

cards

A STAMPING WEEKEND!!

A little while ago I got together with my stamping buddies, Andrea and Leonie N.  for the weekend.  Well it probably amounted to 24 hours that I was there for but boy did we cram a lot of creating in that time!  It’s amazing how much you can create when you don’t have those little interruptions such as family. 🙂   I want to show you some of the projects we created. I won’t give you too many details of the cards.  It will take too long.

I played around with my “Reason to Smile” set.

This is a framelit card.  This card was inspired by one I saw in my blog travels.  It used the “Field Flowers” set but I just changed this around a bit.  I stamped the flower 3 times and then again on scrap Vanilla card and cut out the flower.  I raised this up off the card with dimensionals.  I will try and put together a tutorial on creating this Framelit card.  Just give me a bit of time for that.  🙂

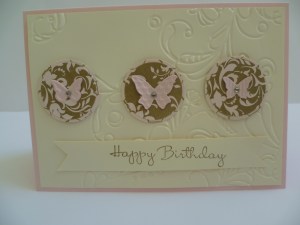
This card was CASED by Maureen (I think???) from MamaMo Stamps. I love the butterflies and the debossing using the ‘Elegant Lines’ Embossing Folder.

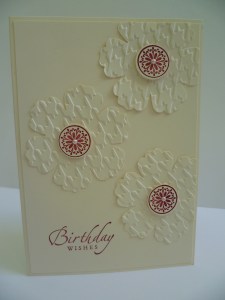
Here’s another CASE from Maureen.  I first embossed some Vanilla cardstock using the Houndstooth Embossing Folder.  I then punched out 3 flowers with the Blossom Punch.  The centres and greeting from ‘Sincere Salutations’ were stamped with Cherry Cobbler ink.  A very simple card but I think effective.

This is a quick one layer card I CASED from Leonie.  I stamped this one in Tangerine Tango.  This is such an easy card – maybe 5 minutes MAX!!  I stamped one flower on scrap white card and punched it out using the Blossom Punch.  This was raised up off the card using dimensionals.

‘That is enough for today.  I will post some more from our stamping day next post.

Hope you can stop by again soon,

Jenny x

cards

CARDS FOR CANCER!!

A few weeks ago I held a ‘Cards For Cancer’ Event.  I wanted to raise some much-needed money to support the work of the Cancer Council.  They do a fantastic job providing support for people affected by Cancer and for their families.  They are also involved in Cancer Education and Research and rely heavily on the support of the community.

We had a great day at my ‘Cards For Cancer’ event and Stampin’ Up! were very generous with their donations for this.  My goal was to raise $500 and  I was so excited to be able to hand over $770.90 to the Cancer Council last week. Thanks to all the wonderful ladies who came along.

 I wanted to show you some of the fun we had on the day.  Unfortunately it was late in the day that I thought to take photos so I missed photos of us playing silly games.  (I’m sure everyone who were there was glad of this!!!).

Firstly, I will show you the ‘Thank-You’ bags I made up for everyone.  I got the idea for these bags from a bag I saw on Becky Roberts blog, I think????  For this I used the ‘Ribbon of Hope’ stamp.  This is a great little single stamp in the current Catalogue.  I used the Lunch Sacks for the bags.  The DSP is from the Prints Paper Stack in Pretty in Pink.  I tied them up with the Pretty in Pink Taffeta ribbon or the white Organza ribbon.

Inside I had a roll of ribbon, a small chocolate and a teabag.  What, a teabag you say.  That’s interesting!!  Here they are.

The original idea came from a swap I received at our Team meeting recently.  I can’t tell you who that was from though.  I didn’t have the ‘Tea Shoppe’ set that they had used though so I used the ‘Take a Sip’ wheel.   I rolled it in Soft Suede ink onto Crumb Cake card and then cut some of the cups out individually.  I coloured some parts of the design with a Soft Suede marker.  I punched out a tag with the small tag punch and stamped different images from the ‘Tiny Tags’ stamp set in Soft Suede.  I took off the original tag on the teabag and then attached the string of the teabag onto the new tag with a dimensional and then adhered the cup on top.

Here are some photos of them all creating.  I had 20 lovely ladies along and we all just fitted into my dining room.

This group was under the spotlight.  I had to end up getting another light up as it was getting darker.

So what were they all creating???

I will show you the projects next post.  I promise it will be in the next few days so stay tuned.

Thanks for stopping by,

Jenny x

cards, Convention, Stampin' Up!, swaps

CONVENTION SWAPS!!

I’m heading off to Canberra for the National Stampin’ Up! Convention tomorrow and I am excited!! It’s always a great time sharing with other Demonstrators you chat to online and have met at other Stampin’ Up! events.  I have worked really hard over the last few weeks to get my swaps ready.  I can now show you them.

Here is the original card I started with.  This card was inspired by a card by LeeAnn.  You can see that here.  I love LeeAnn’s simple style.  It is worth stopping by her blog and checking it out.

Colours: Wisteria Wonder, Elegant Eggplant.

There is not a lot of stamping to this card but there are lots of layers.   I have used the ‘Mixed Bunch’ stamp set.  The flower was stamped and punched out using the new Blossom Punch.  It is a bit hard to tell but the flower was layered over a flower punched from co-ordinating cardstock.  On this card it was Elegant Eggplant.  The centre of the flower was stamped in Elegant Eggplant and punched out with the 1″ circle Punch.  An adhesive rhinestone was added to the centre for bling.  The pennant strip was cut from the ‘Flirtatious Specialty DSP’.  This was adhered on to the Whisper White layer and a Framelit was cut from Whisper White and raised up with dimensionals.  The flower was layered over this.  The sentiment was from ‘Create a Cupcake’.  I also used ‘Teeny Tiny Sentiments’ and ‘Fabulous Phrases’ on the other swap cards.

I just went with the one design for my swaps but I changed the colours for a bit of variety. I made 85 all up!!! (I was so glad they were done, I will say that!!!).

Top: Certainly Celery, Old Olive, Soft Suede.  Paper – Subtles Patterns Paper Stack

Bottom: Perfect Plum, Elegant Eggplant, Basic Gray. Paper – Subtles Patterns Paper Stack.

Top: So Saffron, Daffodil Delight, Basic Gray.  Paper – Flirtatious Specialty DSP.

Bottom: Pretty in Pink, Cherry Cobbler. Paper – Subtles Patterns Paper Stack.

So what colour variety do you like the best??  I have to say, I’m not usually a yellow person but I really liked that version.  It is so bright and sunny.  Pretty in Pink worked well too.  It is always a huge effort doing swaps but I am really looking forward to some great cards back in return.  I hope I can show you some next week.

I don’t think I will be back over the next few days.  You will just have to wait for a Convention report after Sunday when I get back!

Thanks for stopping by,

Jenny x

cards, Challenges

CLEAN & SIMPLE #190

I really like the sketches for the Clean and Simple Challenges but I rarely get the chance to join in.  Last Sunday on Mother’s Day I took some time out to join in this week’s sketch.  This is the sketch.

I have to say it might be a clean and simple card but I think it took longer for me to work out what colours I would use than to do the card.  Here is my version.

Card: Tangerine Tango, Whisper White, Brights Patterns Stack.

Ink: Tangerine Tango, Rich Razzleberry.

Stamps: Short and Sweet, Printed Petals (Now I had to dust that off as it has been so long since I have used it!).

Other: Tangerine Tango Button, White Twine.

I really liked the sketch and I was quite happy with the card.  It really didn’t take that long once I decided what to do. It was a really nice way to indulge on Mother’s Day.  I think this card would be great to make up in different colours as a set.  Maybe I will get around to that sometime.  I will just add that to my list of things to do!!

Thanks for looking.  I hope you stop by to see some more creations shortly.

Jenny

cards

“EVERY MOMENT” WATERCOLOURING!!

After my frustrating attempts at watercolouring a few weeks ago I was determined to give it another go.  I was not going to be beaten!  I pulled out my stampset “Every Moment” which is a good one to colour.  I received this set from Sydney Regionals 18 months ago and it hadn’t seen ink since! (is that bad????).  It’s not that I don’t like it, it’s just that I have so many other stamps to use (and I get a bit lazy when it comes to colouring!)  Now I used several different mediums in my attempts and different types of cardstock to see what I came up with.  I tried the pastels, markers and inkpads using the blender pen and aquapainter and I tried it on whisper White cardstock, confetti White and Watercolour paper.  So this is my final attempt.  Let me say Number 6 attempt!  Sorry you are not going to see the other attempts.  They looked like a kindergarten child had coloured them.  They were not good believe me.  They are now neatly filed in our paper recycling bin to be off to a new home!  LOL

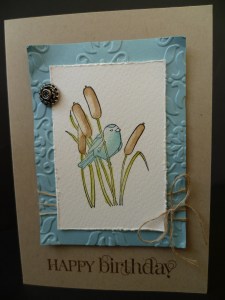
So here is the final card.

With this one I used the inkpads and aquapainter.  Using watercolour paper is a must I think. I built the colour up in layers.  I remembered this was a trick they showed us at Regionals when we used this set.  Picking up the colour with your aquapainter you brush a light wash over the area you want coloured.  So for the bird I gave it a light wash in Baja Breeze.  Let that layer of colour dry.  It only takes a little minute.  You can move onto another area to work on while you let that dry.  Then come back to the first area and give another wash in certain areas.  This will give a darker colour.  Then later apply another touch up in certain areas you want highlighted.  Does all that make sense???  I think I added some highlights in part with the fine tip of the marker like on the reeds and the bird’s head.  Once this was done I assembled the card.  The card is CASED on a sample card from Regionals.  The Baja Breeze mat was embossed with the Vintage Wallpaper Embossing Folder.  I added linen thread and a Vintage Brad to finish it off.  The sentiment is from ‘Curly Cute’.  So I think I was happy with this attempt.

Thanks for looking.  As far as my swap count goes.  Well,  I haven’t fully completed any cards this week.  I have had so much else going on.  But I have 20 more cards cut and stamped ready to go if that is anything.  Hopefully I will have some time to put them together this weekend.  I am not sure when that is going to happen exactly though!! So the count still stands at 35.

Have a good weekend.  I hope all the Mum’s have a lovely Mother’s Day on Sunday and get spoilt.  Stop by and visit again soon.  I love to see you have visited.  Don’t forget to say ‘Hi’

Jenny x

cards

A CUPCAKE AND FLOWER!!

Over the Easter weekend a few weeks back I had some time and decided to pull out some stamps I haven’t used in a while.  It was such fun to ink these stamps up again.  These are the end result.  Nothing exciting really but just some simple stamping.

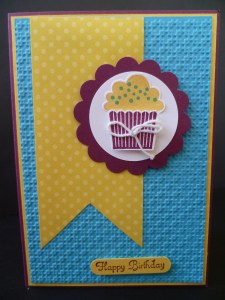
The layout is based on a few cards I have seen recently.  The pennants are “in” at the moment apparently.  I won’t bore you with all the details.  I think it is straight-forward how I have created this card.  Here is the recipe list though.

Stamps: Create A Cupcake   Ink: Rich Razzleberry, Daffodil Delight, Tempting Turquoise.   Card: Rich Razzleberry, Tempting Turquoise, Whisper White.  Daffodil Delight (Brights Paper Stack).       Other: Square Lattice Embossing Folder,  2 3/8″ Scallop Circle punch, 1 3/4″ Circle Punch, Word Window Punch, Cupcake Builder Punch, White Twine.

Here is the second card.

This one uses “Flower Fest”.  This was the first set on my wish list when the catalogue came out last year.  It took me a while to get it still and I have only used it maybe twice.  How disgusting is that!!  I love that it co-ordinates with so many punches.  It makes life so much easier than cutting each one out.

Stamps: Flower Fest, Create A Cupcake (greeting).    Ink: Marina Mist           Card: Marina Mist, Perfect Plum, Certainly Celery, Very Vanilla.  Other: Framed Tulips Embossing Folder, Swirls Scribbles sizzlit Die, Marina Mist Striped Grosgrain Ribbon, Adhesive Pearls.

Thanks for stopping by today.  I can report too my swap convention card count is 35.  I have been cutting and stamping up a storm this week.  I ran out of card of one colour so couldn’t complete the full 20.  I don’t expect that I will get that many done in the next week.  I have lots of other things to do.

Stop by again soon.  I love your visits. 🙂

Jenny x

cards, Convention

VINTAGE FLOWER!!

Thought I would just stop by and show you a card I made a couple of weeks ago.  This was my first play with the new Edgelits.  I do love the edging you can create with these little beauties.   Just a tip:  I found it helps to add some Dotto or other non-permanent adhesive to hold the edgelit in place when you cut them otherwise they can go slipping all over the place.

I cut the edge from the Whisper White card and a piece of the Flirtatious Specialty paper.  The flower was created by punching a few flowers from the new Blossom Punch in Pretty in Pink and folding and distressing and folding until the layers of the card came apart.  I sponged the edges and added a Vintage brad to the centre.   I added some folded Pretty in Pink Satin Ribbon.  The sentiment is from “Fabulous Phrases” and punched out with the Modern Label Punch and added some pearls for some elegance.  The Pink swirls are from “Kindness Matters”.

Hope you like it???

The Stampin’ Up! National Convention is on in Canberra in 38 days!!! I can’t wait!  It is a great time to get together with demonstrators from all over Australia and New Zealand.  Part of the fun of convention is swapping cards with other demonstrators.  You come back with so many great ideas and samples.  I have just started on my swaps.  I have decided to do the one card but have different colour variations.  I have tested a few out and I am ready to go.  I figured that I would make 20 of 5 different colours which will give me a good number to swap.  Each week for the next 5 weeks I am going to create 20 cards.  So I thought I would give you a running tally here so you can help cheer me on.   Then I can have lots of great cards to show you when I come back.  I will share my swap card later on.   So let’s see how we go!!!

Thanks for stopping by today,

Jenny x

cards

STAMPING DAY CREATIONS!!!

A couple of weeks ago now we had our stamping get together with my great stamping buddies, Andrea, Leonie and Tracey.  It is always a fun time.  I have to say though this day I found very frustrating.  I really don’t colour well and just couldn’t get things happening.  We CASED a card from Anne Westerneg (this card was on our Stampin’ Up! Demonstrator forum – Stampin’ Connection).

This stamp set is the gorgeous new “Bordering on Romance” in the Autumn Mini Catalogue.  I stamped the flowers with Stazon and then coloured them with a Blender pen and inkpads.  (Don’t look too closely – colouring is not my strength!).  I finished it off outlining the flowers with the Markers.  The flowery edge is so pretty with the scallop border cut with the new Edgelits.  (Ooh, can I say that?)  I added some Baja Breeze pleated satin ribbon from the Autumn Mini.  I added a greeting from “Teeny Tiny Sentiments”. I punched that out with the word window punch.  Ok it was to hide a little ink smudge, but we won’t tell anyone that will we!!  I added some pearls to finish it off.

The next card was inspired by another card by Anne.  I changed this around a little.

On this card I cut the curved edge with the edgelits.  I embossed a Pretty in Pink card strip with the hearts from the Adorning Accents Embossing Folder and layered this on Pretty in Pink DSP from the Subtles paper stack.  Another strip of the DSP was added to the bottom on the inside of the card that you can see peeking through.  I stamped the flower from “Mixed Bunch” in Pretty in Pink and then sponged the edges in Rose Red ink.  I added a Vintage brad and raised it off the card with dimensionals.  The sentiment is from “Teeny Tiny Sentiments” and punched out with the Modern Label Punch.  This was adhered to another piece punched out in Pretty in Pink.  Some more Pearls finished the card off.

Thanks for stopping by today.  I hope you can visit again soon.

Jenny x