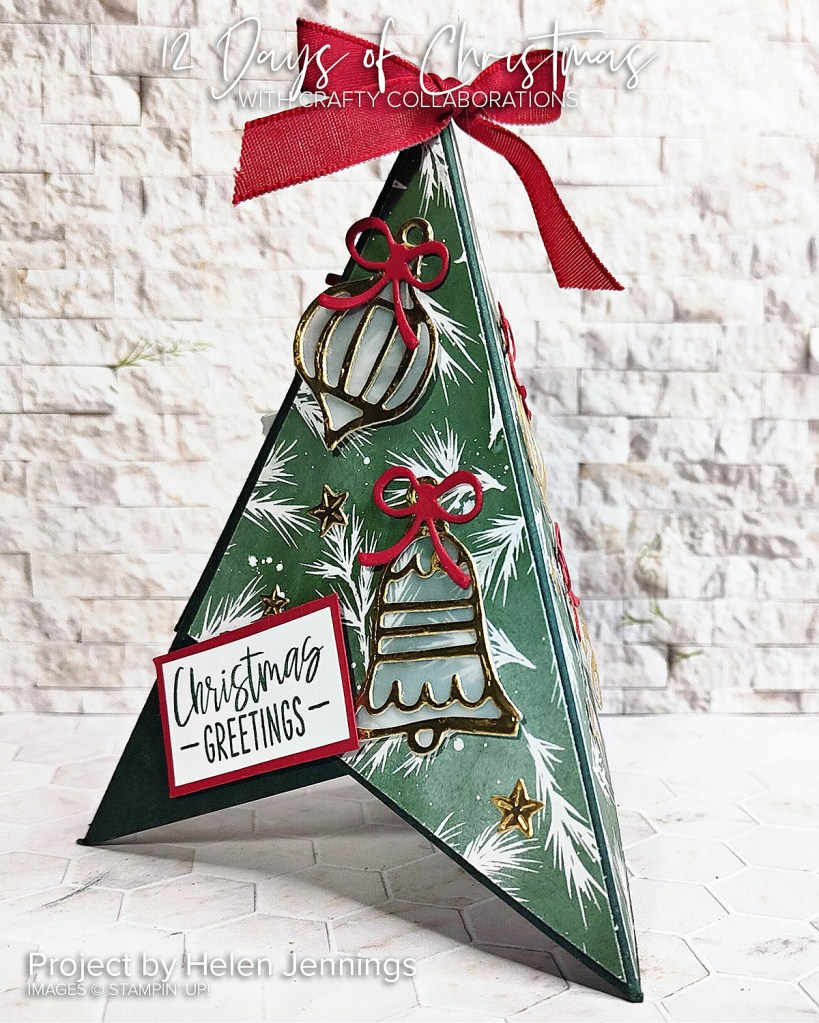
Day 10 of 12 Days of Christmas. It’s a Christmas Pyramid Card. Sometimes called a Teepee card.
I love making these cards. This one is created by Helen.
This one is using the Decorated with Happiness Bundle and the Painted Christmas Designer Series Paper. You could recreate it with any of your gorgeous products.
I created a video for a Pyramid card back a few years ago. You can view that -> HERE. Excuse the quality. I have learnt a lot since then. (and still learning!).
As always, if you need supplies and you are in Australia I would love to serve you.
You can stop by my store -> HERE Please use the Host Code: JCBE3B2U
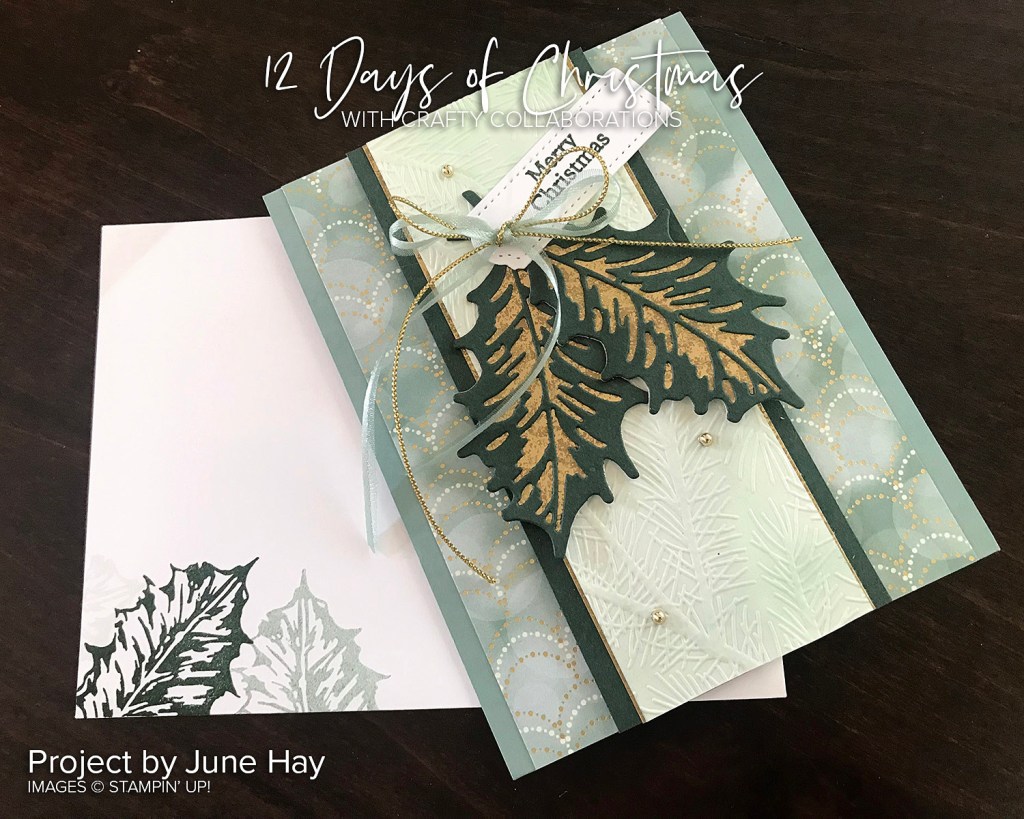
Day 9 of 12 Days of Christmas is a Layered Leaves of Holly card created by June.
You can find the full tutorial to recreate this card -> HERE.
The centre piece embossed with the Pine Embossing Folder is actually Watercolour card sponged with different shades of ink. You could easily simplify this with a piece of card either Soft Succulent or Soft Sea Foam and lightly sponged over it.
Looking for some supplies to get you creating and you are in Australia?
You can stop by my store -> HERE Please use the Host Code: JCBE3B2U
Day 5 of 12 Days of Christmas. It’s a Glimmery Lights Aglow card.
It’s a simple card with the Lights Aglow Specialty Designer Series Paper but the the Glimmery Gold snowflake and Gold Satin Edged Ribbon makes it look so elegant.
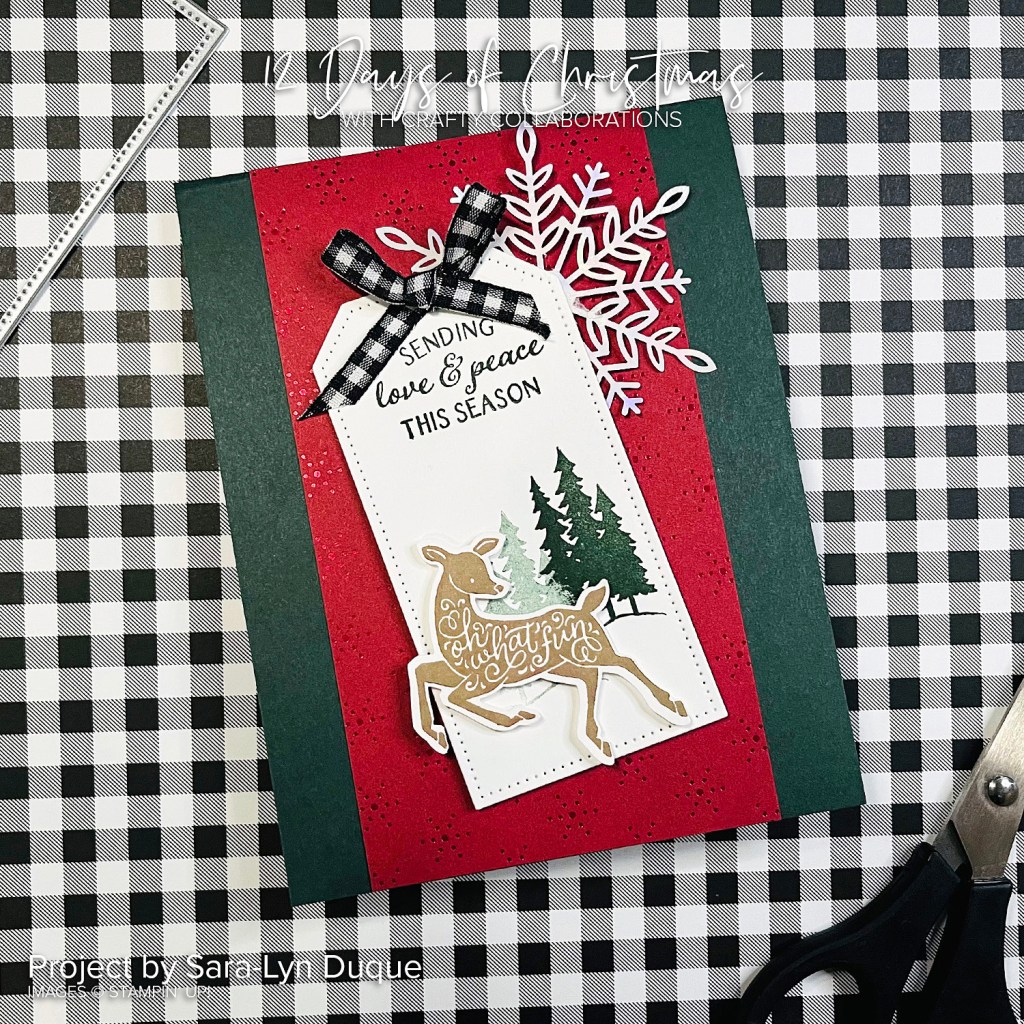
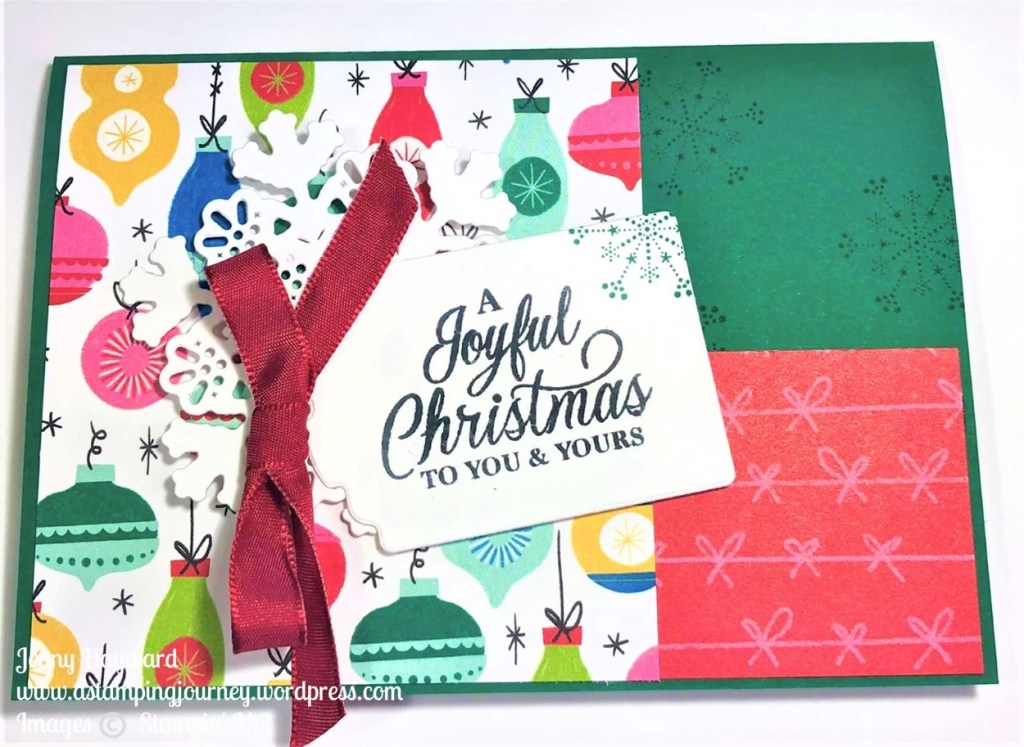
We have Day 2 of 12 Days of Christmas. This project was created by Sara-Lyn Duque.
It’s a gorgeous card using the Peaceful Deer stamp set and the punch. And notice the background?? That is using the Festive Foils Specialty Designer Series Paper. I really hadn’t paid much attention to this paper but isn’t it lovely.
You can find the full tutorial for this project -> HERE.
Need some crafty Christmas supplies and you are in Australia? I would love to serve you.
Head to my store -> HERE. Please use the Host Code: JCBE3B2U
Or contact me directly.
Thank You for your order.
Have a great day. See you in the next post tomorrow.
Recently I shared a card I made at the Craft Show I did. You can head back a few posts on my blog if you missed it. I was just hanging around and creating with what I had with me. It makes you think to use what you have.
Well here’s another card. It’s a simple one. Sometimes simple is good though. Especially if you have to mass produce them for a time like Christmas.
The card uses the Sweetest Christmas Designer Series Paper and the Cottage Wreaths Bundle.
Add on a little sparkle with the Red Rhinestones and some Red Ribbon. It’s very quick to put together.
What I realised making this though is that sometimes we can get overwhelmed with “So Much Stuff”. To the point even that we don’t create anything.
So I challenge you. Just pull out some paper and some stamps and dies and a couple of inks and just create. See what you come up with.
Happy Stamping,
Jenny
In Australia and need some supplies?
Stop on by my store -> HERE. Please use the Host Code: 3WCA7CQE Or contact me directly and I will help you order.
We had our JEN’s INK team get together on the weekend. It was nice to be able to be back together in person. It was a small gathering this time to get us back. That’s ok though. 🙂
I put together some card kits and the crafting challenge was to create a card with the pieces.
This was the card kit. This uses the Celebrate Everything Designer Series Paper (host paper pack).
There was extra white card and some Silver and Gold Foil. I had a number of inkpads, Ribbon, Christmas stamp sets and dies and embossing Folders. That was it!
This was my card. I trimmed down the piece of DSP. The sentiment from the Merriest Moments stamp set was stamped and diecut with the Designer Tags Dies. And I added a diecut snowflake from the Twinkling Lights Dies.
It was a fun exercise but I tell you it was hard.
What would you create with these limited supplies?
Come and be part of my fun JEN’s INK Team. I love welcoming new team members. There is no better time than this month with the extra bonus.
You can order up to $283 of products and only pay $169. And then you have the fun of saving with the discount you receive each time you order. You can stay as long as you like. Email or message me if you want to know more. This ends on October 31st.
Find out more of Why You need to be part of the Stampin’ Up! Family -> HERE.
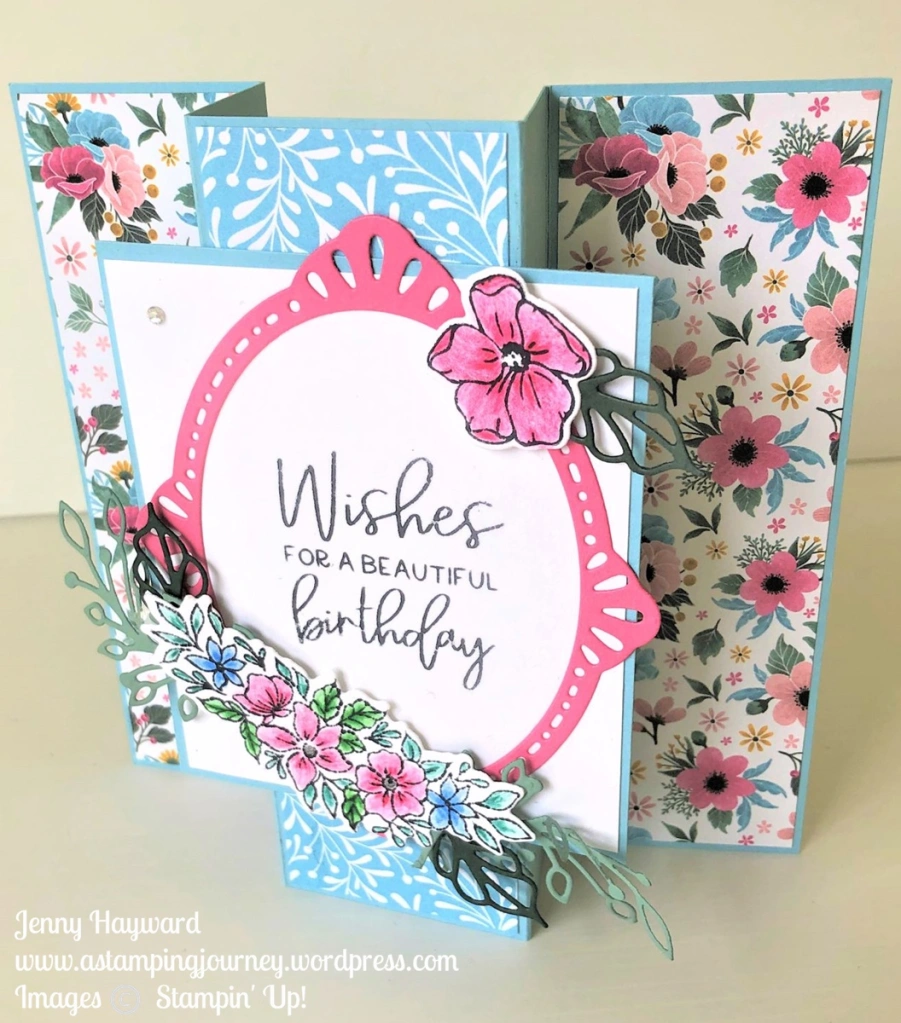
You have probably seen the Fitting Florets Suite around now. It is all so gorgeous. I had to play with it. And I pulled out an old fold that I haven’t done in a while – A Panel Fold Card.
Here it is for you.
And it folds flat for you to post.
You can catch how to create one on the video below. (If you are receiving this blog update by email and the video is not showing, head to the blog post and view it there).
The Fitting Florets Suite will be available to order in November. The Framed Florets Bundle (Stamps and Dies) will be carried over in to the January-June Mini Catalogue but the gorgeous Fitting Florets paper and the Gold Swirl Gems won’t be so you will want to grab that early. I will tell you more about this soon.
But … You could get this earlier. As Demonstrators we can order it now. And if you have considered joining Stampin’ Up! what better way than joining now (also with the extra bonus you get this month) AND you can order it now. Because we can’t wait for these things right. 🙂
Here are the measurements.
MAKE YOUR OWN PANEL FOLD CARD
Card base: 21cm x 14.8cm Score on the long side at 5cm and 8cm. Turn card 180’ – Score at 5cm and 8cm on the other side.
8 ½” x 5 ½” Score on the long side at 2” and 3 1/8”. Turn card 180’ – Score at 2” and 3 1/8” on the other side.
Designer Series Paper strips:
For sides – 4.7cm x 14.4cm @ 2 pieces
1 7/8” x 5 3/8” @ 2 pieces
For centre – 4.7cm x 14.4cm @ 1 piece
1 7/8 x 5 3/8” @1 piece
Front Panel – 10.4cm x 8.8cm 3 ½” x 3 1/8”
White mat – 10cm x 8.4cm 3 3/8” x 3”
I hope you get to make one.
If you are in Australia and need supplies I would love to serve you. You can head over to my store now -> HERE.
Please use the Host Code: 3WVA7CQE Or contact me directly.