My DIgital Studio, scrapbooking, Stampin' Up!

PLAYING WITH ‘MY DIGITAL STUDIO’

Last week I was playing around with ‘My Digital Studio’ using the Free MDS Trial. Here are a couple of pages I created.  I still have a lot to learn with these but it was fun playing around them.

Here is one with Carlie starting school.

My Project 1-001

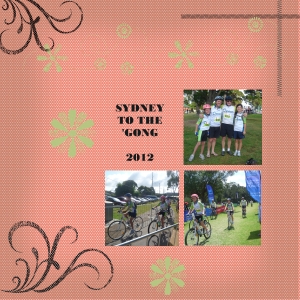
Another page with Carlie’s great bike ride last year completing the Sydney to Gong ride.
Gong Ride

Have you had a go at the Free My Digital Studio yet?  You can download it here and have a play.

I am still in Canberra.  NSW had a great win at the Australian National Gridiron Championships.  After being down at half time 24-7 they had a fantastic second half and beat SA 36-24.  They face ACT today so hopefully another win.  Stay tuned!!!

I will be back on the weekend so I will stop by with some more projects next week.

Jenny

Stampin' Up!

IT’S COLOUR REFRESH TIME!!!!

The new Stampin’ Up! Catalogue will be out soon and Stampin’ Up! have just announced a ‘Colour Refresh’.  I am very excited because POOL PARTY AND ISLAND INDIGO are staying!!!!  I was getting very sad that these were leaving us soon.  Stampin’ Up! have introduced several of the past Incolors into the Colour Collections.  Here are the details.

B1_Color_Refresh

Colour changes

The Subtles Collection have had the big change.  The colours highlighted in red are past Incolors.  I think Bermuda Bay was a past Incolor some time back????  Smoky Slate is the only “New” colour.  Rose Red has moved from Subtles to Regals. Now note the DISCONTINUED colours in the grey.  They are leaving us and from yesterday they will be selling out WHILE STOCKS LAST.  SO, if you love these colours be quick to stock up on your card, ink, refills, paper, ribbon etc.  They won’t be available for long.

Ok, be back soon with a project to show you.

Jenny

Masculine, Stampin' Up!

“21ST PIANO”

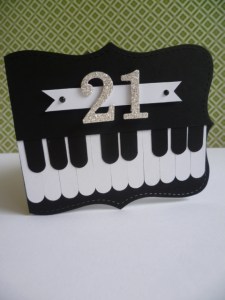
I can finally show you this card.  It was my nephew’s 21st last week and we only got to see him today.  He is quite the musician so I thought this card was just the thing for him.  I have made this card before quite some time back.

P1070977

The card base is cut with the Top Note Die.  Place the fold of the card just inside the side edge on the die so it won’t cut through.  I cut a second piece and cut it smaller to create a layer on the front to slip the Word Window punched “Keys”.  The ’21’ is cut from Silver Glimmer Paper and layered on the Whisper White flagged card strip.  The little black “dots” are Adhesive Rhinestones that I coloured with black permanent Marker.  I think it was well received today.

Thanks for stopping by and visiting me today.  I have been playing “Dress Ups”  today.  No I didn’t dress up in funny clothes.  I will show you shortly!!

Jenny

My DIgital Studio, Stampin' Up!

EXCITING NEWS! MY DIGITAL STUDIO AND SHOPPING ONLINE ARE HERE!!!!

It has been an exciting day!  I can hardly contain myself.  I have not one but TWO announcements for you.

1) You can now Shop Online with me.

2) My Digital Studio is here!!!

Let me tell you all about them.

SHOP ONLINE 24/7

Whenever creativity strikes you can Shop for your Stampin’ up! products.  Head over to my Website  HERE, click on the ‘SHOP NOW‘ Button at the top right and you can shop away.  How exciting!  Shop in your PJ’s.  Don’t forget to Bookmark this site so you can shop anytime.  You might not be thinking straight at 2 am in the morning to think about where you need to go 🙂  I will have the link in the side bar too.

MY DIGITAL STUDIO IS HERE

We have been waiting for this for some time now and FINALLY it is here.  Now you can create cards, tags, scrapbook pages, albums all at your own computer.  My Digital Studio will be $24.95 to download the software program and then you can add to this with extra stamps, brushes, paper etc for a small cost as these are updated by Stampin’ Up! You can check out the new updates every week.  Once you Download them you have it for life.

Digital Designing

Why not have a go at the 30 DAY FREE TRIAL.  To download this, head to my link to the Online store you see above and Click on MDS FREE TRIAL in the Left hand Column.  Give it a try.  It’s a lot of fun navigating around. Here is a card I created today while I was playing around with it.  I still have a bit too learn but it was fun.

birds

If you have any problems or questions drop me an email OR head to the MY DIGITAL STUDIO site for tips, videos or help.

I will show you some more projects as I create them.  I do love playing with real paper and ribbon though so don’t worry there will be PLENTY of those to show you.

Jenny

scrapbooking, Stampin' Up!, Workshops

BLUE BABY PRINTS!

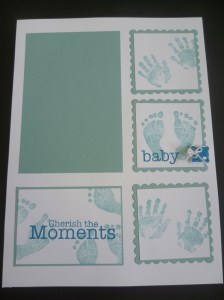
Last weekend at a workshop I did (was it really nearly a week ago!!) the hostess wanted scrapbooking.  Well, if you have been following my blog I don’t do a lot of scrapbooking.  I really need to – and I would like to do more but ……………. !  Anyway, I rose to the challenge and after several attempts I created this page.

P1070686

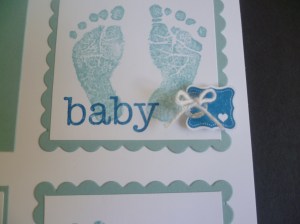
I have used the ‘Baby Prints’ Set.  It was nice to ink that up finally.  What a cute set for Baby scrapbooking pages.  This is an 8 1/2″ x11″ page.  The colour of the card is Baja Breeze.  It looks a little green in the photo.  See the little embellishment on the BABY square.  I will give you a close-up.

P1070687

I have used the Sale-A-Bration set ‘Pretty Petites’.  (This is one of the free choices you can get for $100).  This is stamped in Pacific Point and punched out with the Petite Curly Label Punch (another free Salel-A-Bration choice).  I added a Clear Faceted Button and Whisper White Twine bow. For the word “Baby” I inked up part of the text with the Pacific Point marker.

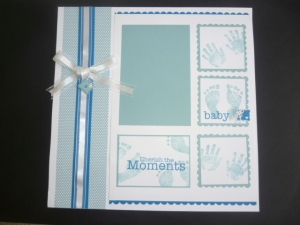
I wanted to show them how you can step-up this page to create a 12″x12″ page.  This is the finished page.

P1070732

I added a scallop edge at the top and bottom of the 8 1/2″x11″ page.  The DSP strip is from ‘Floral District’.  Check out this little tag.

P1070734

This was created with the ‘Pretty Petites’ stamp set too.  The ‘B’ is from the ‘Calendar Alphabet and Numbers’ set (retired).  I punched out a silver glimmer paper heart using the owl punch.

Now just to find a photo that fits.  I went through all Josh’s baby photos and couldn’t find one suitable.  I will have to do a bit of editing on one I think!

I hope you like this cute page.  Thanks for stopping by.  Have a great weekend.  Stay safe.  We have very heavy storms heading our way this weekend.

Jenny x

Stampin' Up!

SALE-A-BRATION 2013 IS HERE!!!

It’s that exciting time of year again – Sale-A-Bration!  This is where YOU get the Freebies!!!!  There are always fantastic products available that you can choose from and this year is no exception.  But this year there is even more choices! Just when you thought it was hard enough!

Have you seen the Catalogue yet?  I can send you out one OR click on the Catalogue front page here and it will take you to view the Catalogue Online.  This link will be in the Right Hand side margin too.

sab_catalog

You HAVE to check it out!! Don’t we all love Freebies??

So, what do you get from Sale-A-Bration???

SAB13LP_cust_Jan2213_SP_04

For every $100 order you can choose one of the exclusive Sale-A-Bration products for Free!!

SAB13LP_cust_Jan2213_SP_02Get your friends together at your place or mine and we can party!  I will show you some of the new SU! products and as Hostess you get extra benefits.  Plus, being the 25th Anniversary of Stampin’ Up! receive a Free pack of Silver Glimmer Paper with parties over $300.  Let’s talk about a date for your party!  Drop me a message and we can arrange it.

SAB13LP_cust_Jan2213_SP_06What about 20% discount on your Stampin’ Up! products ALL THE TIME!!!! Gotta love that!!  During Sale-A-Bration it is even better.  Get 25% extra in your kit to celebrate Stampin’ Up! 25th Anniversary.  Come and join the Stampin’ Up! family.  Come and join my team!!  You can choose ANY Catalogue Products up to the value of $294 in your Kit AND PAY ONLY $169.   Not only do you receive 20% discount on your products ALL THE TIME you become part of THE best company IN THE WORLD!!!  You receive So much inspiration from Demonstrator only Forums, you can attend awesome Stampin’ Up! events AND make some long-time friends (for me that has been the best part!).

So now you know all the details, let me know if you have questions.  I am happy to help you and excited to share stamping with you and your friends.

Jenny

3D projects, Stampin' Up!

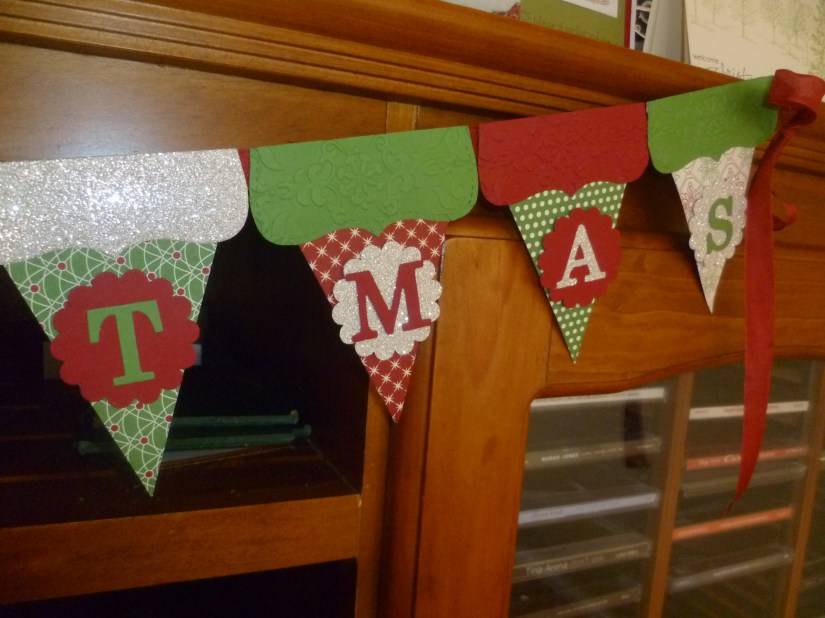
MERRY CHRISTMAS BANNER!

How was your Christmas?  I hope you had a lovely day.  They weather changed considerably here yesterday with rain and much cooler temperatures.  This changed our plans a bit but it all worked out.  Nothing like coziness with all the family on Christmas Day!!!

I know Christmas has now gone but I still want to show you this project.  I have been meaning to make one of these Christmas Banners for months.  I have looked around the internet but just wasn’t sure what to do.  On the weekend just gone I thought I should just ‘DO IT!!’  So I did!

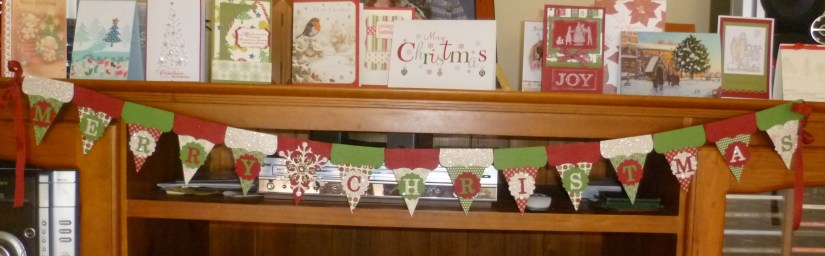
Here is my Christmas Banner.

P1070499-1

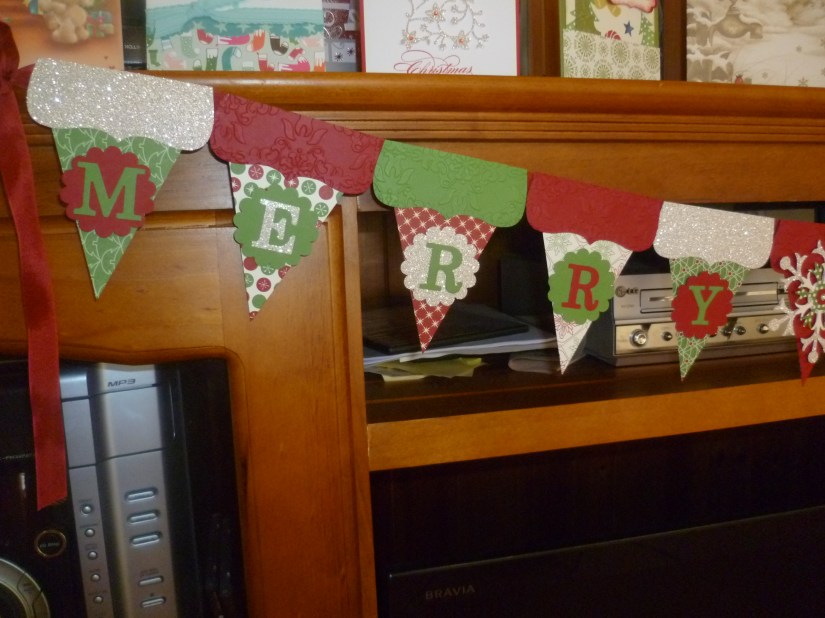
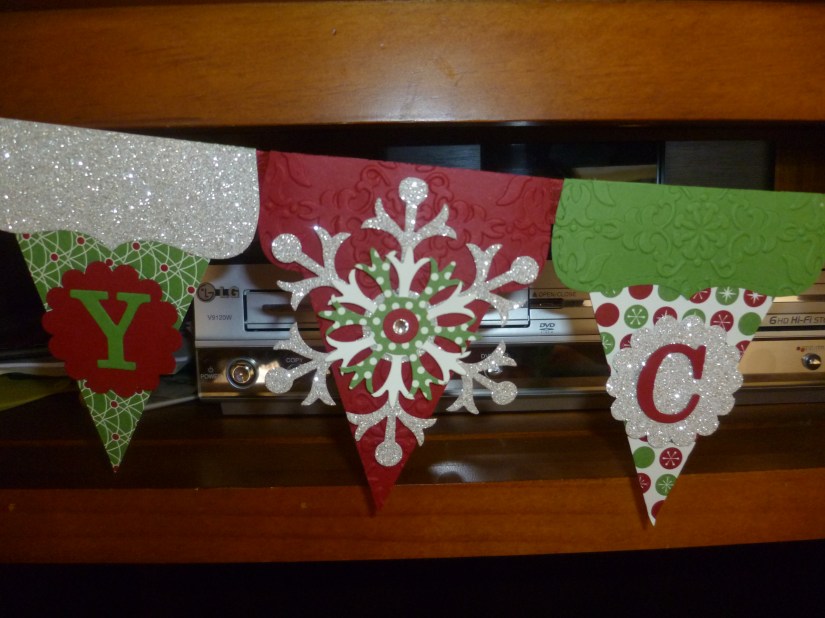
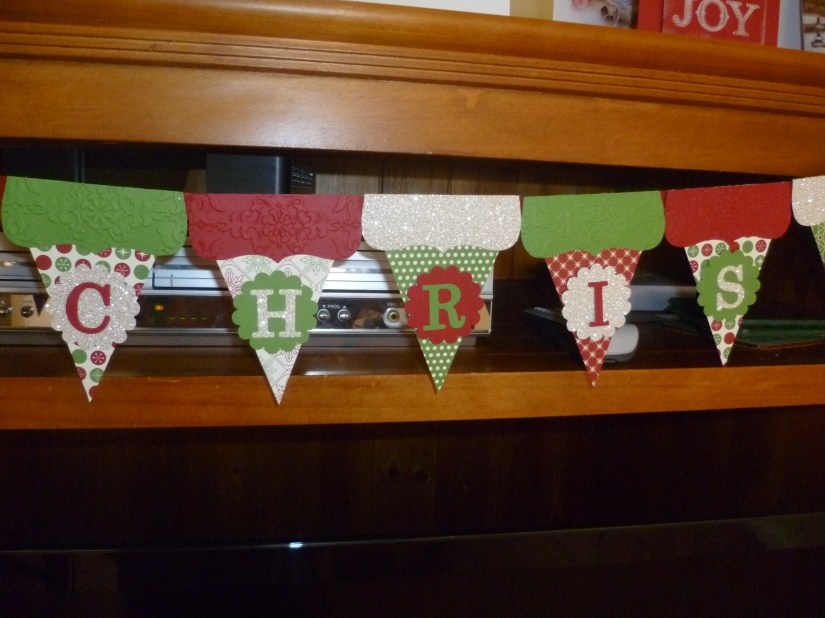
It is hard to see it all here so I will show you some close-up shots.

P1070504

P1070501

P1070503

P1070502

What I have used:

CARD: Gumball Green, Cherry Cobbler, Silver Glimmer Paper, Very Vanilla, ‘Be of Good Cheer’ DSP.

BIG SHOT: Timeless Type Alphabet (retired), Vintage Wallpaper Embossing Folder, Snow Flurry Die, Top Note Die.

OTHER: Scallop Circle Punch, 2 step Owl Punch (centre of Snowflake), Cherry Cobbler Seam Binding, Adhesive Rhinestones.

I hope you like it???? It was fun to create.

Enjoy the rest of your Christmas celebrations and I look forward to you stopping by again soon.

Jenny

3D projects, Stampin' Up!

BOX WEEK – BOX #7

We come to our last box for the week.  This box today is based on the box I showed you yesterday.  So you can get the template from the link in the last post.  This is another version.

P1070324-1

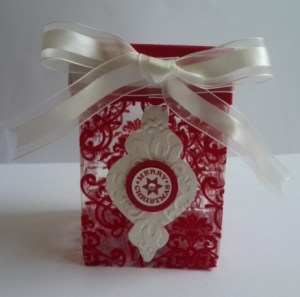
This box is created using the gorgeous acetate sheet with the flocked swirly finish.  It is so soft and velvety to touch.  You get 2 sheets of this in the Candlelight Specialty DSP found in the current Seasonal Mini Catalogue.  It makes up such an elegant box.  I have cut an ornament from the Ornamental Keepsakes set and then run it through the Big Shot with the Vintage Wallpaper Embossing Folder.  You can’t tell but I also sprayed this with Champagne Shimmer Spray so it sparkles in real life.  The centre sentiment is from “More Merry Messages”.  An adhesive Rhinestone in the centre finishes it off.

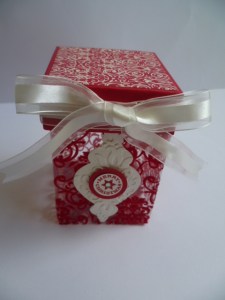
Here is the top view.

P1070326

I adhered a piece of the Candlelight Specialty DSP on top of the lid and some white Organza Ribbon around it to finish it off.

Well, that finishes off my Box Week.  I hope you liked the projects.  There is still time to get creating some before Christmas.  Why not share a photo or a link to your creations?  I would love to see them.  Have fun creating!

Jenny x

3D projects, Stampin' Up!

BOX WEEK – BOX #6

Here we are in Box Week at Box #6.  These boxes are getting bigger now!

P1070306

I found the template for this box on Becky’s 12 Days of Christmas 2009 edition.  You can find the details here.  This was the Bow Box in the collection.  If you scroll down the blog and look in the Right Hand column you can see the 2009 projects there.  You can purchase the Tutorial there too.

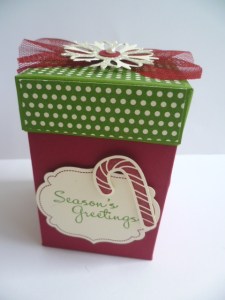
My box was created in Cherry Cobbler.  The frame on the front was stamped using “Memorable Moments” and then cut with the Labels Framelits.  The greeting is from “More Merry Messages”.  A little Candy Cane stamped from “Scentsational Season” and cut with the Holiday Framelits finishes the front.

Here is the top view.

P1070309-1

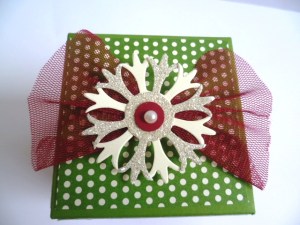
The top was cut in Gumball Green and DSP strips (from “Be of Good Cheer DSP pack”) were adhered to the edges and top.  I cut 2 snowflakes with the Snow Flurry Die in Silver Glimmer Paper and Very Vanilla.  These were layered together.  The Cherry Cobbler circle in the centre was punched out using one of the small circles on the Owl Punch.  An adhesive pearl finished off the centre.  I cut a piece of the Cherry Cobbler Tulle and gathered that together and wrapped some thread around the centre to hold it all in place.  Once all the layers were adhered together they were fixed in place on top of the box with Dimensionals.  This box stands at 10.5cm or about 4 1/4″ tall.

Thanks for looking today.  We have our last box for our Box Week tomorrow so be sure to stop by.

Jenny

3D projects, Stampin' Up!

BOX WEEK – BOX #5

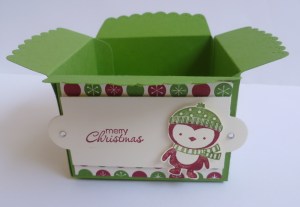
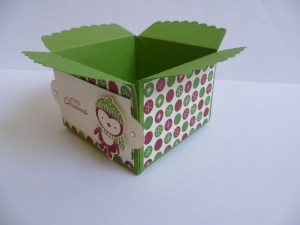
I have made a lot of these boxes over the last couple of years.  I found the idea here when I first made them.   This is made from the Scallop Envelope Die.  I added a Christmas touch to this one.

P1070284-1

P1070288

Once again I added my little mate from “No Peeking” like on yesterday’s box.  He was coloured with markers and added on the greeting panel cut from the Apothecary Framelits.  The DSP is from the “Be of Good Cheer”.  Mmm this DSP is featuring a lot on these boxes!

Another cute box to fill with some little treats.

Come and visit me again tomorrow for Day 6.  I think these boxes are getting bigger as we go through the week. 🙂