cards

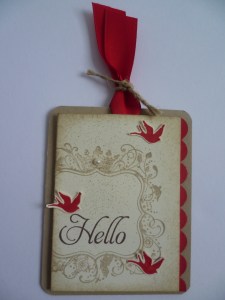
VINTAGE ‘ELEMENTARY ELEGANCE’ TAG!

This is a tag I made a few weeks ago using the Sale-A-Bration set ‘Elementary Elegance’.  The tag was inspired by a tag I came across at SplitcoastStampers by Speedystamper.  She had used the set ‘Style Beautiful’ but I thought it would work quite well with this set.

I stamped the frame on Very Vanilla cardstock in Crumb Cake.  It is a bit hard to see but I spritzed it with the Crumb Cake marker and sponged the edges.  The ‘Hello’ is stamped in Chocolate Chip. I added a scallop strip in Real Red behind the Vanilla card.  Before I mounted this with dimensionals onto the Crumb Cake base I punched a hole in the Crumb Cake card to thread through some Real Red Satin Ribbon.  The ribbon was tied off with some twine.  The corners of the Crumb Cake base was rounded off with the Corner Rounder punch.  I stamped some of the little birds in Real Red on to scrap Vanilla card and cut them out.  I find cutting out to be very relaxing, do you???? The birds were adhered to the front and a pearl added for an elegant touch.

After I showed this to Ness, our lovely team leader, she created a card to match.  You can check that out here.

Thanks for stopping by.

I hope you can visit again soon,

Jenny x

3D projects

“ANOTHER TREAT POUCH”

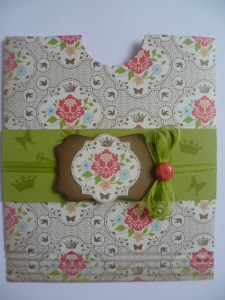
In the last post I showed you a little Valentine’s Treat pouch.  I have made another one.  This was for a workshop last week.  (Thanks Deb 🙂 )  I have used the gorgeous papers you can choose Free during Sale-A-Bration.  This is from the Everyday Enchantment pack.

If you want to know how to make them just head to my previous post. For the band,  I stamped the little images from Everyday Elegance along the Lucky Limeade card strip and wrapped around some of the Lucky Limeade organdy ribbon.  You can choose this as one of your Free Sale-A-Bration items too.

See the loopy ribbon??  I came across this idea from Barb here.   I think it is a cute idea.  Just a little different to a regular bow and it is very easy.  Basically, take a small piece of scrap card, the width of it being the size of the loops you want.  The size I used here was 5cmx6cm roughly (approx. 2″x 2 1/2″).  Then just wrap your ribbon around the card an odd number of times not too tightly.  I did this one 7 times.  Then carefully slide your loops off and wrap a brad around the centre of the loops.  Does that make sense??? I adhered this to the pouch with a dimensional or you could use a glue dot.

I have more Sale-A-Bration goodness to show you next time.  Have a good weekend everyone.  Stop by again soon.  Don’t forget to say Hello.  It is nice to hear from you.

Jenny x

cards

HAPPY VALENTINE’S DAY!!

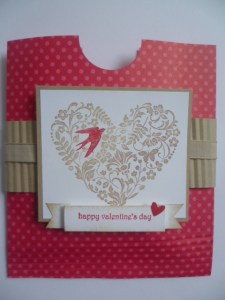
Wishing you all a Happy Valentine’s Day.  I thought I would stop by and show you a quick Valentine’s Treat Holder.  You could use this for any special occasion with a Chocolate treat or Gift card perhaps.

The original design was from Angie from her 12 weeks of Halloween found here.  I think this is cute (if I can say that!).  The paper measures 25cmx14cm.  Score the long side at 12.5cm.  Fold your paper in half with the fold on the left hand side.  Add Sticky Strip to the bottom edge and right hand side and adhere together.  Too easy!! You can crimp the bottom if you like.  Of course, you can make this to any size for your treat or Gift Card.

I have used the set “You are Loved”.  It finally found ink this week after sitting on my shelf for a couple of months.  I inked the heart with Crumb Cake and sponged over with Chocolate Chip on parts of the image.  (It is a bit hard to see).  I went over the bird with the Real Red Marker. This was mounted on a Crumb Cake mat.   The paper is from the Brights Paper Stack.  The Crumb Cake strip was run through my crimper and I wrapped some Crumb Cake Taffeta Ribbon around the strip.  The sentiment is from “Teeny Tiny Sentiments” with a little heart punched out from the 2-step Owl Punch.  I punched a  half circle from the top of the holder with the 1 3/8″ circle punch to make it easier to pull the treat out!!

I hope you have a special day with the loved ones in your life.  🙂

See you again soon,

Jenny xx

cards

STAMPING SESSION!!

I am so far behind in my blogging.  To try and catch up a little I am going to hit you with a lot at once.  Apologies in advance for this 🙂  A couple of weeks ago I had a lovely time with my stamping buddy, Leonie N.  It was a great little overnight visit and we accomplished a lot in 24 hours.  It’s amazing what you can achieve when you don’t have interruptions like cooking dinner or picking kids up from school!!!

I thought I might spread these out over a few days but time is getting on.  I won’t be giving long descriptions on them, but really they are so simple.  I’m sure you can work them out.  After all, we worked them out even at unearthly hours in the morning!!  Who needs sleep when you can stamp!

Here you go!

This was a card inspired by a few similar I had seen around.  (Ok, well Leonie did it first then I CASED her!)

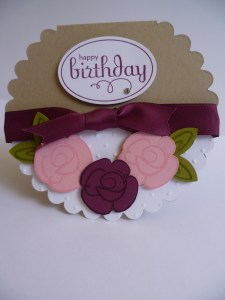
A Scallop circle card I created for a private class I did recently.  Stamp set is “Flower Fest”.

CASED from Kim here.  I love her style.

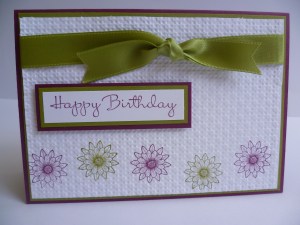
This card was CASED from Chris here.  I used the flower from “Language of Friendship”  This was stamped first and then ran through the Square Lattice EF.  Colours are Rich Razzleberry and Old Olive – always a nice combination!

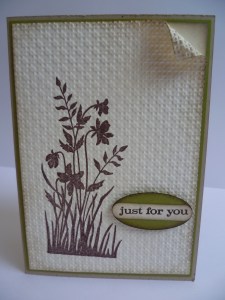
CASED from Joanna here using “Just Believe”.  This was a set I haven’t used for a while.  It was good to give it a stamp up!

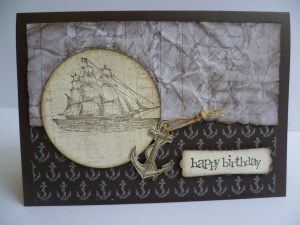
I CASED this from Leonie.  I wasn’t really taken with this set “Open Sea” from the Summer Mini but it is growing on me.  The DSP is Nautical Expedition also from the Mini.

Well that about covers most of the cards we did on our stamping day.  It was a fun time and I don’t think I have made so many cards at one time.

Thanks for looking.  See you again soon.

Jenny x

Personal Ramblings

SORRY, HAVE TO SHOW YOU!!

Sorry, it’s not card related but I had to share this.  Josh had his first game of Gridiron yesterday.  It was a pre-season Gala Day with a number of small games then a big game.  He absolutely loved it! He has followed NFL for a while now (Go the Patriots for the Superbowl this year!!!)

Here he is in all his gear.

Don’t mess with this guy!!!!  I am amazed at how much padding they wear. Which is probably good really but when he plays Rugby League he wears a chest pad which is only padded cloth and headgear because we ask him to (and of course a mouthguard).

Action shot!  Apparently he is the one crouching in the centre close to the action!!

Thanks for the indulgence.  I know for my American readers this is a common sight but in a country dominated by Rugby League and Cricket, NFL is starting to make it’s presence felt.

See you soon with some more stamping,

Jenny x

cards, Uncategorized, Workshops

WISTERIA WONDER + EXTREME ELEMENTS

I hope you have had a great Saturday? I know I have! The sun has been shining which has been good to see – and today I had my Sale-A-Bration Launch.  We had a great time together  I think – didn’t we ladies?????  I won’t mention the toilet paper game here 😉

I haven’t got a photo of the little treat bag I made yet but I will show you the card everyone got to make for the Make and Take.

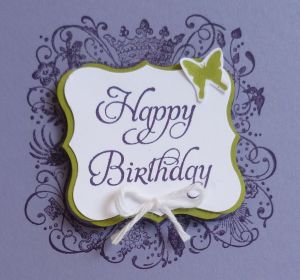
I have used Wisteria Wonder and Lucky Limeade card.  Don’t you just love those colours together????  This is using the set ‘Elementary Elegance’, one of the stamp sets you can get for FREE during Sale-A-Bration. Have a close look at that stamped frame.

 This stamp goes with so many current Catalogue stamp sets.  (Artistic Etchings, Pocket Silhouettes, Extreme Elements [which I have used here], as well as So Swirly Wheel).  I’m sure you could spot a few more.  So this is certainly a stamp to add to your collection.

I used Elegant Eggplant ink.  The punch strip was created with the Dotted ScallopRibbon Border Punch and then a little butterfly cut with the Beautiful Wings Embosslits.  This is a very simple design but I like the colours together.

This is based from a card I made a few weeks ago using Crumb Cake, Chocolate Chip and Baja Breeze.

This card was originally inspired by a card I saw on SplitcoastStampers by Chris Smith.

Have you seen the Sale-A-Bration Catalogue yet?  If not, click on the link in the right hand column and check out what you can choose for Free with every $100 order.  If you would like your own copy then contact me to send one out to you.

Ok, I have to run now.  Enjoy the rest of your weekend.  I’m hoping the sun will shine again tomorrow.  That will be a novelty!!

Jenny

cards

“FRESH VINTAGE”

I hope you have had a great weekend.  School went back for us today after the Summewr holidays, and of course the Summer weather arrived!!!  It is still so hot here now as I write this so I’m not hanging around here long.  I just wanted to show you these couple of cards using some of the gorgeous papers and stamps you can get during Sale-A-Bration.

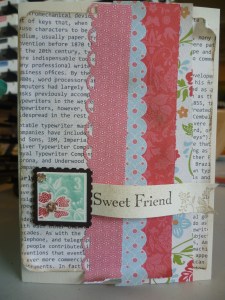
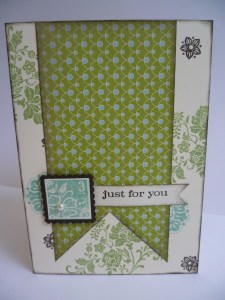
A couple of weeks ago we had a team stamping day at Ness’.  Unfortunately not many could make it but we had fun.  These cards were based on samples that Ness had done.  I have changed them a little.  They are not my usual style but they certainly show off the beautiful papers.  These are using one of the Sale-A-Bration sets “Fresh Vintage”.

There is a bit of distressing with this one with sponging, curling, tearing and spritzing (although that is a bit hard to see!).  The ‘Sweet Friend’ is from the stamp set “You are Loved” in the Summer Mini Catalogue.

For this one there is a bit more sponging going on again.  I have to say that pennant is a bit wider than I would have liked but it is covering up a little “whoopsie”  😉 We all have those don’t we!!

Thanks for visiting.  I do appreciate you stopping by.  I love to hear from you too so don’t forget to drop in a comment and say HI.

Until next time,

Jenny

Blog Hops, cards

IT’S SALE-A-BRATION TIME!!!

Yay! Sale-A-Bration starts today. It is a very exciting time because you get the free stuff! Gotta love that! You might be familiar with how it works, but if not here is the scoop ~

Sale-A-Bration runs from 24th January to 31st March.

Customers— For every $100 purchase receive your choice of an exclusive stamp set or paper pack or ribbon and brad pack AND they are gorgeous!

Hostesses— Receive a free Sale-A-Bration stamp set or ribbon/brad pack or paper pack with a $600 or more workshop, in addition to the normal Hostess rewards. Also, if your own order is more than $100 then you receive another Sale-A-Bration choice. As a hostess you get to keep the projects I make and you receive a current Catalogue for Free. Home workshops are a lot of fun!!

Recruits— Choose any current stamp set from the current catalogue for FREE when you sign up during this time. The Starter Kit is at a discount price of $249 – and you can choose the Stamp sets, Cardstock and Inkpads.

You can check out the choices by clicking on the link in the Right Hand side bar or ask me to send you a copy. OR Why not book your own workshop????

Here is a card I made last week with one of the Stamp Sets “Everyday Elegance”. That’s just one benefit about being a Demonstrator, you get to play with these early!!

This card was CASED from the US Demonstrator Magazine Stampin’ Success. It was actually a smaller card so I made mine a Standard size card. Since it was bigger I stamped another Swirly crown frame (if that’s what you want to call it!) underneath the pennant to fill up the space. I made the pennant longer and crimped near the ends. The frame is white embossed. I punched out a label with the Curly Label Punch and stamped the swirly label on the sides. I then cut it in half and adhered it either side of the pennant. I have used Lucky Limeade, Island Indigo and Pool Party. A little bling was added to the crown with an adhesive Rhinestone.

I really love this set and I have used it a lot already. I will show you some more creations in the coming weeks.

If you want to see some more creations today with the Sale-A-Bration products why not stop by the ESAD Sale-A-Bration Bloghop. I didn’t join in this time but you can start here at Nicole’s blog. I have just finished the bloghop and I am telling you these projects are awesome. There are some very clever ladies there. So stop on by – just have a little time up your sleeve though!! :)

See you again very soon with some more Sale-A-Bration creations.

Jenny x

cards, Challenges, Stampin' Up!

CHERRY COBBLER WEDDING INVITE!!

Recently Stampin’ Up! held a competition among the Demonstrators in Australia and New Zealand to create a Wedding Invitation.  Unfortunately I didn’t win.  I was happy with the end result but really with all the embossing on this card I don’t think you would want to make 60-80+ invitations of these.  I thought I would show you mine anyway.

I have used Cherry Cobbler and Whisper White.  The swirls are from ‘Elements of Style’. All of the swirls are stamped in Cherry Cobbler and clear embossed. That takes a little time!!  Before I stamped them though I dry embossed an oval on the top part with the Designer Frames Embossing Folder.  The greeting is from ‘Sincere Salutations’.  This was Gold embossed on scrap Whisper White and punched out with the Extra Large Oval Punch.  I added a bow with the Cherry Cobbler Seam Binding.  See the curled ends on the ribbon??  I wrapped the ends around a pencil and misted them with a little water.  Then I gave them a short blast with the Heat Tool.

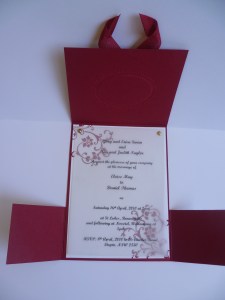
This card is created with the Double Dutch Fold.  I found that on Splitcoast Stampers here.  It is a really cool fold.  Here is a different photo with the flaps open.

Here is the card open.  On the inside I stamped the swirls in Cherry Cobbler on Whisper White.   I made up a dummy invite for the competition.  I created this on the computer and then printed it out on Vellum.  This was attached at the top with Gold Brads.

I hope you like it.  I had a lot of fun creating it.

Before I go I wanted to say a HUGE Thank You to you all for your response and comments on my last post of the Tote Bag Tutorial.  I was so overwhelmed with the response.  Thanks so much.  I wanted to share this with you all –  my special blog readers.  I do hope you get to create one for yourself. If you haven’t seen it yet then just go back to the last post.

Till next time,

Jenny x

3D projects, Tutorials

LARGE TOTE BAG TUTORIAL!!!!

A few months ago I wanted a larger size Gift bag.  When I went surfing around the internet I could only find Tote Bags that would be large enough for Note cards or similar.  So I created my own! I wanted to share this Tutorial with you before Christmas – but it didn’t happen.  The other day I created another one and put together some step-by-step photos to help you.  I have to apologise in advance for the quality of the photos.  It was a very overcast day when I took them.  I hope it gives you an idea though.

Here is the Tote Bag that I had created previously.
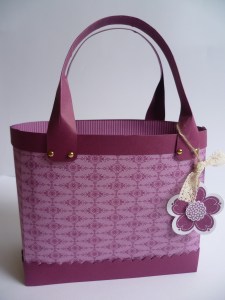
I used the Rich Razzleberry Paper from the Brights DSP stack.  The tag is from the hostess set ‘Posy Punch’.  The design of the tote is based around the Box in a Bag you may have seen around.

Now do you want to make one??  Here is the tutorial.  I hope it is clear enough. 🙂  The finished size is ~ Width: 18cm at the base (approx. 7″), Height: 15cm to the top of the bag not including the handles (approx 6″), Depth is 8cm at the base (approx. 3″).  EDITED: I have now updated the tutorial to include the Imperial Measurements. I have also added a new version. You can see that post HERE.

LARGE TOTE BAG

BASE: Card measuring 27.5cmx17.5cm (11″x7″)

On the 27.5cm side score at 5cm and 22.5cm (2″ and 9″) On the 17.5cm side score at 5cm and 12.5cm (2″ and 5″).  Fold on the score lines and then cut the score lines on the long side up to the score line running across to create 2 small tabs on each end. 

Add Sticky Strip to the small tabs and fold in and assemble the box.

DSP (patterned paper) FOR SIDES: 2 pieces @ 15cmx27cm (6″x10 1/2″).  

Place sticky strip along the 15cm (6″) side and join the 2 pieces together to make one long length.

CARD STRIP: for along bottom edge.  2 pieces measuring 3.5cmx27cm (1 1/2″ x11″). Join the two pieces together and scallop along the top edge of the long piece.  It’s a bit hard to see because it is so long but this shows the joined strip with the scallop edge!

CARD STRIP: for along top edge. 2 pieces measuring 1.6cmx27cm (1/2″x11 1/2″). Join the 2 pieces together to make a long strip.

HANDLES: 2 card strips measuring 2.4cmx29.5cm (1″x11 1/2″)

Score both pieces lengthways at 1.2cm (1/2″).  This is from the 3cm (1 1/4″) mark at the top down to 3cm (1 1/4″) from the bottom edge. (ie 26.5cm mark on cutter).  That is, you don’t want to score right to each end.   Check the photos out.

Here is a close-up of the ends to get an idea of the scoring.  So you stop 3cm (1 1/4″) short of the end.

Fold along score line but flatten out the ends. Round the corners with the corner punch. 

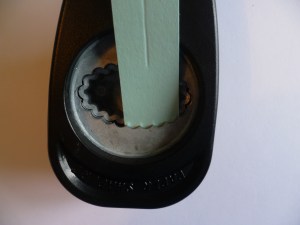
Now when you get to the finished bag below you will notice that the handles I have made are different to the tote above.  To create the ends of these handles I have used the Scallop Oval Punch.  To do this I slipped the ends of the handle strips in through the top of the punch.  I put it in on the side first and then turned the strip to the end of the scallop.  Make sense???  Here are some photos to show you what I have done.

Slip the card strip into the top of the Punch on the side.
Gently turn the strip to the end and punch the end of the strip.
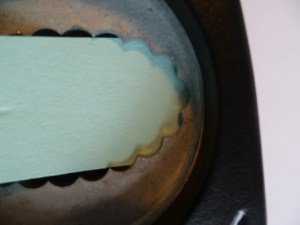
Here are the punched ends.

Now all the pieces are prepared you are ready to assemble the Tote.

Add Sticky Strip along the bottom edge of the DSP piece and along one of the short sides.  (Don’t take the red backing off the side piece yet!!!!).   Lay box along the edge of DSP and slowly wrap the DSP around the box. (See the photo below). Stop before you get to the end so you can remove the backing off the side piece.  Now you can finish wrapping the DSP around the bottom and then adhere the side pieces together.  I do it this way because if you remove the backing of the Sticky strip on the side piece at the same time as the bottom you get it stuck to everything (believe me it happens!! You might be more skilled than me :)).

Adhere the scallop edge strip and wrap this around the outside of your DSP covered box at the bottom.

Adhere the other long strip along the top edge of the bag as a trim.

Now you can add the handles.  You can pierce holes through the top of the bag to attach the brads and handles together, or attach the brads to the handles and then adhere the handles with sticky strip or dimensionals.  Whatever you prefer. 

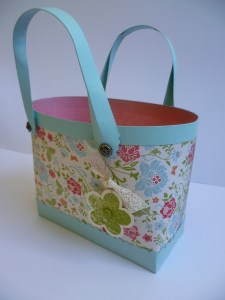
Here is the finished bag.
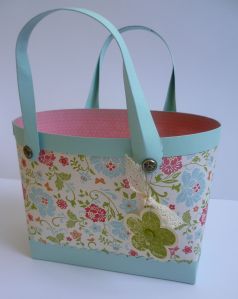
You are wondering what that DSP is from????  Well, you can get that for FREE!  This is part of the DSP pack (Everyday Enchantment) that you can select for Free during Sale-A-Bration when you place a $100 order.  It is just gorgeous paper!

Here is the inside of the tote.
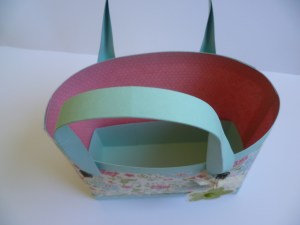
Here is a side view.
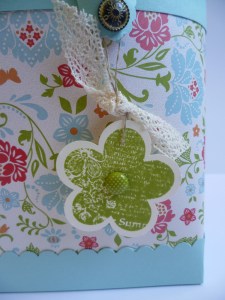
Thought I would show you a close-up of the tag on the bag.  This is using the Hostess set ‘Posy Punch’.
Hope you enjoy this project.  If you create one of these Totes, I would love to see your version.  Drop me a link or a photo.  I like to share with my creative friends but please, don’t forget to give credit if you do create one 🙂

If you have any questions just drop me a note in the Comment section.

Happy Creating!

Jenny x