cards

IT’S TIME FOR SOME CHRISTMAS CARDS!

I have been so busy showing you all my fun boxes and bags I have done for Christmas, I haven’t shown you many Christmas Cards yet.  I have to say I haven’t done as many cards as I should have done.  But here are a few quick ones.

A Gatefold Tree Trimmings Card. (Not the clearest photo, sorry!) Can you see the bling???

I really liked this one.  It is so effective with the brayered, embossed background.

A ‘Dasher’ Christmas.   This one and the one above we did at my Christmas Stamp-A-Stack.  This card was inspired by one by Andrea Walford.  The card above was inspired by a card by my lovely friend Leonie N. (Thanks Leonie!)

Some really quick cards with ‘Season Of Joy’ stamp set.  Not very clear but I added a Self-adhesive pearl to the centre of the word ‘Joy’.

Sorry, no time for details on the cards today.  I am in a hurry, but I thought I would stop by and show you these all together or it would be New Year before you saw them!  We are off now to look at the Christmas lights.  That is a tradition we do every year.  There are some spectacular displays that some people put up on their houses. I can even manage to drag out my teenage son to see them.  I don’t know how long that is going to last though!

 Catch you very soon. xx

Tutorials

NOW A CHRISTMAS BOX!

I have shown you some bags for Christmas.  Here is a Christmas box I have been working on.  I found the instructions here.  I will add the metric measurement for this at the end of the post.

Before I assembled the box and ran the So Swirly wheel around the bottom edge.  I stamped the tree from ‘Christmas Classic’ in Soft Suede on Very Vanilla Cardstock and the Merry Christmas in Real Red.  I stamped the flourish from ‘Tiny Tags’ in Crumb Cake and sponged the edges.  It gives it a Vintage feel.

Here is a view from the top:

The top is a scallop square cut with the Big Shot, then I ran the card through the Big Shot again with the Vintage Wallpaper Die to add the texture.  I tied up some of that lovely striped Grosgrain ribbon and added tags from the ‘Tiny Tags’ set.

Here are the measurements:

TALL SCALLOP SQUARE BOX

Cut card 21cmx28cm. Score on the 21cm at 6.3cm. Score on the 28cm at 6.3cm, 12.8cm, 19cm and 25.4cm. With the long side running horizontally, cut up on each of the short score lines until they meet the score line running across. On the small tabs place your adhesive on the wrong side of 3 of the tabs. Also, place adhesive on the right side of the narrow tab on the side. Assemble your box

For the lid. Cut a scallop square with the Big Shot. Score on 2.3cm on each side. Cut up on the small tabs on 2 opposite sides. Place adhesive on these tabs and assemble.

UPDATE:  The lovely Lynda asked about how to create the lid without the scallop square die.  I have had a little play and come up with some dimensions for you. 

Lid (without Scallop Square Die)

Cut card 12.6cm.  Scallop the edge of the card.  TIP:  Punch opposite sides of the card first.  Then go back and do the other sides.  It doesn’t matter if the corners don’t match as they will tucked inside.  Emboss the card with the embossing folder of your choice.  I used the vintage Wallpaper Folder.  Score card at 2.2cm on each side.  Cut up tabs up to the score line running across.  Place Sticky Strip on the tabs and assemble the lid. 

You probably have your Christmas wrapping all sorted by now. So you could use this box for any occasion.  But if you are like me you still haven’t got the wrapping done.  That’s my children’s job this week!!  They’re going to love that!!


cards, Challenges

JUST ADD CHRISTMAS!

I have been very good today.  I got stuck into my swaps for Sydney Regionals and finished them except putting them in the cello. bags.  So, I got to play!  I checked out Just Add Christmas challenge earlier and it was ‘Just Add Christmas’. You can see all the lovely creations here.  Since I have been getting in Christmas mode I wanted to play along.  I have been working on this card in my mind for days so it didn’t take too long to put together.  Here is my card for the Just Add Christmas challenge.

The backgrouund paper is from the Newsprint DSP.  I have used the Victoria lace coming in the new Summer Mini with an Antique brad.  It is a bit hard to see but I have added some Adhesive Pearls to the ornaments.  Here is a run-down of what I have used.

Stamps: Tree Trimmings, Christmas Classics.

Ink: Real Red, Old Olive.

Card: Real Red, Old Olive, Very Vanilla, Newsprint DSP.

Other: Vintage Wallpaper Embossing Folder, Top Note Die, Victoria Lace, Antique Brad, Sponge, Adhesive Pearls.

OK, got to run!  The Wednesday crazy afternoon begins between school pick-up, swimming lessons, cricket training, cook dinner and team meeting this evening.  Be back later with some more Christmas Creations! 

cards

DAY 2 OF CHRISTMAS CARD BUFFET!!

As promised here are the other cards from my Christmas Card Buffet.

Card 3.

 PICT1836

This was the most popular card of the day. The baubles were stamped first on the card in More Mustard and then on scrap Whisper White card in Ruby Red.  These ones were cut out and mounted over the More Mustard baubles.  I added some 2 way glue on the intersecting points on the baubles and sprinkled over some Dazzling Diamonds glitter.  Gotta love bling for Christmas!!!!

Card 4

PICT1837

I added the 2 way glue and dazzling diamonds on the stars on top of the trees but you just can’t see that in the photo.

Card 5

PICT1838

This one I stamped the “Jingle all the Way” on the Whisper White in Real Red and then again on scrap Whisper White.  I cut the bell out and mounted it on with mounting tape, adding some more bling.  It’s a shame you can’t see the sparkle on these cards!!! 

Here is the recipes for them all:

  All measurements are in centimetres.

  CARD 1 CARD 2 CARD 3 CARD 4 CARD 5
CARDSTOCK:          
BASE Night of Navy Night of Navy Ruby Red Ruby Red Kraft
OTHER Baja Breeze 8×10.5Rose Red 10.5×6.2+ scrap piece

W/White 10.1×5.8

Baja Breeze 8×10.5  Rose Red 10.5×3.1+10.5×1 +scrap

+ W/White scrap

Old Olive 14.4×10.1W/White 14×9.7+ large scrap piece Old Olive 14.4×10.1W/White 14×8.2 Real Red 10×7.5W/White 7×5.5+ scrap
INK Baja BreezeNight of Navy

Rose Red

Night of NavyRose Red Old OliveMore Mustard

Ruby Red

Old OliveMore Mustard

Ruby Red

Creamy CaramelReal Red
STAMPS Schoolbook Serif AlphabetSeeing Spots

So Swirly wheel

Tree TrimmingsBest Yet Baroque MotifsShort and Sweet

Christmas Classics (bauble)

Christmas Classics (tree and Greeting) Christmas Classics(Jingle all the Way, holly leaf)
OTHER 1 1/4” circle punchmounting tape

sponge

Nt of Navy Grosgrain ribbon

Scallop Border PunchWide Oval punch

Scallop Circle Punch

 White Gel Pen

 Mounting Tape

 2 way Glue Pen

 Dazzling Diamonds.

Mounting Tape

 scissors

2 way Glue Pen

Dazzling Diamonds

Eyelet Border Punch2 way Glue Pen

Dazzling Diamonds

Spiral PunchCorner Rounder Punch

Striped Real Red Grosgrain Ribbon 

scissors

 mounting tape

2 way Glue Pen

 Dazzling Diamonds

So, Card 3 was the most popular.  Nearly everyone preferred the traditional red and green.  So, what do you think?  Leave a comment as to which one you think is the best.  I’d be interested to know.

I’ll be back soon with some more creating!! In the meantime, Happy Stamping!!!!

Personal Ramblings, scrapbooking

CARLIE’S PAGE!

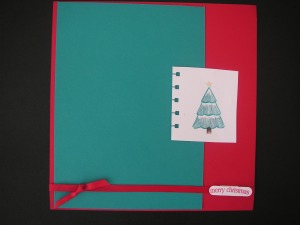
I just had to stop by today to show you this beautiful creation by my DD Carlie, who is 9 years old might I add!  She often gets in my craft room EARLY in the morning.  She brought it to me later and I was so impressed.  She did this all herself.  I did help tie the ribbon for her.  The design and the stamping was all her own ideas. 

PICT1695

She inked up the tree from Christmas Classics with the markers.  (I hadn’t even inked this set up yet!).  She used Taken with Teal, So Saffron and Chocolate Chip.  She has used the Spiral punch on the edge of the Whisper White square.  Carlie then stamped the greeting with Real Red and used the Word Window punch to punch it out and then finished it off with the Real Red Grosgrain.  She has said it is ready for me to take a photo of her by the Christmas Tree 😉 

I had to laugh though.  Later when I went into my craft room I found this piece of paper on my desk.  She had put a lot of thought into this!  She had drawn a sketch even with what colour she was going to use!  Now where does she get these ideas from!!!

PICT1696

Thanks for stopping by to see Carlie’s creation.  I’m very proud of her!!

Hope you stop by again soon!