cards

BORDERING BLOOMS!

A couple of weeks ago I had a chance to play with the ‘Bordering Blooms’ set.  This was my first time playing with Photopolymer stamps too.  I have to say I loved them.  Love how they stick to the block and stay!!! They are very easy to use too being able to see clearly through the block.  So here are the cards I made then.

This first one was CASED from Pinterest by Shelly Godby.  Her version was a lot more gorgeous and she stamped the inside too but I was happy with this.  I used Crisp Canteloupe and Baked Brown Sugar.  The scallop edge under the border was using the Dotted Scallop Ribbon Punch.  The greeting is from ‘Wetlands’.

P1140198

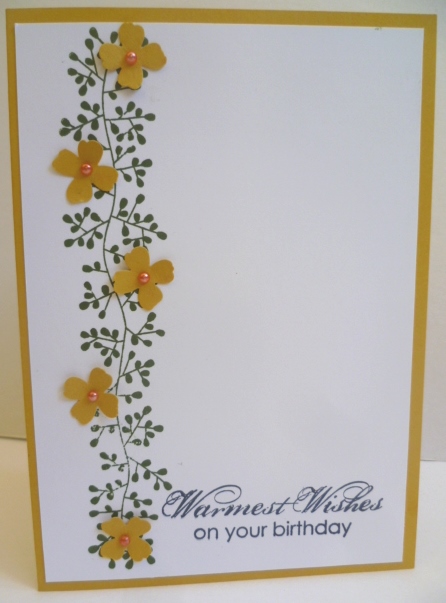
Another quick card.  This one was CASED from Sharon Burkert on Pinterest.  Her card had a White Card base.  I decided to make mine on a coloured card base so I used Hello Honey.  I think this will look good on any colour base.  I will try that sometime soon.  The little flowers were punched from the ‘Itty Bitty Accents Pack’.  The greeting was from ‘Blooming with Kindness’.  I coloured Adhesive Pearls with the Calypso Coral Blendabilities set.
P1140193

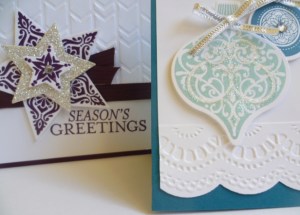
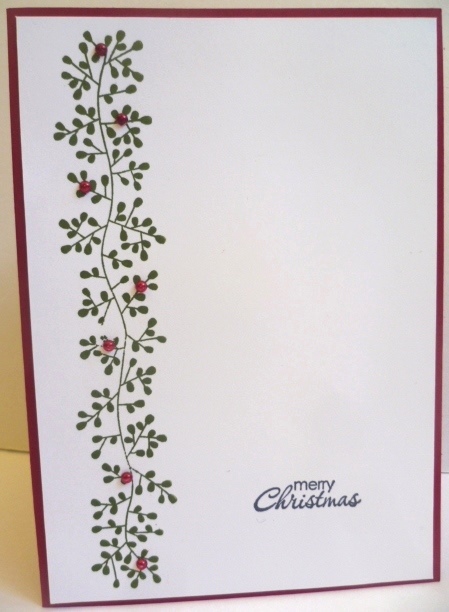
I liked this simple layout so I thought I would make it into a Christmas Card.  My first for the season. It’s a bit hard to get your head around Christmas yet but since the Holiday Catalogue is out very soon I have to make a start.
P1140191

I used Cherry Cobbler and stamped the “vine” type image in Mossy Meadow.  The pearls were coloured with the Cherry Cobbler Blendabilities.

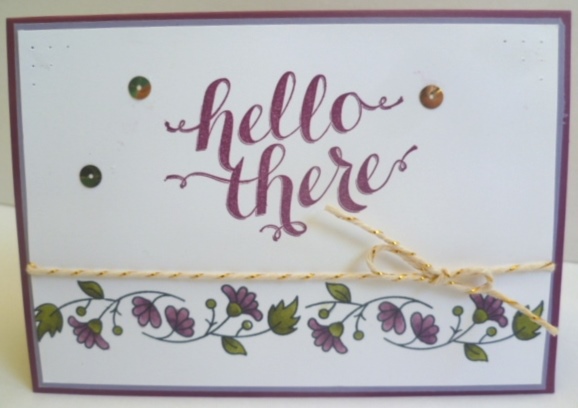
One more – sorry.  This next one I made for a workshop last week.  After stamping the blooms I coloured them with the Blendabilities.  The greeting is from the hostess set ‘Hello There’.  I added a little of the Gold sequins, Gold Twine and some paper piercing.  I haven’t used this colour combination for some time using Rich Razzleberry and Wisteria Wonder.
P1140195

Hope you liked them.  I think these will be a great addition to your stamp collection suitable for many occasions.  Check it out below.  You can buy this or any other Stampin’ Up! products in my Online store.  Check the link in the right hand side bar.

Thanks for stopping by today. The rain is still pouring down here but it is good to have it.  The grass was looking a little brown. Hope all is well in your part of the world.  🙂


cards, Classes

CHRISTMAS CLASSES STARTING!

I know we don’t want to think about preparing for Christmas yet but it will sneak up on us.  This week I start my Christmas Stamp-A-Stack classes so if you are in the Wollongong area do come and join in.  Be organised this Christmas!  We are using the old and the new this month. Here are the details.

WHEN: This Friday 15th August at 10am or 7.30pm at my studio in East Corrimal.

COST: $15 OR FREE with a minimum order.

BYO: Scissors and Adhesives.

RSVP: By Wednesday evening please so I can prepare the card kits.  Just leave a comment or you can phone or email me.

I am going to show you a little sneak of what we will be making.

P1140206

Can’t make it??? Let’s make another time for you and a few of your friends for your own Private Class.  Contact me for details.

Hope to see you in my Classroom soon 🙂

cards

COLOURFUL ‘LOVELY LACE’!

I have been playing around with the ‘Lovely Lace’ Embossing Folder this week.  As soon as I saw this in the Catalogue I knew I had to get it.  I love all the detail in it.

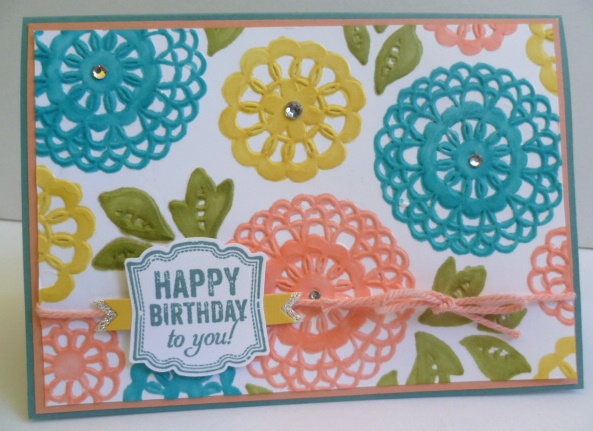
Here is the first one.  Since I had been playing around with the Blendabilities as well I thought I would do some colouring in.

P1140188

For this card I embossed on Whisper White cardstock.  I then just simply coloured to highlight the impression. The Blendabilities work better colouring on the card than the Stampin’ Write Markers as you don’t need to press hard to colour so you don’t effect the impression, and the colour blends nicely.   I found using the fine tip on the Blendabilities worked better for the finer lines. So easy – and so therapeutic just sitting and colouring. 🙂

I just finished it off by wrapping around some Pistachio Pudding Thick Baker’s Twine.  This was adhered to a mat in Pistachio Pudding and a card base in Lost Lagoon.  I added a greeting from ‘Label Love’.  The banners were cut from the ‘Bitty Banners’ Framelits.  One from Daffodil Delight and one from the Silver Glimmer paper. They were then cut in half and adhered behind the label. Some Rhinestone bling was added for more sparkle.

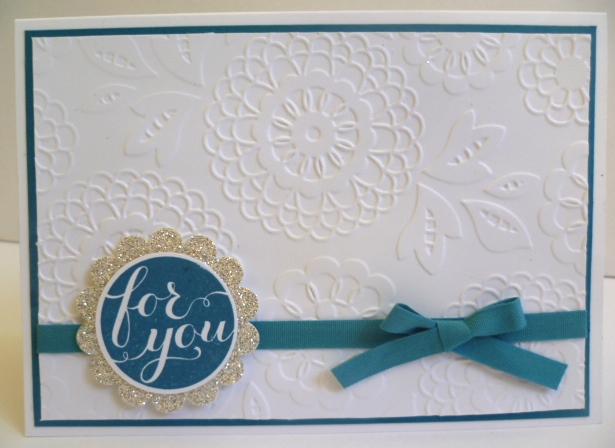
Another card I made was very simple.

P1140196

Simply emboss on white cardstock.  Tie around some Island Indigo Cotton ribbon ( I love how soft and easy to tie this ribbon is!).  This was adhered to an Island Indigo mat and then Whisper White card base.  I punched out a scallop circle in Silver Glimmer Paper.  The “For You” is from the ‘Hello There’ Hostess set.  I will be making a few of these cards to send out to some special people this week.

Thanks for stopping by.  Hope you have a wonderful weekend. 🙂

cards, Masculine, My DIgital Studio

“ON THE GO” FOR A 5 YEAR OLD!

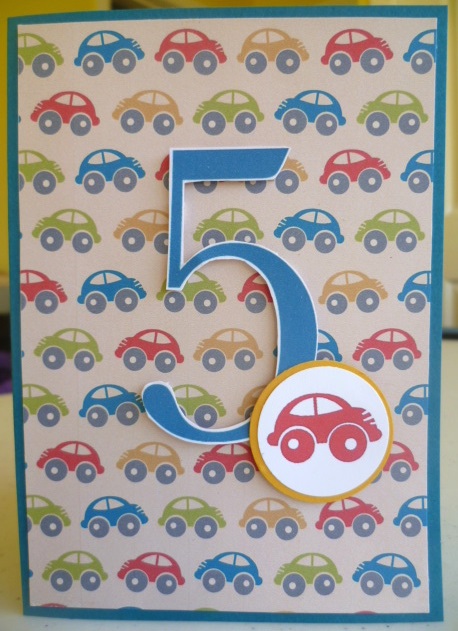
Another Great Nephew’s Birthday….yesterday. Again I left it until the last minute, and again I realised I don’t have any suitable stamps for a young little boy since the new Catalogue came out! So I turned to MDS (My Digital Studio). I love how MDS extends your card and paper supply.  Here is the card I made.

P1140184

I printed off some Designer Series Paper to card size.  I used the ‘On The Go’ paper.  Then I created a ‘5’ using the “Schoolbook Serif” Digital brush set, resized it and recoloured it to Island Indigo.  I chose a little car from the ‘On The Go’ Brush set and recoloured it Real Red. Once these were all done I printed them off.  I did have to go back and resize the car to fit the 1 1/4″ circle punch (a couple of times).  A circle was punched out with the 1 3/8″ circle punch from Crushed Curry to layer underneath it.  I cut the ‘5’ out leaving a white border around it.  After adhering the Designer Series Paper to the Island Indigo card base I then raised up the 5 and the car with dimensionals.

MDS to the rescue again – and you can still have dimension and layers by creating a Hybrid card.

Thanks for stopping by.

Jenny

Stampin' Up!

BIG SHOT BUNDLE BONUS!!!

You have probably heard by now about the fantastic Big Shot promotion this month.  It is awesome whether you have a Big Shot already or not.  What’s the deal???

Buy a Big Shot and get a Bundle for FREE!!!!!  How good is that? That is a huge bonus with your new Big Shot machine.

OR

Buy a select Bundle and get 15% off.

Big Shot promotion-1

The prices are a bit hard to read aren’t they?? I have added a table below with the clearer prices. Check them out here.

Big Shot


Below you can see the stamp sets in these bundles just to help you out. So you don’t have to go fumbling through the Catalogue.  NB. I have just added the wood-mount images but they are available as wood and clear mount.  The prices are just for the stamp set only but use the bundle prices as in the table above.

                                             ————————————————————————-
Do you recognise the Bright and Beautiful stamps??? These are a little sneak peak from the upcoming Holiday Catalogue.  This would have to be my most favourite set from the catalogue AND you get the Star Framelits in the bundle.  Gotta love that!
Here is a close-up.  Isn’t it gorgeous???  How nice would it be heat embossed??? I can’t wait to get my set later this week to play.
Bright and Beautiful
Now how can you get your hands on these bundles.  For Australian residents.
1. Email or phone me your order.
or
2.  Shop at my online store.  Head over here NOW to check them out. You can order them and they will be shipped direct to your door.
Thanks for stopping by.  Have a Happy Stamping Day 🙂
Jenny
Classes

BEGINNER’S CARDMAKING CLASSES!

I am starting a new series next week for people who would like to have a go at Cardmaking OR maybe they have lost their MOJO and are having trouble pulling out their stamps again. If you are in the Wollongong area I would love you to join in.  Cardmaking is a lot of fun and brings great pleasure not only to you when you make them but for the special person receiving your card.

SO, maybe you would like to come along or you know someone.  Tell them about it.  Here are the details.

“Classes just for the Beginner – or for someone who wants to kick their MOJO in to gear!!”

During these classes we will go through basic Stamping Techniques such as simple stamping, stamping off, masking, 2 step stamping and many others.

WHEN:  These are run over 2 sessions.

Friday 8th August at 10am or 7.30pm in East Corrimal.

And Friday 5th September 10am or 7.30pm. 

*Can’t make it, we can work out another time.

COST:  $15 per week or $20 for the 2 sessions paid up-front.

RSVP: Wednesday 6th August.


Drop me a comment and I will get back to you with further details shortly.

Jenny

3D projects, cards

BIRTHDAY STEP CARDS!

Last week we had a stamp day with my stamping buddies Leonie N, Andrea and Tracey.  They are always good times.  I have been wanting to make the Block/Step cards you might have been seeing around the blogosphere. I had a chance to make them that day. So here are my versions, then I will share you the link to the instructions.

Firstly, using ‘Amazing Birthday’ stamp set.

P1140117

I used the DSP ‘Sweet Taffy’.  Isn’t it cool?? I love all the bright colours in this pack.  A little brightness and sparkle makes for a HAPPY Birthday.

Now another version. This time for the menfolk. I used the ‘Amazing Birthday’ set again and also the ‘Traveler’ set.

P1140114

I have also used the new In Colors – Mossy Meadow, Hello Honey and Tangelo Twist. I stamped the background on the Mossy Meadow cardstock BEFORE assembling it!!! 😉  Then I stamped the other images separately and cut them out and adhered them on.  I added a silver button and a Linen Thread bow.

Now for instructions.  There are a few tutorials you might find but I found this one on Libby’s blog. Check it out here. Click on the link just a little way down to take you to the template.  I just changed it slightly.  Since our Australian card size is longer, instead of cutting the cardstock to 28cm x 10.5cm, I made the length 29cm.  Which meant I didn’t have to add the extra little strip (10.5cm x 2cm) to join the block card.  So I scored the card on the long side at 3.5cm, 7cm, 10.5cm, 14cm, 17.5cm, 21cm, 24.5cm and 28cm.  Cut and assemble the box as it says in the template. I just added Sticky strip along the small tab that was left on the end and adhered it together.  Hope that all makes sense.  I do love making these.  They are fun.  Now I have done these two I will make some more again soon.

Thanks for stopping by,

Jenny

My DIgital Studio

ANOTHER DIGITAL BON-VOYAGE!!

A month ago I showed you a Bon Voyage card I made with MDS for my son as he headed off to Fiji for 4 weeks.  You can see that card here if you missed it. I can say he has now returned safely. The day after he returned my daughter set off for China as part of a trip with her Dad’s employer. There are over 100 children from countries all over the world.  She will be away for 3 1/2 weeks (One sad Mumma again!).  It is a big adventure for her at only 13 years, but a fantastic opportunity.  So, with her leaving I had to make another Bon Voyage card (I hope this doesn’t become a regular thing!). Once again I turned to MDS to create it.

My Project 52-001

She loves orange and loves daisies so I thought this was fairly close.  She loved it anyway.  The dotty background was a digital DSP (I can’t remember the name of it now).  The stamp set was the digital ‘Enjoy Every Moment’ for the text and the flowers. I added a couple of other digital stamps.  (I really need to make a note of the stamps I use!).   The speech bubble was a punch which I coloured in Tangerine Tango and added a mat in Daffodil Delight.  I was going to add real bling to it but in the end just went for the Digital Rhinestones.

Have you tried MDS yet?  You can always download the free MDS Trial version and have a play to see how it works. Then if you like it, you can download the software and add your digital elements as you go.  Check out the link to the right for my store and you can see there how you can go about downloading it. If you need any help, just ask me. I will try and help you out.

Thanks for stopping by.

3D projects, cards, Masculine

MONEY HOLDER FOR THE BOYS!

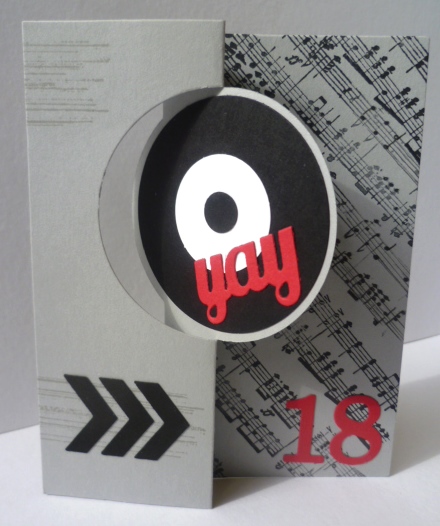
Hope life is going well in your corner of the world??  Here it is cold and windy – but I guess you have to expect that for this time of year.  Yesterday was my gorgeous boy’s 18th Birthday.  I can’t believe how the time has flown.  I thought I would show you the card and gift I made for him.

You might recognise the card???

P1130120

I used this card for my Convention swap a few month’s ago.  Josh loves vinyl records so thought this idea would be really cool for him.  I used the Circle Thinlets Die to cut the Smoky Slate card base.  I used the Music Notes wheel (now retired) to run over the card in Black Stazon.  The black circle was punched with the 2 1/2″ circle Punch and the white inner circle was punched out with the 1 1/4″ circle.  The small black circle was punched with the 2 step Owl Punch.  The ‘YAY’ is cut from Real Red card using the little extras in the Circle Thinlets set.  I could have used the Chevrons in the set too but these ones were punched with the Chevron Border punch.  The ’18’ is cut using the ‘Timeless Type’ Die (now retired).   I stamped the streaks in Smoky Slate from ‘Gorgeous Grunge’ too.

Here is a close-up.  Josh thought it was pretty cool and even at 18 had fun flipping it! 😉

P1130123


Here is the inside with just a simple “Happy Birthday” from ‘Fabulous Phrases’.

P1130127

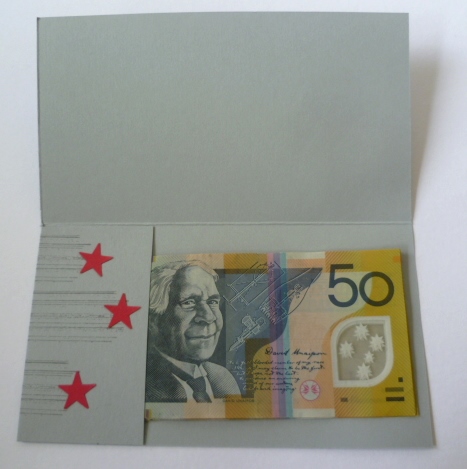
I forgot to take a photo of the Money Holder on it’s own but you can see it in the photo at the top. For this I followed the theme of the Vinyl Record.  I stamped over the front of the card using the streaks and splodges from ‘Gorgeous Grunge’.  The stars were punched from the new ‘Itty Bitty Accents’ pack and the greeting is from ‘Label Love’.  Here is the inside of the Money Holder.  I added some more streaks and stars.

P1130125

I will give you directions so you can make your own Money Holder.  They can just add a little extra to the gift rather than just adding it inside the card.  I didn’t take step-by-step photos but I think it is fairly straight forward  – I hope 🙂

MONEY HOLDER   (The finished pocket is 16cm long)

METRIC

Cut you card 21cm x 16cm.  Score on the short side at 8cm.

On the long side score at 5cm. Cut off the Top Left Hand section. (This will be the smaller tab section)

Add adhesive along the top and bottom of the lower Left Hand section and fold over to create a pocket.

IMPERIAL (These are approximate.  Check your card size – and your money size).

Cut your card to 8 1/2″ (ie the width of the card) x 6 1/2″. Score on the short side at 3 1/4″.

On the long side score at 2″. Cut off the Top Left Hand section. (This will be the smaller tab section)

Add adhesive along the top and bottom of the lower Left Hand section and fold over to create a pocket.


Have a happy day.  I hope to go and create today.

cards, Masculine

HEXAGON HIVE SOCCER INSPIRED CARD!

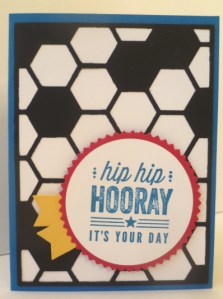
Just a quick post as I race out the door to get this in the mail.  I made this card up for one of my Great Nephew’s 9th Birthday.  I have to get it in the post TODAY!

I realised I didn’t have a lot of stamps for the young boys, but Hey! with the World Cup Soccer that has been around this would work the trick.

P1140001

I cut Black card with the Hexagon Hive Die and layered it on some Whisper White card.  This was adhered to the Pacific Point Card Base.  The greeting is from the ‘Hip, Hip, Hooray’ card kit and stamped in Pacific Point and cut with the 2 1/2″ Circle Punch.  I cut a Real Red Starburst with the Starburst Framelits.  The little yellow flags are punched with the Petite Pennants Punch.

I am sure the inside money would be more appreciated than the outside card so no need to go to too much trouble!! Hope you like it though??

Gotta run, Have a great day 🙂