Uncategorized

A 60TH BIRTHDAY MEDALLION!!

Last week I was invited to a 60th Birthday.  I was really quite honoured to be invited.  It is nice when the people who are your customers become good friends and you are included in such special occasions.  So, I had to make a special card.  I had been tossing around a few ideas for a couple of weeks and then finally a few days before the party I managed to put something together.

?????????????????????????????

I created a paper Medallion from the Quatrefancy Specialty DSP (see below how to do this), and I added a silver ’60’ cut using the ‘Timeless Type’  alphabet dies (retired).  This was layered on 1 1/4″ circle punched in Island Indigo.  The whole piece was a centre-piece on the front of the card stamped with the large image from Daydream Medallions in Island Indigo.  I then added tails with some Pool Party Seam Binding ribbon.  The greeting is from ‘Perfectly Penned’ and then I added a little butterfly cut using the’Beautiful Wings’ Embosslits in Pool Party to finish it off.

How did I make the Medallion??  

There are a few blogs out there with instructions but I found the most helpful was a video by Dawn Olchefske.  You can view it here.

Basically it is taking a strip of your DSP (which is 30.5cm long or 15″).  You score your strip every 1.2cm or 1/2″.  If you use your paper Trimmer you just line your paper up and score every 1/2″ and move your paper along and keep scoring.  It is a lot easier to use the Simply Scored.  Line the paper along the top edge and score down every 1.2cm or 1/2″.

Once you get to the end, then flip your paper strip over keeping the same edge of your paper along the Left Hand side of your Simply Scored (or Paper Trimmer).  Now you will score every  6mm or 1/4″.  Then concertina fold your strip all the way.  Add sticky strip to one end and join the strip into a circle.

Punch a circle from 1 1/4″ cardstock and add Sticky Strip or Hot Glue over the circle.  Gather up your Concertina ring into a medallion shape evenly spreading the folds out and then place your punched circle with adhesive face down on to the centre of the medallion.  This is where you need extra hands sometimes!!!!!  This is the back of the medallion.  Then turn your medallion over and decorate as you like.

There you go.  Add a medallion (or paper rosette) to your next special card.

Thanks for stopping by today,

Jenny
Masculine, Personal Ramblings, Punch Art

FOR A BIRTHDAY BOY!!!

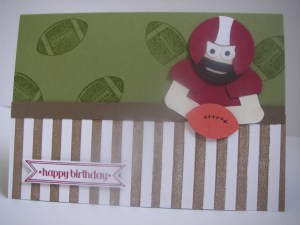
I wanted to show you a special card today for my gorgeous big boy.  I have probably bored you enough about his Football pursuits BUT well it is his 17th birthday today so I have to show you the card I made for him.  I have had a number of people share this idea with me over the last few months.  Thanks so much my friends.  So I only just remembered to use this idea for his card.  This idea originally came from the blogosphere somewhere (sorry I can’t remember where) but recently it was on Pinterest.

KONICA MINOLTA DIGITAL CAMERA

I used Cherry Cobbler which is close to his club colours since I don’t have Bravo Burgundy anymore.  The ‘Fence’ was created by brayering the inside of the Stripes Embossing Folder with Soft Suede and running Whisper White Card through it.  The card was too wide to fit so I cut it in half before embossing it and then joined it together on my Old Olive Card base.  (See you don’t even notice do you???).  I added a strip of Soft Suede card along the top of the fence.

Punches I used for the Football Dude:

1 3/8″ circle, 1 1/4″ circle, 1″ circle, 3/4″ circle, Word Window and 2-step Owl Punch.  I did a little cutting of some of the circles to adapt them to what I wanted.  The Helmet cage took the most work.  It is not quite right but it is OK, although Glenn and Josh thought it was a cool beard!!!!!?????  The stamp sets I have used are ‘Great Sport’ for the football and ‘Itty Bitty Banners’ for the greeting.

I hope you like my cool dude anyway.

HAPPY 17th BIRTHDAY JOSH!!  xx

Here are my gorgeous two this morning.  Love you both xx

P1090482-1

Personal Ramblings

AUSSIE FUTURE STARS IN ACTION!!

WARNING: Personal post ahead.  I am sorry.  I am just taking a moment just to share a family achievement with you.  I apologize in advance for my readers on Facebook as I have shared this there BUT I thought my readers might like to hear about this – or not!!!  Josh has just come back from the Gold Coast, Queensland.  This past week he took part in the Future Stars Gridiron Program.  There was intense training each day and it all culminated in competition games with 5 team from the United States.  On Wednesday he played the US Cougars.  This team was made up of players from High Schools in Indiana, Iowa, Louisiana, Ohio and Texas.  The Australian Future Stars won 40-36.  This was an incredible achievement.  The first time an Australian Team has beaten the US  in 24 year history of the Downunder Bowl.  The Future Stars came up against the US Grizzlies yesterday.  The Grizzlies were made up from players in Alabama, Alaska, California, Hawaii, Nebraska, North Dakota, South Dakota, Utah and Wyoming.   It was a tough game but the Aussies fought hard.  Unfortunately they went down 24-0.  So for my US readers: You still hold the Championship. 🙂

Here is a photo of both of the Grand Final teams: The Future Stars and the Grizzlies.  I think this is a great photo.  It is not often that you get a photo with both teams together after such a hard fought-out game but it shows the great spirit of the game.  Well done to both teams.  Josh is in the centre sitting down in the second row.

2 teams-1

Here he is in action.  #48 on the left hand side. (Both photos courtesy of ‘Bring it on Sports Facebook page)

Josh

OK, thanks for your patience.  See you again soon for some stamping creations.

Jenny

cards

MOSAIC MADNESS FUN!

It’s been over a week since I have stopped by here.  School Holidays are still on so I have been a little busy with other things.  I have done some stamping.  I have been working on a project this week and I am going to put together a tutorial for you.  I am planning on sharing it with you early next week so stop by soon and check it out.

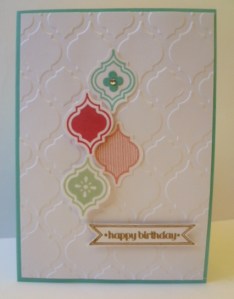
Today though I thought I would show you some cards I made recently using Mosaic Madness.  Isn’t it cool that you get these in a bundle now!  Buy the stamp set and the punch and you save $$$$.  You can find this on p 123 of the Catalogue.

Here are the cards.

I am loving the new In Colors.  They are just gorgeous and I have used all of them on this card. (I just noticed my background to my blog is Coastal Cabana.  How funny is that!).

 P1090342

I added a little flower punched from the Itty Bitty punch set and added a rhinestone to the centre of this. The greeting is from Itty Bitty Banners.  Of course we have a matching Embossing Folder to go with the stamps and punch.  This is not included in the bundle.

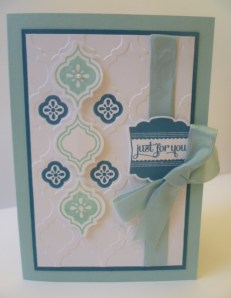
The great thing with this folder is you can emboss and use either side.  They both look great.  I have used the other side on this next card.

P1090348

Island Indigo and Pool Party – it makes any card just right!!!  LOL.  I have added some Pool Party seam binding and the greeting is from Label Love.  This is another Bundle you can get in the Catalogue and comes with the Stamp set and matching punch (see p 33).

A quick post today but I hope you like them.  Stop by early next week for a special project.

Have a great weekend,

Jenny

cards, Catalogues

WILDFLOWER MEADOW IN PISTACHIO PUDDING!!!!

That sounds an interesting title!! It conjures up strange kind of images but I am sure if you are up to date with Stampin’ Up! and the fantastic new Catalogue that has just been released you will know what I am talking about.  I hope!!!  Yes, the Catalogue is now live.  I have been playing around with some new goodies now for a couple of weeks.  That’s just one of the bonuses of being a Demonstrator.  One of the products I am loving is the new set ‘Wildflower Meadow’.  I love that you have a co-ordinating Embossing Folder with the stamp.  You can stamp up the image and then emboss around it creating a beautiful outlined edge.  I shared this card on my Facebook Demonstrator page a couple of weeks ago and realised I hadn’t shared it with you yet.  Sorry about that.  A bit slow here!  Of course I have used one of the new In Colors, Pistachio Pudding.  I love the new subtle colour range of the In Colors this year.  Not that I didn’t like the past In Colors.  I am so glad they have made it in to the core colours now.  Anyway, enough of this.  On with the card.

P1090261-1

I have stamped and embossed the image on Pistachio Pudding, then layered this on to Whisper White and then on to a Pistachio Pudding base card.  I added some Organza ribbon and adhesive Pearls.  Check out the greeting label.  The greeting is from ‘Pennant Parade’ and I have punched it out with the Mosaic Punch.  I am sure you will be seeing a bit more of this too.

I have put the link to the new Catalogue in the Right Hand column so be sure to go and check it out online.  If you would like me to send you your very own catalogue, then drop me a message and I will get one to you.

Thanks for stopping by.  Come and visit me again soon with some more creations from the new Catalogue.

Jenny

Uncategorized

CATALOGUE SHOWCASE WITH WILDFLOWER MEADOW!

Today I held my Catalogue Showcase and I just had to stop by and show you what we made.  It was a fun time and I was so grateful that so many came out despite the constant rain we have had for a week now!!

There are so many gorgeous new products but I had to use the set ‘Wildflower Meadow’.  It is a beautiful stamp and to have a matching Embossing Folder is fantastic!  Of course we used the new In Colors too.   Here is the card.  It is very simple but having the embossing just adds that little texture to it with very little effort.  It is a bit hard to tell in the photo though.  I have used Crisp Cantaloupe here but everyone could choose the colour they liked to.  The greeting is from ‘Sketched Birthday’ and stamped in Baked Brown Sugar.  Don’t you just love the names!!  I have cut it out with the Itty Bitty Banners die and layered on a Baked Brown Sugar piece underneath.  A little linen thread bow finished it off.

P1090316

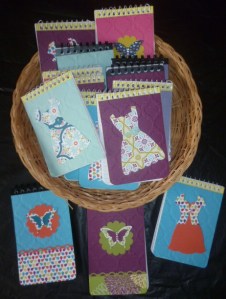
For everyone that came I covered little notebooks.  They can use them for their wishlists perhaps???  Or anything really!

P1090319

I had 2 different designs.  They were all covered with card that had been run through with the Mosaic Embossing Folder.  One design had a strip of DSP.  I then punched a 1 1/4″ scallop circle and layered a butterfly with the Elegant Butterfly punched with matching DSP and then a Bitty Butterfly punched with coordinating card.  Some Rhinestones finished them off.  The other one I simply cut a dress from the Dress Up die in DSP and then dressed it up with a punched flower and pearls.  I think everyone liked them.

I have made some other cards using the ‘Wildflower Meadow’ stamp that I will show you soon.

I hope you are dry where you are?  I am looking forward to some sunshine to dry everything out.

Thanks for stopping by,

Jenny

cards

VELLUM SWALLOWTAIL!

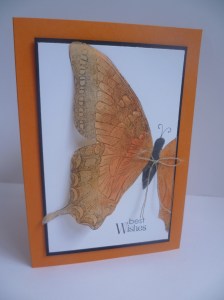
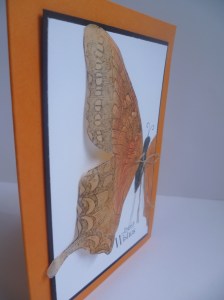
I held a class a couple of weeks ago using vellum.  I think everyone loved the projects.  I will show you them eventually but I first wanted to show you this card.  This was a card I made as a sample of one of the ways of using vellum.  I used the Swallowtail stamp from the Seasonal Catalogue.  I love this big butterfly.  I am so glad it has made the new annual Catalogue.  I plan on doing a lot more with this one.

P1080345           P1080342

I love the 3D effect with this.  It was purely unintentional but I like it!

I have used the Stained glass technique.  I stamped the Swallowtail stamp with Stazon on Vellum then coloured the back of the image with Pumpin Pie Marker almost to the edge of the image.  (Be sure to colour the back to give it a softer effect).  I used the Aquapainter to lightly blend the colour out at the edge and that lightened the colour.  I coloured the antenna with Black Marker also. I cut the butterfly out when it dried (that didn’t take long) and it curled up a little.  I was a little disappointed at first but then thought it added dimension to the image. I cut down the right side of the butterfly to fit the Whisper White mat (which I had already adhered to the Black mat and to the Pumpkin Pie Base card).  I adhered the butterfly on the right side and under the antenna and added a couple of glue dots under parts of the left hand edge just to adhere it down in places.  I added some Linen Thread and the greeting is from Petite Pairs.

I hope you like the effect.  I was pleased with how it turned out.

Some more vellum projects soon so stay tuned.

Hope your staying warm and dry for those on the East Coast of Australia.  It is wet AND cold!!!

Jenny 

Uncategorized

SPONGED ‘BY THE TIDE’

P1090314-1

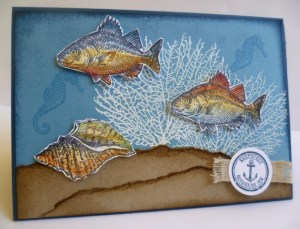
At our team meeting on Wednesday night Sarah showed us how to create this card using ‘By The Tide’.  As usual I didn’t finish it then but managed to finish it today.  (Fancy that not only do I finish I card from a team meeting BUT I post it the day I finished!!!). The base card is Midnight Muse and it is all stamped on Marina Mist card.  The coral is stamped in versamark and embossed with white Embossing Powder. The “sand” edges are torn strips of Crumb Cake and sponged over with Soft Suede.  I added a little extra sponging around the edge of the card with Midnight Muse and added a couple of seahorses in the background stamped with Marina Mist. The fish are stamped in Stazon on Whisper White card and coloured with a blender pen and inkpads. I added the tag from the set too punched out with the 1″ circle punch and some burlap style trim.

You did good Sarah 😉

Thanks for stopping by,

Jenny

cards

A SPECIAL DOILY DRESS!

I can finally show you this card now.  I made it a couple of months ago for my Niece’s 19th Birthday. I think it is safe to show you now.  🙂

Megans Dress card

The dress is made from 2 Tea Lace Paper Doilies.  I found the idea for the folding on Becky’s blog.  I thought I could show you the folding but why not stop by Becky’s blog here and you can check it out!  I tied around some Island Indigo satin ribbon from Sale-A-Bration.

I have layered the dress on a piece of Island Indigo card that I ran through the Big Shot with the Vine Embossing Folder.  The bottom edge was cut with the Adorning Accents Edgelits.  I stamped the greeting in Island Indigo using the Curly Cute stampset.  If you want to get hold of this set you better be quick.  You only have just over a week and it will be GONE!!!!

I’m glad I can finally show you this card. I think it was well-received????

See you again soon,

Jenny