cards, Techniques, Tutorials

KISSED BUTTERFLIES

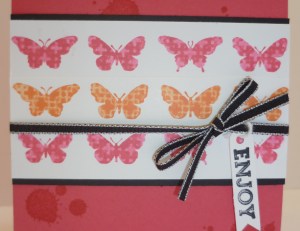
Have you kissed lately??? Your stamps – what else would I be talking about!!!  Here is a recent ‘Kissed’ card I made using the’ Butterfly Collection’ wheel.

P1090660

I have used Melon Mambo and Pumpkin Pie.  The other stamp sets I have used are ‘Gorgeous Grunge’ and ‘Oh Goodie’ which is a sneak peak at a stamp set in the upcoming Holiday Catalogue.

This card was inspired by a project in last month’s Demonstrator magazine.  I really liked the effect so I thought I would give it a go, and I thought I would share with you how to do it too.  So, let’s get kissing!!!

KISSING YOUR EMBOSSING FOLDERS

1. Firstly, take an Embossing Folder with a small print on it.  I have used the Square Lattice folder.  Run a piece of scrap Whisper White card through it.

P1090656

2.  Ink up your wheel and run your wheel over the card.  Alternatively, ink a solid image stamp and stamp on the embossed card.  This is taking off some of the ink on your wheel or stamp.  OK now you are thinking,  Why can’t you wheel or stamp directly on to the Embossing Folder.  You can but it doesn’t give you such a defined impression.  Try it and see.  (I did!!).  It really pays to do the extra step.

P1090657

3. Run your wheel over a second piece of Whisper White card that you are using for your finished card.  You will see the embossed print on your stamped image.
P1090658

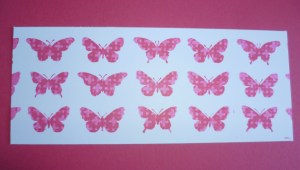
4. For the finished card above, I inked up the wheel in Pumpkin Pie and repeated the steps.  That is I ran it over the scrap Whisper White.  You can use the same piece you already used it doesn’t matter as you are just wanting to take off some of the ink.  Then wheeled it over another strip of Whisper White card.  I cut the middle row of butterflies out and adhered them over the Melon Mambo piece I had previously inked.  (As in Step 3).
P1090660-1

For the card I finished it off with some black Taffeta ribbon.

I hope you like this technique.  Now go and get kissing your stamps – and Embossing Folders.

Have a great weekend,

Jenny
cards

BUTTERFLY COLLECTION

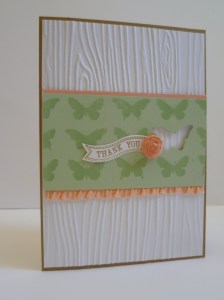
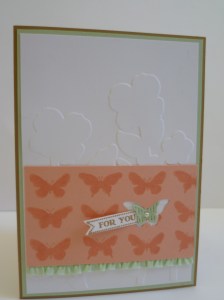
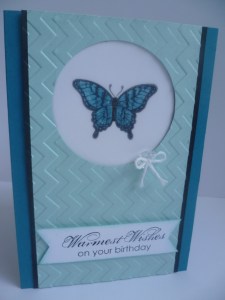
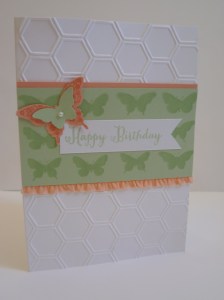
Last week I had a play with the new wheel ‘Butterfly Collection’.  I haven’t used wheels a lot so it was fun to play around.  The great thing is that this wheel co-ordinates with a number of stamp sets already and the butterfly punches. Who doesn’t love butterflies?? On these cards I have used the current In colors of Crisp Canteloupe, Pistachio Pudding and Baked Brown Sugar.

P1090665

This one was inspired by a card on Pinterest by Heather Owens.  I changed the colours using the current In Colors.  I have also used ‘Papillion Potpourri’ and ‘Remembering your Birthday’.

P1090662

On this one I used the woodgrain Embossing Folder on the Whisper White card.  The greeting is from Itty Bitty Banners.  I added a flower made from the Paper clay and coloured it with the Aquapainter and Crisp Canteloupe inkpad.  I adhered the flower using the multi-purpose glue (Tombow).  I find that the most effective adhesive.  Don’t you love the pretty ruffled ribbon.  It is so soft – and stretchy!  I love how the Itty Butterfly punch fits nicely with this wheel.

P1090663

This one was the Make and Take we did at the workshop on the weekend.  Many of them used the Woodgrain Embossing Folder on the Whisper White which looked really good.  I have used the ‘Beautiful Butterflies’ sizzlits.  It’s so nice that everything works together.

I have another card to show you using the wheel and a tutorial of how to create it.  I will show you that next time so make sure you stop by.

Thanks for visiting today.  Why not drop me a comment and tell me where you are from.  I would love to hear about you.

Jenny

cards

SUMMER STARFRUIT MOSAIC

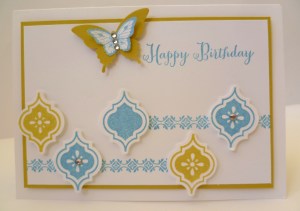
This card was inspired by a card I saw on Pinterest.  This is using Mosaic Madness, Papillion Potpourri and the greeting is from Remembering your Birthday.  The funny thing is I would never have thought to use Summer Starfruit and Marina Mist together and when I have just gone back to the original photo now I see she didn’t use those colours. I think she used Coastal Cabana and Pistachio Pudding.  (OK, it was a small picture and I was going by memory!)  I quite like this colour combination I used though.  I will store that away for future reference!!

P1090651-1

Have yourself a great weekend.  The weather is turning out really nice again here.  I think I can handle this ‘Winter’ weather we are having at the moment as long as the wind stays away.

Stop by again soon,

Jenny x

cards, Masculine

“BLUE RIBBON CONGRATS”

One of my Nephew’s recently graduated from University so I wanted to make a card congratulating him.  I didn’t think I had a ‘Grad’ stamp but then I remembered the Blue Ribbon stamp set.

P1090561

It is a hard to tell by the photo but I clear embossed the ‘Congrats Grad’ after I stamped it in Black. So it has a nice shine to it.  This was punched out with the 1 3/8″ circle.  The Scallop was stamped in Pacific Point and punched out with the 2 3/8″ Scallop Circle. The tail outlines were stamped in Pacific Point and then I stamped the words over it with Black.  The Whisper White card was embossed with the Chevron Embossing Folder. This was layered on a Basic Black mat and then a Pacific Point card base.   I have added some Black Taffeta ribbon.  It doesn’t hurt to add a little bling on a boy’s card either does it???

Thanks for stopping by today.  I hope you can visit me again soon.

Jenny

My DIgital Studio

A FAMILY HOLIDAY PAGE!

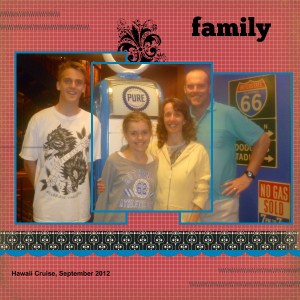
Just a quick post for you.  I really, really should be going to bed RIGHT NOW!!! It was an early start this morning to go to Sydney for the Stampin’ Up! ‘My Digital Studio’ training day.  It was a lot of fun but I have been staring at a computer screen all day.  When I got home tonight though I was really inspired and wanted to create something.  I have been following along with Heather Summers My Digital Studio videos so I thought I would try this technique out.  This is not something we did today but it was fun to try this out.

Hawaii Cruise-001

This is a special family photo taken of our holiday to Hawaii last September.  This technique creates an overlapping of the photos.

Hope you like it!!

Jenny 

cards, Techniques

STAINED GLASS BUTTERFLY!

I realised I hadn’t shown you this card.  We made this at my Vellum class a couple of months ago. This is the stained glass technique on Vellum.

P1080347-1

The stained Glass technique is very easy to do.  Simply stamp on vellum using black Staz-on.  Then on the back of the vellum, colour with markers.  You can use different colours if you would like to.  Leave it to dry a little and then assemble your card.  For this card I have used one of my favourite combinations of Pool Party and Island Indigo.  I ran the Pool Party piece through the Big Shot with the Chevron Embossing Folder and layered this with some black card.   I simply added a greeting from ‘Blooming with Kindness’ and added a button and Whisper White Bakers Twine.

Thanks for stopping by today.

Have a good weekend,

Jenny

Stamp At Home Kits

‘STAMP AT HOME’ KITS LAUNCHES!!!!

I am excited.  From today I am going to start offering ‘Stamp At Home’ Kits for you.  Life gets busy and I have had so many people say to me that they would love to come to classes but the times don’t suit, or they are just too busy, or  they would love to create at home but they don’t know where to start.  SO, let the class come to YOU!!!  

These “Stamp At Home’ kits contain all the card cut, the embellishments and step-by-step instructions to create 6 cards (2 each of 3 different designs).  You use your own stamps, ink and adhesives.  I suggest stamps and colours that you can order separately if you wish.

August ‘Stamp At Home’ Kit.

P1090527 

Includes card, ribbon and step-by-step instructions. to create 6 cards (2 each of 3 designs).   HINT:  Check out my last post and you will see a full view of one of the cards 😉

$15 + postage to mail out if you need me to.  

(Australian residents only)

Orders must be in by Friday 16th August and will be posted just after that date.

I have used the ‘Flower Shop’ Stamp set.  You can use a similar flower stamp set.   The colours are the current new In Colors.  If you wish to order any of these additional items then let me know.

Flower Shop  Bundle – Stamp set and coordinating punch. These can be ordered separately.  Ask me for individual prices.  As a bundle you save 15%.

(W)  $60.95                   (C) $54.25

In Colors  2013-2015.  Cardstock and Pad Kit  $47.95.  Or buy the colours individually.

Sentiment Stamps – A Dozen Thoughts (W)  $46.95       (C)   $36.95.  Any sentiment set would be suitable.

Any questions, please ask but I am sure you will enjoy these card kits.

Jenny

cards

FLOWER SHOP AND PANSY PUNCH!!

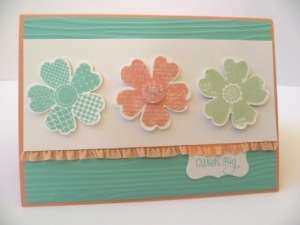
I loved the new set ‘Flower Shop’ in the catalogue.  Do I really need another flower stampset??? OH YES!!!! I love the flowers in this set AND to have a matching punch.  Awesome! No fussy cutting these pretty babies!  I have been playing around with this set recently.  Here is one of the cards with the gorgeous In Colors.

P1090530

The sentiment is from ‘A Dozen Thoughts’ which I have been playing with.  I punched the sentiment out with the Curly Label Punch.   Don’t you love the ribbon?  This is the Ruffle Stretch Trim in Crisp Cantaloupe.

I will tell you though punching the flowers out can be a little frustrating as they are not symmetrical. It takes a little fiddling to line it up each time.  I found a couple of videos on my blog travels to help line up the stamps in the punch.  The one I saw was by Connie here.  You can stop by there and check it out but  I have done out a written tutorial for you if that helps.

USING THE FLOWER SHOP AND PANSY PUNCH TOGETHER

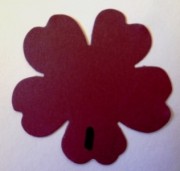
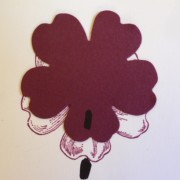
1) Make a mark at the bottom edge of your flower punch.  Punch a flower from scrap card.  When you take it out of the punch, don’t turn the punch-out around.  Lay it down and make a mark at the bottom of the punch.  You know that point will always be to the bottom.

P1090540

2) Stamp a flower on White card.  Line the punched flower over the stamped flower until you get it to match up.  There are particular markings on the punch and flower that enable you to see where it fits best. You have an extra divet in the flower so look out for that. (By doing these steps it enables you to see where to line it up each time so you don’t have to try turning it and twisting it in all directions each time! Believe me I know!!).  Once you have the place then mark that on the stamped image.

P1090550

Here I have just pulled the punched out flower up so you can see what I mean.

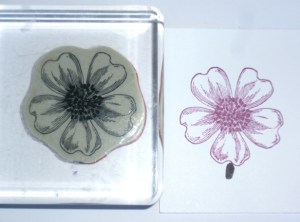
3) Place the stamped image over the stamp to line it up with that.  (You could probably just place the punch-out over the stamp but it can be a bit easier having the stamped image to go by).

P1090509

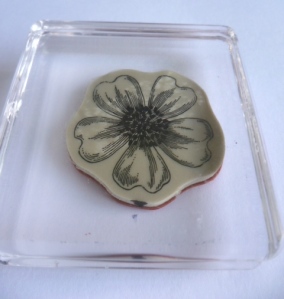
Once you have it lined up, place a mark on the stamp with a permanent marker like I have shown.  You know this goes on the bottom of the punch each time.

From the top of the block.

P1090494

From the side of the block: You can do this whether it is wood-mount or clear-mount.

P1090511

4)  Now when you stamp the flower, stamp it with the mark on the rubber stamp closest to you ie at the bottom.  Pick up the stamped image and punch out straight away without turning it.

5)  You will need to mark each of the stamps in the same way.  This does take a little time initially but believe me, it saves a lot of time and frustration each time you stamp!!!!

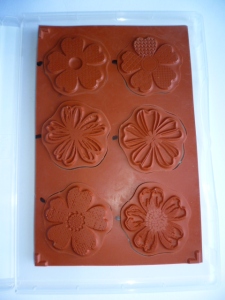
ANOTHER TIP: I have marked the rubber insert in my clear case with marks so that when I put the stamps away I don’t have to turn and twist them each time to get them to fit the right way.

P1090492

I hope this is helpful to you.

Just a note on the card above too.  This is a little sneak of one of the cards you can make in my card kits being released later this week.  Stay tuned for more details.  🙂

Have a good day,

Jenny