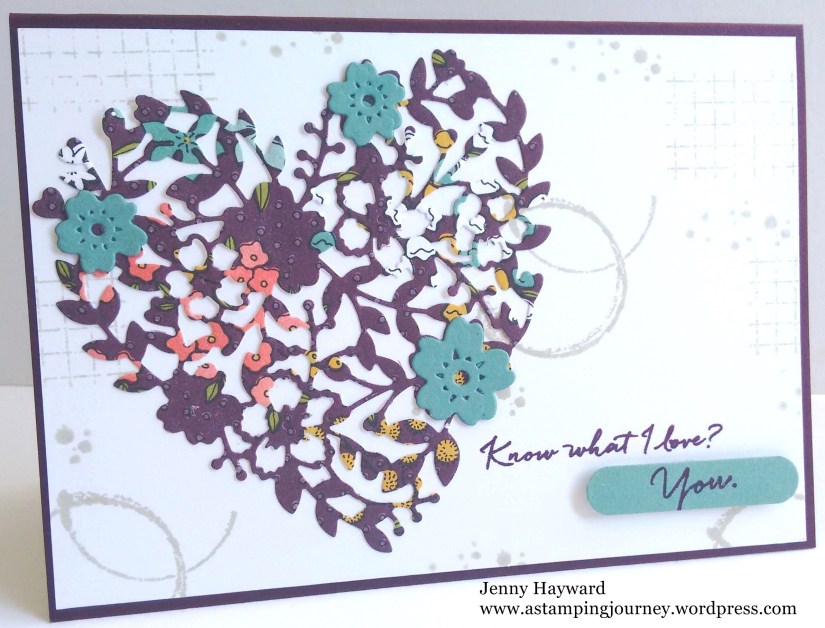
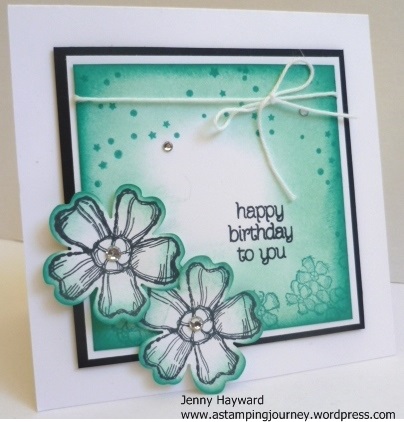
I loved the new set ‘Flower Shop’ in the catalogue. Do I really need another flower stampset??? OH YES!!!! I love the flowers in this set AND to have a matching punch. Awesome! No fussy cutting these pretty babies! I have been playing around with this set recently. Here is one of the cards with the gorgeous In Colors.

The sentiment is from ‘A Dozen Thoughts’ which I have been playing with. I punched the sentiment out with the Curly Label Punch. Don’t you love the ribbon? This is the Ruffle Stretch Trim in Crisp Cantaloupe.
I will tell you though punching the flowers out can be a little frustrating as they are not symmetrical. It takes a little fiddling to line it up each time. I found a couple of videos on my blog travels to help line up the stamps in the punch. The one I saw was by Connie here. You can stop by there and check it out but I have done out a written tutorial for you if that helps.
USING THE FLOWER SHOP AND PANSY PUNCH TOGETHER
1) Make a mark at the bottom edge of your flower punch. Punch a flower from scrap card. When you take it out of the punch, don’t turn the punch-out around. Lay it down and make a mark at the bottom of the punch. You know that point will always be to the bottom.
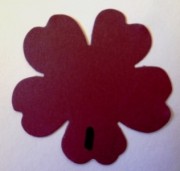
2) Stamp a flower on White card. Line the punched flower over the stamped flower until you get it to match up. There are particular markings on the punch and flower that enable you to see where it fits best. You have an extra divet in the flower so look out for that. (By doing these steps it enables you to see where to line it up each time so you don’t have to try turning it and twisting it in all directions each time! Believe me I know!!). Once you have the place then mark that on the stamped image.
Here I have just pulled the punched out flower up so you can see what I mean.
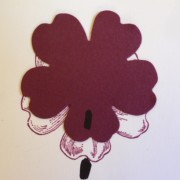
3) Place the stamped image over the stamp to line it up with that. (You could probably just place the punch-out over the stamp but it can be a bit easier having the stamped image to go by).

Once you have it lined up, place a mark on the stamp with a permanent marker like I have shown. You know this goes on the bottom of the punch each time.
From the top of the block.

From the side of the block: You can do this whether it is wood-mount or clear-mount.

4) Now when you stamp the flower, stamp it with the mark on the rubber stamp closest to you ie at the bottom. Pick up the stamped image and punch out straight away without turning it.
5) You will need to mark each of the stamps in the same way. This does take a little time initially but believe me, it saves a lot of time and frustration each time you stamp!!!!
ANOTHER TIP: I have marked the rubber insert in my clear case with marks so that when I put the stamps away I don’t have to turn and twist them each time to get them to fit the right way.

I hope this is helpful to you.
Just a note on the card above too. This is a little sneak of one of the cards you can make in my card kits being released later this week. Stay tuned for more details. 🙂
Have a good day,
Jenny