cards

TUNNEL CHRISTMAS CARD

Here is the Tunnel Card we created at my Sparkly Christmas Class last week.  You might have seen these around your Blog Travels.  I am going to share the instructions below so you can create your own version, so read on!

Here is the inside of the card.

I have used the Framelits Labels to cut the centre out.  I stamped the cute greeting from ‘More Merry Messages’ and cut it out with a smaller Labels Framelits.  The DSP strips either side are from “Be of Good Cheer” DSP.  The little pinecone and leaves from ‘Lovely as a Tree’ are stamped in the corners.

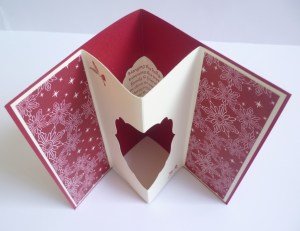
You can see a top view how it opens out. Isn’t it cool!!
Here is the front of the card.  I kept it plain as we were focusing on the inside.
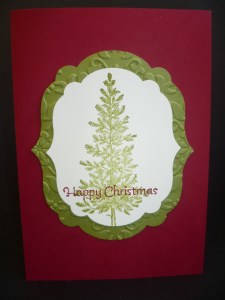
I cut a larger Labels Framelit in Old Olive and ran it through the Big Shot with the Vintage Wallpaper Embossing Folder.  I really think the tree could have some Dazzling Diamonds on it to give it some bling.  I think I will add that later.  The greeting is from ‘More Merry Messages’.

So, here are the instructions for you to make your own.

TUNNEL CARD (This is in metric).

Cut a standard card size base:  ie 14.8cm x 21cm, score this at 10.5cm.

For the inside: Card size is 14.4cmx20.6cm.  Score this at 5.2cm, 10.3cm and 15.5cm.

If you wish to add Patterned Paper strips, these measure 4.7cmx14cm.

You can create any shape window in the centre of the inside card, either cutting a square or using the Big Shot with the Framelits (the Big Shot is much easier!!).

On the inside card piece, adhere only the 2 outside sections onto the card base.  Don’t add any adhesive in the middle section or it won’t pop out!

*This card can be decorated any way you desire.  The inside piece could be entirely of Patterned paper.  It’s all up to you!!

So off you go and make your own now.

Why not show me your version.  I would love to see it.

I am heading off in the morning to the Stampin’ Up! Heartfelt Event in Sydney.  I can’t wait to meet up with some stamping friends and be totally blown away with all the inspiration there.  That’s always what happens anyway!  I will  tell you all about it next week.  I will show you my projects I have created for the Inspiration Boards too.

Have a good weekend,

Jenny

cards

“SPARKLY CHRISTMAS”

Firstly I would like to say that if anyone out there is responsible for speeding up the clock, please revert it back. Thank You. Or even make it a little slower would be nice!!! I don’t know where the time is getting to but it is certainly flying past at an almighty pace.  Are you finding this???  We have reached the crazy time of year, end-of-year Dance Performances and extra practices that go with that, End-of-Year school presentations (and Final Year 6 events too), throw in a few extra stamping classes as well.  As for Christmas shoppping HA! Let’s not go there right now!  Anyway, I’m sure you are feeling the same too.  So you don’t want to hear about my happenings.  You have enough to deal with.  So, onto what you really came for – A CARD (or 2!).

The week before last I held my ‘Sparkly Christmas’ Class.  That was a lot of fun.  We all got glittery but learnt some fun techniques in the process.  Here are 2 of the cards we made.

This one was inspired by my lovely friend Andrea.  This is using the Dazzling Dust technique, I think!!! It is Really very sparkly.  It’s a shame it doesn’t capture it too much in the photo.  It is much better IRL!

This next one was inspired by Colleen here.  This is my version.

I have used the ‘Delicate Designs’ Embossing Folder along the bottom.  The Snowflake was cut from the Silver Glimmer Paper using the Snow Flurry Die.  It is SO sparkly.  I wish I could show that to you!!!!  Photos just don’t do them justice sometimes! This is such a simple card but I think so elegant.

We did a third card – a Tunnel card.  I will show that to you next time.

As for me, I must now dash – school pickup, swimming training for Carlie, Football training for Josh!!

Catch you sometime soon,

Jenny

cards

“ANOTHER SCENTSATIONAL WINDOW!”

I wanted to show you this card we made a few weeks ago at a workshop.  Thanks Deb :).  I have been having fun with this stamp set ‘Scentsational Season’.  How easy is it when you have the co-ordinating Framelits??? – No scissors involved!!!

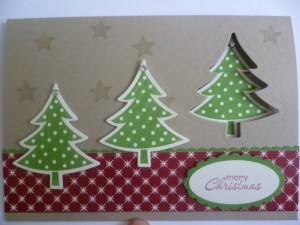
Here is the card.  I CASED this from Fiona Whitten on our Stampin’ Connection forum for Demonstrators.  I just changed a couple of little things.

I love the little window created with the tree.

I will give you the details:

CARD: Crumb Cake, Gumball Green, Very Vanilla, Be of Good Cheer DSP.

INK: Gumball Green, Crumb Cake, Cherry Cobbler.

STAMPS: Scentsational Season, Petite Pairs.

OTHER: HOLIDAY Framelits, scallop oval punch, oval punch, Dotted Ribbon Punch, Rhinestones.

Just a couple of tips:

– Once you stamp and cut the trees, line them up on your card front so you roughly know where to cut the tree.

– It is easier to push the tree through the window at the front to position it rather than trying to line it up from inside.

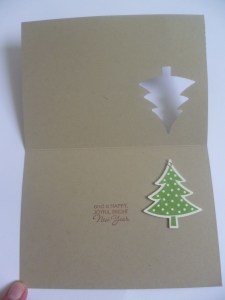
Here is the inside of the card if you want to see.

The inside greeting is from Petite Pairs.

Thanks for looking.  My bed is calling me …….

Come and visit again soon,

Jenny x

Personal Ramblings

“HAYWARD’S HAWAIIAN HOLIDAYS”

Finally back here to share some photos with you from our recent holidays to Hawaii.  Sorry it has taken a while.  With over 1000 photos it took some time to upload them and sort them – and pick out “a few”.  I don’t want to bore you with too many so I have just picked out ones that you might be interested in!!!

So, sit back and enjoy the slideshow.  Here is “Hayward’s Hawaiian Holidays!”

This slideshow requires JavaScript.

Thanks for indulging me.  I tried to keep it brief but there was just so much to show.  🙂

Now I will move on to sharing my creations.  I have been working on a lot of Christmas projects so I will be back to show you them shortly.

Until then,

Jenny x

Uncategorized

HOME AGAIN!!!

I am back home again after a fantastic holiday.  We had a great time away but it is so nice to be home again. I will share photos once I get myself sorted.  It’s back in to our school term now and I have lots of classes and workshops coming up.  But it’s all good!  When I was thinking of how good home is it made me think of a card I made quite some time ago.  (Ok, nearly a year ago but Ssh!!).  I made this card for a special friend who was moving house and wanted to make something special for her.  This took me a while but I loved the end result.  This card was inspired by a card I saw by Jackie Topa but I can’t find the actual one now.  I have just added some little “extra’s” to it.

Here is my card.

I have sponged clouds in the background.  I made a mask using 2 scallop ovals punched out with scrap paper and adhering them to the card with Dotto.  I sponged with Baja Breeze and moved the oval masks in places.  The little scallop edge under the triangle roof was made using the Scallop Dotted Ribbon punnch. I sponged each piece that I punched out: the flowers, roof, leafs, grass.  For the grass, I punched out a strip of Old Olive with the Scallop Edge punch and then moved it along slightly in the punch and punched out again to create a jagged edge.  Other punches used: Boho Blossoms Punch, 2 step Bird Punch, Modern Label Punch, Word Window Punch, Owl Punch (circle for the “hole”).  I also used Old Olive Taffeta ribbon, and some Dazzling Diamonds for the flower centres.

Thanks for stopping by today.  I love to have you visit me.

See you again soon,

Jenny x

cards

‘CANDY CANE WINDOW’

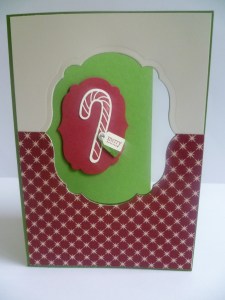
A couple of weeks ago I was playing around with the Framelits ‘Labels’.  I wanted to create a window in the card front to have an image peeking through.  Here is what I came up with.  I used the fun Christmas set ”Scentsational Season”.

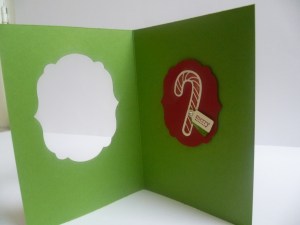
Here is the inside view.

CARD: Gumball Green, Very Vanilla, Cherry Cobbler.  A Good Cheer DSP. I was going for very traditional colours here taking the colours from the DSP.

INK: Cherry Cobbler.

STAMPS: Sensational Season, Lots of Tags.

OTHER: Framelits (Labels), Jewellery Tag Punch.

I like the idea of having a window in your card.  You get to enjoy the main image even when it is open.

Thanks for looking.  We are leaving Hawaii tomorrow.  We have just had one last swim at Waikiki.  It has been a wonderful time but I am looking forward to getting back home and stamping again.  I hope to get some photos up soon from our time here.

Until then!!

Jenny

cards

BLOOMING WITH KINDNESS ON WHITE!

Aloha!! Have you missed me???  I have been cruising around the Hawaiian Islands this past week.  It is such a beautiful place and the people are so friendly.  I have taken SO many photos and I will share some with you when I get home.  I just thought I would pop by and send you a post so you don’t forget me too quickly 😉

Here is a card I created a couple of months ago now with ‘Blooming with Kindness’.  (Not the best photo   It seems a bit washed out.  Sorry I can’t take another photo now!!) I really love the detail in the flower.  So many ways you can use this flower.  I used this stamp at Leonie N’s.  when we were having a stamping day.  I have CASED this from somewhere and now I really can’t remember.

I have cut 3 rectangles in Cherry Cobbler, Basic Gray and Old Olive.  I used some non-permanent adhesive to adhere the 3 pieces together on scrap card and then stamped the flower randomly over them.  I then adhered them to the bottom of a Whisper White card piece.  The flower was then stamped again above these.  Each time I used Black Staz On.  The greeting is from ‘Fabulous Phrases’.  I add this all to a whisper White Card base after tying around some Cherry Cobbler Seam Binding ribbon.  A pearl was added for a touch of elegance.

Thanks for stopping by.  For now, I’m off to the beach  Sorry!  🙂  I will stop by and post again soon.

Jenny x

cards

“MUNCHED GINGERBREAD”

Just a quick post today.  School holidays start today and we are heading off to …………..HAWAII!!! I can’t believe today is here.  We have been planning this trip for a year.  We have a few final things to pack and last minute rush around getting hair cuts.  Leaving things to the last minute here!!! 🙂  Anyway, I wanted to show you a quick card before we leave.

I had a lot of fun making this card.  I CASED this off our Demonstrator Facebook group.  Now I can’t remember who the original creator is – Sorry.  Let me know if you recognise it.

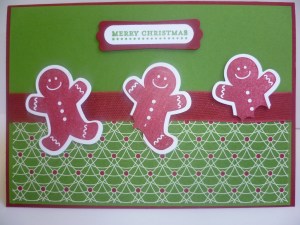
Isn’t it cute??  I have used the set ‘Scensational Season’.  This was made in Gumball Green and Cherry Cobbler and the ‘Be of Good Cheer’ DSP.  I have “munched” the gingerbread with the scallop circle punch.

Why not make your own “munched Gingerbread” card??

I hope to stop by occasionally and give you a few travel reports.  I don’t want to bore you too much though. 🙂  I have some cards that I have planned to show you too so don’t forget to visit.

Until then, Mahalo (Thank You and Good Bye)  – see I am learning the lingo already!!

Jenny

cards

BETSY’S “THINKING OF YOU”

‘Betsy’s Blossoms’ was one stamp set I had to get when the new catalogue came out.  I had seen quite a few cards posted in the blogosphere and loved the ideas.  This is the first card I made with this set a few weeks ago.

I CASED this card from Splitcoaststampers and just changed the colours. I used some of the new In-Colors: Midnight Muse, Summer Starfruit and Raspberry Ripple.  For the bird I stamped it twice on scrap Whisper White card first in Midnight Muse and then in Summer Starfruit.  I cut just the wings from the Summer Starfruit one and adhered them over the Midnight Muse one.  I was being lazy with the small flowers.  After I stamped them I punched them out with the 1″ circle punch (I think it was 1″???).  No cutting out around all the flowers for me!  I stamped the leaf stem on scrap Whisper White card and I did cut that out myself.  🙂 The greeting is from ‘Curly Cute’ and stamped in Midnight Muse.   I liked how this one turned out.  I wasn’t sure about these In-Colors but they work well together.

Thanks for looking.  Stop by again soon and I can show you some more creations I have been working on with stamp sets from this new Catalogue.

Jenny x

cards

“RASPBERRY RIPPLE MEMORABLE MOMENTS”

Last weekend I had my Catalogue Launch and big sale day.  It was a huge day.  We had a few challenges along the way but we got there.  As usual I was so busy and forgot to take photos of the fun But I think I can say we all had fun!!! 🙂

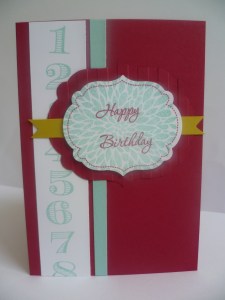
We had a play with some of the new products and everyone got to make a card to go home with.  Here is the card that everyone made.  I CASED this card from one I saw on Pinterest.  The original creator was Jill from Jill’s Ink.

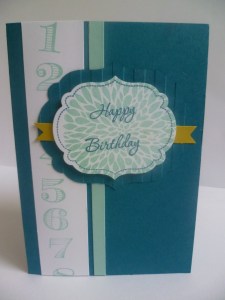
This is using some of the new In Colors: Raspberry Ripple and Summer Starfruit.  I have also used Pool Party for the card strip down the card and the stamping.  We used the new set Memorable Moments – a very versatile set.  One advantage of being in clear mount is the numbers could be mounted together down a clear block and stamped in one go.  Just a tip though, stamp it on scrap paper first to check that they are fairly straight and facing the correct way.  Don’t ask how I know??  I cut a larger Framelit Label and embossed it with the Stripes Embossing Folder.  The stamped blossom on the Framelit Label is from Betsy’s Blossom. We did a couple of other colour variations using the other In Colors.  We kept the Pool Party and the Summer Starfruit to co-ordinate with it.   Here is the version in Island Indigo which was popular on the day.  Don’t look too closely.  I was a bit out with the blossom in the middle of this Framelit.  It is a good idea to stamp the blossom first then line up the Framelit around it.

I made up some Thank You bags that had a few little goodies in too.  I kept it very simple as it was the day before when I did these.

Here is a close-up of the tag so you can see.  I have used the DSP from ‘Story Time’ and punched a flower out with the Blossom Punch.  The ‘Thank U’ is from Pennant Parade stamped in Rose Red and layered on a Rose Red Circle.  It was very quick and easy.

Stay tuned for some more projects I have been making with some new Catalogue goodies.

Thanks for stopping by.  Until next time,

Jenny