cards, Masculine

“MEMORABLE MOMENTS 50TH”

Have you checked out the new Catalogues yet???  There is some great things in there, isn’t there?? Oh, what to choose first!  I have put the links to the Catalogues in my sidebar so you can click on there and check it all out Online if you haven’t already had a chance to.  Why not get your very own copy?? Isn’t it nice to lie in bed and drool over that Catalogue?? Although that does effect the sleep as you lie awake dreaming up ideas!  Am I the only one that does that??  If you would like me to send one out to you then drop me a comment and I can get back to you to arrange your very own one to be sent to you.  The Catalogue would cost $12 which includes shipping to anywhere in Australia.

Anyway, you have come here to check out cards not read about my ramblings.  Here is a card I created a couple of weeks ago.

I wanted to play around with the Core’dinations Cardstock.  This is really cool stuff.  I have embossed it with the Woodgrain Embossing Folder and then sanded it lightly with the ‘new’ sanding system.  The paper strips are from the DSP pack ‘Patio Party’.  I have stamped on the leaf image from ‘Just Believe’ in Crumb Cake onto the Card base.  I stamped the Framelit border from ‘Memorable Moments’ and cut it with the Framelits die.  Happy Birthday is stamped in Crumb Cake and the ’50th’ is stamped in the new In-Color Midnight Muse.  I added a Vintage Brad to finish it off.

I think this set ‘Memorable Moments’ will be very useful.  How many times do you need a numbered birthday and this set has the ‘nd’, ‘th’, ‘st’ and ‘rd’ that you quite often need!

I did enjoy making this card and playing around with my new toys.  I have lots to show you.  I have been creating up a storm over the last couple of weeks.  I have my BIG Catalogue Launch and Stamp sale on tomorrow so I will show you these next week.  It is going to be a big day tomorrow with 18 ladies coming along, but it is always fun stamping with friends.

Thanks for stopping by,

Jenny x

cards

“GOOD-BYE EXTREME ELEMENTS!”

This is another stamp set I am very sad to say Good-Bye too.  I think this is a fantastic set for those ‘hard-to-do’ male cards.  I have used it SO much.  Here is a card we did probably late last year now but I don’t think I have shown it to you.

Card: More Mustard, Cherry Cobbler, Whisper White.

Ink: More Mustard, Cherry Cobbler, Basic Black.

Stamps: Extreme Elements, Happiest Birthday Wishes.

Other: Curly Label Punch, Twine, Cutting Kit (for distressing).

This is a quick card to whip up for those boys in your life.

Thanks for stopping by.  Come back and visit again soon.  (Don’t forget to leave a comment and say ‘Hi’.  It’s always nice to know you have been).

Jenny x

cards

“BYE, BYE BUTTERFLY”

We say Good-bye to the ‘Butterfly Prints’ Stamp set this month too.  This is such a cute little set – and always good when you have a matching punch!!  I just wanted to show you a quick card with this set.  This was a card we made at last month’s Stamp-A-Stack.  I CASED this from Brandyscards but sorry I don’t have the exact link. I love the colours in this.  It is so bright and happy.  It reminds me of Spring – which is just around the corner.

Here is the card:

Stamps: Butterfly Prints, Upsy Daisy (which is also retiring).

Ink: Melon Mambo, Rich Razzleberry, Tempting Turquoise.

Card: Whisper White, Rich Razzleberry.

Other: Butterfly Punch, Scallop Border Punch, 2 step Owl punch (circles), Adhesive Pearls.

I have been having fun today playing with some new toys from the upcoming new catalogue.  Oh, so much goodness!!!!  I can’t wait to show you some of the results of today so stay tuned.

Thanks for stopping by.  Come and visit again soon,

Jenny x

cards

“SWEET PEA”

I have been wanting to show you this card for some time now.  Since we are now saying Good-Bye to ‘Baroque Motifs’ I think it is about time.  I am sad to say Farewell to this set.  We have had a long association together. This set has been with me since the beginning of  my stamping journey.  I have used it for weddings, birthday, Christmas, Anniversary, I think just about any occasion.  If you want to check out some of the cards I have created with this set then just click on the ‘Baroque Motifs’ tag and it will take you there – I hope!  This time I have used it for a Baby card – and I think it is a very appropriate use.  🙂

You might have seen versions of this card around your blog travels.  I wanted to make this card for a special friend who just became a Grandma.  (Doesn’t that make you feel old when your friends start becoming Grandparents???).  Anyway,  when my friend was pregnant with her own daughter many years ago she used to call her baby ‘Sweet Pea’, and she had that nickname for quite a few years.  Now when her daughter was pregnant this little baby was called ‘Sweet Pea’.  So you see, I just had to make this card.  Here it is.

Stamps: Baroque Motifs, Short and Sweet.

Card: Olive Olive, Bashful Blue, Whisper White, Certainly Celery

Ink: Old Olive, Bashful Blue

Punches: Wide Oval, 3/4 ” circle, 2 step Bird Punch, 2 step Owl Punch, Boho Blossoms.

Other: Beautiful Butterflies Sizzlit, White Gel Pen, Whisper White Grosgrain Ribbon (check out the little tuft of hair!)

I hope you have got ‘Baroque Motifs’ in your collection because it is such a versatile stamp set.  Have you had a chance to check out the other retiring stamps and accessories??  Some items have sold out already so you have to be quick.  You can check it all out here.  Look down the page for the retiring stamps and accessories in the little picture boxes (if that makes sense).

Good Bye ‘Baroque Motifs.

Thanks for stopping by,

Jenny

Tutorials, Uncategorized

IT’S A POP-UP!!!!!

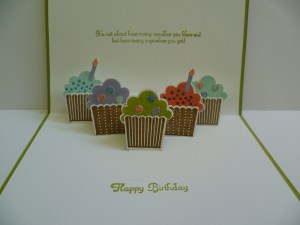
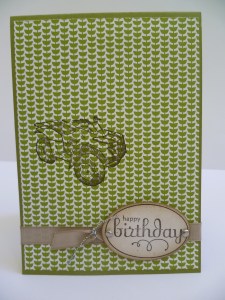
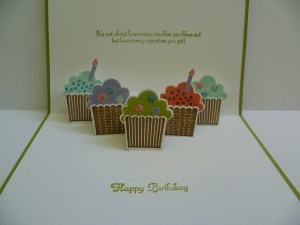
Finally I have got back to you with instructions of how I made the Cupcake Pop-Up card.  I showed this card one or two posts back but here is a photo of the card to refresh your memory.

Leonie N  showed me how to make this card at a stamping day a few weeks ago.   It is so cool and gives such a ‘WOW’ when you open it.  I have put together a few steps and some photos to help you.

CUPCAKE POP-UP CARD

NB. All the measurements are in metric.  I have used the Cutter to cut the slits for the Pop-up.  I found that so much easier.

1.  Cut Card 20cmx13.8cm.  Score card along the 20cm side at 10cm.

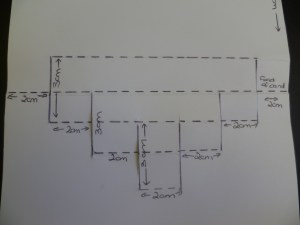
Here is the template to go with the photos.

——-   Score lines                         ______  Cut lines

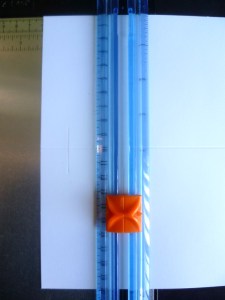
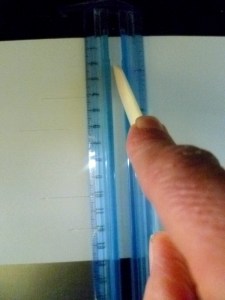
2. Line the card up on the cutter with the 13.8cm edge at the top. Starting at the scored centre line, move across 2cm.  Cut 1.5cm below the score line and 1.5cm above the score line (ie making a 3cm cut).  It is a bit hard to tell but in the photo I have the edge of the card lined up at the 2cm mark.  I have the cutter at the 11.5cm mark and will cut up to 8.5cm.

3. At the 4cm mark on the cutter, cut from the score line down 3cm. (Sorry I didn’t have a photo of this one but you can get the idea from the other photos and the template- I hope!)

4. At the 6cm mark, measure down 1.5cm below the score line (this is the 11.5cm mark on the cutter). Cut 3cm down (ie to the 14.5cm mark). (The photo shows the cutting ending at the 14.5cm mark).

5. At the 8cm mark, cut a line following the same measures as Step 4 above.  (ie measure down 1.5cm below the score line down to 14.5cm.

6. At the 10cm mark, cut from the score line down 3cm. (Missed that photo too!)

7. At the 12cm mark, cut 1.5 cm below the score line and 1.5cm above the score line. (Like you did in Step 2).  You can see the other cut marks from the earlier steps.

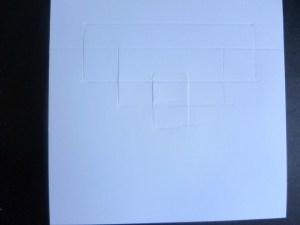
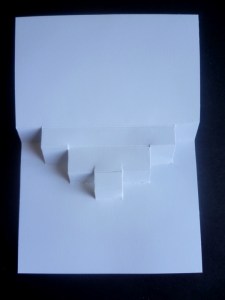
Here you can see all the lines cut.  If it’s not too clear refer to the template photo above.

8. Now the cuts are made, score the lines between each cut line (see the template above to show the score lines).  Don’t score out towards the edge of the card.

9.  Now the folding begins.  Here are a few tips to help with the folding. Firstly, fold the card in half on the regular score line.  Lift up the top half of the card and fold on the first score line.  Then turn the card over and fold the card back on each of the score lines.  Then open the card and push from behind on each of the folds and cuts to push it in shape.  Press along the score lines to make the scored lines crisper.

10. Now the folding is done, you can adhere this in to your card.  Place adhesive on one half of the back of the template.  Place inside the base card while folded.  Then you can add adhesive to the other half of the template and adhere in the base card.

Phew! I hope you are still with me!!!  I hope this all makes sense???  If any questions, please don’t hesitate to ask.

Enjoy!

Jenny x

Stampin' Up!

THE RETIREMENT LIST IS OUT!!!

It’s that time of year when we say Good-Bye to some much-loved stamps and accessories.  The list of what will be leaving us is out.  You can check the list out here.  These are only available while supplies last, so don’t delay!

If you don’t have a local demonstrator, then drop me a comment and I will email you back to get your order.  I can have it delivered anywhere in Australia.

Have a happy day!  🙂

cards

SOME POP-UP CARDS!!

I have some fun pop-up cards to show you today.  I made these at our stamping weekend a little while ago.  They were so much fun to put together.

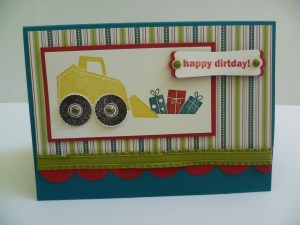
This first one Leonie N showed me how to do. (Edited to Add:  Andrea let me know that she showed Leonie this card, whom then showed me.  Thanks Andrea for the great card).  This is a great one for the boys using ‘Need For Speed’.

Card: Lucky Limeade and Very Vanilla.  Paper: Cheerful Treat (Hostess DSP) Ink: Soft Suede.  Stamps: Need for Speed, Perfect Punches.

Here is the inside View.  I used Confetti White for the insert.   I stamped the Quad Bike in Soft Suede and coloured it with the Crumb Cake Marker and blended it with the blender pen.  This was cut out and mounted on the Pop-up part.  I stamped the Quad Bike again in Crumb Cake on the top part of the insert.  The greeting is from the hostess set ‘Happiest Birthday Wishes’ and is stamped in Soft Suede.

Here is a side-view to see the Pop-Up part in action.

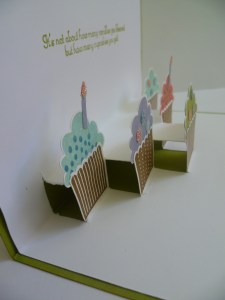
This next Pop-Up Card is using ‘Create a Cupcake’.  This is the front.  The Birthday greeting is from ‘Happiest Birthday Wishes’ again and is coloured with the In-Color markers.  The DSP is from the ‘Sweet Shop’ pack in the Autumn/Winter Mini Catalogue.

Here is the inside.  It is so cool! (Can I say that????).  There are lots of cupcakes here.

Here you can see the side-view of the Pop-Up cut-outs.

This is really simple once you work out the cutting part.  I am putting together a tutorial for you to make your own Pop-Up Cards.  I will try and finish them off and show you early next week.

Thanks for stopping by.  Have a lovely weekend.  🙂

Jenny

cards, Personal Ramblings

A 16TH BIRTHDAY!!

I know I said I would show you some Pop-Up cards from our recent stamping weekend but I have to interrupt the posting.  I hope you don’t mind.  🙂  Yesterday was Josh’s 16th Birthday.  He has been hanging out for this day for so long.  It means now he can get his Learner’s Permit to drive!  I wanted to show you the card I made him – and Carlie’s cards she made him.

Josh is really in to Vinyl records at the moment.  Now I have to say, I thought they went out years ago.  Apparently they never left.  Anyway, we bought him a record player for his Birthday and he has been collecting records.  He is in to Hardcore music. Now it is not just any records.  It is cool for them to be coloured.  When I went looking for inspiration for his Birthday Card I came across a card on Pinterest that I thought would be great.  (Seriously, how much inspiration is there on Pinterest!!).  Anway, I digress again.  I tracked down the original card here by Gill.  I changed this around a bit to suit Josh’s card.  I created coloured records and added a ’16’.  By the way, Josh thought it was really cool.  He already has a green record along with all the other colours he has.  A pink one is on order and he will be getting a blue one soon.  Isn’t it great when you make a card, especially for the male species, and they take note of the details.

So, here is the card.

The circles are punched out with the 1 3/8″ circle punch and the black centres are punched with the 3/4″ circle.  I punched the centres of the black circles with the Crop-A-Dile.  The coloured circles are sponged and spritzed just the way they would be on the records.

I have to show you Carlie’s card she made too.  I think she did a fantastic job and she did it completely by herself.

Carlie has used a retired stamp set ‘Play Ball’ and some retired Brilliant Blue and Orchid Opulence Cardstock.  The balls are stamped in Crumb Cake.  Don’t you love the splodge effect from ‘Extreme Elements’???

Carlie wanted to make another card too and I have to show you.  She drew this one and I think it is very clever.  (Big Brother said it was “the best”!!)

On the front of the card it says “I love you this much….”.  Now this is a standard card size to give you an idea of the size. I will show you it opened up.

It is a bit hard to see the picture but she made it on a HUGE piece of paper and it just opens out and out and out….  It shows her long arms outstretched.  I thought she was very clever, and very special, to make this for her Big Brother.

Ok, Thanks for indulging me in a little personal family post.  I will get back to the Pop-Ups next post.

See you next time,

Jenny x

cards

SOME MORE CREATIVITY!!!

Just a quick post to show you some more cards we made at our stamping weekend a few weeks back.  These were some fun cards to create.

This first one I CASED from Leonie using the cute set “I Dig You”.  This is a great set.  I think I need to add it to my collection.  I just don’t have too many little boys to use if for, but then again I have a few “young boys at heart”!

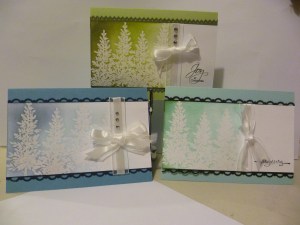
This one was CASED from Renee Van Stralen here. I love the emboss resist effect with the tree from ‘Lovely as a Tree’.  The layout is kept simple so the effect stands out – I hope??? I used Pool Party for most of the sponging and along the left hand edge I added just a touch of Garden Green.

We each made one of these so I thought I would show you a group shot.  It is funny how they look in different colours.  Andrea made hers in Old Olive (top), Leonie’s was in Marina Mist (bottom left), and then mine.  I really should have tied a bow on mine rather than just knotted the organza ribbon, and added some rhinestones.  It really makes them look more classy!

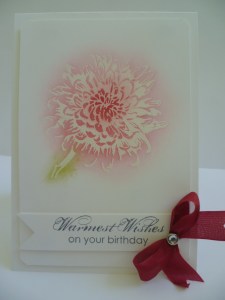
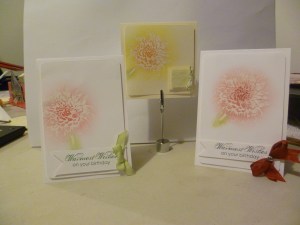
Now this card below is a sneak of a new set coming in the new catalogue.  This set is called “Blooming with Kindess”.  I got to have a play with Leonie’s set.  She got this set from Convention at the Manager’s reception.  I love the detail in this flower.  It is really gorgeous.  I love the font in the greetings in this set too.  We CASED this card but I can’t tell you from where at the moment.  I will get back to you on that if I can find out.

This card is done with the Emboss resist technique again. I have used Pretty in Pink around the flower with Cherry Cobbler sponged in the centre.  Then I sponged Old Olive along the stem of the flower.  I added a bow with Cherry Cobbler Seam Binding Ribbon.

Here are the 3 together of this card.  (Sorry about the mess around the photo).  Left is Leonie’s with the Certainly Celery bow. Centre is Andrea’s.  She went for a square card. Sorry the photo is not very clear. Mine is on the right.

I hope you liked them.  I have some fun Pop-Up cards still to show you in next post, so stop by again very soon.

Jenny

cards

A STAMPING WEEKEND!!

A little while ago I got together with my stamping buddies, Andrea and Leonie N.  for the weekend.  Well it probably amounted to 24 hours that I was there for but boy did we cram a lot of creating in that time!  It’s amazing how much you can create when you don’t have those little interruptions such as family. 🙂   I want to show you some of the projects we created. I won’t give you too many details of the cards.  It will take too long.

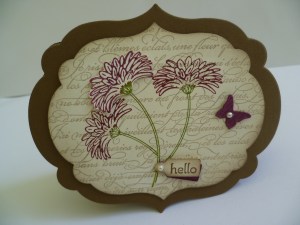
I played around with my “Reason to Smile” set.

This is a framelit card.  This card was inspired by one I saw in my blog travels.  It used the “Field Flowers” set but I just changed this around a bit.  I stamped the flower 3 times and then again on scrap Vanilla card and cut out the flower.  I raised this up off the card with dimensionals.  I will try and put together a tutorial on creating this Framelit card.  Just give me a bit of time for that.  🙂

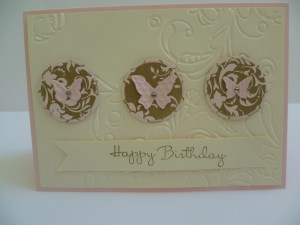
This card was CASED by Maureen (I think???) from MamaMo Stamps. I love the butterflies and the debossing using the ‘Elegant Lines’ Embossing Folder.

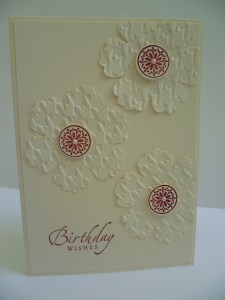
Here’s another CASE from Maureen.  I first embossed some Vanilla cardstock using the Houndstooth Embossing Folder.  I then punched out 3 flowers with the Blossom Punch.  The centres and greeting from ‘Sincere Salutations’ were stamped with Cherry Cobbler ink.  A very simple card but I think effective.

This is a quick one layer card I CASED from Leonie.  I stamped this one in Tangerine Tango.  This is such an easy card – maybe 5 minutes MAX!!  I stamped one flower on scrap white card and punched it out using the Blossom Punch.  This was raised up off the card using dimensionals.

‘That is enough for today.  I will post some more from our stamping day next post.

Hope you can stop by again soon,

Jenny x