cards

‘EXTREME’ POP-UP!!!

I have wanted to try a Pop-up card for a long time but it seemed like a lot of work.  Then a lovely friend, Marilyn, showed me how you can make them using the Word Window Punch.  This looked so much easier.  Now I can’t find that original blog where it was from, but there are a few around I discovered.  You use the Word Window punch to create the slots that enable the card to pop-up.  I could explain how to do them but you could head over to Jackie’s blog here and she has a photo tutorial that explains it. Saves me repeating it all! 

Here is my card.  I showed this as a demonstration at a workshop last week.  The hostess wanted some Masculine type cards and wanted to see the Extreme sets.   I used the Extreme Elements Set and Extreme Guitar.

This is the front of the card.
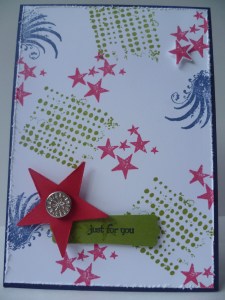
Colours used are Night of Navy, Real Red and Old Olive.  I used the Modern Label Punch for the greeting which was from Teeny Tiny Sentiments.  The small star is stamped on some scrap and cut out and raised with dimensionals.  I distressed the edges a bit for a bit more masculine look.  I added a silver brad is from the HodgePodge Hardware on a punched out large star.

Here is the Pop-Up inside.
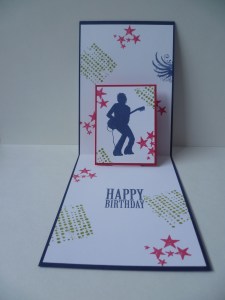
From the side you can see the Pop-Up. (Sorry I didn’t realise there was such a shadow on the card.  I think you get the idea though!)
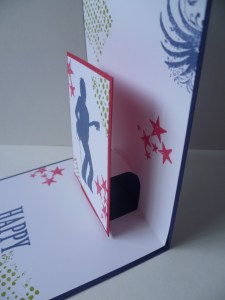
Isn’t this so cool!  I have to try some more of these.

I will give you the measurements for this card.  This is in metric.

Outside card is 29.6cm x 10.5cm scored at 14.8cm on the long side. The front panel is 14.4cm x 10.1cm.

Inside card is 28.8cmx10.1cm scored at 14.4cm on the long side. 

Just to give you an idea.  On this inside piece, I marked in pencil on the scored line at 3.3cm and 6.6cm.  I also marked my Word Window punch at the half way point.  This mark I lined up on the scored line with the pencil mark on the card showing in the middle of the punch through the punch window.  Does that make sense???  This gives you a fairly accurate place to punch then.  Your centre piece that pops up needs to be wider than the opening so it covers the pop-up section from showing.  On this card the Red mat measures 6.4cmx8.4cm and the Whisper White piece measures 6cmx8cm.

If you wanted to open the card horizontally you would use the same principle, but the Pop-Up would be wider so you need a wider image.

These are so much fun to create. You have to go and make one!

Have a good day,

Jenny  xx
 

cards, Challenges

PRESSURE-COOKER STAMPING!!

I have been wanting to show you another card we did at our stamping day 2 weeks ago.  It has just taken some time to get back here with my daughter sick all week.  I had to put this card together really quickly on our Stamping Day.

After a yummy lunch by Leonie we had about 1/2 hour left before I had to go.  After chatting for a few more minutes we thought we could do another card, couldn’t we????  After deciding what we would do, we had 20 minutes left!!  We had chosen a sketch challenge from Clean and Simple stamping, (number 27, seen here).   Tracey picked the colours from the Colour Coach: 

Wild Wasabi      Marina Mist           Early Espresso

The clock was ticking!!!!!

It took me another few minutes to decide how I was going to do the card and what stamps to use.  These things take time, you know!   The race was on –   15minutes to go!

I cut a strip of Wild Wasabi card and wanted to run the strip through the Big Shot but because our card is a different length it wouldn’t emboss the whole length.  I tried to fix it up by going back the other way but it wasn’t going to work.  PANIC! I ran it through the crimper both ways but that didn’t look right.  10 minutes to go!!!

I cut and stamped and scrunched, card was flying everywhere.  It was pandemonium.  The heart was racing and time was running out……………

Here is the final card.

Ok, so I didn’t quite get it finished before I left. I couldn’t leave my daughter stranded at the school gate!   It was all stamped. I just had to glue it all together when I got home and I added the twine too.  I don’t think it is too bad considering the rush.  I love this colour combo.  I will have to use these colours again sometime.

I have so many projects that I have been working on to show you, especially with the Extreme sets.   I will endeavour to get back here more often this week – all being well in our household! 

Have a Happy Week!

Jenny xx


cards, Challenges

ANOTHER CHALLENGE CARD!!

I finally managed to get back here.  I don’t know where this last weekend has gone.  I wanted to show you another card we did last week at our stamping get together.  This one was for the sketch challenge at stamping411 here.

We added a colour challenge to it just to make it interesting!!!

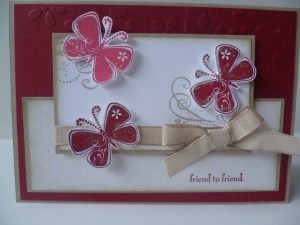
The colours were REAL RED, CHERRY COBBLER, CRUMB CAKE, VERY VANILLA, WHISPER WHITE.  I really wasn’t sure how I was going to put Vanilla and White together.  One thing I have come to realise when there are lots of colours in a challenge is to just add a subtle touch of a colour.  Otherwise, it can get a bit overwhelming.  Here is the card I created.

I used the Crumb Cake for the base and the mat pieces.  I ran the Cherry Cobbler card through the Big Shot with the Elegant Bouquet folder. (Must add that to my wish list!!!). I borrowed “Priceless” set from Leonie and stamped the swirls in Crumb Cake onto Whisper White and sponged the edges with Crumb Cake.  I stamped up 2 butterflies in Cherry Cobbler and 1 in Real Red and cut them out and raised them with mounting tape.   You can’t see in the photo but I added some bling to the butterflies with the 2 way glue and Dazzling Diamonds.  It makes them sparkle! 🙂

For the token Very Vanilla I used a piece of the Vanilla Neutrals DSP pack and sponged that in Crumb Cake and matted it onto a Crumb Cake piece.  I used some Kraft Taffeta ribbon (now retired).  The greeting is from Pocket Silhouettes and stamped in Cherry Cobbler.  So, I got a touch of Vanilla and Real Red in there.  It works!!!!!

I have another challenge card to show you.  I will leave that till next time.  Have a Happy Day 🙂

Jenny xx

cards, Challenges

I’M A WINNER!!!!

How excitement!!! I was just over at Jac-Inks Papercraft Challenge here to check out the new challenge this week and discovered I was a winner for last weeks challenge.  I can’t believe it!!  I don’t think I have won a challenge before. 

This was from their first challenge.  It was a colour challenge of Neutrals and 1 other colour.  This was my card I entered.

I used Crumb Cake, Soft Suede, Very Vanilla with Baja Breeze.  I’m so excited!!!!

Head over to Jac-Inks blog here to check out all the other entries.  There are so many fantastic creations.  Why not have a go at the next challenge.  It’s a sketch challenge this week.  The great thing with these challenges is that you have 2 weeks to complete them.  I will have to see what I can come up with?????

Thanks for looking,

Jenny xx

cards, Challenges

ONE LAYER FLOWERS!!!

I had a fun day yesterday with my stamping buddies – Leonie, Andrea and Tracey.  There is always plenty of laughs!!  Andrea had organised some challenges for us.  One of the challenges we did was for the ‘Less is More’ site.  You can see that here.  The challenge was a single layer card with flowers or trees.  Now I didn’t quite get to do this card yesterday, but I played around with it today.  I wanted to show you this card first so I can enter it into the challenge.  Here is my card. 

To stamp this, I inked the stamp from “Because I Care” in Certainly Celery.  I then misted the stamp with water lightly and stamped it on Confetti White card.  It is better to use watercolour paper to get a better spread but as it is a One Layer card, watercolour paper wouldn’t have been big enough.  Confetti White is a little thicker than Whisper White so it would work ok.  I rounded off each of the bottom corners on the card too.

I stamped the greeting in Old Olive and then  tied around some Certainly Celery Grosgrain ribbon. An adhesive Pearl was added onto the flower.  On this card I wanted to use a Silver Hardware Frame also but I stamped it too close to the edge.  I redid the card again to include the Hardware.  I was going to enter this version into the Challenge but wasn’t sure if the card had too much on it for a simple One Layer!  Here is this version.

Here is a close-up of the flower.

These photos seem a bit dark.  Not sure why but it doesn’t give such a clear photo of the card!!  I hope you get the general idea anyway.

Thanks for looking and pop back again soon.  I will show you the other challenge cards we did.

Jenny xx

cards

BABY ‘PUNCH BUNCH’

I needed to make a few more baby cards and thought it was timely to use the Sale-A-Bration set “Punch Bunch”.  I made a pink and a blue one.  They were very simple as I haven’t got a lot of spare time at the moment!

A pink one for the girls.

I ran a piece of the Pretty in Pink card through the Big Shot with the Polka Dots Embossing Folder and layered this onto Whisper White. I raised that off the Pretty in Pink Card base with mounting tape.  I stamped the baby tag from “Punch Bunch” in Pretty in Pink and punched it out with the small tag punch.  This was raised off the card with mounting tape and I then tied a small bow with the lovely Organza ribbon.  I did some paper piercing in both opposite corners. 

For the blue one I did exactly the same using Bashful Blue.

Very simple but I think very cute!  Ok, gotta run.  I’m off to the school for an appointment with the Principal.  Gotta love those!

Enjoy the rest of your day – AND Happy Valentine’s Day to all my lovely readers.  I hope your day is special.  If you don’t get anything special from your ‘significant other’, then go and buy yourself some chocolate.  You know you deserve it!!  xxx 😉

cards, Challenges

VINTAGE ELEMENTS!

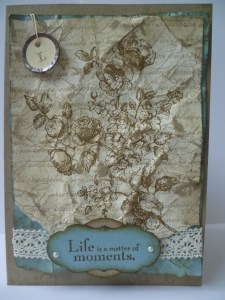
I thought I would show you a card I created with some of the ‘remains’ from my last marathon card making effort.  I went for another vintage style card.  I came across a new challenge blog and thought I would give it a go.  The site is here at Jac-inks Papercraft challenges.  They have just started up so why not give them a go.  Their first challenge is a colour challenge with Neutrals plus 1 other colour.


 I salvaged one of the Crumb Cake bases I had discarded.  This had the swirl from ‘Elements of Style’ stamped in Crumb Cake.  On the Very Vanilla Card I stamped the ‘French Script’ in Crumb Cake and stamped the flowers in Soft Suede.  I scrunched up the card tightly and reopened it, then scrunched it again.  After I opened it out again and flattened it slightly, I swiped some Crumb cake ink over it to pick up the ink in the creases.  I sponged Crumb cake around the edges.  I scrunched up some Baja Breeze card and inked the edges with Soft Suede.  I debated so long “To tear or not to Tear”????  I kept tearing a bit off the Vanilla card and a bit off the Baja Breeze and a bit more on the Vanilla.  In the end I had to stop or I wouldn’t have anything left!!

 I wrapped some Victoria Lace around the card and cut out a tag with the ‘Lots of Tags’ Die in Baja Breeze and stamped on the text from “Elements of Style”.  I punched a circle with the 1 3/8″ in Crumb Cake.  These were then both sponged with Soft Suede.  I raised these up with dimensionals.  I added some pearls and a Vintage Tag with ‘L’ (for Life) in Soft Suede.  This one certainly didn’t take as long as the last one!

I hope you like it???  I think I will go with some simple cards for a bit.  These vintage style cards are hard work – on the brain!!!

Thanks for looking and I hope you visit again soon.  I have some more Sale-A-Bration cards to show you.

Jenny xx

cards, Techniques

THE CARD THAT NEARLY DIDN’T HAPPEN!!

Do you have days when a card just doesn’t come together??? When anything you do, doesn’t go right and you have to redo it??? Do you look at the card and think “I just don’t know what is wrong”???  This was one of those cards.  It has just taken me 2 days to complete it.  I think I have redone every part at least once!  Maybe the heat was getting to me.  Well, I finished it!  I could have tossed it so many times but I was determined to see this through.

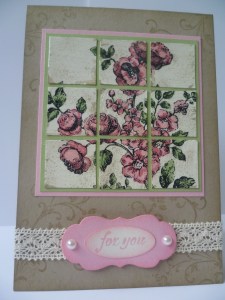
It started out as a card for this week’s sketch challenge at Inkspirations.  I had been wanting to try the faux tile technique and thought this would be good with this sketch.  After stamping and colouring (twice!), I cut the card up to 1″ squares and realised they were too small for the challenge.  I tried to make it work and it  just wasn’t happening.  So, I gave up on the idea of it for the challenge but wanted to complete the card – eventually getting there!!  Enough of the sorry saga you just want to see the card.

The flowers from ‘Elements of Style’ were stamped in Stazon on Very Vanilla  card measuring 3″x3″ (7.5cmx7.5cm).   They were then coloured using the Pretty in Pink, Regal Rose, Certainly Celery and Always Artichoke Markers.  I spritzed the card with the Crumb Cake marker, then cut it in 1″ (2.5cm) squares.  I then covered the squares in Crystal Effects to give it a glaze.  It is a bit hard to see in the photo.  You need to leave it overnight to dry properly.  It was after I covered it in Crystal Effects I realised I should have sponged the edges.  I just touched them up a bit with the Crumb Cake ink.  I then adhered the squares to a Certainly Celery mat and then Pretty in Pink. 

For the card base I stamped the swirl from the stamp set in Crumb Cake and sponged the edges.  I redid this 3 times.  The first time it didn’t come out right.  The second time I realised I cut the card wrong.  (That’s ok, I have used that on another card!)  This card opens upwards, so I wrapped around some Victoria Lace around the bottom edge.  The label is cut with the Big Shot in Pretty in Pink and the edges sponged.  I  had to do that a second time too!  The greeting is from “Fresh Cuts”.  (Thats a set I haven’t used for a while).   I stamped it in Pretty in Pink onto Very Vanilla and punched it out with the small oval punch.  The edges were sponged in Pretty in Pink too.  I adhered them with mounting tape and stuck some Adhesive pearls on it.  Phew!! I WAS DONE!!!!!!!!!!!!!  I couldn’t even think about doing the inside of the card then. 

Sorry about the ramble.  I hope you kept up with all that!  That was a marathon card.  I have another card that I made later while I had all the stamps and ink out.  I will show you that tomorrow.  I’m done.  It’s exhausting just reliving it!!!!!

Take some time to stamp today – you deserve it!

Jenny xx

cards, Challenges, Uncategorized

WHAT WOULD YOU DO WITH THIS PICTURE??

This picture was one of the INKSPIRATIONS4U Challenges that was set a few weeks ago.  Use this picture as an inspiration for a card. 

It was a tricky one and I know it had me stumped for a bit.  What would you do?  Would you base it on the colours??  Use the shapes such as the swirls or circles or perhaps the stripes??  In the end I picked out some of the colours and I wanted to use circles in there somehow.  Here is my end result.

I went with Crumb Cake, Chocolate Chip, Baja Breeze and Old Olive.  I thought these colours would suit a masculine type card.  I ran some Old Olive card through the Big Shot using the Square Lattice Embossing Folder and layered it on Chocolate Chip.  I wrapped around some twine and adhered that to a Crumb Cake base.  I punched out various circles with the  1″, 1 1/4″, 1 3/8″ circle punch.  I added some eyelets to 3 of the circles.  I adhered the circles in a formation with Snail or raising some with mounting tape.  The greeting is stamped with Chocolate Chip and is from “Party This Way”.  This was quite a fun card to do in the end.

Thanks for stopping by.  Pop back again over the weekend and I will show you a card that nearly didn’t happen!

Jenny xx

3D projects, cards, Classes

BLISS BOX AND CARD!

On Saturday I held my Sale-A-Bration Kick-Off event to start the new year of stamping.  It was a great day with some lovely ladies.  I think they enjoyed their stamping????  This is the project I put together for them.

I have used the Sale-A-Bration set ‘Bliss’.  I love that set, it is so versatile.  I used the lovely rich Cherry Cobbler and Regal Rose.  This is the box.

This is just a little narrow box as you can see in the photo below.  Just the size to put some small love note size cards or something simlar.

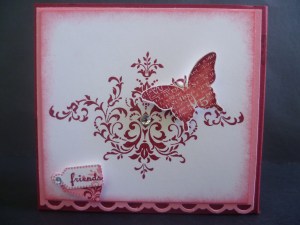
The original box came from a USTAMP project a few years ago.  I modified it a little to fit our card size so I could get 2 per sheet.  On the front of the box we scalloped the edge of the Regal Rose card with the scallop trim punch.  On the Whisper White card, I sponged the edges of the card with the Regal Rose ink.  The flourish from the set was stamped in Cherry Cobbler.  The butterflies for the box and the card were stamped in scrap card in Regal Rose and then rock and rolled in Cherry Cobbler.  These were cut and raised up with dimensionals.  The little tags were made with the Tiny Tags set.  The flourish from that set was stamped in Regal Rose on the white and Cherry Cobbler on the Regal Rose.  The greeting was stamped on the white.  They were punched out and layered and raised up with the dimensionals.  Phew!  That’s a mouthful!  Does that all make sense???  Here is a close up to see that clearer.

To add the bling I added a Rhinestone to the centre of the flourish and the edge of the tags.

The card was similar to the box with the flourish and 2 butterflies.  The greeting is from Teeny Tiny Sentiments.  Here is a close up of the card.

I had made up a similar box in different colours for the lucky Door Prize.

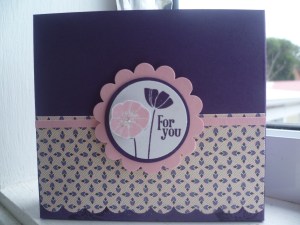
I used Elegant Eggplant cardstock and Lap of Luxury DSP.  The tag was made using the “For You” Flower from the Sale-A-Bration set “Punch Bunch.  It was first stamped in Elegant Eggplant and then stamped again in Pretty in Pink.  I cut the one flower out and raised it up with dimensionals.  This was punched out with the 1 1/4″ circle then matted with a 1 3/8” circle in Elegant Eggplant and I then punched out a scallop circle in Pretty in Pink.  I added some Dazzling Diamonds for a bit of bling.

Ok, I hope I didn’t bore you too much with all those details.  It was a fun day and I’m looking forward to more stamping with my friends soon.  Right now, I’m getting off here.  It is such a hot day here today.  The summer weather has arrived just when all the kids go back to school today. 

See you soon,

Jenny xx