cards, Stampin' Up!

PEEKABOO PEACH FAIRY!

This is another project I made on our stamping weekend.  Originally I stamped and coloured this Fairy from Fairy Celebration for the Panel card I showed a few posts back but I thought it was a little detailed to go on the card.  So I created another card to put this on.

peekaboo-peach-fairy

The fairy is stamped on to Watercolor card and coloured with the Aquapainter.  (Don’t look too closely at the colouring.  I have a bit to work on with that).  I did finish it with the Clear Wink of Stella Brush but you can’t quite see the sparkle unfortunately. The sentiment is stamped on a strip of the Watercolor card.

I wanted the rest of the card to be kept simple so I adhered a piece of the Playful Palette DSP on to  the Peekaboo Peach base card and then could assemble the coloured piece and the sentiment.  It was finished off with a White Baker’s Twine bow and some Rhinestones. I thought the sentiment was a bit bare so I cut a small flower from Blushing Bride from the little flower in the Flourish Thinlits. 

I hope you like this one.  It was the first time I have played with this set.

Thanks for visiting

Jenny

cards, Personal Ramblings, Stampin' Up!

CRAFT ALIVE REVIEW!

All of a sudden it is Thursday!  Where has this week gone to?  I have had every intention of getting back here to share our exciting weekend at the Craft Alive Fair but there has been so much happening.  So here we are today.

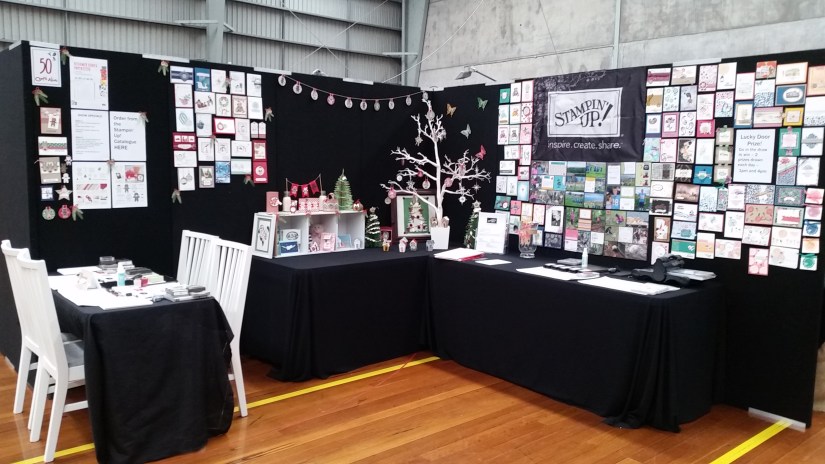
Craft Alive is a big Fair of papercraft and needlework exhibitors held in various large centres on the East Coast of Australia.  I am so excited it has now come to Wollongong AND we got to have a stand there this year.  I thought you might like to see our little display.  It was such fun to share in this with my stamping sisters Leonie and Vanessa.

This was set up day.  It took 5 hours to put together.  Such a huge day but we were so pleased with the final display.

20161013_150449

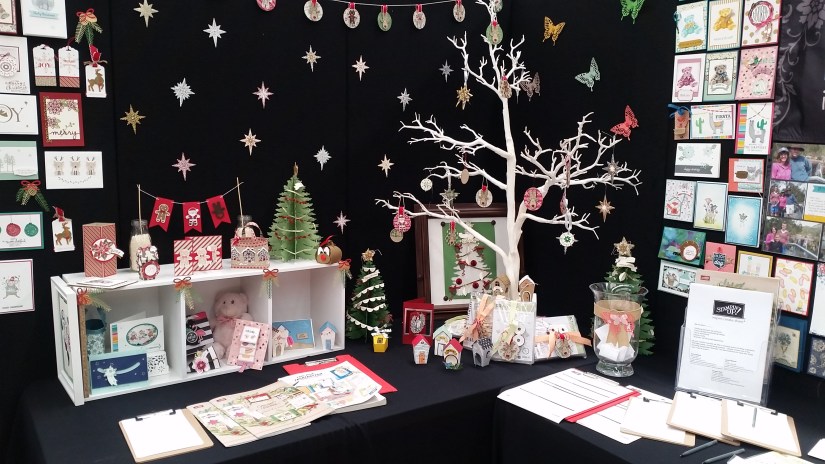
We had so many positive comments about our stand which was nice. We added stars on the space near the tree which I think just finished it off.

20161013_150237

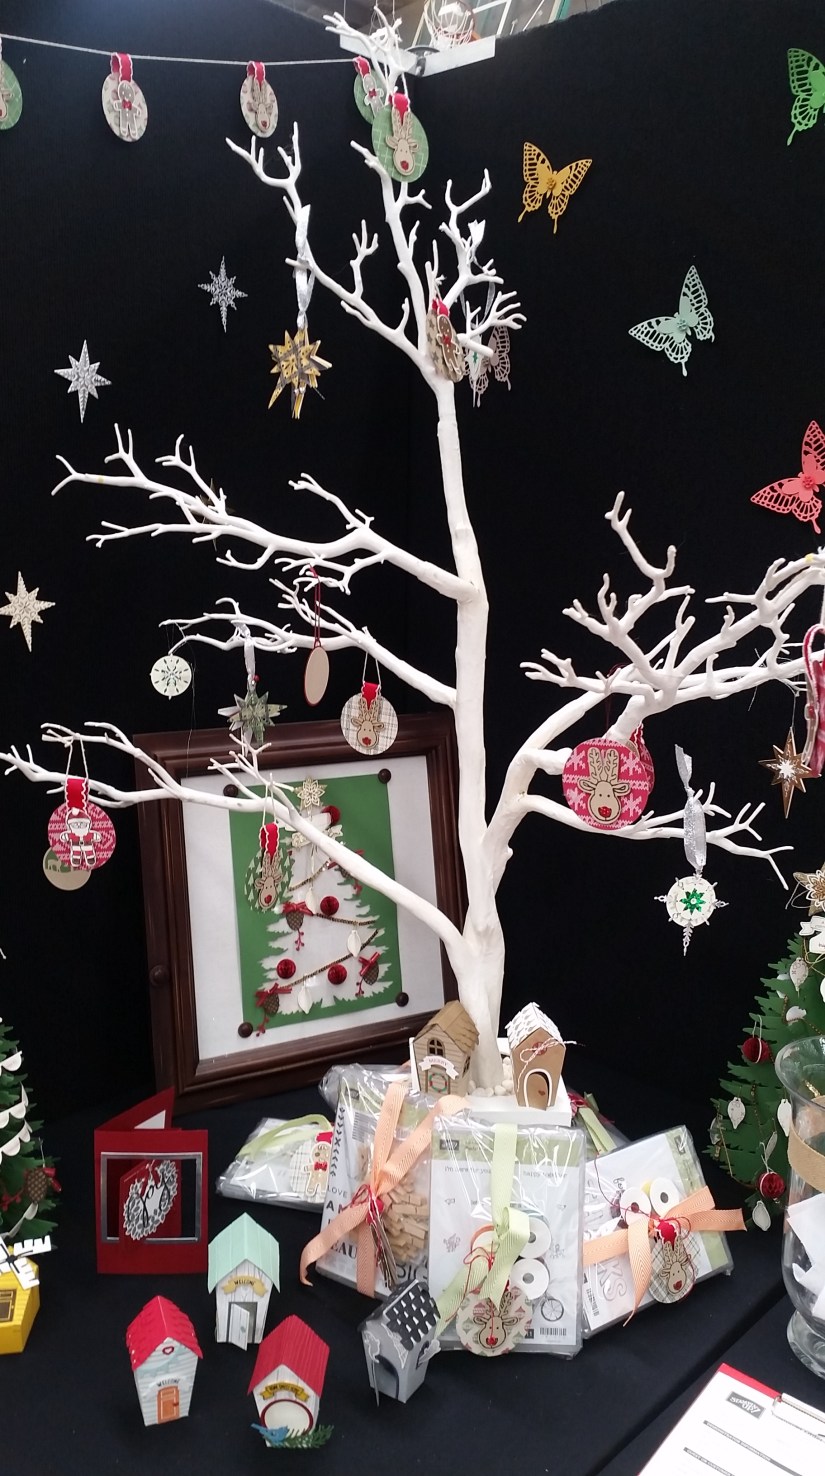
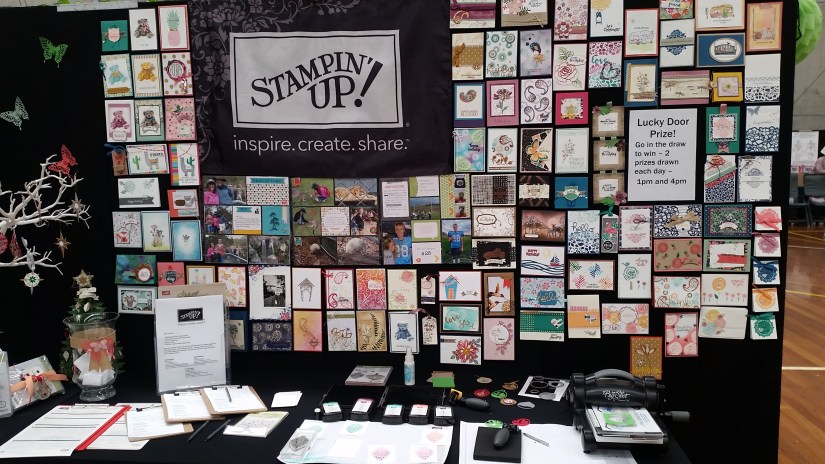
We had 6 Lucky Draw prizes over the weekend which some lucky visitors received a stamp set and some lovely embellishments. Of course you have to have them under the tree.

20161014_142811

20161014_142709

20161014_142807

This photo was courtesy of the Craft Alive Facebook page.  We were kept busy having a card for the visitors to make.

make-and-take

The Make and Take card was very popular so I thought I would show you.  Everyone loved the Cookie Cutter set.  This card was Cased from Jillstamps.

craft-alive-make-and-take_1

Thanks for sharing in this with me. I still have more cards from our stamping weekend.  I might have to hit you hard with them all next week to catch up so stay tuned.

Jenny

3D projects, cards, Techniques

CUPCAKE PANEL CARD!

I have been wanting to try one of these Panel Fold cards for some time and finally got a chance to on our stamping weekend.  Here is the final result.

cupcake-panel-card

cupcake-panel-_-side

It can fold flat for postage which is good.  They are so quick to make.

I also got to play with this ‘Sweet Cupcake’ stamp set.  This is a great 2 step stamp set in which you can build on the layers to get the dimension effect. It also has matching dies too to cut these sweet cupcakes out.

There are a number of different tutorials for these Panel Cards on the internet.  You can find the one I used HERE. For mine I teamed it with the Playful Palette DSP stack.  It needed something in the corner so I cut a little “flower” shape from the Flourish Thinlits in Dazzling Diamonds Glimmer Paper and added a Rhinestone in the centre of it.

Thanks for stopping by.  Have a great day,

Jenny

cards, Techniques

OMBRE FLORAL THINLITS!

Here is another card from our Stamping Weekend.  This one uses the Detailed Floral Thinlits.  It has been a little while since I have used these so it was good to give these gorgeous Thinlits a whirl again.

20160926_134833-copy

Colouring your card:

For this card take 2 pieces of Whisper White card just slightly smaller than your card base. My card base is Dapper Denim.  On one of the pieces of Whisper White cut the Detailed Floral Thinlits in the top and bottom of the card.

On your other piece of Whisper White you will colour the card. You can watercolour it (if you have used Shimmery White or Thick Whisper White), roll it or sponge it.  I sponged mine in similar tones.  This creates a graduation of colours known as Ombre. I used Soft Sky at the top, Marina Mist in the middle and Dapper Denim at the bottom.

Assembling your card:

Adhere your diecut piece over the sponged piece of Whisper White and adhere these to your base card.  It’s that simple. I then diecut the “HELLO” from Hello You Thinlits and adhered this down. I went over the word with Wink of Stella to give it some sparkle.

I thought it needed something else and added a butterfly from Papillon Potpourri.  I am still not sure on that addition What do you think?  It does have a little sparkle with Wink of Stella but it is hard to see.

Thanks for visiting.  I have lots more to share with you so come back soon.  Or why not subscribe to get my emails to your inbox or your reader so you don’t miss anything.

If you need to order any of these products then you can head to my store (link in the side column).

Have a great day,

Jenny

cards, Challenges, Personal Ramblings, Techniques

BUTTERFLY FOR FRESHLY MADE SKETCHES #257

Today I indulged and made a card just because I wanted to.  Well it was my birthday so I thought I could …..

I saw the Freshly Made Sketches for this week so wanted to try something out for that. Firstly here is the sketch.

fms-final-257-001

Here is my card.

butterfly-for-fms

Let me tell you how I made it:

Butterfly – To create the butterfly I firstly washed over some Shimmery White card with the Aquapainter and water.  Then using the Aquapainter I picked up some ink from the ink pad and brushed over the card in patches.  The first colour was Watermelon Wonder. Here it is to show you.

butterfly-_-colouring

Wipe off your Aquapainter on scrap paper before picking up the next colour and brush over in patches again.  I have used Cucumber Crush.  The third colour was Delightful Dijon. You can fill in areas at the end with any of the colours or go over some.  See how it looks.  Well what you have at the end really is …… a mess!!! It is pretty ugly isn’t it? But don’t despair.  Something beautiful will emerge. 🙂

butterfly-_-colouring-2

From this I cut the large Butterfly Thinlits.

Just as an aside; When I cut the butterfly and rolled over the back of the die with the Die Brush, this is what was left when I lifted the die.  I thought it looked really pretty.  Just had to show you. 🙂

20161007_113755

This was the finished butterfly.  See persevere with the ugly mess and it is pretty.

butterfly-_-coloured

Now for the card: On a piece of the Moroccan DSP I stamped the fern leaf from the Butterfly Basics set and the “splodges” are from Timeless Textures. I sponged around the edges of the paper. This piece was adhered to some Copper Foil sheet and adhered to a Crumb Cake base. What you might not be able to see in the  photo is the sparkle from the Wink of Stella.  It does sparkle really!

The sentiment is from Badges and Banners.  I finished off the card with some pearls.

That was lengthy.  Sorry about that.  Thanks for visiting though. You can visit the Freshly Made Sketches blog HERE and play along.

See you again soon,

Jenny

cards

BELLA IN PEEKABOO PEACH!

I have another card to show you from our stamping weekend.  I don’t have this set ‘Bella and Friends’ but when I saw Leonie’s card I had to CASE it. I made mine in Peekaboo Peach.  It is very cute. 🙂

bella-in-peekaboo-peach

It is a very simple card.  The ‘Stylized Birthday’ stamp was stamped directly on to the Peekaboo Peach card base.  You can be very nervous doing that in case it doesn’t stamp right but hey! it is only card right.  Just do it again!  Which I ended up doing anyway but this was the first one I stamped and it was better.

I cut a strip of the ‘Playful Palette’ DSP Paper Stack and punched it with the Banner Punch on the end.  Then I cut a scalloped circle from the Layering Circles Framelits from Watercolor paper after I stamped Miss Bella on it.  This cute puppy was coloured with the Aquapainters and inkpads and I coloured the small sections with the markers.

When I was colouring the background I placed the Scalloped Circle Framelit back on the piece. Then I coloured the area with a light wash using the Aquapainters and inkpads again. I had seen this around my blog travels and was keen to try it.  I was pleased with the look and it seems like it is layered but it isn’t.

The piece was then adhered to the card with Dimensionals and all finished with a White Baker’s Twine bow and a little bling with a Rhinestone on her collar.

What do you think of Miss Bella??

Thanks for visiting me.  See you soon with some more projects.

Jenny

3D projects, cards, Catalogues

BEACH HOUSES!

This is the first project I made on our stamping weekend this past weekend.  I just have to share this with you.  I was so pleased with how it turned out.

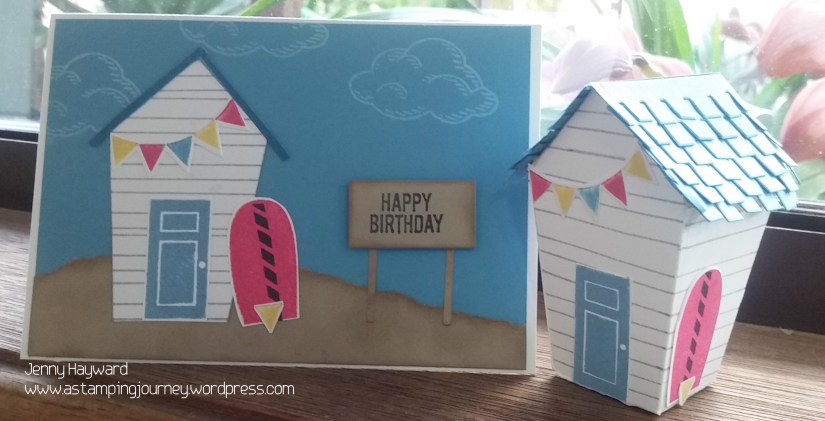
beach-houses

I live right near the beach so had to make a beach house. I have used the Sweet Home Stamp set and the Home Sweet Home Thinlits.  What a great versatile bundle it is.

Once I made the house I had to make a matching card.  Here are the details.

HOUSE: The roof is in Marina Mist. The house stripes are stamped in Smoky Slate.  I coloured the banners with the markers. The surfboard is the oval door stamp and die and I added the hatched line (if that is what you call it). The fin is from one of the banners and I cut that by hand and kind of rounded the points.

CARD: I cut the house out on Whisper White and then trimmed off just the front part of the house.  Then stamped the lines in Smoky Slate to match. I stamped another board for the card.  The “sand” was a piece of Crumb Cake card that I tore the edge off then inked it with Crumb Cake ink on the edge and in patches.  I assembled it all on a piece of Marina Mist card than I stamped the clouds from Sprinkles of Life in White ink.

I debated what else to do.  It needed something else but wasn’t sure how to add a greeting. Then I had a thought.  I cut the thin door frame from the Thinlits set from Crumb Cake card.  The centre piece that is left when you cut it I trimmed off and then stamped the Sentiment which is from Balloon Builder on to that.  I sponged these pieces a little too with Crumb Cake ink. I was really pleased with how that worked.

I have plans for more homes.  When I get to it. 🙂

Thanks for visiting today.  See you again soon,

Jenny

cards, Catalogues, Stampin' Up!

WEEKEND STAMPING HAUL!

This past week I had a fun weekend with some of my stamping buddies.  These are great times just to sit and stamp and not be interrupted … and have a few laughs and eat too much!!!

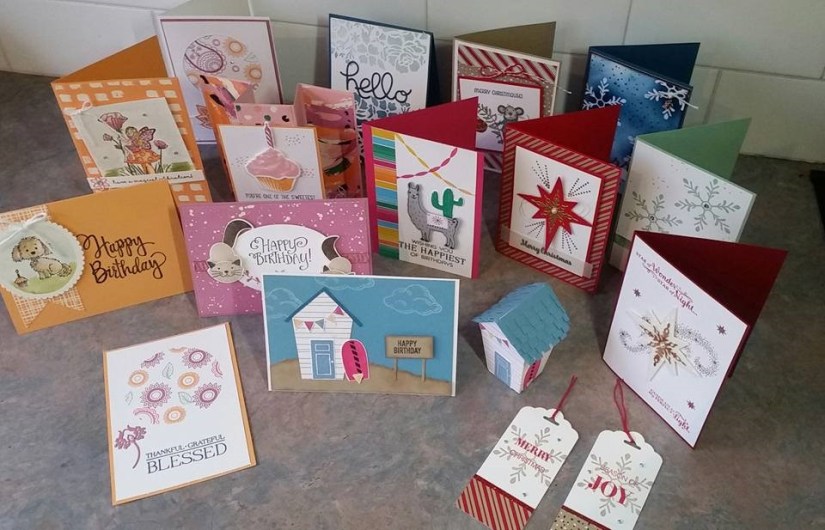
I want to show you all my creative efforts for the weekend.  It still amazes me what you can put together with some ink and bits of card.  I plan to share details on the projects individually over the next couple of weeks so stay tuned for that.

group-cards

It was a mix of Christmas cards and general cards.  I think the project I loved most was the Beach House and the card.  It took some time put I was pleased with the end result.  It has shown to be popular on my Facebook page and other group pages I am on too.  I will tell you about that one soon.

The great thing when you get together with others too is sharing stamp sets that you don’t have yourself.  It’s great to make cards using those sets.

Now what will I share with you first????

See you again soon.

Jenny

cards, Catalogues, Stampin' Up!

DAPPER MERRY WISHES!

I have another card for you today with the Merriest Wishes set and the Merry Tags Framelits.

merriest-wishes-tag-in-dapper-denim

On a piece of Whisper White I embossed the card with the Holly Embossing Folder that you can find in the Annual Catalogue.  I love the detail in this folder and how delicate it is when you emboss.  Then it was a matter of Heat Embossing the sentiment in Silver Embossing Powder and cutting it with one of the Merry Tags Framelits.  The deer tag was cut in Dapper Denim and then I cut a circle from the Silver Foil Sheet and adhered that to the back to the back of the tag.

Before I adhered the white card on to the Dapper Denim card mat I wrapped over some Silver Taffeta ribbon and adhered that down. I find Snail Adhesive the best thing to adhere ribbon down to your projects. The tags were raised up with Dimensionals and  then I finished them with a Silver Taffeta Ribbon bow.  The card base is Thick Whisper White.

I think this might be good to try in other colours. Must try that.  If you make one in a different colour do share it with me.  I would love to see.

Thanks for visiting me today.

Have an awesome day.

Jenny

cards, Catalogues, Stampin' Up!

RED MERRIEST WISHES!

I really liked the Merry Tags Framelits when I saw them in the Holiday Catalogue.  I got to finally play with them the other week.  Now I can share the cards with you.  I wasn’t sure where this card was going when I first started it but I was happy with the end result.

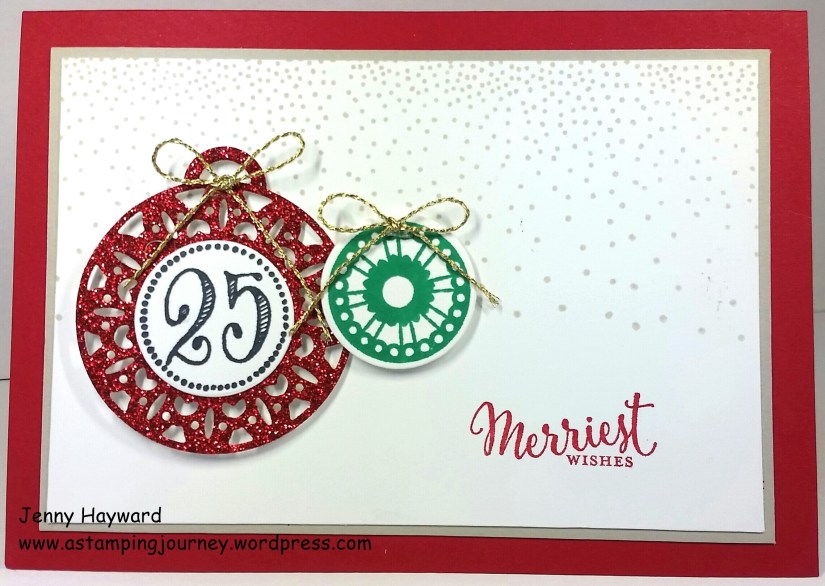
merriest-wishes-in-real-red

It’s great to  have different shapes in the Merry Tags Framelits set.  You have the detailed tags and you have circles as well.  So many options to create different looks.

For this card, the card base is Real Red and the card mat is Sahara Sand.  I stamped the dots in Sahara Sand on to Whisper White.  A number of people have asked me what you would do with the dotty stamp in the Merriest Wishes set.  I stamped them a few times along the top of the White card reinking the stamp each time.  I think they make a nice background or you could stamp them on card and cut them with one of the circles. What do you reckon?

I cut one of the detailed tags in Red Glimmer Paper and stamped the “25” in Memento black and then punched it out with the 1 1/4″ Circle punch. The small ornament shape is stamped in Emerald Envy and punched with the 3/4″ Circle punch.

The ornaments were raised up on the white card with Dimensionals and then finished off with some Gold Twine and to finish I stamped the sentiment in Real Red.

If you haven’t noticed these yet then here they are for you.  You can find them on p 21 of the Holiday Catalogue.

merriest-wishes_stamp-set       merry-tags

If you buy the bundle you can save 10%.  Pay $81 Wood Mount $68  Clear Mount.

You can order these in my store HERE or by emailing me directly.  If ordering Online please use the Host Code this week:  RYWGMMKD      Thank you kindly. 🙂

Thanks for stopping by.  I hope your weekend is a stamping one.  My daughter heads off tomorrow for a 2 week school excursion through Central Australia.  I am going to miss her but maybe I will have a little extra creating time. 🙂

See you again soon,

Jenny