cards, Classes, Sale-A-Bration

IRRESISTIBLY YOURS BUTTERFLY!

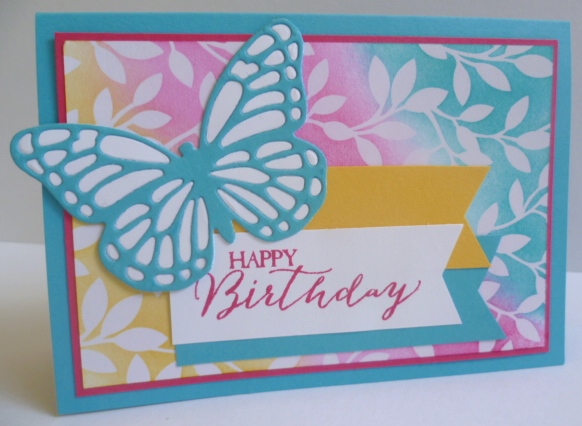
I have just discovered the ‘Irresistibly Yours’ DSP in the Sale-A-Bration Catalogue.  I had fun creating with it the other day.  I found this card on Splitcoaststampers.  I loved the bright colours and just had to copy it.

P1150837

I used Tempting Turquoise, Melon Mambo and Daffodil Delight.  To colour the paper I sponged the ink picking it up from the inkpad with the sponge.  Rather than dabbing with the sponge though I rubbed in a circular motion.  I think that gives a smoother coverage of ink rather than it looking blotchy. Once you ink it then rub over the paper with a tissue and it will wipe off the ink over the embossed areas and give it a shine. For this card the paper is teamed with the gorgeous butterfly die available now in the Occasions Catalogue and I backed this with some Whisper White card to make it stand out.  The greeting is from the Buttefly Basics stamp set.

The ‘Irresistibly Yours’ DSP contains 12 sheets (2 each of 6 designs) that are single sided. They each have a glossy white pattern. You can apply ink to the paper by sponge, brayer or directly with the inkpad.  You could colour with Blendabilities too if you like. The embossed like pattern resists the ink leaving a gorgeous pattern. If you haven’t seen it yet or really paid attention to it, check it out on page 15 of the Sale-A-Bration catalogue. Here are the patterns you will find in the pack.  It’s great to create some beautiful patterned paper to the colour you would like and to make it look embossed and you haven’t had to drag out the embossing powder and Heat Tool!

paper

Thanks for visiting today,

Jenny

cards, Sale-A-Bration, Stampin' Up!

SALE-A-BRATION ‘BIG DAY’!

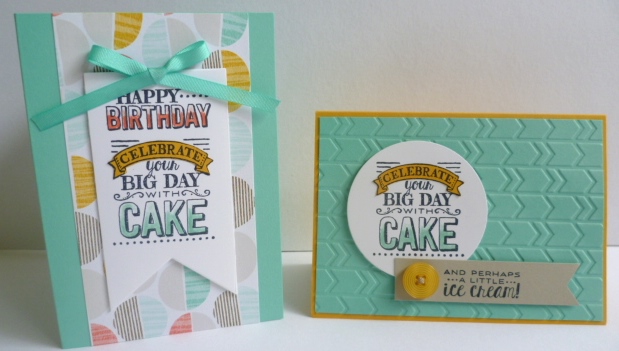
I showed you one of these cards in a recent post but I thought I would show you it again and show the other card I made at the same time using one of the Free Sale-A-Bration stamp set ‘Big Day’. There are so many fantastic Free choices this year for Sale-A-Bration it is hard to choose a favourite but I think this is a fun one.  There are so many ways of using it.

P1150767

The card on the left was one of the cards we made at my stamp Day on the weekend.  That was a fun card to colour.  The “Happy Birthday” and the “Celebrate” stamp were stamped together on Whisper White and then cut with the Banners Framelits.  To colour it I just used the blender pens and picked up the colour from the ink pad and coloured the lower part of the words.   The “celebrate” word was stamped again on Crushed Curry, cut out and adhered over the word.  The DSP on this card was another free Sale-A-Bration set ‘Best Day Ever’.  I love the colours in this DSP of Crisp Canteloupe, Coastal Cabana and Crushed Curry (which is not a colour I have used before!!).  I finished it off with a Coastal Cabana bow (Yes a Free Sale-A-Bration choice!).

The card on the right was from a sketch on Freshly Made Sketches #283.  I turned the sketch when I created the card.  I was pleased how quick this card came together.  I stamped the “celebrate” stamp and cut it with the Circles Framelits.  This was coloured the same way as the above card and the “celebrate” stamped on Crushed Curry card and cut and adhered over.  The “icecream” greeting was stamped on Sahara Sand scrap.  I added a button (yet another free Sale-A-Bration choice).  The Coastal Cabana piece was ran through the Big Shot with the Arrows Embossing Folder.

Two quick cards which came together with little drama.  Which for me is a great thing.  I think these were both made in under an hour.  Gotta love that! I agonise over cards way too much.

Here is the ‘Big Day’ Stamp set if you haven’t noticed it before.

Big Day

Have you checked out the Sale-A-Bration Catalogue yet?? There is a link in the right hand column to view it online.  Don’t forget, for every $90 of product order you can choose one of these items for Free!!!!  Go and check it out.  You can order directly online at my store too (the link is in the right hand column).  I can ship anywhere in Australia. Of course, if you have a HUGE wish list, maybe you should think about joining Stampin’ Up! (discounts every time you order!!!).  Ask me for more information if you would like to know more. You won’t regret it.  You can check out all the Sale-A-Bration news HERE.

Thanks for stopping by today.  I hope you have an inky day.

Jenny 🙂

cards, Masculine, Stampin' Up!

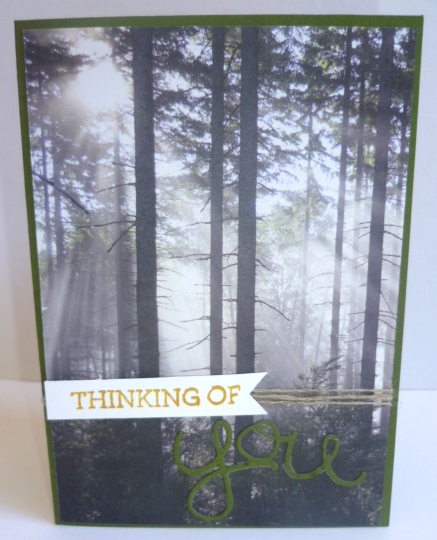
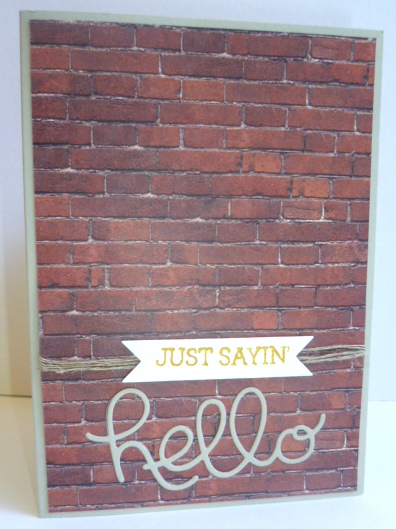
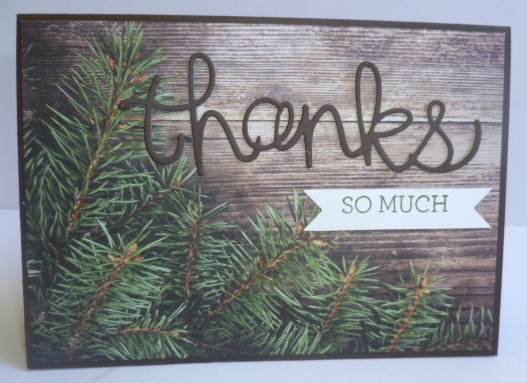
ADVENTURE BOUND + HELLO YOU. GREAT FOR THE MALE CARDS!!

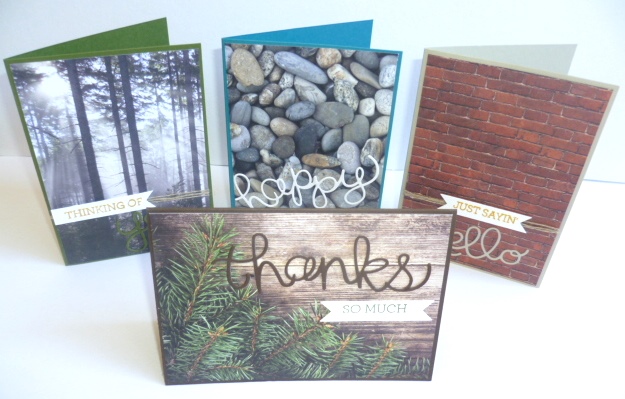
I just have to share these cards I made yesterday.  I am not great at making male cards.  Aren’t they hard to make???  The new Adventure Bound Designer Series Paper Stacks in the Occasions Catalogue makes creating them so much easier.  Actually there are a lot of great “male” sets in this catalogue.

P1150801


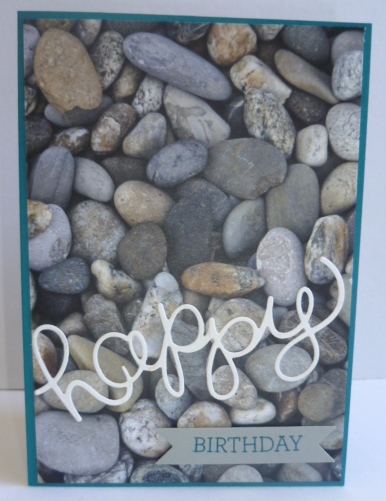
The prints in the stack are beautiful.  You really don’t need too much more with them on your cards.  I have used the new ‘Hello You’ Thinlets and the ‘Crazy About You’ stamp set with them and kept the embellishments very simple.  I was thinking of putting Candy Dots on them but didn’t get around to it.  I don’t think it needs them really.  I like the clean look.

Here they are individually.

P1150803

P1150805

P1150808

P1150806

The Adventure Bound Stacks are great value at $11.95.  (p 40 of the Occasions Catalogue).  You get 48 sheets – 4 each of 12 double-sided designs.  Sized right for the front of your cards.

Adventure bound

You can get the Thinlets and Crazy About You set as a Bundle. (p 31).  For Bundle price W $112.95  C $94.25  Photopolymer $72.95.  They are available individually too.

Hello You          Crazy About You

So if you have a hard time with cards for the boys then grab one of these stacks.

Thanks for stopping by today,

Jenny 

cards, Classes, Sale-A-Bration, Stampin' Up!

A CASUAL DAY OF STAMPING!!

Two posts in one day!! I had to stop by again and let you know of a Casual Stamp Day I am having on Saturday.  If you are in the local area (East Corrimal, Wollongong) you are most welcome to join in.  Here are the details.

Saturday January 10th from 2pm. Cost: $5.  Come when you like, stay as long as you like. 
 
Bring your own projects to work on. You can use my stamps, inks and Big Shot for those projects and/or I have some cards that you can choose to make for $2.50 each.  I supply all the card etc for these.  Make 4 and the 5th one is free.
 
Come and join us.  Please RSVP by Friday 9th so I can have space available. Afternoon Tea is provided and you can pick up a copy of the new Occasions and Sale-A-Bration Catalogue.
Here is one of the cards you can make on the day.  Make one or make a number of them for $2.50 each. I have a couple of other cards to choose from too.
P1150773
I know it is still school holidays here but you might just want to sneak out and have some time to yourself!!!! (YES, I hear you cheering!!).  Drop me a message to let me know you are coming.  It will be nice to have a relaxing afternoon together stamping.
 
Jenny
cards, Christmas

I JUST HAVE TO SHOW YOU THESE CHRISTMAS CARDS!

I am very proud to show you these cards today.  I can say that because I didn’t make them.  These were made by my clever Mother-in-law (who is 87!).  She has just started getting more into cardmaking recently and just loving it.  I loved these cards she has just made and thought I have to show you her fabulous work.

Firstly on this card, trees were punched with the Tree punch from Rich Razzleberry from the Brights Designer Series Paper Stack.  The white paper has been embossed with the Square Lattice Embossing Folder and adhered to a Tempting Turquoise card base. A non-traditional colour scheme here.

P1150629

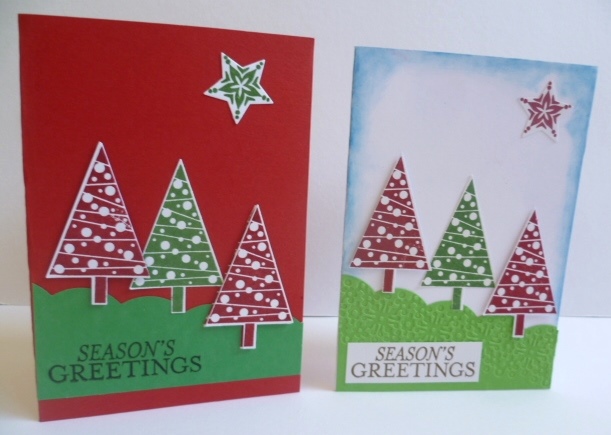
These next 2 use the ‘Festival of Trees’ set.  The left card is on a Real Red card base.  The scallop edge is cut with the Scallop Thinlet and adhered at an angle.  Great idea!  The star is from the ‘Bright and Beautiful’ stamp set.  The one on the right is on a White card base and the edges sponged.  The scallop edge this time is ran through the Big Shot with the Delicate Details Embossing Folder to give it some texture. The greeting is stamped on a piece of white card and added to the card.
P1150628

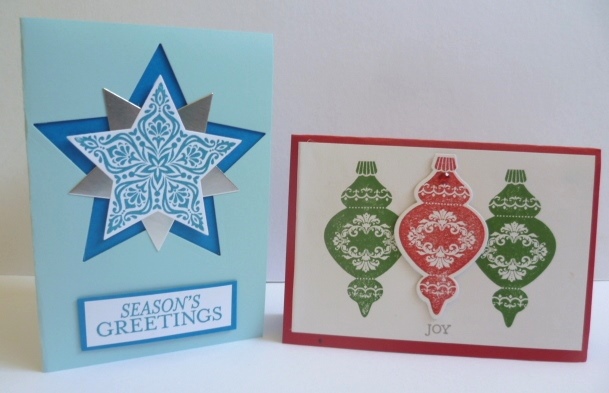
Now for the next two. The one on the left has a large star cut from the Pool Party base card then a piece of Pacific Point card is adhered underneath.  A star is cut from Silver Foil Sheet and then another star is stamped and cut out with the matching Framelits and then layered together.  The greeting from ‘Bright and Beautiful’ is matted on a Pacific Point card piece and adhered to the card.

The right one is on a Real Red card base.  The ornaments are from ‘Ornamental Keepsakes’ stamp set.  Two Wild Wasabi Ornaments are stamped directly onto the Whisper White card mat. Another ornament is stamped in Real Red and cut out with the Framelits.  The “JOY” is from the ‘Bright and Beautiful’ stamp set and stamped in Smoky Slate.
P1150626

Now for the last two which I think is very clever.
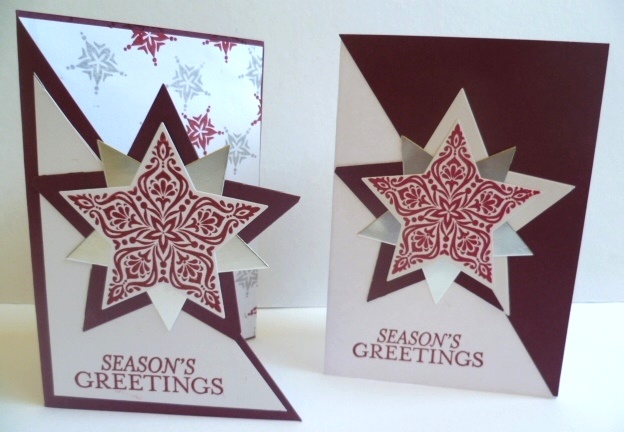
P1150624

The one on the left is on a Blackberry Base.  The front of the card is cut at an angle.  Then a Whisper White angled piece is adhered to the front.  Stars are cut from Blackberry Bliss, Silver Foil and a white one stamped.  These are all layered together and the greeting stamped on the front. Inside on a Whisper White card mat the smaller stars are stamped in the upper right corner and partway down on the right side.  This is in Smoky Slate and I think Cherry Cobbler (?).  The card on the right is on a Whisper White card base.  The angled piece that was cut from the other card is adhered to the front of this card.  Then a large star is cut from both Blackberry Bliss and Whisper White and half the white star is adhered to the Blackberry card.  (Clever!!).  Then another star is cut from Silver Foil Sheet and one stamped on Whisper White. These were layered on the front of the card and a greeting is added.

What do you think?? Pretty clever, Hey! I am so proud of her.  I think she has done an awesome job.  So why don’t you stand and applaud my Mother-In-Law’s great results.  Or why not drop her a comment here and tell her what an awesome job she has done.  I know she would love that.  Her name is Verna BTW. 🙂

Thanks for stopping by and seeing these wonderful cards today.

Well, I might just have to go back to showing you my projects next post!!

Until then, Happy Stamping,

Jenny 

cards, Christmas

A SHABBY CHRISTMAS STAR!!

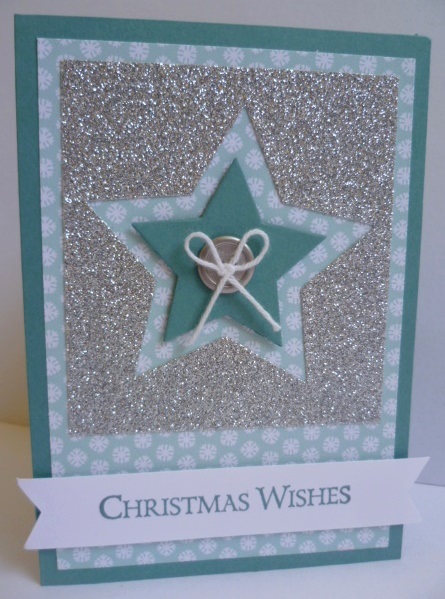
I was playing around a couple of weeks ago with some “bits” that were sitting around on my table.  I love this “shabby” style of Christmas card I made. (If you could call it that style!).  Here it is.

P1140936

I had a piece of silver glimmer paper with a star cut out from a previous project.  I really didn’t want to waste it.   Hey! It was nicely centred and positioned the right way especially compared to some other stars I had cut recently.  I layered a scrap piece of DSP from Nordic Noel DSP onto the Lost Lagoon base card.  I adhered the silver Glimmer piece onto this and added a smaller star cut from Lost Lagoon.  To the centre I added a little silver button and a White Baker’s Twine bow.  The greeting from Ornamental Pine is stamped on a strip of Whisper White card. I flagged the end of the strip.

This card really didn’t take that long to put together.  It is a one-of-a-kind though!! 🙂

Thanks for stopping by today,

Jenny

PS. Don’t forget the CLEAR-OUT SALE is on now. Some items are already sold out.  Head over to my store HERE and check them out.  You can order there and  it can be sent directly to you or email me your order.  (Australian Residents only). Thanks 🙂

cards, Christmas

HEXAGON DECEMBER WONDER!

Here is another card using the set ‘December Wonder’.  I thought the Hexagon ’25’ would work well with the Hexagon Punch.  I did find a card similar on Pinterest that inspired this card.

P1140934

I punched out some Hexagons with the Hexagon Punch from the ‘Nordic Noel’ DSP and lined them up on the Lost Lagoon piece.  To get the ’25’ in the right position I punched a Hexagon from scrap paper, added some 2 way glue to the back and let it dry a little so it was repositional.  Then I placed it in position in the centre, removed the DSP hexagons and then punched out the shape over the scrap paper one.  The stamped ’25’ was placed behind the Lost Lagoon card using Dimensionals to raise it up a little.  I adhered the rest of the Hexagons in place and stamped the Snowflakes over the card.  This piece was adhered to Whisper White card with Dimensionals and then adhered to the Lost Lagoon card base.  I finished it off with some Rhinestones and Silver Ribbon bow.

Thanks for stopping by to visit today.  Do say ‘Hi’ and let me know where you come from.  I love to hear from you.

Jenny 🙂

cards

A SHABBY CONGRATULATIONS CARD!!

I made this card a month or 2 ago now and realised I hadn’t shown you.  I needed to wait until the special person had received it – and then well, I forgot to show you.  I made this card for a lovely friend of mine who had just achieved one of her dreams in life.  It has been exciting watching her work towards this goal over the last few years.  She kept this dream alive the whole time through all the obstacles and through all the steps needed to achieve it.  It was so wonderful the day she told me she had “done it!!!”.  I had to make a card to celebrate! 

P1140592

This is very much her style.  Vintage, shabby, all the little details.  I did CASE this card off Pinterest but can’t tell you who sorry.

The greeting is from the Kit ‘Everyday Occasions’.  I love the greetings in this kit.  This was stamped in Lost Lagoon and cut with the Project Life Cards and Labels Framelits.  This is a great die-cutting set for any greetings.  Don’t just think of them for Project Life. I added some Rhinestones for the bling factor. The Whisper White card is embossed with the Honeycomb Embossing Folder.  I added half a doily to the top and wrapped around some Linen Thread and punched out some banners with the Banner Punch.  The flower is punched from Hello Honey card using the Itty Bitty Accents Punch. The white is layered onto Lost Lagoon mat and then adhered to a Whisper White card base.

Thanks for stopping by today.  I hope you have a wonderful weekend however you spend it.  I do hope there is some creating in it 🙂

Stop by again soon,

Jenny

3D projects, cards, Christmas

12 WEEKS OF CHRISTMAS – BONUS!!!

Latte 12 weeks Header

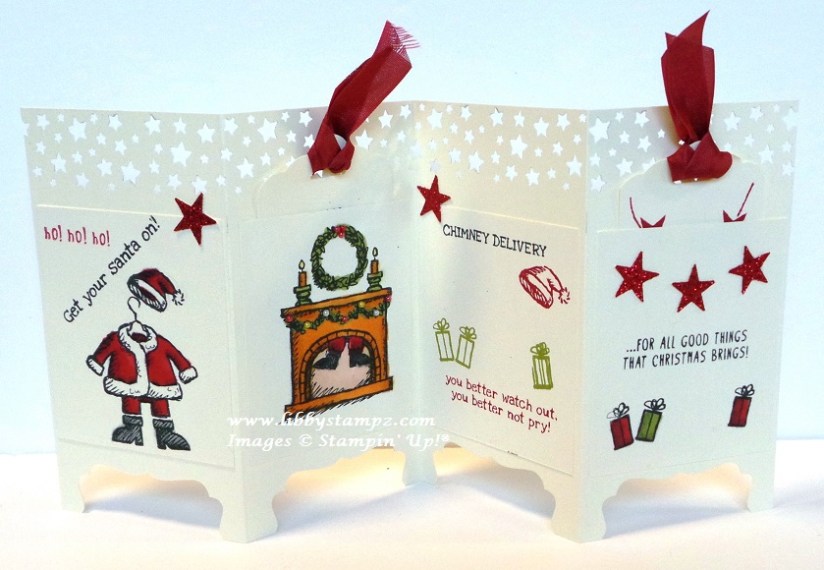
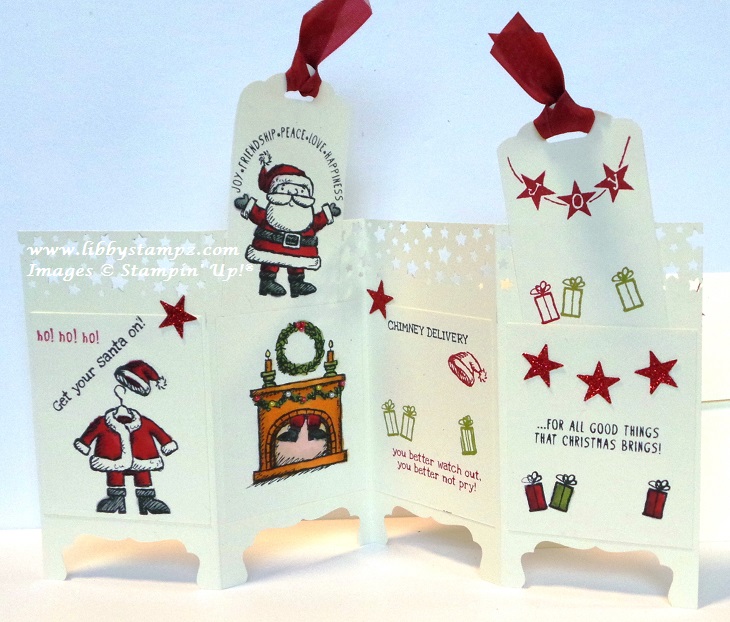
Have you been enjoying the 12 Weeks of Christmas projects the last few weeks.  Well, today I have a bonus project for you from the very clever Libby. This bonus project is a bit of fun and you could use the tags to write recipients names on them or use the back of the screen to write your personal message.

GetYourSantaOn13.jpg screen divider

HERE IS WHAT YOU NEED TO RECREATE THIS CUTE PROJECT.

  • Stamp Set – Get Your Santa On
  • Card – Very Vanilla, Red Glimmer Paper
  • Ink – Tuxedo Black Memento Black; Cherry Cobbler; Old Olive
  • Punches – Itty Bitty Accents Punch Pack; Decorative Label; Scallop Tag Topper; Confetti Stars Punch
  • Ribbon – ½” Cherry Cobbler Seam Binding
  • Adhesive – Liquid Multipurpose Glue
  • Blendabilities – Cherry Cobbler; Old Olive; Pumpkin Pie; Smoky Slate; Skin Tone; Colour Lifter; Daffodil Delight
  • Other – Basic Jewels Pearls; Stampin’ Trimmer; Simply Scored; Bone Folder; Acrylic Blocks; Stampin’ Mist; Stampin’ Scrub


GetYourSantaOn18.jpg screen divider

This card opens so you can create your own scene using all or most of the stamps from Get Your Santa On and it has little tags inserted so you can add some little surprise messages or images. This particular one will fold down to fit into a C6 sized envelope.  

If you would like a detailed PDF tutorial to create this card then drop me a message or email and I will get one sent your way. 

As we have done with our other 12 Weeks of Christmas project, we have a special bundle for you. Now this bundle is only available if you order through me and not through my online store.

SPECIAL BUNDLE OFFER

Get your Santa On $27.95

Confetti Stars Punch $37.95

P & P $5.95

TOTAL = $71.85 get a free Tuxedo Black Memento Ink worth $9.95

Contact me today to order this special bundle just for Australian Residents.

Thanks for stopping by today.

Have a great weekend,

Jenny

cards

EVERYTHING ELEANOR FOR A WEDDING CARD!

Yesterday we went to a wedding for a work colleague of Glenn’s.  It’s always interesting when you don’t even know the bride and groom!! It was a lovely wedding though.  The wedding invitation was in a Crumb Cake colour with black swirls. I knew for the wedding card I wanted to replicate this.  The stamp set ‘Everything Eleanor’ was dusted off. I have hardly used this set but it was one I loved when it first came out.  Here is the card.

P1140587

It is hard to tell in the photo but I Heat Embossed the swirl, the flower and the greeting so it had a nice shine to it. The greeting is from ‘Petite Pairs’ and punched with the large oval punch.  I used the Crumb Cake Taffeta ribbon (retired) and some pearls to finish it off.  I thought it would be a bit heavy to have a Black card base so I matted the stamped piece in black cardstock and layered it on a crumb cake base.

I think the Bride and Groom will like it???

Have a good week this week.  I hope it is a creative week for you.  🙂