cards, Classes

CHRISTMAS STAMP A STACK!

Another Christmas Stamp A Stack is this Friday. Have you been thinking about coming along but not sure.  Then if you are in the local area (Wollongong area) you really must join us.  We are normal – kind of! ;).  We do have a lot of fun and laughs at these classes.  Here are the details for you.

This Friday 10th October 10am or 7.30pm.

Cost: $15.  BYO: scissors and adhesives.

Please RSVP by Thursday so I can have your card cut all ready to go.

Here is what we will be making this week.

P1140594


See you there or at another class very soon. 🙂


cards

BLACKBERRY BLISS SNOWFLAKE THINLETS!

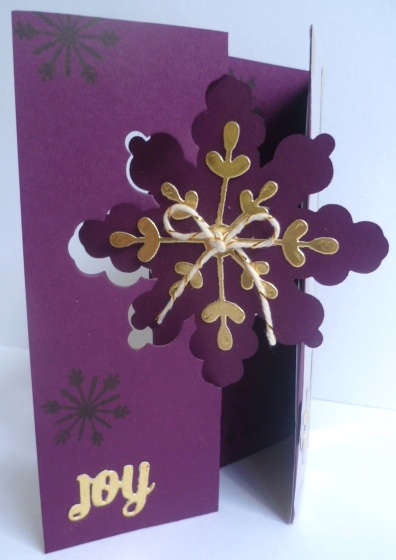
I made this card a few weeks ago and realised I hadn’t shown you.  I think I shared it on my Facebook page but forgot here.  SO, here it is! This is one of the first cards I made using the Snowflake Thinlets from the Holiday Catalogue.

P1140334                      P1140335

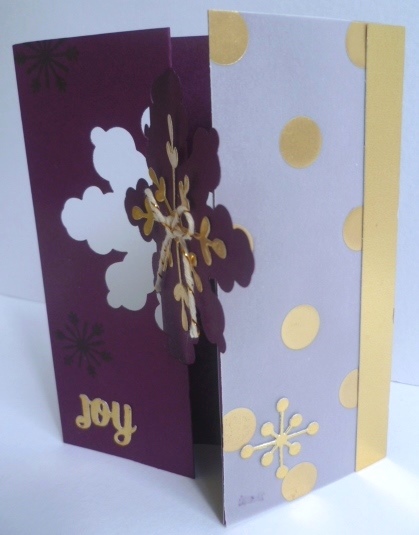
These cards are a bit hard to photograph but I hope you get the idea.  I extended the card so it has a little fold out flap. On this flap I adhered some Gold Vellum and a strip of the Gold Foil Sheet.  I cut the snowflakes and the joy word out from Gold Foil sheet also and adhered them on the card.  I stamped the snowflakes from the set ‘Cheerful Tags’ over the Blackberry Bliss card.  I think they co-ordinate so well with this Thinlet.  I finished it off with a Gold Twine bow on the front snowflake. Hope you like???

Thanks for stopping by today.  Do say Hello.  I love to hear from you.  🙂

cards, Punch Art

FIRST BIRTHDAY TEDDY BEAR!

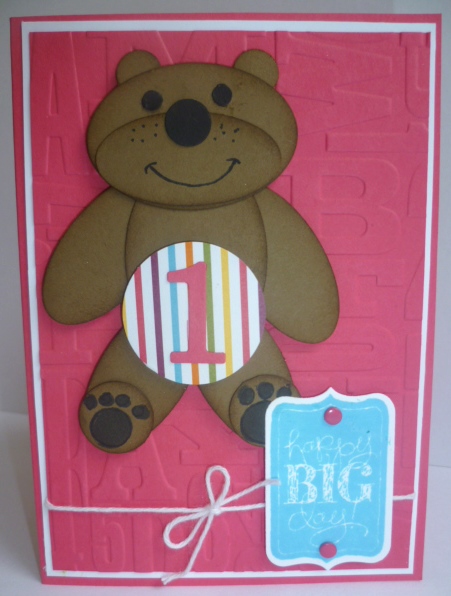
I can’t believe I forgot to show you this card.  I made this a few weeks ago for one of my Great Niece’s 1st Birthday.  I was a little stumped at first what to do as I had nothing really suitable.  I did consider the ‘Something for Baby’ set but then I thought PUNCH ART!! It has been ages since I did something like that.  This little bear took a little while to work out.  I did have a Punch Art Bear similar I had made a while ago but I had to reconfigure him.  Once he was done the card came together fairly quickly. Do you think he is cute???

P1140321


I used a number of oval and circle punches to create his body and sponged all the pieces. The greeting is from ‘Chalk Talk’ and finished with some Melon Mambo Candy Dots. I embossed some Melon Mambo card with the ‘Alphabet Press’ Embossing Folder and layered this piece on to a piece of Whisper White (after tying around some Whisper White Baker’s Twine). Then this was all adhered on to a Melon Mambo Card base.

I hope you like my cute little friend.

I hope you have wonderful weekend wherever you may be. Sending some Bear Hugs your way.

Jenny x

3D projects, Blog Hops, cards, Techniques

STAMP-A-LATTE HOLIDAY BLOG HOP!!

Latte Holiday blog hop banner

Welcome to the First Stamp A Latte Holiday Blog Hop.  We all have some great projects from the Stampin’ Up! Holiday Catalogue to share with you today.  You may have just come from Narelle’s blog Here or you may be starting out here. Either way sit back and enjoy your little hop around.

Today I am focusing on the Snowflake Thinlets. I really like this Thinlets set.  They are so versatile for a number of different occasions not just Christmas.  Not only does it contain the Thinlet to create the Flip card but it has a 2 different size snowflakes, a tree, a heart, banner and 3 words (Brrr, Joy, snow).

snowflake thinlets

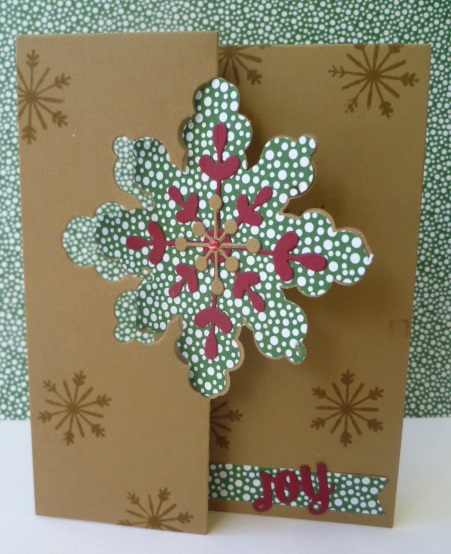
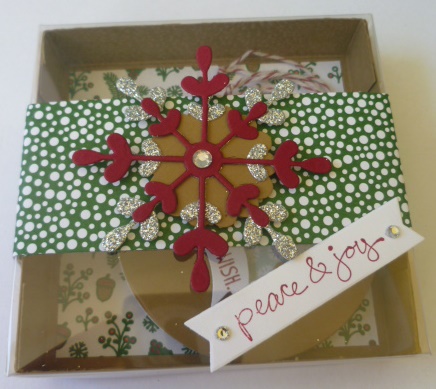
On to my projects.  I have made a cute little tag box and a flip card.

P1140514

Firstly, the card…

P1140516

I have used the Nordic Noel DSP with Baked Brown Sugar and Cherry Cobbler cardstock. The snowflakes stamped on the card are from the ‘Cheerful Tags’ set.  They co-ordinate so well with this die I think.  I cut a large snowflake in Cherry Cobbler and a smaller one in Baked Brown Sugar to layer them together.  The Rhinestone in the centre was coloured with the Blendablilites.

What made this Thinlet die even more useful is that recently I discovered that you can cut the centre large snowflake out.  I was watching the Stampin’ Up! Snowflake Thinlet video here and they showed this little tip.  I will show you below.

Cutting a Thinlet Snowflake.

Cut a piece of DSP or cardstock larger than the shape and cut it out with your Big Shot.
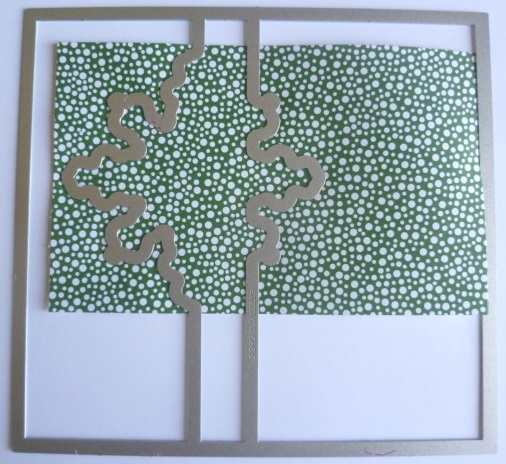
P1140456 - Copy

Turn the Snowflake to line it up in the Die the other way to cut it out completely.  I found it easier to lay the Die upside down on a cutting plate and place the DSP or cardstock into the Die rather than try and line the Die over the paper. Then you can just lay the other cutting plate on top and cut it.
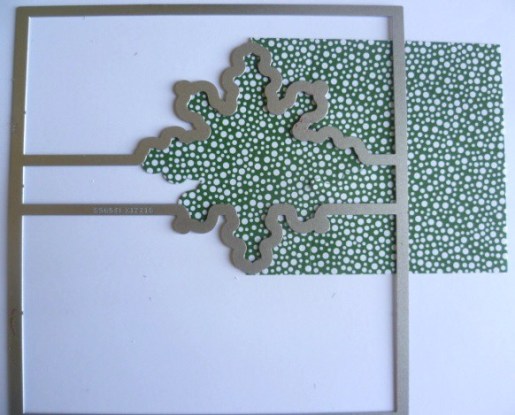
P1140457

This is what you end up with. How cool!
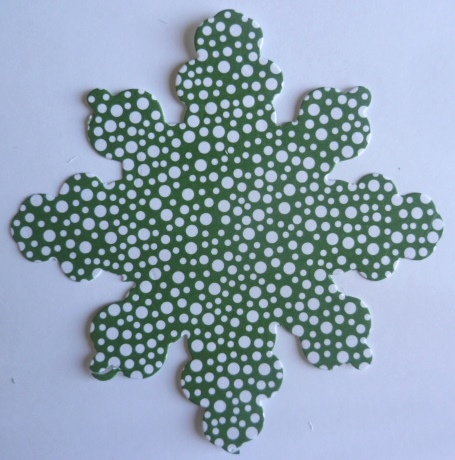
P1140458


Now on to the box.

P1140518

Once again layering some cut Snowflakes on the top.  The greeting is from the ‘Good Greetings’ set that you can get for free this month. Check the blog post here if you missed those details.

Now on to the inside.
P1140519

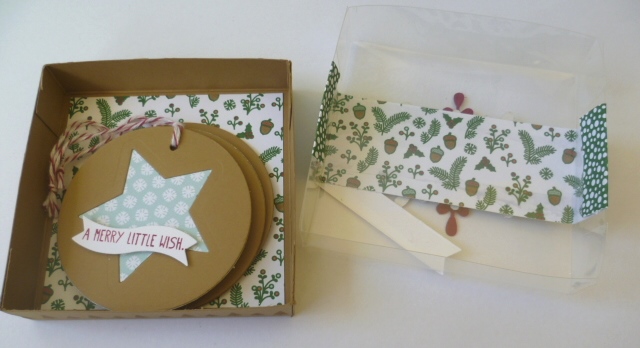
I used the Nordic Noel DSP again. I added a strip of DSP on the top of the acetate lid but it doesn’t wrap right around.  I lined the bottom of the box too.  This one was the reverse side of the DSP strip used on the lid.  It holds these cute tags I made.  I just made 3 but you could easily fit lots more in there.

Here they are close-up.
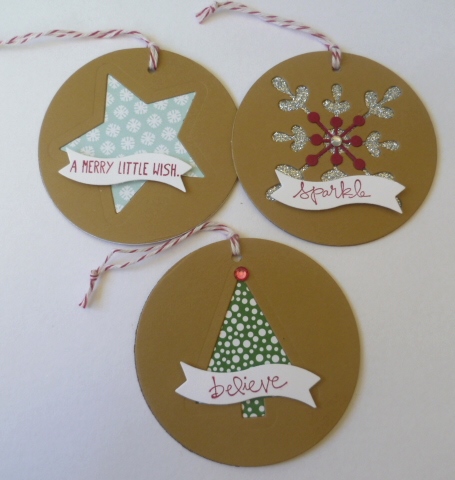
P1140520

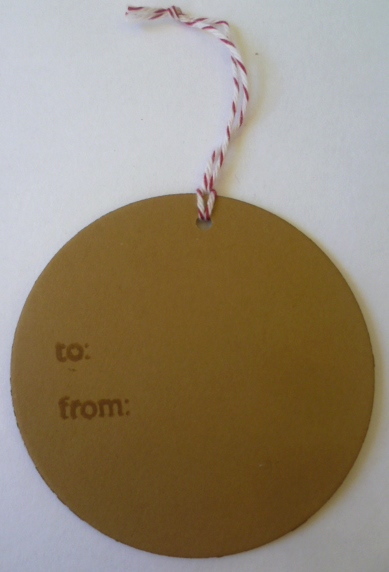
I used the 1 3/4″ circle Punch to cut the Baked Brown Sugar circles. The tree and snowflake are cut from the Thinlets.  The Star is one from the Star Framelits set.  These Banners were cut with the Bitty Banner Framelits.  Here is the back. The “to” and “from” is from the ‘Cheerful Tags’ set again.
P1140521


OK now you have had a photo overload.  I will spare you anymore so you can be on your way.  If you would like to know how I made the cute Tag Box then stop by tomorrow and I will post a tutorial.  I think I have taken up enough of your time.  You need to get on to the next blog now.  Thanks for stopping by today 🙂

Remember to stop by and comment on each blog so you can be in the running for a prize.  You will go in a draw for a Trim the Tree DSP Stack and a pack of Rhinestones (Australian Residents Only & Stampin’ Up! Demonstrators are ineligible for the Blog Candy).  Now on to Virginia’s blog Here.

If you get lost here are a list of blogs you will visit today.

  1. Leonie Schroder     http://www.stamp-a-latte.com
  2. Narelle Fasulo         http://www.simplystampingwithnarelle.com
  3. Jenny Hayward      http://www.astampingjourney.wordpress.com
  4. Virginia Hampson    http://www.stampinup.net/esuite/home/stampoutyourartwithvirginia/blog
  5. Libby Dyson           http://www.libbystampz.com

cards, Techniques

DON’T MISS OUT ON MY ONLINE PARTY!!

My Project 67-001

It’s On TOMORROW!!! Have you joined in the group yet? Here are the details. 

WHEN: Friday 19th September starting at 7.45pm.  If you can’t make it at that time then you will be able to go back and join in later.

WHERE: Through a Private Facebook Group, and you can join wherever you are in the world!  If you are not on Facebook then read below.

To join head Here to the group page and CLICK ‘JOIN’. Do this before the event so you are all ready to go.  

WHAT: There will be fun projects and games and Giveaways PLUS go in the draw to win!!!

For every $50 order you will go in the draw to win the cute little stamp from the Holiday Catalogue ‘Bearing Gifts’.

Bearing Gifts


Here is a sneak peek of one of the projects I am sharing.

P1140442 - Copy


OK, so you are not on Facebook?? Here is how you can join in.

1) Go and visit a friend who has Facebook and join in together.  You can have your own party!

OR

2) If you place an order then you can receive the tutorials for the projects I share.  If your order is over $50 you still can enter the draw for the cute stamp set.  

** If you are ordering ONLINE  (which you can do through my Online store Here  you can use the Hostess Code  WDVPNNM7

** Demonstrators and non-residents of Australia are not eligible to enter the prize.  Non-residents are not able to order through me due to Stampin’ Up! conditions.

 
So what are you waiting for ?? Come and join in. I look forward to chatting to you on the 19th!!!
 
Jenny
cards

A TRIO OF SANTA’S!

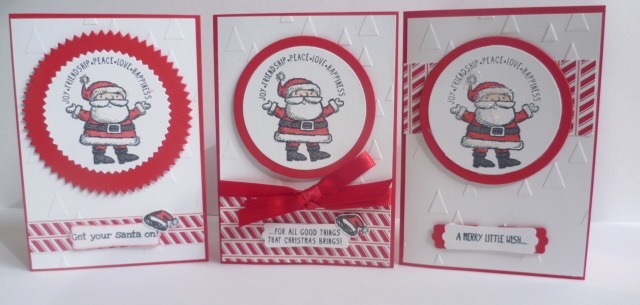
Have you seen this cute set in the Holiday Catalogue “Get Your Santa On”.  I love  colouring the images.  I have a few things in mind with this set but first I just played around with some simple cards.  Check them out!

P1140434

Aren’t they cute!

They are similar layouts.  The one on the right is one we did at my Stamp-A-Stacks on the weekend. I used the ‘On Point’ Embossing Folder and the Nordic Noel DSP.  I also used the Starburst Framelits or the Circle Framelits.  The red ribbon is the Real Red Satin Woven Ribbon.  I love that ribbon.  It is so easy to use and tie.

To colour him I used the Cherry Cobbler Blendabilities pack.  The lightest colour is a good match to Real Red.  How good is that!!  I used the Nude colour in the Skin Tone pack for his cheeks and the darkest colour in the Smoky Slate pack. You can’t see it in this photo but I used some Dazzling Diamonds applied with the 2 way Glue pen.

Here they are close-up.

P1140345

P1140342

P1140410

Hope you like them??

Thanks for stopping by 🙂

cards

ORNAMENTAL PINE!

I have made quite a few of these cards recently to send out with the Holiday Catalogue.  I really liked this stamp set when I first saw it.  Most days I see these type of pine trees when I go walking. I love that you get some beautiful images Plus special greetings all in the one set.

P1140275

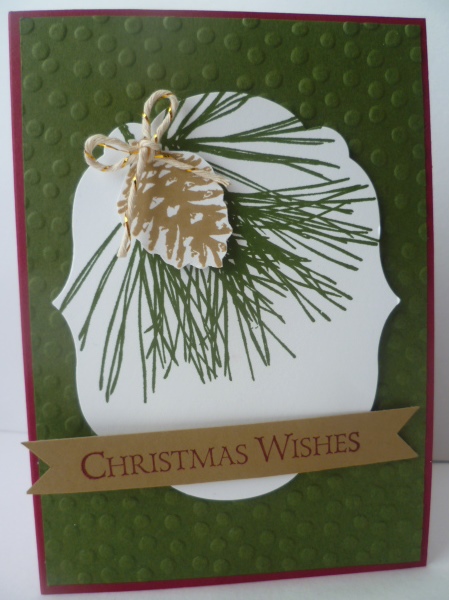
I have used Mossy Meadow and Cherry Cobbler which might be a popular colour combination this Christmas.  I love the richness of them together.  I embossed the Mossy Meadow piece with the ‘Decorative Dots’ Embossing Folder.  I stamped the pine branch in Mossy Meadow on Whisper White and then cut it out with the Labels Framelits.  I stamped the pinecone in Baked Brown Sugar ink and cut it out.  This was raised up off the White stamped piece with a little Gold Twine bow added.  The Greeting was stamped in Cherry Cobbler onto a strip of Baked Brown Sugar card and then I flagged the ends.  This was raised up off the card too.  A simple card but one that is easily reproduced many times I think.

Have a great day,

Jenny

cards

“GOOD GREETINGS” FREE!

Don’t you love all the freebies you get when you host a party! What you didn’t know about that??? When you get the qualifying sales (which is very easy to meet), you get FREE products to choose on whatever you want!!! Well, can I tell you that from now until October 31st you get not just these special rewards because you are the “Hostess with the Mostest” BUT you can receive a FREE STAMPSET with $300 minimum in orders OR if you don’t want to party then order $300 of products just yourself!!!  That can be very easy to do especially now with the Holiday Catalogue out!

Let me tell you this stamp set is great.  There are so many greetings in this set that you can use it for any occasion all year. That’s why they call it ‘Good Greetings’.  Check it out below.

Good Greeting promo


You will want a closer look at the greetings, won’t you!

Good Greetings

So many uses for this set – and to think it is FREE! There are quite a few you could use even now as you start your Christmas creating. Now if it has been some time since you had a party OR you haven’t got around to having one yet, then maybe NOW is the time.  If you are not sure how a party all works then check out the website here to help you with your concerns.   If you are local I would love to share stamping with you and your friends.  It’s a lot of fun and I know  you and your guests will have a great time.  Let’s set a date.  We can use this set at your party too so you can see some ideas to use it.  Can’t wait to show you.  🙂

cards, Stampin' Up!, Techniques, Tutorials

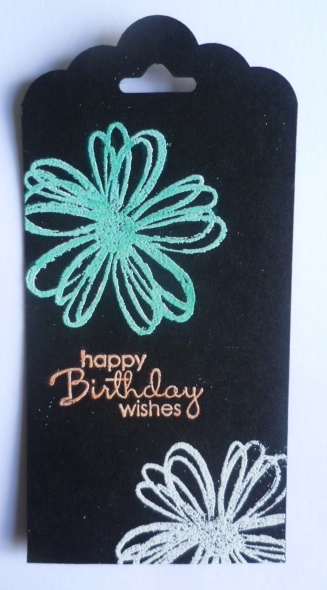
BLENDABILITIES + WHITE EMBOSSING = COOL EFFECT!!!!

I am loving using the new Blendabilities.  Have you had much of a play yet?? When they first came out I discovered this cool technique but I only got a chance to try it out a couple of weeks ago. Finally I can show you the cards PLUS I have a tutorial so you can try this out yourself.

For this card I used the Hostess Set “Hello There”.  I love how you can get the different coloured effect.  Isn’t it cool???  Once I coloured it (which you can read about in the tutorial below), I added it to my card.  For the card I wrapped some White Baker’s Twine around a piece of Sweet Taffy DSP and adhered this to a card base of Melon Mambo. I added the little flowers punched from the Itty Bitty Accents punch pack.  It is hard to see it clearly but I added some Dazzling Diamonds to the centre to add some sparkle.

P1140207

So how do you create the effect?  I will show you.

COLOURING WHITE EMBOSSING WITH BLENDABILITIES

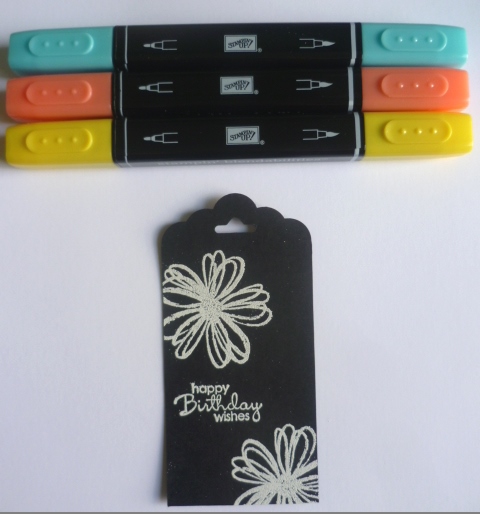
To show you how to create the technique I am making some little tags using the Scallop Tag Topper Punch.

1. White emboss your image. If you are not familiar with that then I will just explain this.  Swipe your cardstock with the Embossing Buddy (this reduces the static on your project in which stray specks of embossing powder will cling to).  Stamp your image in Versamark and then pour over your White embossing powder.  Tip off the excess then heat the image with your Heat Tool to melt the Embossing Powder.  (I love watching the embossing powder melt.  It is so magic.  I don’t think you ever get sick of watching it.)

Take just a minute to let this dry before you start colouring.

2.  Select your Blendabilites.  I used Coastal Cabana, Calypso Coral and Daffodil Delight.  Colour over your image as you like.  I found using the fine tip more effective especially on the finer parts of the image.

P1140279


P1140281

3. Once you have finished colouring you can complete your project.

P1140277

I made lots of these at the time to give out.

P1140282

Now you can go and try this technique yourself and watch the magic happen.  ENJOY!!

Until next time 🙂

Jenny


cards

BORDERING BLOOMS!

A couple of weeks ago I had a chance to play with the ‘Bordering Blooms’ set.  This was my first time playing with Photopolymer stamps too.  I have to say I loved them.  Love how they stick to the block and stay!!! They are very easy to use too being able to see clearly through the block.  So here are the cards I made then.

This first one was CASED from Pinterest by Shelly Godby.  Her version was a lot more gorgeous and she stamped the inside too but I was happy with this.  I used Crisp Canteloupe and Baked Brown Sugar.  The scallop edge under the border was using the Dotted Scallop Ribbon Punch.  The greeting is from ‘Wetlands’.

P1140198

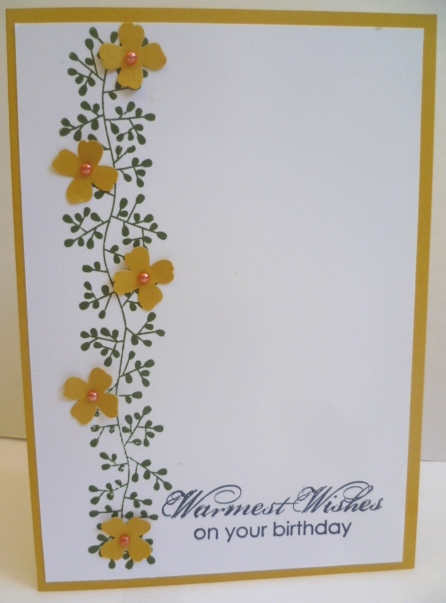
Another quick card.  This one was CASED from Sharon Burkert on Pinterest.  Her card had a White Card base.  I decided to make mine on a coloured card base so I used Hello Honey.  I think this will look good on any colour base.  I will try that sometime soon.  The little flowers were punched from the ‘Itty Bitty Accents Pack’.  The greeting was from ‘Blooming with Kindness’.  I coloured Adhesive Pearls with the Calypso Coral Blendabilities set.

P1140193

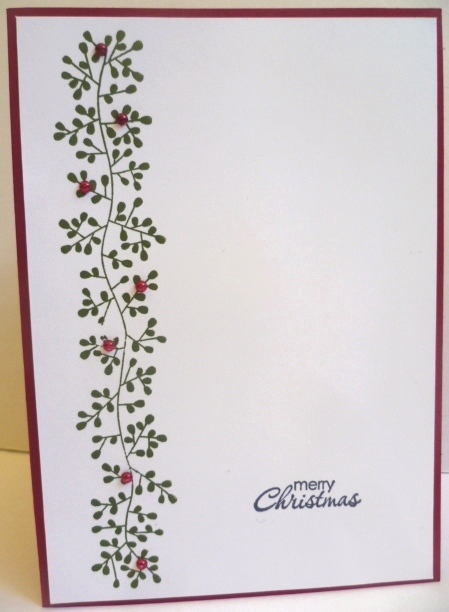
I liked this simple layout so I thought I would make it into a Christmas Card.  My first for the season. It’s a bit hard to get your head around Christmas yet but since the Holiday Catalogue is out very soon I have to make a start.

P1140191

I used Cherry Cobbler and stamped the “vine” type image in Mossy Meadow.  The pearls were coloured with the Cherry Cobbler Blendabilities.

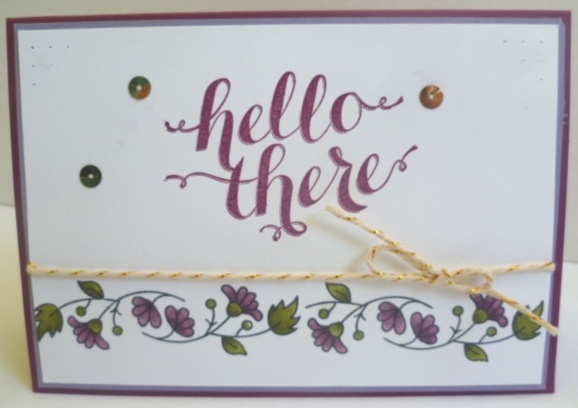
One more – sorry.  This next one I made for a workshop last week.  After stamping the blooms I coloured them with the Blendabilities.  The greeting is from the hostess set ‘Hello There’.  I added a little of the Gold sequins, Gold Twine and some paper piercing.  I haven’t used this colour combination for some time using Rich Razzleberry and Wisteria Wonder.

P1140195

Hope you liked them.  I think these will be a great addition to your stamp collection suitable for many occasions.  Check it out below.  You can buy this or any other Stampin’ Up! products in my Online store.  Check the link in the right hand side bar.

Thanks for stopping by today. The rain is still pouring down here but it is good to have it.  The grass was looking a little brown. Hope all is well in your part of the world.  🙂