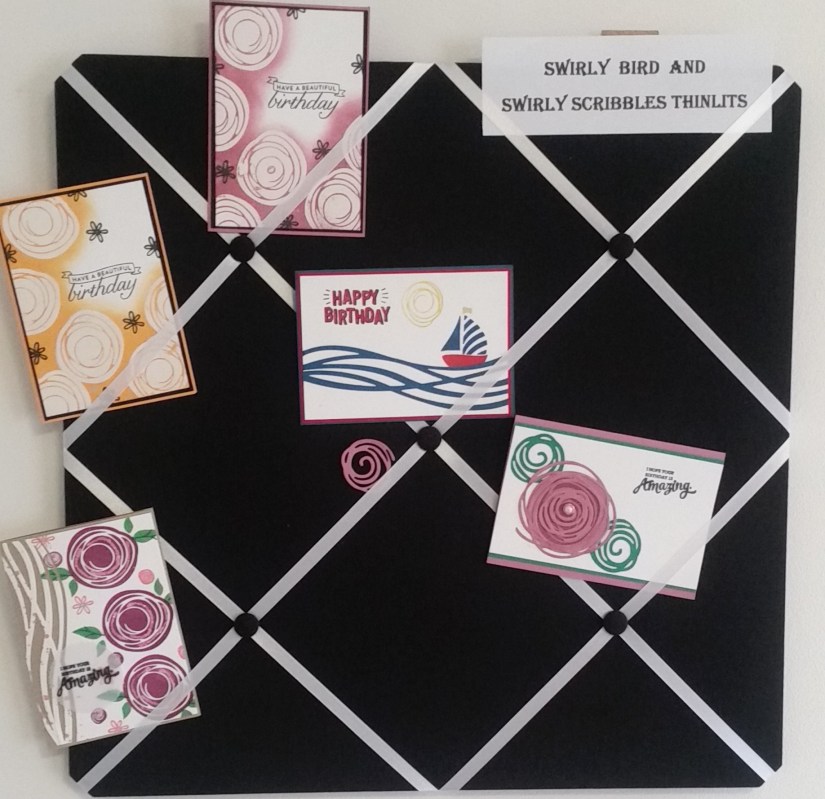
cards, Stampin' Up!

SINGLE SWIRLY PINWHEELS!

I had to play with the Swirly Bird set again and make some more pinwheel cards.  They are so fun to make.  This time I made single Pinwheels and made some different colours.
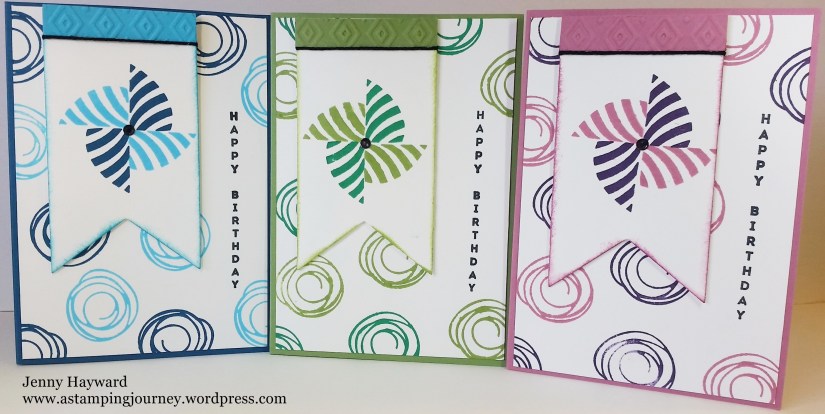
Swirly Pinwheels - Group

I will show you them individually.  First one is Dapper Denim and Tempting Turquoise.
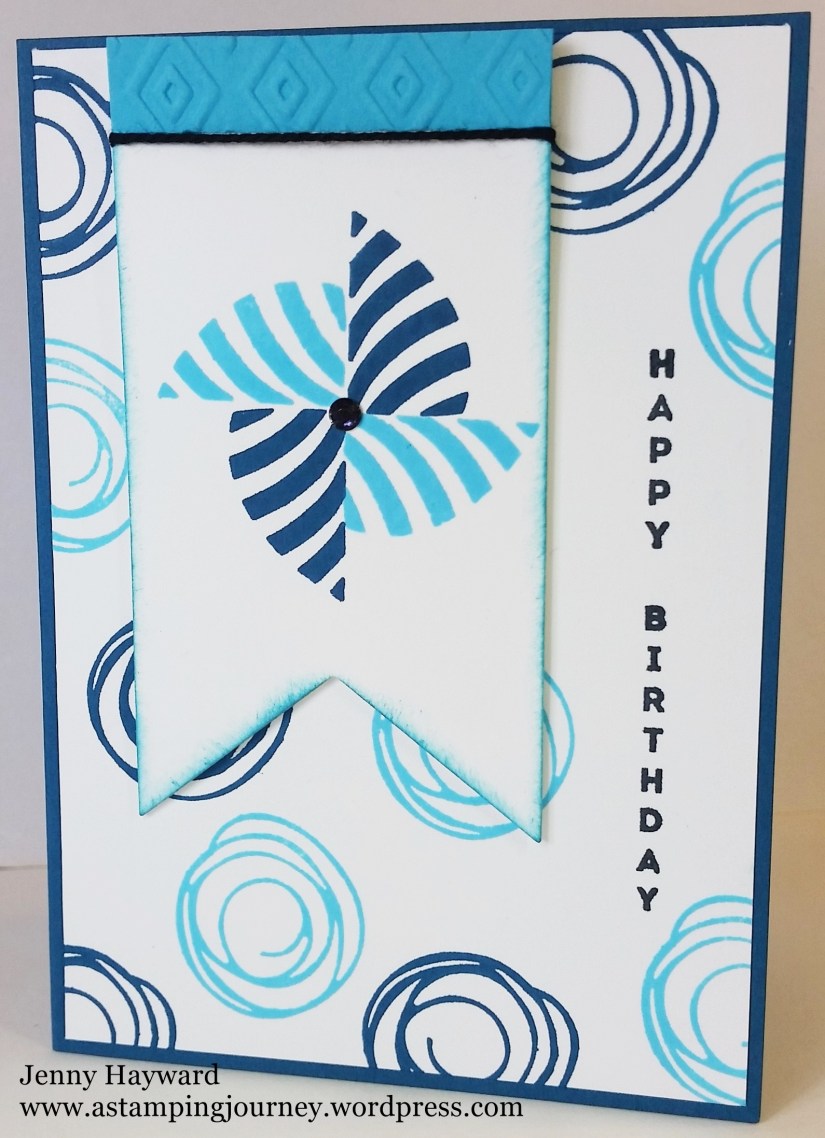
Dapper Denim Swirly

Next one is Wild Wasabi and Emerald Envy.
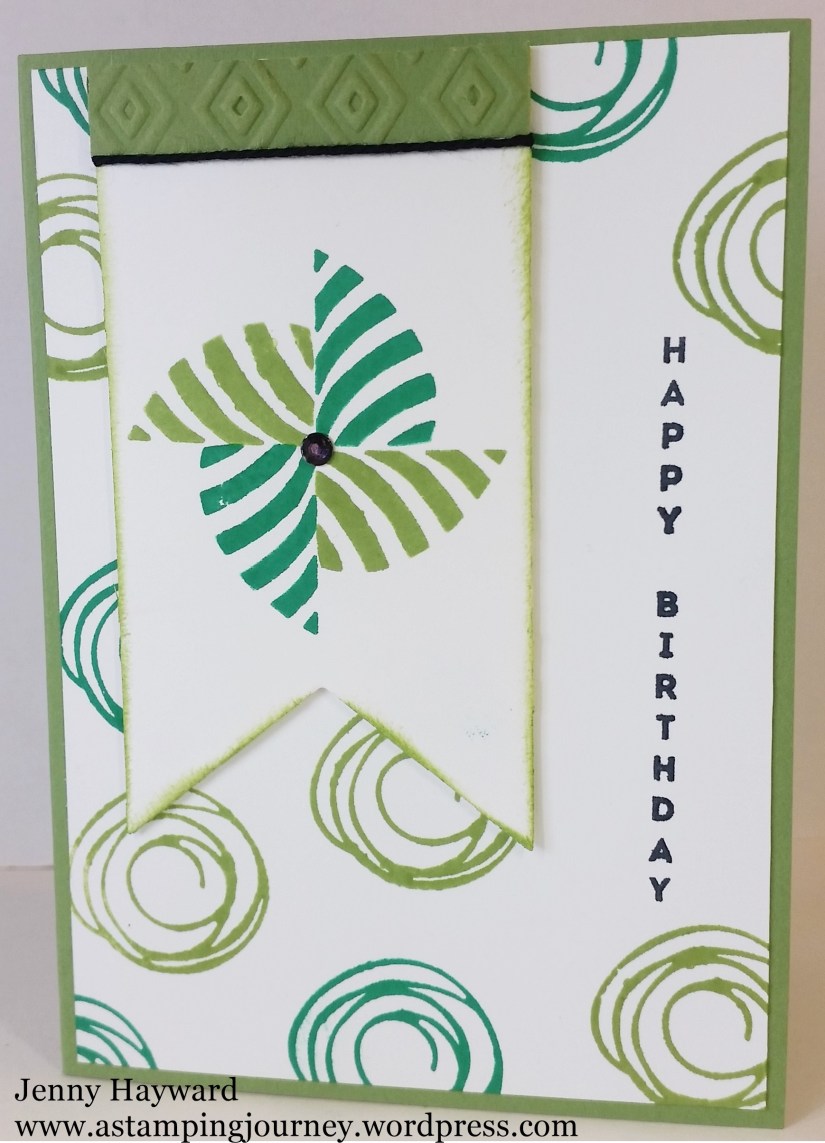
Wild Wasabi Swirly Pinwheel

This next one is Sweet Sugarplum and Elegant Eggplant.
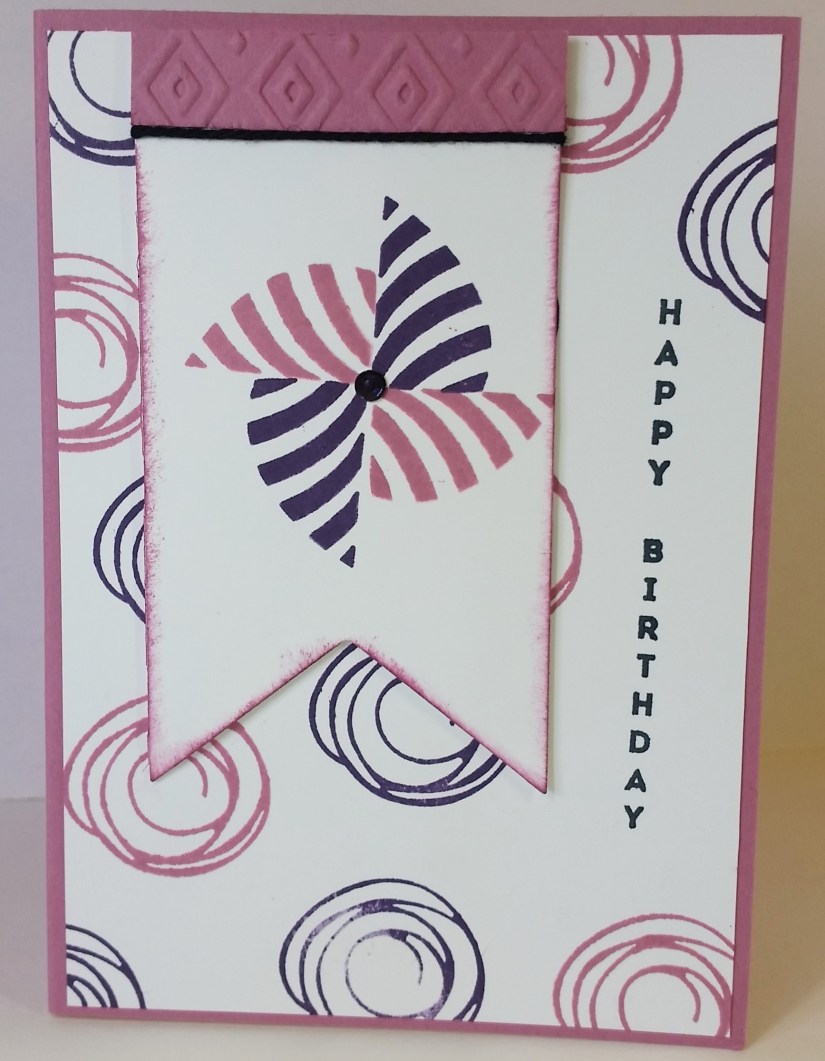
Sweet Sugarplum pinwheel

To make them I simply cut a piece of Whisper White card with the Banners Framelits and then stamped the pinwheels in the colours.  I sponged the edge of the banner.  At the top of the banner I embossed a small strip of the colour card with the Boho Chic Embossing Folder and wrapped around some Thick Black Twine.

The sentiment is from Vertical Greetings and I stamped over some Whisper White card with the swirls from the stamp set.  The centre of the banner is an adhesive Rhinestone that I have coloured with a black Sharpie.

You can see the original Swirly Pinwheel card I made a couple of weeks ago in THIS post if you had missed it.

Go and make some pinwheel cards yourself.

Thanks for visiting.   I hope your weekend is going great?? 🙂

Jenny
cards, Stampin' Up!, Techniques

BEST BIRDS WITH PLAYFUL PALETTES!

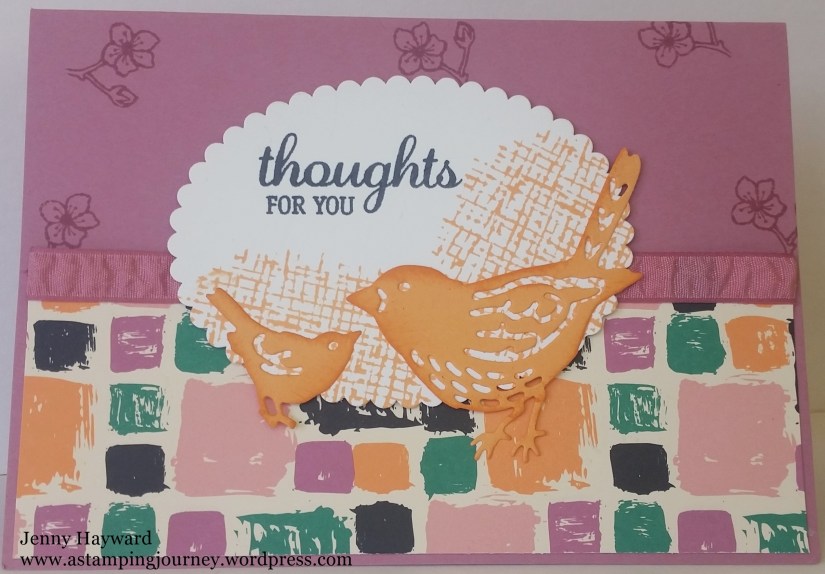
After I made the card with the Best Birds set the other day (you can see that card in a post or 2 back), I thought I would make a couple more cards with these stamps and dies.  I had some bits of the Playful Palette DSP stack lying around and I am really trying to use my paper more. I have so much paper left over when it comes to the end of a catalogue.

These “bits” were just the right size for the front of a card.  Here they are for you.

The first card is using the Sweet Sugarplum card base.  Flowers were stamped on the base. I have used the new Oval Layering Framelits to cut some white card and stamped the hatch pattern in Peekaboo Peach and the sentiment in black.  I really like the sentiments in this set. It has beautiful font and lovely words. I sponged the edges of the Peekaboo Peach birds before adhering them to the card.

Best Birds 2

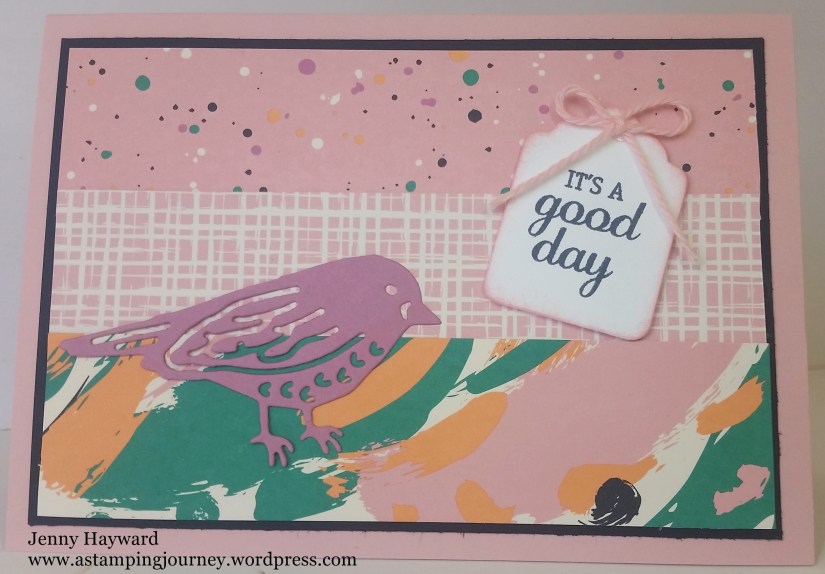
The next card I had 3 pieces of the Playful Palette Paper stack that just fitted nicely.  I matted them on to black card and added it to a Blushing Bride card base.  The bird was cut in the Sweet Sugarplum.  The tag is cut from the ‘Tags and Labels’ Framelits.

Best Birds and Playful Palette strips

So some cute cards using  “bits” on my table.  That’s always a good thing isn’t it. 🙂

Have a great weekend,

Jenny

Catalogues, Classes, Stampin' Up!

BONUS DAYS START TODAY WHERE YOU CAN GET A CREDIT COUPON FOR NEXT MONTH!

header_bonusdays_demo_july0716_eng

This month (from 7th – 31st July) for every $90 spent you receive a $9 coupon to redeem next month.  This is a great way to check off those items on your wish list!

You can get some items now and some next month. Stretch out your spending – and save money in the process! I am sure you can easily find $90 to order especially with the lovely new catalogue out. Your bank account will love you. 🙂

HOW TO ORDER

You can order directly at my Online Store HERE.  (Australian residents only).

Please use the Host Code: SGX4CRDG

OR

By emailing or phoning me your order.

*PLEASE NOTE: Your redemption coupon will be emailed to you directly following your order with your coupon number.  Please keep the email sent as these emails can not be resent.

cards, Stampin' Up!, Techniques

BEST BIRDS IN ROSE RED!

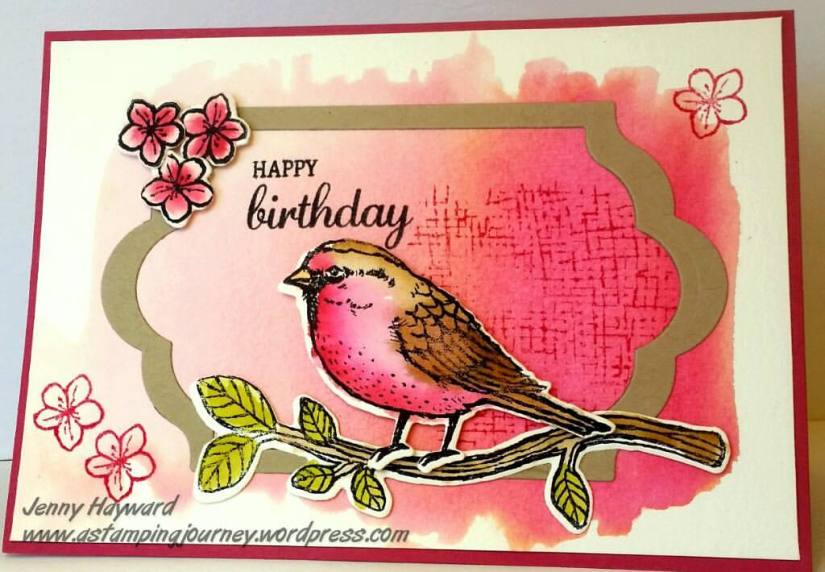
Yesterday was my Mother-in-Law’s birthday.  As she makes cards herself the pressure is always on when I make a card for her.  I thought for the card I would ink up the ‘Best Birds’ set that I have had for a few weeks and have not been able to use yet. I played around with watercolouring it.  I will show you the card and then share a few tips in making this.

Rose Red Birds

I chose Rose Red as the base card as that is my Mother-in-Law’s favourite Stampin’ Up! colour.  Well any of the reds!  (TIP#1) I used a piece of Watercolor paper and firstly washed over the card in the centre area with the aquapainter to lightly dampen the card  I have discovered recently by wetting the card it allows the ink to spread much easier creating a more washed look.  I used Blushing Bride on the left, then Rose Red in the middle section and Cherry Cobbler towards the right end.

(TIP#2) For regular watercolouring you can use the Thick Whisper White card or Shimmery White but if you are creating a washed look you MUST use the Stampin’ Up! Watercolor paper. (TIP #3) You need to be patient and let it dry.  Either you can use a Heat Tool or leave it for a few hours.

I stamped the bird, the branch and the flowers on watercolour paper too Black StazOn and watercoloured them.  (TIP #4) When colouring the bird I gave a light watercolour with the Rose Red and added highlights of Cherry Cobbler.  On the wing I washed over it with Crumb Cake and then highlighted it with Soft Suede.  The branch was coloured with Soft Suede for the branch and Old Olive for the leaves. The flowers were coloured with Rose Red and then darker highlights added in the centre with more concentrated Rose Red.

These were all then cut with the matching ‘Birds and Blooms’ Thinlits.  Too easy with that. No hand cutting necessary!! 🙂

I was going to cut the washed piece with the ‘Lots of Labels’ Framelits. I left the framelit on the card ready to cut in the morning but when I looked at it then I thought it might look OK to have a frame over it.  I cut the frame from Crumb Cake with the 2 largest ‘Lots of Labels Framelits’.  I am really pleased I went that way with it. I stamped the hatch pattern from the stamp set in Rose Red in the middle of the piece and stamped the sentiment in Memento Black.  Then it was all put together and a couple of flowers stamped around the edge to finish.  I was pleased with the finished result – and I think it received approval when I gave it to her today. 🙂

I hope you found these tips helpful when you create your next watercoloured card.  Let me know how you go.

Have a great day,

Jenny

cards, Stampin' Up!

CELEBRATING A 90TH!

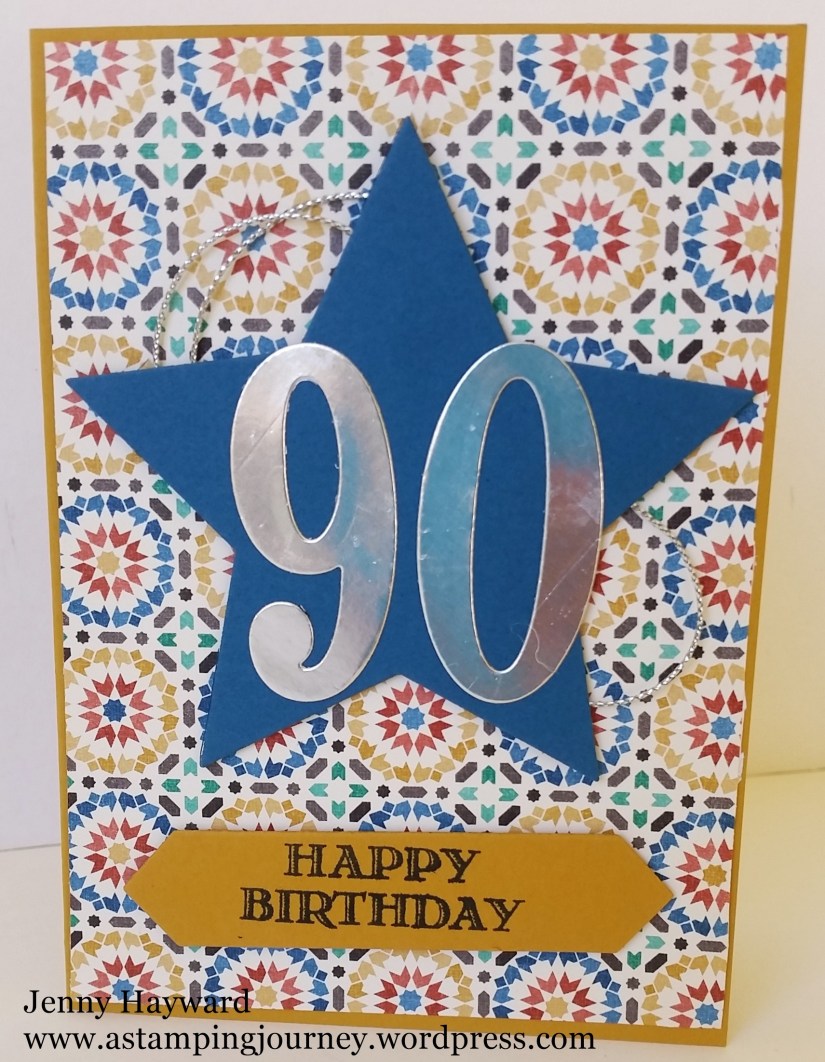
Last week we discovered it was one of my neighbour’s 90th Birthdays.  This is a great occasion so of course I had to make a card.  I didn’t have a lot of time as I was in the middle of class preparation but I whipped one up quickly.  Here it is for you.

90th

I have used the Moroccan Designer Series Paper for this card 1) because it was quick but 2) because my neighbour is Estonian and while they are not near to each other the bright patterns and colours suited the occasion I thought.  Blue is one of the colours in the Estonian flag so the Dapper Denim really worked well.

The base card is Delightful Dijon. The sentiment is from ‘Guy Greetings’ set and cut with the Project life Framelits.  After I cut the star using the Star Framelits I looped behind some Silver cord (retired) and added the Silver Foil number “90” with the Large Numbers Framelits.  I think he was very touched by the card and it was lovely to give it to him and chat about his life in Estonia.  It’s a remarkable age.

Have a great weekend wherever you may be.  I hope it is a crafting one?  I am planning on a little creating myself.

See you again soon,

Jenny

cards, Classes, Stampin' Up!

SOME MORE SWIRLY BIRDS!!

I have some more Swirly Bird cards to show you today.  This is such a fun set. Have I told you that before 😉

Here they are. These first 2 cards we made at our Swirly Bird class along with others I had already shared. These cards were inspired by ones I had seen on my internet travels.

On this first one, the sentiment is from ‘Butterfly Basics’ and the clouds are from ‘Sprinkles of Life’.  The base card is Dapper Denim with the kite stamped in Dapper Denim and Real Red.

kite

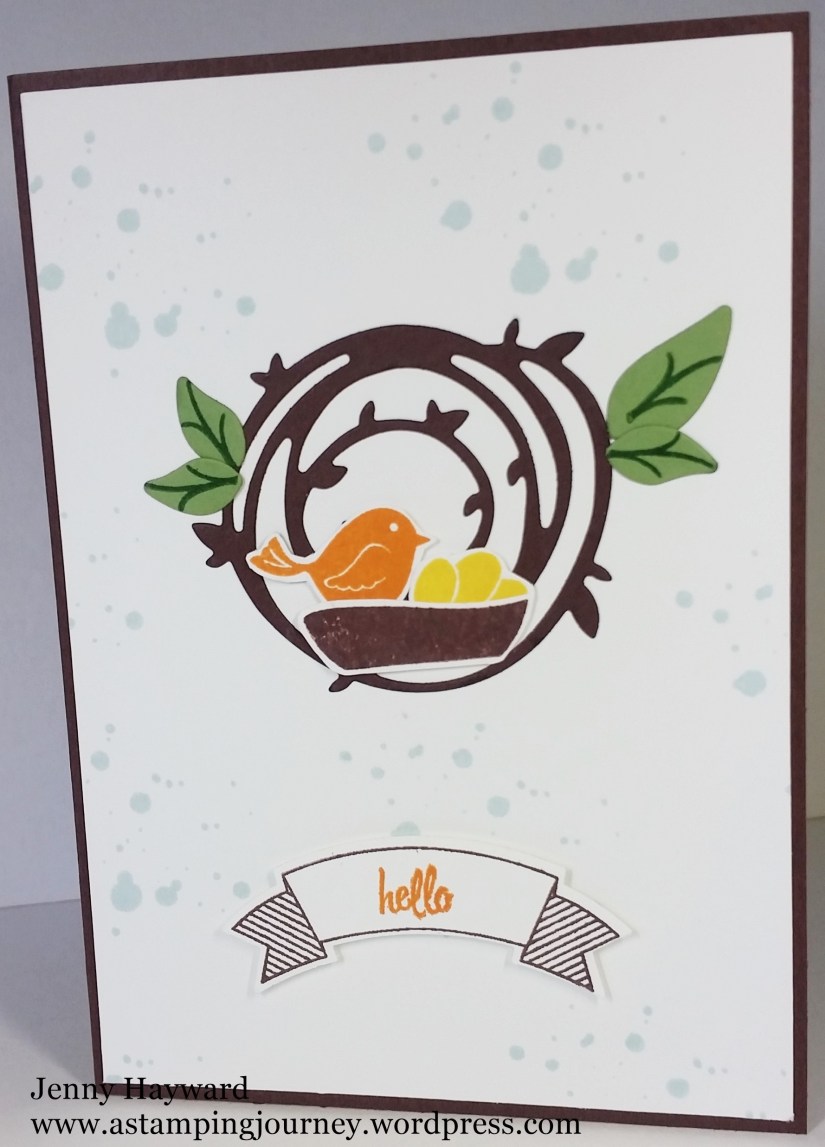
This next one, the card base is Chocolate Chip.  This is a colour I haven’t used in AGES!!! I even dragged out the inkpad! This made a cute image of mummy bird and her eggs.  The sentiment is from ‘Thoughtful Banners’. The background spots are stamped in Soft Sky. This card is fairly simple looking but it did take some time to cut and to put together.

Swirly Bird _ bird

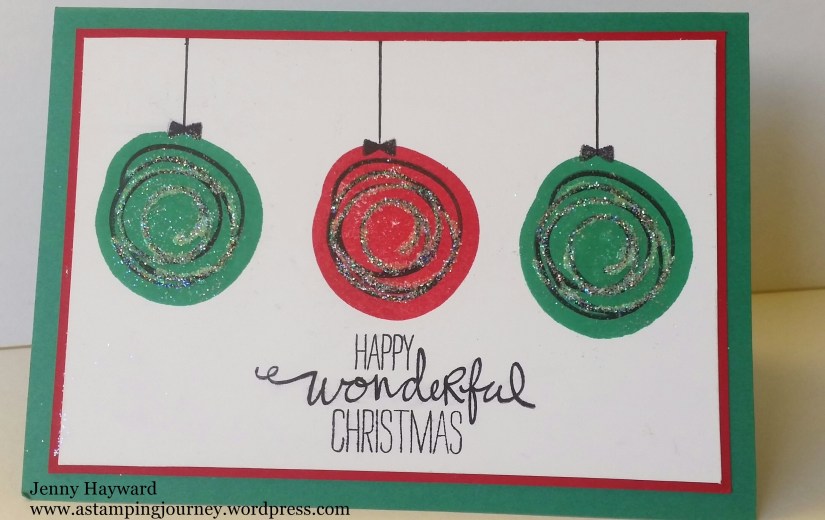
What about a Christmas Swirly card?  Yes I made a Christmas card!  I couldn’t help it.  I wanted to show the versatility of this set at my class. This card was CASED from Beth on a Facebook group I am on.  I just made it into traditional Christmas colours.  I added some dazzle with the Dazzling Diamonds in the centres of each bauble too.  The sentiment for this is from ‘Wondrous Wreath’.

Swirly Christmas

So many ideas for this set.  What have you come up with?? I would love to see them.  Send me a photo and I will share them here on my blog.

Thanks for stopping by.  Today it is FREEZING!!! Is it Summer soon???

Have a great day wherever you are,

Jenny


cards, Stampin' Up!

SWIRLY BIRD PINWHEELS!

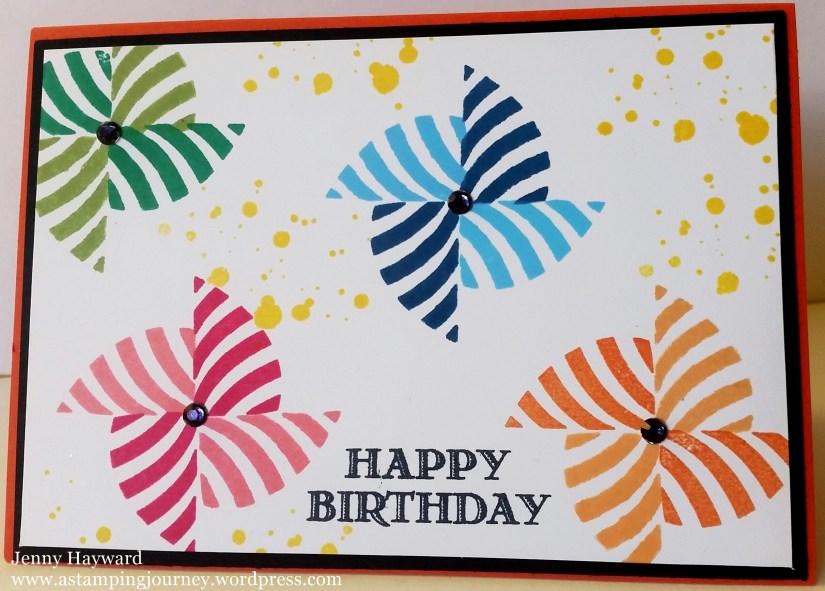
I have been having fun making samples with the Swirly Bird stamps and Swirly Scribbles Thinlits ready for my Swirly Bird Class tomorrow.  I just finished this card today and had to show you now.  I really liked how it turned out. I saw an idea for a type of pinwheel using it somewhere, I think on a group I am on??  So I thought I would have a play and see what I could come up with.  I wasn’t sure how it would work at first.  Here is the end result.

Pinwheel Swirly Bird

What do you think?  Pretty funky?

It’s a simple card in itself.  The colours for the pinwheels are from the top right: Emerald Envy and Wild Wasabi; Dapper Denim and Tempting Turquoise; Flirty Flamingo and Melon Mambo and Peekaboo Peach and Tangerine Tango. I only realised as I got to the last one that I was using the new Incolors. 🙂  The “spots” from the stamp set and stamped in Daffodil Delight.  The sentiment is from ‘Guy Greetings’.  I went through all my stamp sets and thought this font really suited.

The Rhinestones were coloured with a Black Sharpie to add to the centres.  The white card was then adhered to a Basic Black mat and the base card is Tangerine Tango.

These pinwheels were really fun to do and being a clear set you can see through the block to line up each stamp.  I stamped the shape running across lengthways first and then inked the stamp again and flipped it to run across the other direction.  Then inked the other colour and stamped  to line up the long edge with the shorter edge already stamped if that makes sense?? I think I will have to try some more cards with these pinwheels!

Go and make some funky pinwheels for yourself.  Of course, you need the Swirly Bird stamp set to do this.  If you haven’t already got it and the Swirly Scribbles  Thinlits you better buy it.  This is such a fun and versatile set.  Get it as a Bundle and save 10%.

swirly bird

If you are in Australia you can order it through me if you don’t already have a Demonstrator.  Head to my Store HERE and place your order or contact me directly.

Thanks for visiting me today.

Jenny

Catalogues, Stampin' Up!

2016 STAMPIN’ UP! CATALOGUE RIBBON SHARE!

Have you seen the gorgeous ribbons in this year’s catalogue?  You can find them on p178-179 if you haven’t.  I know that at times it is hard to get through a whole roll of ribbon so why not share it around with others!  I have some Ribbon Shares for you to join in.  I only have a few places left so you have to be quick.  Let me know by a comment or email.  This is for Australian residents only.

2016 RIBBON SHARE  

* These prices include Shipping and Handling for the ribbon to be sent to me from Stampin’ Up! There may be a small cost to mail the share on to you so please ask me.

2016 Incolor Ruched Ribbon (3/8” or 1cm wide)

1.8 m of each colour (Dapper Denim, Emerald Envy, Flirty Flamingo, Peekaboo Peach, Sweet Sugarplum)                                                  $14.70

Incolor Ruched Ribbon

Mint Macaron Sheer (3/8” or 1cm wide)      1.8m             $ 2.60

mint macaron sheer ribbon

Whisper White Mini Pom Pom Trim              90cm              $2.60

mini pom pom trim

JOIN ALL 3     FOR $19.00

Thanks for checking in today.  Have an awesome day/night wherever you may be. 🙂

Jenny

cards, Catalogues, Stampin' Up!

STAMPIN’ UP! CATALOGUE LAUNCH – PART 2!

I have some more of the fun from my Catalogue Launch for you.  If you missed out on the first part then head back to the last post I did.  Today I want to share with you some of the stamping fun we had.

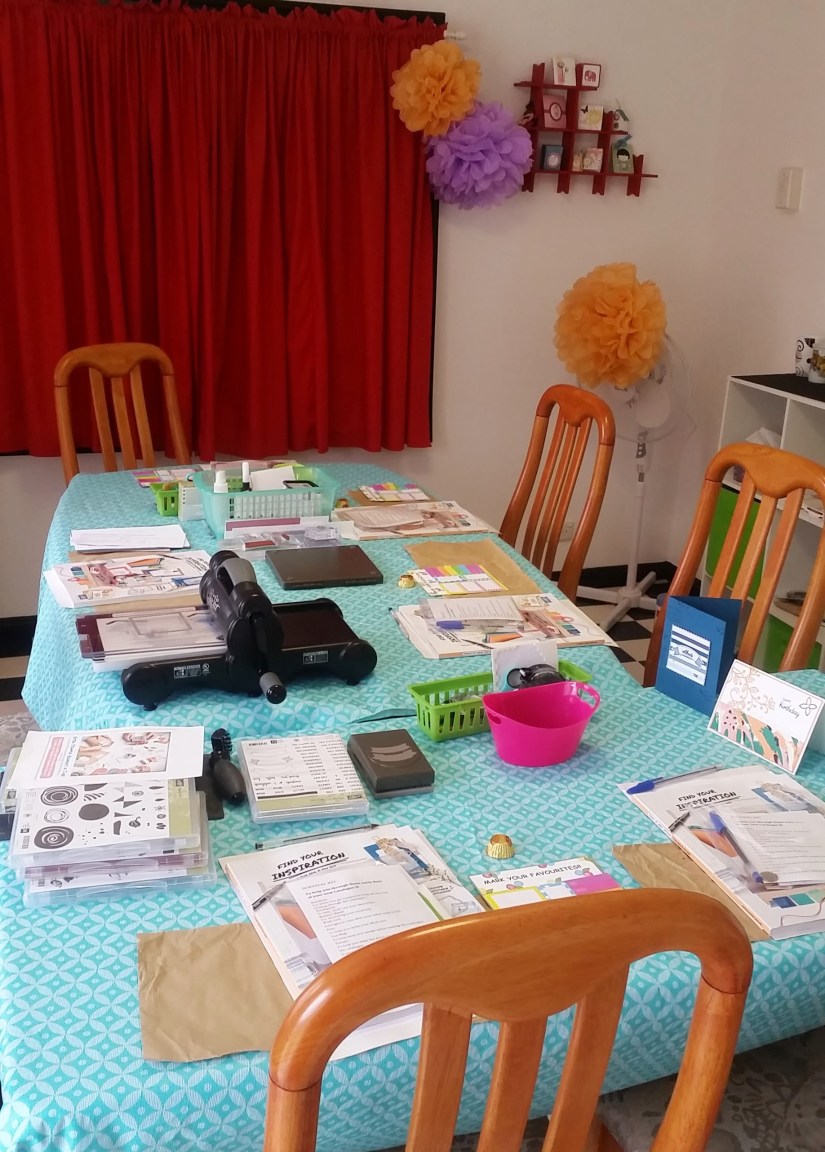
The table all set up ready to go.  I was pretty excited with the Pom Pom Flowers I found that was a fairly close match to some of the new Incolors.

Table

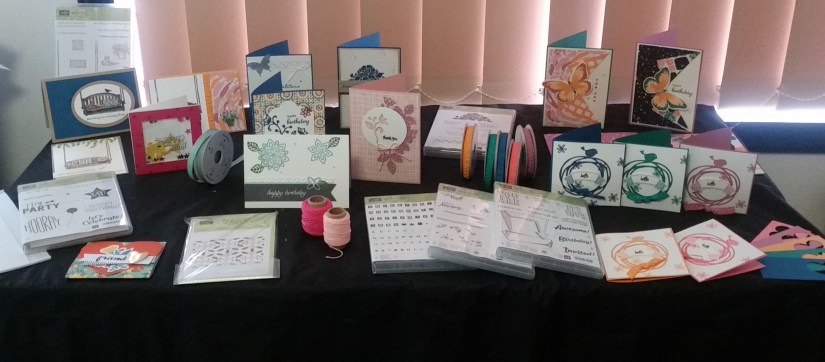
This was a sample of some of the new products and some cards.  I had other new products in the Product Playground that I showed in the last post.

sample table

I had some Swirly Bird card samples to share.  I have a class this coming Saturday just with the Swirly Bird stamps and the Scribbles Thinlits.  That should be a lot of fun.

Swirly Board

This was the first Make and Take using the new Flourish Thinlits.  I love the delicateness of these dies.  I found they cut surprisingly easy even with just the regular platform.  I used the new ‘Playful Palette’ DSP stack too.  The sentiment is from the new set ‘Best Birds’.

Flourish _ Peekaboo Peach

The other Make and Take was using the new Dapper Denim Incolor.  I have used the ‘Thoughful Banners’ stamp set. These banners are so easy to punch with the Duet Banner Punch.   I stamped a background on the base card with the Timeless Textures stamp set. The colours of the stripes were from the top – Night of Navy, Dapper Denim, Island Indigo, Marina Mist and Soft Sky.  I cut a scallop square mat for the white stamped card piece with the new Layering Square Framelits.  It just gives a subtle peek of the silver Foil. This card was inspired by a card I saw on a Facebook group I am on.

Dapper Denim thoughful banners

So lots of fun was had by all my lovely ladies who came.  I appreciate each and every one of them.  If you are local make sure you come along to my next launch or class to enjoy the fun.

Thanks for stopping by,

Jenny

cards, Catalogues, Stampin' Up!

ELEGANCE WITH FLORAL PHRASES!

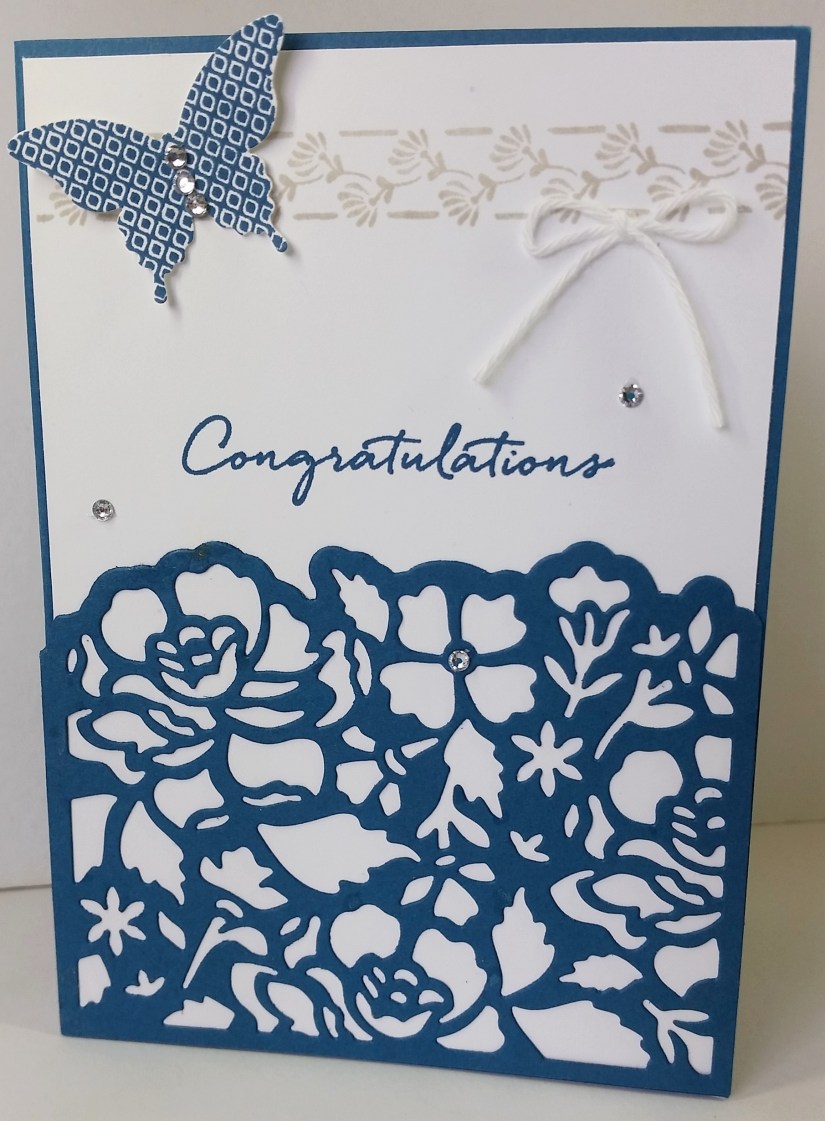
Have you seen the new Floral Phrases Stamps and the Detailed Floral Thinlits in the Catalogue?  They are just so gorgeous.  It makes elegant cards so easily.  I had a play with them yesterday and thought I would show you my creations.

These cards were inspired by 2 I had seen on a Facebook group I am on.  I love the new Dapper Denim Incolor too.  It just adds to the elegance. 🙂

Floral Themes _ 2

The Detailed Floral Thinlits cut so easily.  I then placed it on the Whisper White card mat so I could line it up to stamp on the white card. Then I could adhere it in place with the Fine Tip Glue and then to the Dapper Denim Card base. The stamped strip is in Sahara Sand.  The butterfly was stamped in Dapper Denim and is from the Papillion Potpourri set.

The Rhinestones add a little sparkle. I debated on whether to tie around some White Baker’s Twine but decided against it. When it was all stuck together though I realised that I should have done it and kept coming back to it.  In the end I added a small twine bow.

This second card was in Dapper Denim too.  This time I stamped the floral image and then added the “spots” in the Crumb Cake.  I wanted to keep the sentiment simple so I stamped the floral border in Crumb Cake on a piece of card strip and then stamped the greeting over the top.  This time I added some Pearls for glamour. I sponged the edge of the card too which softens it.

Floral Themes _ 1

Here is the stamp set and the Thinlits if you haven’t noticed them before.  They are available to order from my store.

Floral Phrases           Detailed Floral Thinlits

Thanks for stopping by.

Jenny