Catalogues, Classes, Stampin' Up!

IT’S MY PARTY THANKS TAGS!

I forgot to show you these.  So many other exciting things to show.  I made a number of these tags a couple of weeks ago for the lovely ladies who ordered at my Occasions and Sale-A-Bration Catalogue Launch.

thanks tags

These were very quick to make.  They had to be. I cut a strip of white card 10cm x 5cm (4″ x 2″) and a piece of the ‘It’s My Party’ DSP stack.  I adhered them together and then punched out the end with the Scallop Tag Topper Punch.  I added a strip of the Sahara Sand print from the ‘It’s My Party’ stack along the bottom.  I then tied around some of the Melon Mambo or Mint Macaron Baker’s Twine. The greeting is from the ‘Tin of Cards’ set and that was raised up with dimensionals and then a couple of the balloons from the ‘Party Wishes’ set were stamped and punched out to add to this.  I think I may have even added some sparkle with the Wink of Stella brush. It’s a bit hard to see that though sadly.

Thanks for stopping by today,

Jenny

cards, Challenges, Stampin' Up!

MINT HONEYCOMB HAPPINESS!

Our team has colour challenges each week and I don’t often have the time for them but 2 weeks ago I had just a little time so thought I would have a go.

I had received the Free ‘Honeycomb Happiness’ set for Sale-A-Bration just 2 days before.  I had been busy making some cards with it the day before.  Which I will show you soon. Since this set was out still I thought I would use this for the challenge.  I wasn’t sure of this set at first.  I didn’t know how I would use it.  I had seen some cute cards around with it though.

The Colour Challenge was Mint Macaron, Night of Navy and Daffodil Delight.  To be honest I thought these colours were hard to work with but I would give it a try.  After all that’s what a challenge is right!!

The stamps were sorted, the colour sorted, just the design to sort.  When I get stuck with a design and I am not CASING a direct card I usually go to a Sketch design.  I have a few on Pinterest.  The layout for this card was based on the Clean and Simple Sketch #139.

So I have talked enough about how I got here but you want to see the card.

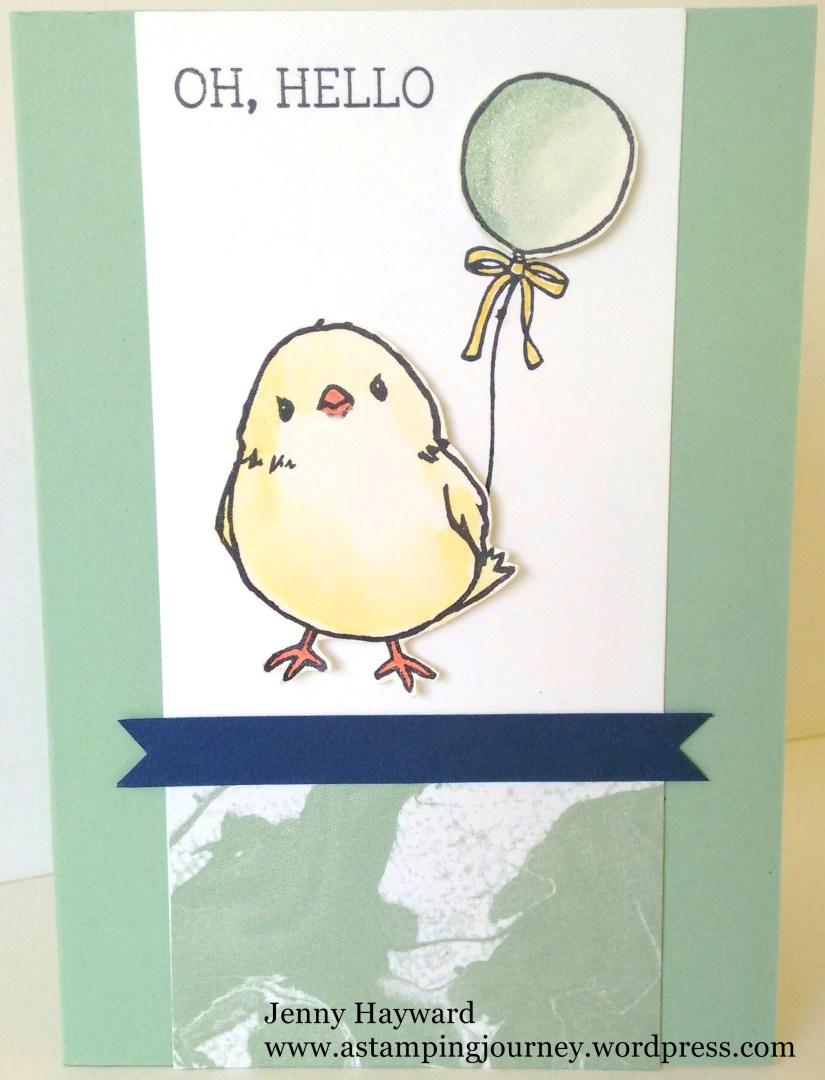
mint hello

I used Shimmery White card to stamp the chick and the balloon on and coloured them with the aquapainter and ink pad.  OK I cheated,  I added some Calypso Coral for the beak and legs. 🙂 I cut them out and raised them up with Dimensionals. The paper is the Sale-A-Bration paper ‘Perfectly Artistic’ which is now not available.  It was when I made the card 🙂  You can’t quite see but I added some Wink of Stella Clear Brush to the balloon.

Thanks for visiting.  Why not go and challenge yourself to use these colours on a card.

See you next time,

Jenny

Get Free products during Sale-A-Bration whether you SHOP, HOST OR JOIN.  

cards, Stampin' Up!

BLOOMIN’ HEART BUTTERFLY!

I have another card for you today using the Bloomin’ Heart Thinlits.  This card uses the Thinlits in a different way.  I saw this idea on Pinterest and other blogs and thought I just have to try this myself.

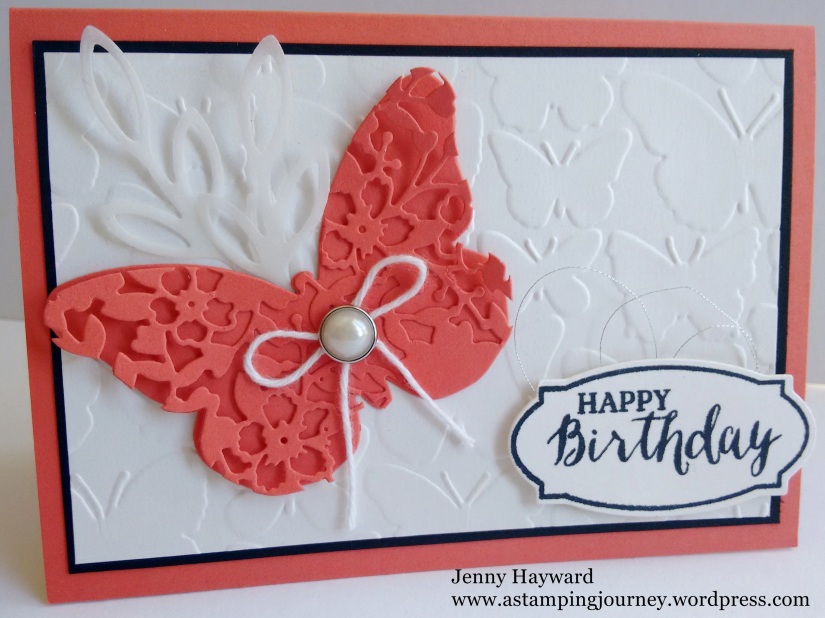
5154

I first cut the Bloomin’ Heart Thinlits from Calypso Coral card then placed the large Bold Butterfly Framelits over the heart and cut it out. I cut a second butterfly straight from Calypso Coral card.  I adhered the both together.

To assemble the card I embossed a piece of Whisper White card with the Fluttering Embossing Folder and layered this piece on to black card and adhered the both pieces to a Calypso Coral card base.

I cut some leaf stems from vellum using the Rose Garden Thinlits and placed them behind the butterfly.  I think it gives a little softness.  The greeting is from the Rose Wonder set and cut with the matching frame.  I added some silver metallic Thread behind the label.  In the centre of the butterfly I added a White Baker’s Twine bow and a Metal Rimmed Pearl.

I was really pleased how this turned out.  I hope you might like it too.

Have a great day/night wherever you may be.

Jenny

cards, Classes, Sale-A-Bration, Stampin' Up!

KNOW WHAT I LOVE??

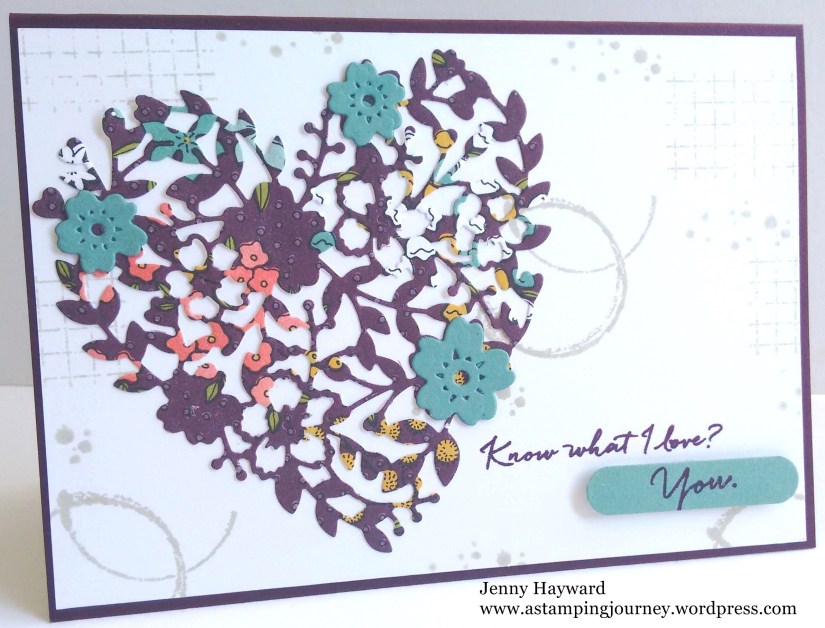
This was another of the cards I made a couple of weeks ago when I was playing with the Bloomin’ Heart Thinlits.  I had cut the heart from the Sale-A-Bration paper ‘Wildflower Fields’ DSP.  This was one of the activities everyone got to do at my Launch at the Product Playground but I hadn’t got around to actually making a card from it at that time.

I wasn’t sure how to put it together but I teamed it with a few of my new Favourites the ‘Timeless Textures’ stamp set which I stamped in Sahara Sand and the greeting from one of the Sale-A-Bration sets ‘What I Love’.

5153

The card base is Blackberry Bliss to match the DSP and the flowers were cut from Lost Lagoon.  Simple but hey that’s me!! 🙂

Hope you like it.

See you soon,

Jenny

Catalogues, Sale-A-Bration, Stampin' Up!, Workshops

NEW SALE-A-BRATION ITEMS ADDED!

We have a few new Sale-A-Bration items added from today to replace the few that ended yesterday.  Do you want to see them?

SAB_2016 2nd release _ 1

SAB 2016 _ 2nd release _ 2

These are cute sets and what about that Glitter Tape?? In what ways do you think you can bling up your projects?

You can choose one of these items (or any of the others) for Free!

Yes, Free with every $90 order.  Too easy! Sale-A-Bration ends on 31st March, so get your Wish List together. I am sure you have more than $90 on your Wish List.

Why not get your friends together? We can have a few laughs, have a cuppa and make a card while I show you the fun projects?  Let’s get it happening!  I have limited dates so let’s make a time.

See you again soon with some more fun projects,

Jenny

cards, Sale-A-Bration, Stampin' Up!

LAST DAYS FOR SOME SALE-A-BRATION ITEMS!

Today is the day we say Good-Bye to some Sale-A-Bration items and I will say it is a bit sad.  I have loved these products. If you want to grab any of these items TODAY then let me know and remember they are FREE!!!!!

SAB _ Sky

SAB _ Hello

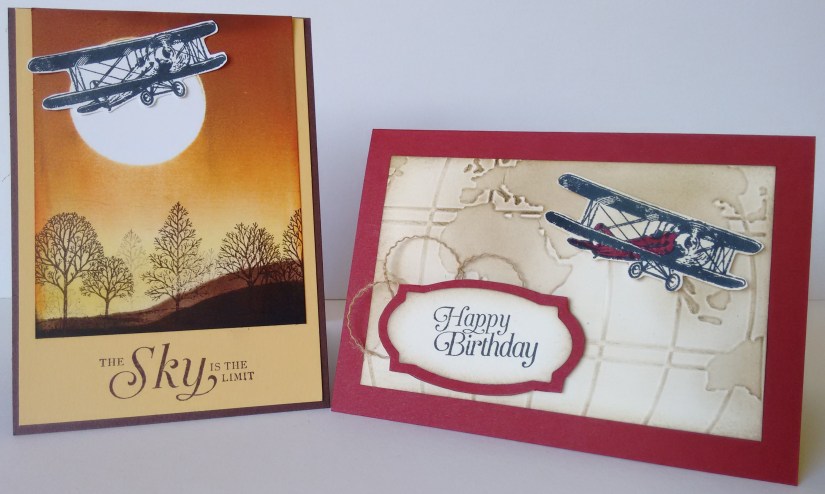
Here are some cards I have made recently using ‘Sky is the Limit’.  I have CASED these cards.  The one on the left we made at my class on Saturday.  The one on the right I changed a little and added a few twirls of the Burlap Ribbon. I used the ‘World Traveler’ Embossing Folder. Some people brayer or ink over the embossing folder before they emboss to get the effect.  I tried it a few times.  In the end, I embossed Very Vanilla card with the Embossing Folder and sponged over the raised parts with Crumb Cake ink.  I found that more effective.

This ‘Sky is the Limit’ set is great for your Masculine cards. I think you need this set. 🙂

sky is limit

I had a quick play with the ‘Perfectly Artistic DSP’ yesterday. I wanted to keep the card simple to show off the paper.  It was harder than I thought to be honest. 🙂  I used the ‘Amazing Birthday’ set with this.   I cut the greeting with the ‘Tags and Labels’ Framelits.  The black piece I embossed with the ‘Softly Falling’ Embossing Folder. I finished the card off with the Black Satin Stitched Ribbon and some Silver Thread.

perfectly artistic

Now for the details.  How do you get these items for Free??

Choose one of these items (or one of the other items in the Sale-A-Bration Catalogue for Free when you place an order of $90.  So easy! I am sure you have more than $90 on your wish list don’t you??

To order: Order directly by contacting me TODAY.

OR

Order Online HERE.  Please use the Host Code: 6ZRUDB6Z

I will be back tomorrow to show you the new Sale-A-Bration items that will replace these.

Have a great day,

Jenny

3D projects, Sale-A-Bration, Stampin' Up!, Tutorials

PERFECTLY ARTISTIC BAGS!

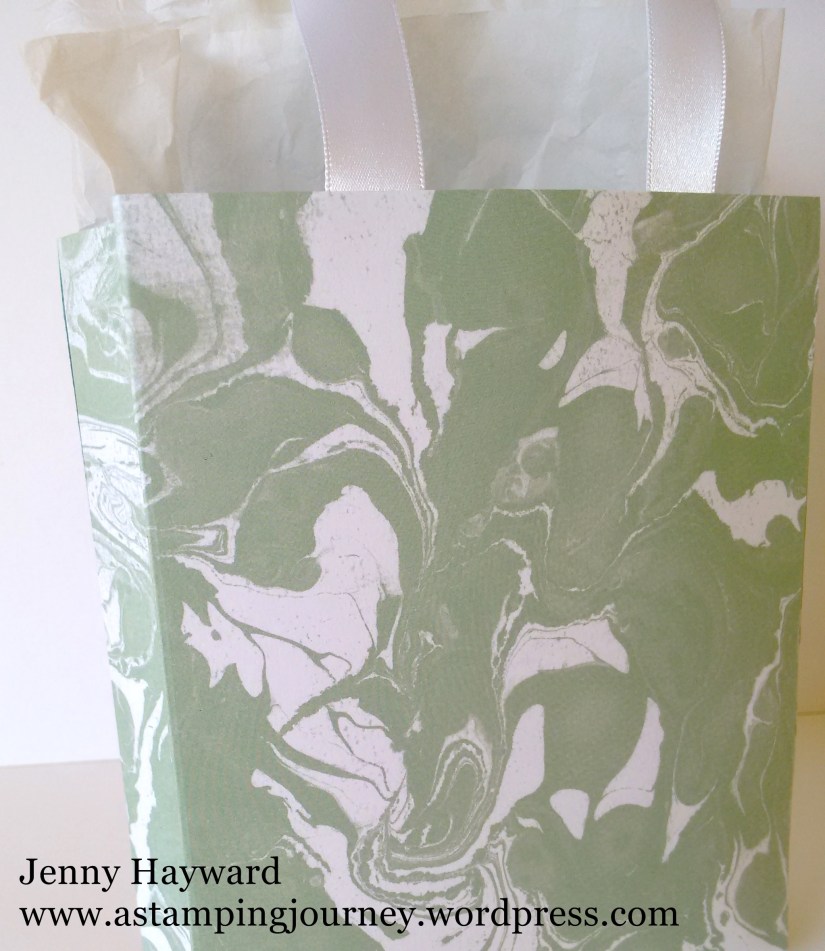
I know I told you I was going to share some more Bloomin’ Heart Thinlits cards and I will, but I HAVE to show you these bags. I realised the other day that there was less than a week left of some fantastic Sale-A-Bration products. I still had so much of the lovely ‘Perfectly Artistic’ DSP that I just HAD to use. What better way but to use it but to make some bags.

Here they are for you. I thought I would make 3 different ones. I will show you how to make them too.

5186

BLUSHING BRIDE MINI BAG

This cute little pink one is very simple to make. I found the idea on the internet somewhere quite some time ago but I am not sure where now – sorry 🙂
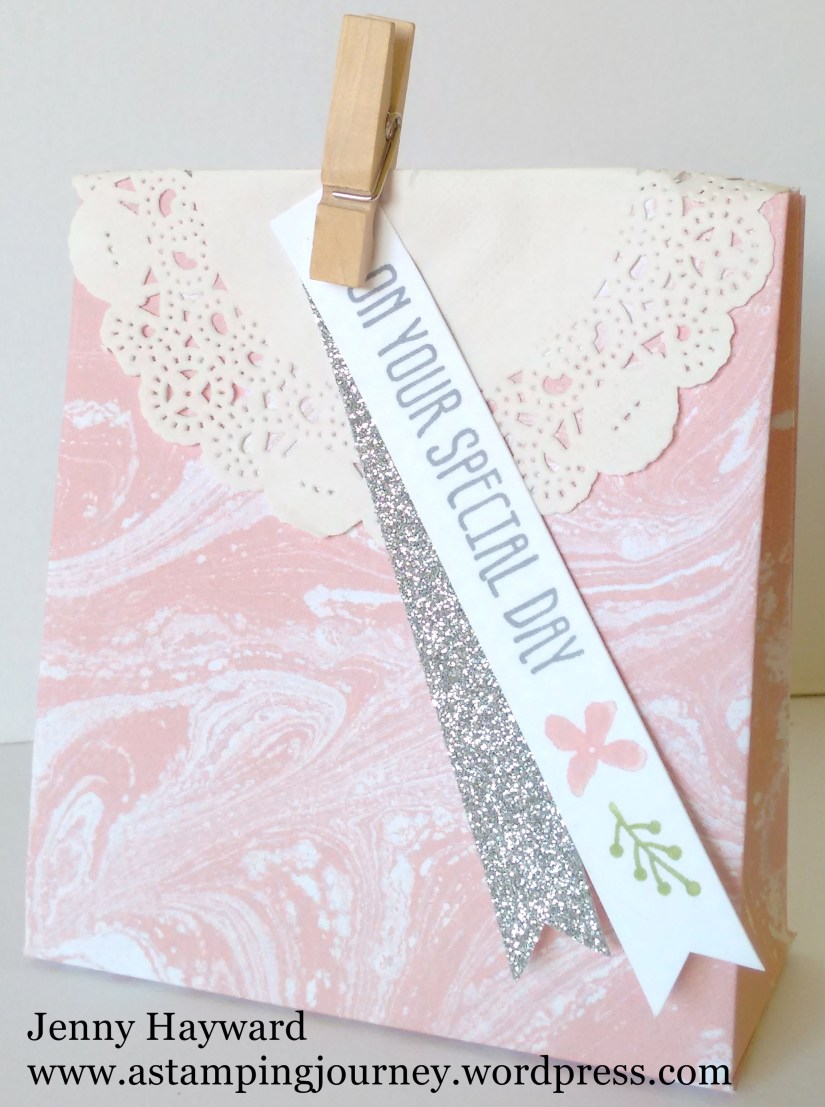
image-5196

Cut your paper to 15cm x 30cm.  (6″ x 12″)

On the 15cm (6″) side, score at 4cm. (1 1/2″)

On the 30cm (12″) side score at 10cm, 14cm, 24cm and 28cm.  (4″, 5 1/2″, 9 1/2″ and 11″)

Cut up on the score lines on the 30cm (12″) side up until it meets the other score line. Cut off the small tab at the end. Add adhesive on the small tab at the side and assemble. Add adhesive to the bottom tabs and fold up and adhere.

Decorate as you like. I have used the greeting from a Sale-A-Bration set ‘Botanicals For You’. I added a strip of Silver Glimmer Paper too for the dazzle factor. To close the bag I simply used a Wooden Clothespin over a folded Paper Doily. 

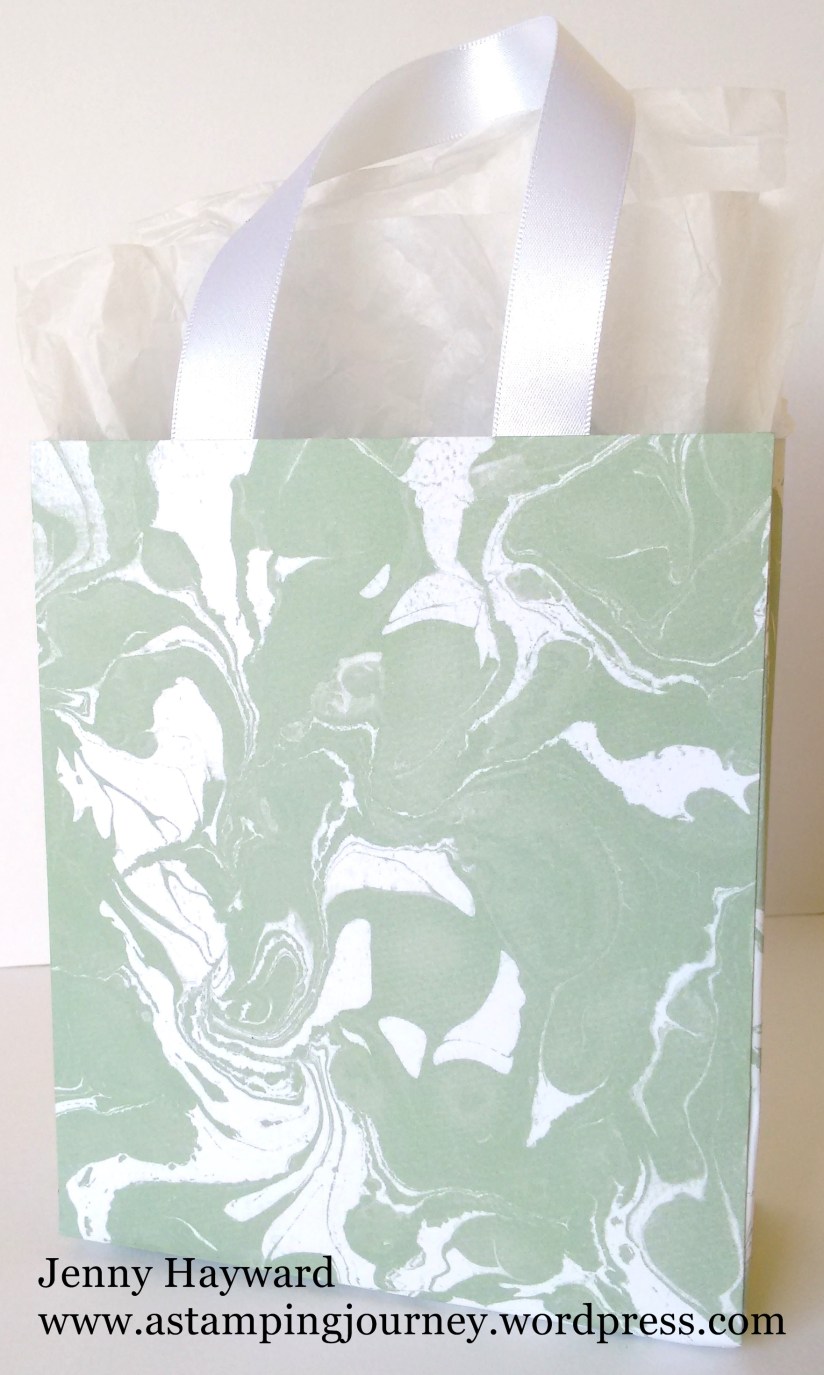
MINT MACARON BAG
5192

Here is a side view.

5203

The Mint Macaron is another quick bag. You can find the tutorial to make this bag at ChicNScratch HERE.

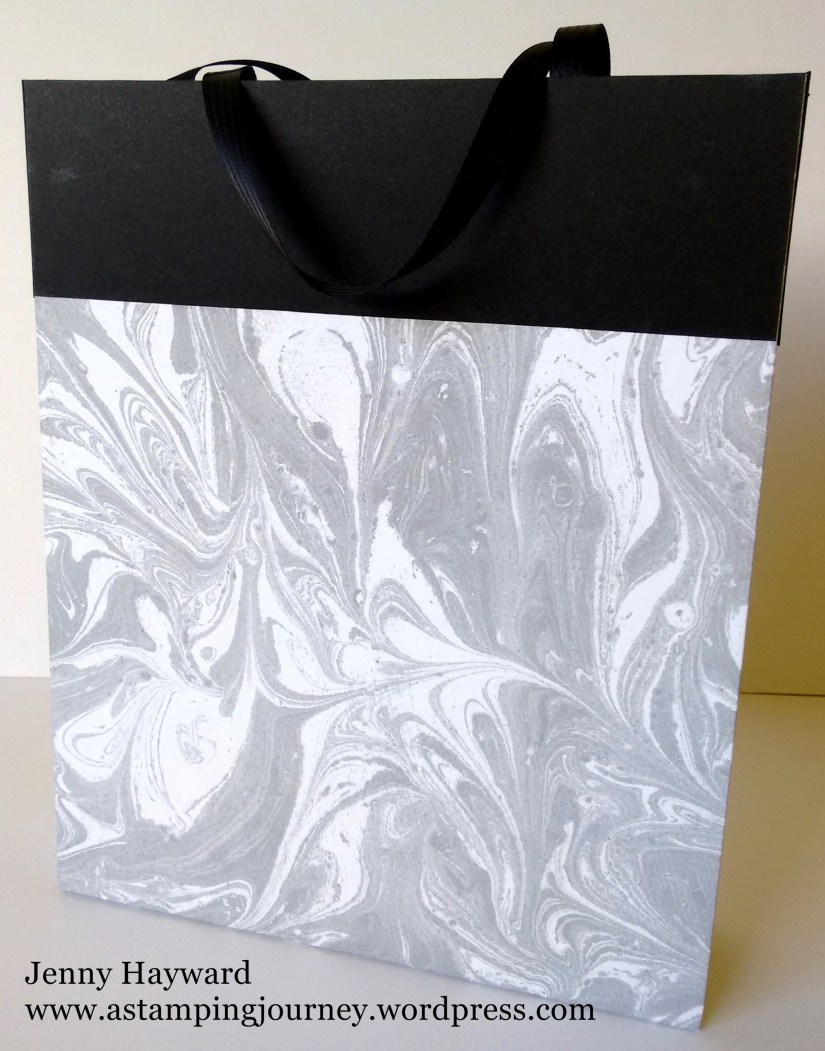
LARGE BASIC GRAY BAG
5191

This large bag is so easy to make.  I don’t know why it has taken me so long to make one of these. You can find the instructions on a number of blogs.

For mine, I took 2 sheets of the Basic Gray pattern from the pack. On 3 sides, score at 5cm (2″). Cut up on the tabs at the bottom. Place adhesive along the bottom of one sheet and join the 2 sheets together. Place adhesive to the side tabs on one sheet and assemble together.

TIP #1 you could if you like score on the top edge as well when you are scoring and then fold that score line forward to show the inside colour on the outside, if that makes sense? I had decided that I wanted a black edge. I cut strips from black card stock approximately 5cm (2″) wide and adhered that along the top edge. I think it makes a striking contrast.

TIP #2 for your ribbon handles.  I didn’t punch holes in my bags to add the ribbon.  I added the strong Tear Tape to each end of the ribbon and adhered them to inside of the bag.  To cover the ends I punched out an oval in card and adhered this over the ends.  It gives a neater finish I think.
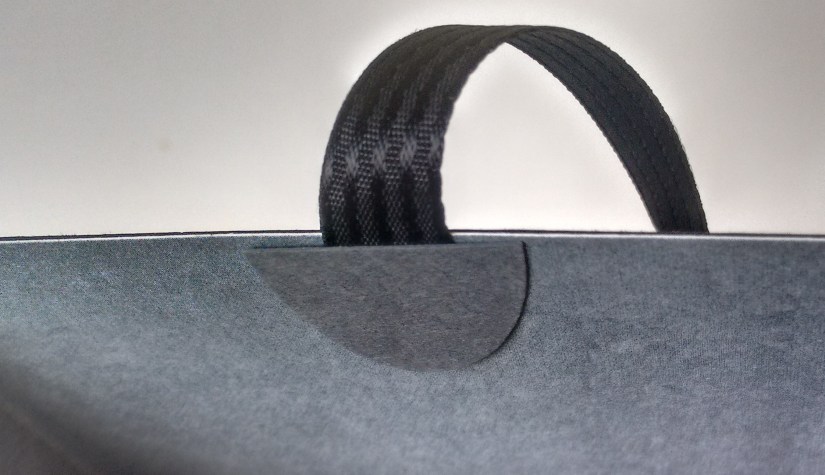
insdie

I hope you like these bags. They were fun and I was surprised how easy they were to make. Go and make some yourself. 🙂

Until  next time,

Jenny

cards, Stampin' Up!

A BLOOMIN’ HEART!

I have had the ‘Bloomin’ Heart’ Thinlits Die for a  little while now but only managed to make some cards with it last week.  I have to say I was a little intimidated by the delicateness of it. It was going to be fiddly pushing out those extra little bits that you don’t want. I braved it though and had a go.  Now I had my new Die Brush to use too.

I cut the heart from the ‘It’s My Party’ DSP stack and using the Die Brush and the foam pad that comes with it I gave it a few rolls over the back of the die and Voila! out popped the heart with very little effort.  I don’t think I minded this Heart die now.

I thought I would show you the card that I made with the pretty little heart.

heart card

I stamped the flourish from ‘Timeless Textures’ on Sahara Sand card.  Then matted that on to Whisper White and then adhered that to a Thick Whisper White Card base.  I cut some flowers from Pool Party using the little flowers in the ‘Bloomin’ Heart’ Thinlits and adhered those on.  Some Adhesive Pearls adds a little Elegance.

The greeting is from  the Sale-A-Bration set ‘Sky is the Limit’. Have you got this set yet from Sale-A-Bration?  There is less than a week left to grab it and then it is gone.  Some new sets are being added after the 15th.  I cut the greeting with the ‘Project Life’ Framelits and added Pearls to finish.

 I have now made a few cards with the ‘Bloomin’ Heart’ Thinlits so I will show you those over the next few days.

Have a Happy Day,

Jenny

cards, Classes, Sale-A-Bration, Stampin' Up!

FLOWERING FIELDS FLAP FOLD!

Say that 10 times quickly! Seriously, sometimes it is hard to come up with names for blog posts!

Anyway, you want to see a card not my posting dilemmas.  Today I have a sweet card for you using the Sale-A-Bration set ‘Flowering Fields’.  I stamped and coloured this a few weeks ago at a team stamping day.  I wasn’t sure  how to put it together then so put it aside until later. Well later was a week or two later!

I decided to go for a slightly different style card.  The flowers are so pretty so I wanted to show them off a little.  We were told at Onstage last year when they showed this set that the flowers are based on Australian natives.  I really struggle with colouring these different colours to what they are meant to be especially the Waratah. I think I used the aquapainter and inkpads to colour them – or was it the blender pen??  It was so long ago I can’t remember.

calypso outside 2

It is a standard size card but I cut off about 5cm (2″) from the bottom on the front of the card.  I adhered some of the Sale-A-Bration paper ‘Wildflower Fields’.  Isn’t it pretty?? I wrapped around some Calypso Coral Seam Binding Ribbon to the front. The finished stamped piece was adhered to a black mat and then adhered to the front with Dimensionals.  Just add your dimensionals to the top sections of the panel.

Then it came to the greeting.  Do you struggle with where to put your greeting on your cards?  You don’t want to overshadow the main image but you don’t want it disappearing in the mix.  The greeting I used is from another Sale-A-Bration set ‘Botanicals For You’.  I love the greetings in this set. Did you have a close look at the greeting on this card?  The smaller framelits or punches weren’t going to work and then the next sizes were too big.  What to do? I have used the “ledge shape” die in the ‘Heart and Home’ Thinlets Dies. I was really happy how that turned out. I will have to keep that in mind to use again.

Here is a photo of the inside of the card.  I stamped one of the flowers on the inside in Calypso Coral and under the paper strip I adhered a strip of black card to give it a lift.

calypso inside

Phew! Thanks for sticking with me with all my dilemmas for today’s post.  🙂

I hope you have a happy day wherever you are in the world.  Thanks for visiting me today.

Jenny

Did you know you can get free products during Sale-A-Bration?  Ask me how you can.

Product Share, Stampin' Up!

2016 OCCASIONS CATALOGUE RIBBON SHARE!!

Who loves ribbon??? Especially when it is lush Stampin’ Up! ribbon that matches your card AND ink and just finishes it off with that elegant touch.  I know sometimes it is hard to get through a whole roll of ribbon.  So why not share it around!

Join in my Ribbon Share and get a taste of all the different ribbons and twine in the Occasions Catalogue. Take your pick OR join them all.  Here are the details.  Just message or leave a comment that you want to take part and then I can get back to you about shipping etc.

Baker’s Twine Combo    5.7m each of Melon Mambo/Black and Mint Macaron/Black

                                                                                                                                $3.00

bakers twine

 Pool Party Glitter Ribbon    2.2m                                                               $2.50 

glitter ribbon

Watermelon Wonder Stitched Satin Ribbon       2.2m                      $3.70

watermelon wonder ribbon

Bermuda Bay Stitched Ribbon      2.2m                                                   $2.75    

bermuda bay ribbon

So you can join in as many of the ribbon shares as you like.  Join them all and receive a discount.  Total for all the shares is $11.50.

These shares already include the 5% Shipping and Handling. If you need the ribbon shipped to you there will be an additional small cost to send them on to you.

Let me know ASAP.

Jenny