3D projects, Stampin' Up!

BOHEMIAN TOTE!!

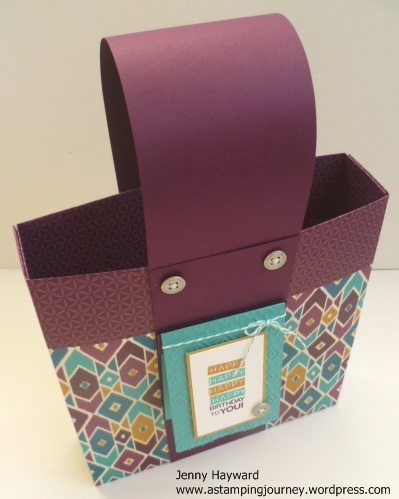
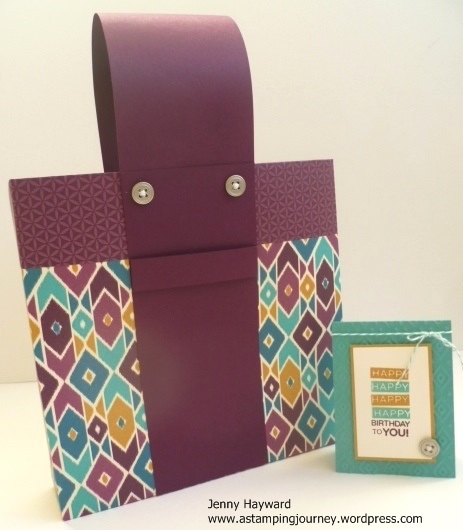
I have been playing around with the new Bohemian Designer Series Paper (DSP).  I really like the colours and the funky patterns.  Totes are all the go at the moment and I wanted to create a new Tote.  It is not a particularly new design using 2 sheets of the DSP but I thought I would change it up a bit.  Plus I added a little tab to hang your gift card off. I hope you like this one 🙂

P1160789       P1160791


P1160795

Would you like to make one?  Here are the instructions in metric and imperial.

BOHEMIAN TOTE

2 Sheets of 12×12 Designer Series Paper (DSP) I have used the Bohemian DSP

Handles: 2 pieces of 20.5cm x 8cm (8” x 3 1/8”) co-ordinating cardstock

1 piece of 28cm x 8cm (11” x 3 1/8”) co-ordinating cardstock

Card Tab on Handle:   2cm x 10cm (¾” x 4”) co-ordinating cardstock

Inside Base:   4.8cm x 20.2cm (1 7/8” x 8”) co-ordinating cardstock

  1. On each piece of DSP score your sheets at 5cm (2”) on each side. Fold on each of the score lines.
  2. Cut up on the small score lines at the bottom of each piece of DSP.
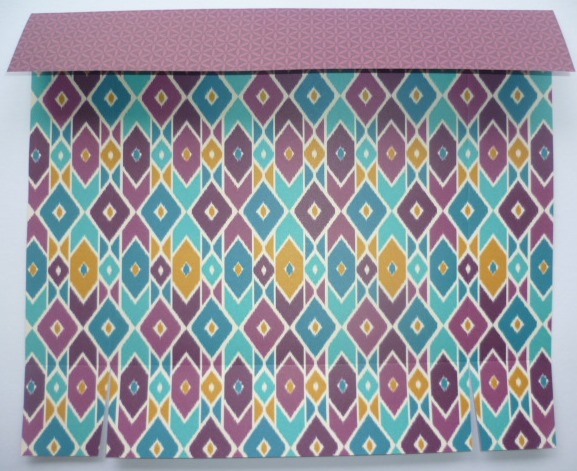
P1160761


  1. Add adhesive to the 2 small bottom tabs on one sheet of the DSP on the outside. Adhere this to the inside of the long bottom tab.
  2. Place this assembled piece on to the second piece of DSP which has the right side facing down.

P1160763


  1. Add adhesive to the bottom small tabs on the second DSP sheet and assemble on to the bottom of the first piece. Add adhesive to the long side tabs on the inside of the second sheet of DSP. Adhere this to the first piece.  Add adhesive to the long bottom tab of the second sheet of DSP and fold up on to the first piece.  So it is like wrapping the second sheet onto the first sheet. (The piece at the bottom would be the front of the bag so just check to see what print you want showing).
  2. On the 28cm x 8cm (11”x 3 1/8”) piece for the handle, place adhesive at each end of the handle ON THE UNDERSIDE. Adhere on the outside of the bag near the top.
  3. Take one end of this handle piece and adhere to the top of the bag on the outside of the bag. Adhere the other end to the other side of the bag on the outside of the bag.
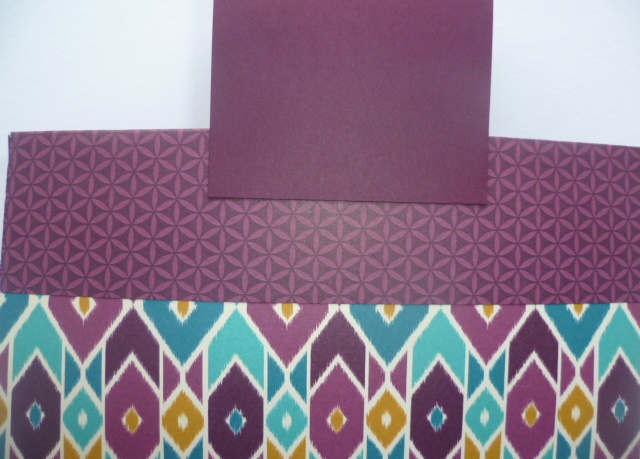
P1160765

  1. Take one piece of your 20.5cmx8cm (8”x 3 1/8”) cardstock and place adhesive on the back of this piece. Line up the top edge of the piece with the top edge of your bag positioning it over the handle piece. And adhere on to the front of the bag.  Repeat with the other piece adhering this to the back of your back.  NOTE: If you wish to add brads to your bag for decoration ADD THESE FIRST.  (Just so you don’t see the back of them inside the bag).

P1160766

  1. Fold on the score lines of the small card tab and unfold.  Add adhesive to the ends (on the side facing up). Fold over the piece again and adhere this piece to the front of your bag.
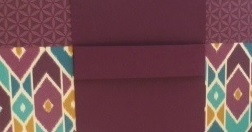
P1160796


  1. Add your piece of cardstock base to the inside of the card. This provides some extra strength.

Decorate the bag as you like.

——————-

Card to hang on the front measures 20cm x 7.5cm. Score at 10cm.

7 ½” x 3”. Score at 3 ¾”
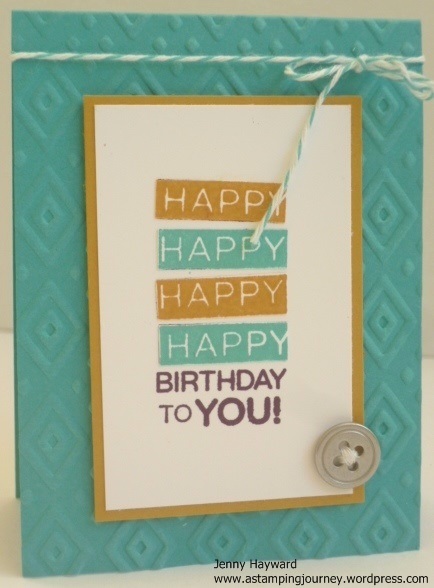
P1160798

For my card I used the Boho Chic Embossing Folder on the front of the Bermuda bag card.  The Happy Birthday is from ‘Amazing Birthday’. I stamped it first onto Whisper White Cardstock in Blackberry Bliss and then again twice on scrap card with Bermuda Bay and Delightful Dijon.  I cut 2 of the “HAPPY’s” out of each colour and adhered them over the top of the Blackberry Bliss greeting. The Whisper White piece was matted on to Delightful Dijon and the whole piece was raised up with dimensionals.  I wrapped around some Bermuda Bay Baker’s Twine and added a silver button that I had sewed with white sewing thread.  This complemented the silver buttons on the bag.


I hope you like this version of the Tote Bag.  It’s a good size for those larger gifts.  Enjoy making them.

Have a happy weekend.  I hope it’s a crafty one for you.  It’s a long weekend here so I hope there is some time to create this weekend.

Jenny


Catalogues, Stampin' Up!

THE 2015 STAMPIN’ UP! CATALOGUE IS HERE!

The excitement has been building over the last few weeks and there has been lots of sneak peeks shown on so many blogs and social media.  The wait is over!  The 2015 Stampin’ Up! Catalogue is now available.

2015_AnnualCatalog_en-AU

I will add the link in the right hand column but you can head over HERE now and see the Catalogue Online.  Whoo Hoo! Grab your cuppa and some paper so you can start making your wish list.  If you are someone who likes to have their own copy of the catalogue and you haven’t got one yet, then ASK ME FOR ONE!!! (Australian residents only!).  I will drop one in the post for you.

I am not going to ramble on today because I know you have important things to do – like read a catalogue!!!  🙂  But I will say that FOR TODAY ONLY ALL 3 CATALOGUES ARE AVAILABLE TO ORDER FROM – the 2014-15 Stampin’ Up! Catalogue, the Occasions Catalogue and the new 2015-16 Stampin’ Up Catalogue.

I am placing an order tonight so if you know what you want already and planning to order online (by 8pm) (HERE) then please use the Hostess Code:     2FBF4JF9

Join in June

Some exciting news though too before you go.  If your wish list is loooooong!!!!! Believe me I think it will be.  Then Join Stampin’ Up! during June and receive 2 additonal stamp set for FREE! Exciting!

Pay $169= $235 of products + 2 extra stamps set + Pay no shipping!  You do the Maths 🙂

Ask me for more information or you can join Online HERE now! It doesn’t matter where you live in Australia. I welcome you to my team. 🙂

Now on to “Operation Wish List” 🙂

Jenny

Stampin' Up!, swaps, Techniques

FAUX SHAVING CREAM FLOWER!!

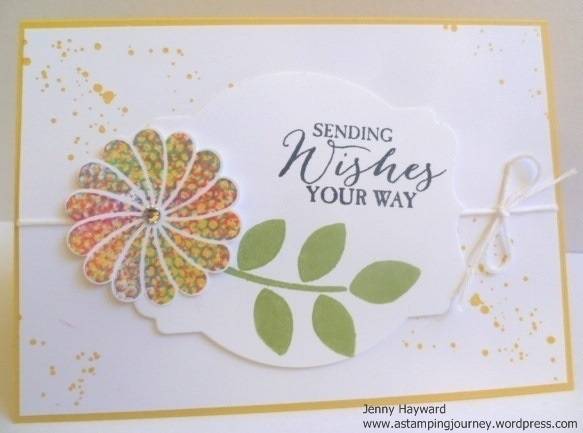
I have always been fascinated in the Shaving Cream technique but I haven’t got around to trying it. I think it is the mess!  The shaving cream and reinkers and ….. Just too hard!  SO, when I came across THIS technique on Splitcoaststampers a few weeks ago when I was looking for a different technique for a class, I thought I could really try this one.  Here is the card I made.

P1160643

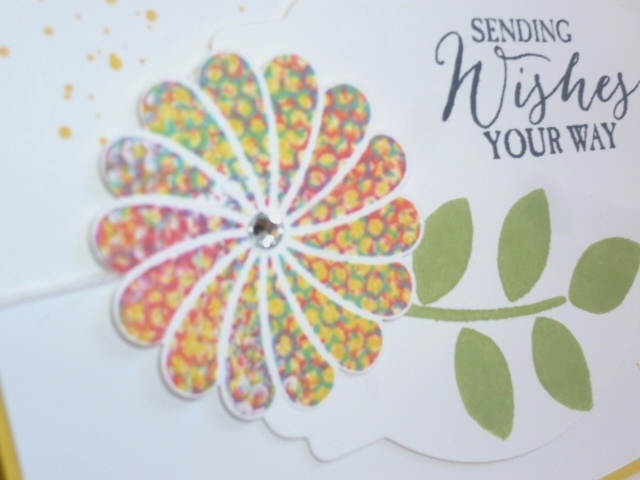
The layout for the card was INSPIRED from Deb Currier from artfeltcreations.com.  I changed a few things around and I created the Shaving Cream flower.  I loved the effect.  Here is a close-up. (OK a little blurry!)

P1160646

I don’t usually share a tutorial for the Technique Classes I do but this technique is so cool I just wanted to share this with you my lovely readers. Of course, you can read about it at the Splitcoaststampers link above too.  It is a bit like the Kissing technique if you have tried that.

SHAVING CREAM TECHNIQUE

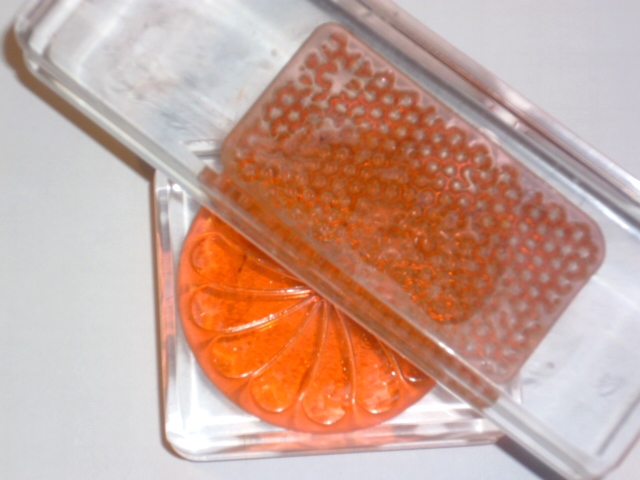
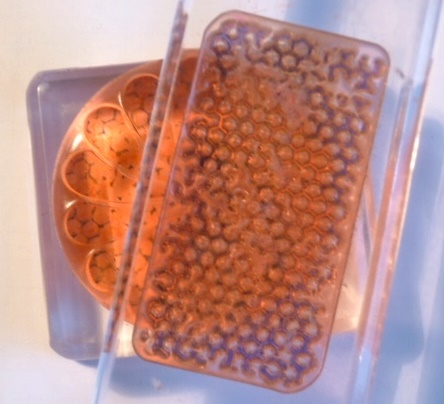
1. Choose 3 co-ordinating ink colours. I have used Daffodil Delight, Tempting Turquoise and Melon Mambo.  I found the darker colours didn’t blend well and just looked messy 🙂

You will also need 2 stamps: One solid image stamp and one patterned stamp.  I have used the flower from ‘Crazy About You’ and the honeycomb pattern from ‘Butterfly Basics’.

2.  Ink up your solid image stamp with the lightest colour. Don’t stamp it on your card yet.

3. Ink up your patterned stamp with one of the other ink colours. Press it on to your solid image stamp and give it a slight twist.  Clean your patterned stamp and ink again in the same colour.  Press on to your solid stamp on the other part of your stamp and give a little twist.  See the photo below.

P1160660

4. Clean your stamp again and ink your patterned stamp with the other ink colour.  Turn your solid image stamp 1/4 turn.  Then press your inked patterned stamp on to the stamp and give a little twist. Clean your stamp.  Ink it again in the same colour and stamp on the other part of your solid image stamp and give a twist.

P1160663

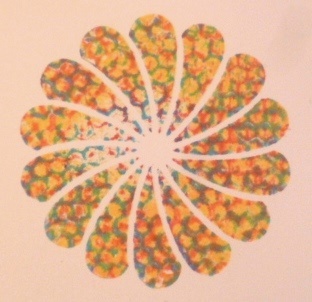
5. Now give your solid image stamp a little huff to re-moisten the stamp and then press on to your piece of card.

P1160667

It gives a really cool effect.  Don’t you think???

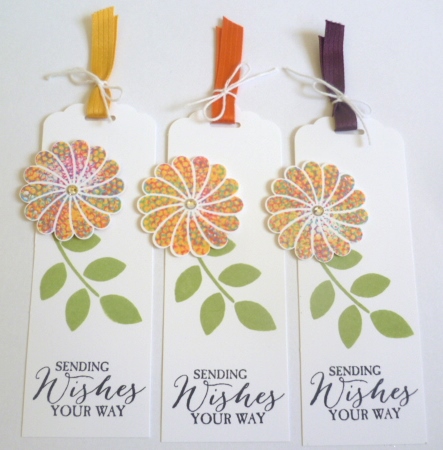
I really loved the effect so I made some tags up using this technique for our team swaps last week.

P1160671

Here is a close-up.

P1160727

So why not give this technique a try.  It is so cool and each time will work out different.

Have a happy, stampy weekend 🙂

Jenny

Stampin' Up!, Techniques

WEEKLY DEALS AND UPDATES!!

Wednesday again which means it is WEEKLY DEALS time.  I love these deals.  There have been some great deals lately to save you money.  I have a reminder too on the retiring list and Clearance Rack so you can check about that but before you leave here today you have to see this cool technique video I have posted below.

Here is this week’s deals.

May 19

Punches and Big Shot dies are always great! How can you get these??

Contact me directly to place your order

OR

Order Online at my store HERE.

Have you checked out the RETIRING PRODUCTS (see Here) OR THE CLEARANCE RACK (see Here)??? Items are selling out fast.  Check them out and contact me to place your order or Order online. (Australian residents only and if you haven’t got a current Demonstrator). 🙂

Of course, I can’t leave without sharing a project.  Check this fun technique out using Watercolouring and Spritzers. I love the effect!

cards, Catalogues, Stampin' Up!

“FIRST PLAY WITH AWESOMELY ARTISTIC!”

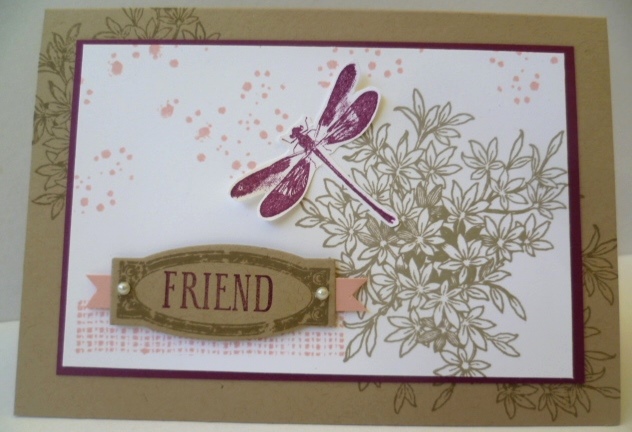
Last week at Leadership at the South Pacific Stampin’ Up! Convention we were given this brand new set ‘Awesomely Artistic’.  I love this set. There are so many lovely elements so there will be lots of ways you can use this set. I really love the dragonfly. Yesterday I had a chance to play a little.

 P1160636

The base is Crumb Cake.  Other colours used are Rich Razzleberry and Blushing Bride.  The layout was loosely based on the clean and simple sketch #192. You can see that sketch in the PDF here.  (There are lots of sketches on this site that can help you out when you are stuck for ideas.  Check them out sometime).

This set will be available in Wood ($49.00) or Clear ($35.00) AUS.    I think it will be one to have on your wish list.

Have you ordered your catalogue from your Demonstrator yet??  If you are in Australia and don’t have a demonstrator yet then contact me to have a catalogue sent out to you.  This is just one of the lovely sets coming June 2nd!!!  Not long to go now.

Thanks for stopping by.  Hope your day is inky 🙂

Jenny

3D projects, cards, Convention, Masculine, Stampin' Up!, swaps

CONVENTION SWAPS!

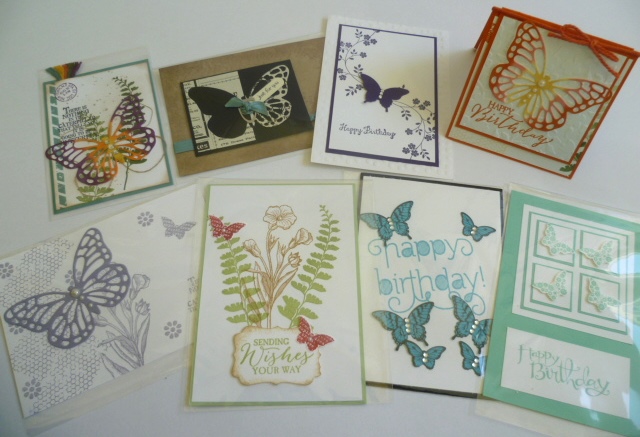
I have finally had a chance to go through my swaps and take photos.  I thought you might like to see them. There are some great ideas. I have grouped them to help you see them.  If you would like a closer view of one or to know about it more then let me know.

Butterflies are always popular!

P1160588

Flowers of all types!

P1160590

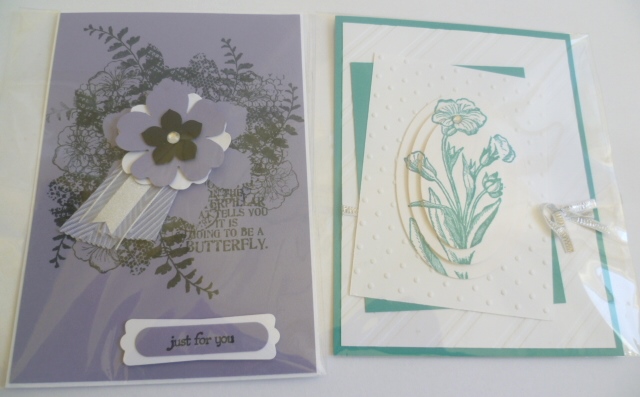
I took photos of these next 2 separately to show you as I liked these ideas.

On the left is a collage card.  I have been wanting to try one of these.  One on the right is a triple layer stamped card using ovals.  It looks great!  (I will give this one a go too).

P1160592

A variety of cards here.

P1160596

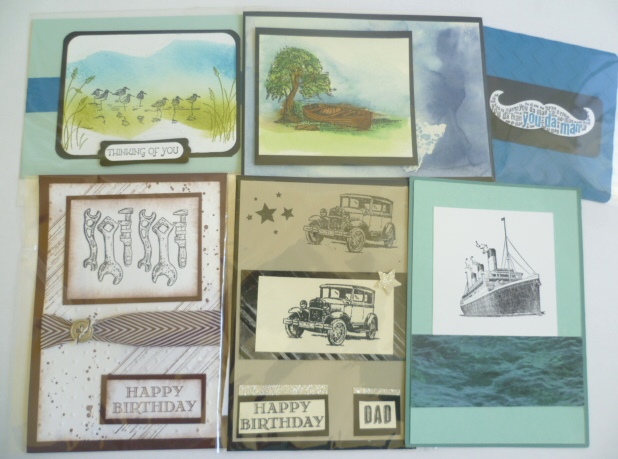
Some ideas for the men!

P1160597

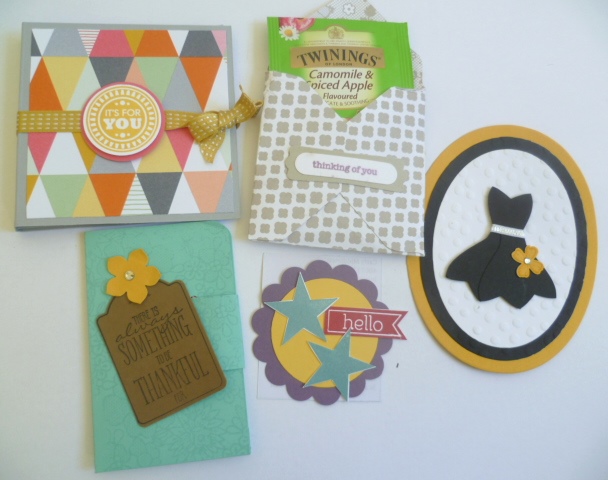
These are gift card holders, tea bag holder and little tags.  Check out the black dress.

P1160600

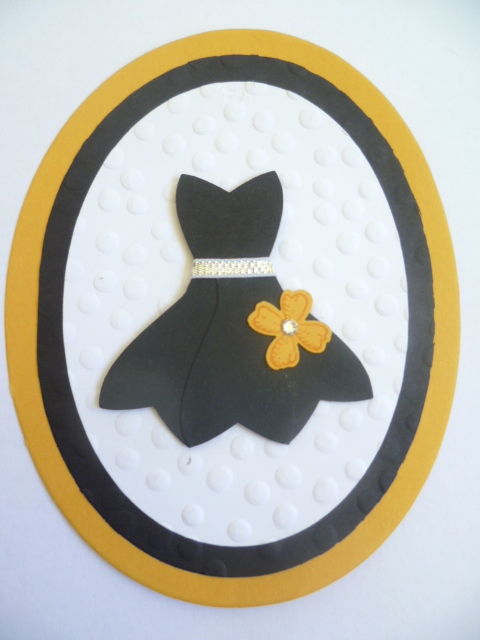
I had to take a close-up of the dress.  It is using the Bow punch.  How clever!

P1160602

Some little treat holders. Very cute!

P1160605

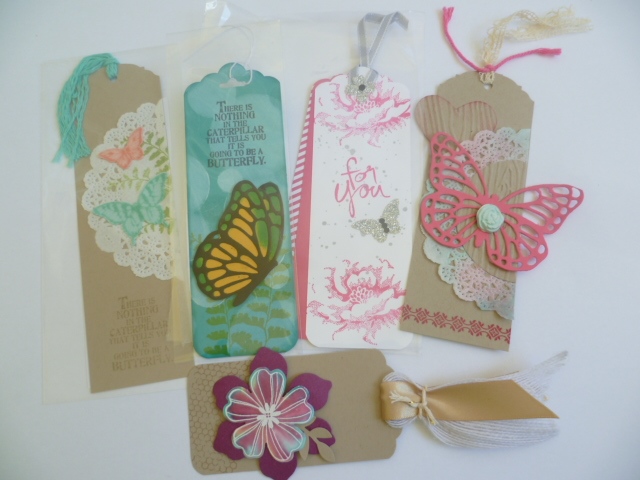
Tags and bookmarks

P1160608

There you go.  Thanks to those people who swapped with me. There are some great ideas for you to try.  What is your favourite??  What will you try first?? I think I will need to grab my bow punch and try the dress out.

Thanks for stopping by today.  Join me again soon,

Jenny

Convention, Stampin' Up!

SOUTH PACIFIC STAMPIN’ UP! CONVENTION IS OVER!

I have just returned home from the Gold Coast following the South Pacific Convention.  Oh! such fun!!! It’s always nice to spend time with friends and finally meeting up with your online friends. This is THE BEST!!!! If you have been to a Stampin’ Up! Convention you would know what I mean. If you haven’t you would have still experienced this if you have been to a stamp camp or even having a crafty time together with friends.  It’s the sharing of ideas, the friendship, the care of each other, the laughs, the fun …….

Anyway, I have taken LOTS of photos of cards and Projects but it will take some time to go through AND to photograph my swaps so bear with me there.  I will get to them this week and then I might just share some with you.  🙂

Now we did perhaps get our hands on the new Stampin’ Up! Catalogue???

OK, maybe a little excited!! Sharing the catalogue with one of my team, Sarah.

catalogue

There are lots of GREAT new products and once again Stampin’ Up! have done an excellent job on their co-ordination! You are going to want to see it. Now you will be able to view it online on June 2nd BUT if you are someone who likes to take their catalogue to bed and do some quiet reading, and you like to mark those post it notes right through them, Yes You!!! then you are going to want your own copy aren’t you!!

So if you don’t have your own Demonstrator AND you live in Australia then drop me a comment and I will get one in the post to you in the next couple of weeks.  Stock up on your post-it notes 😉 I am ordering the catalogues THIS WEEK!!

Now before I go I will give you a little sneak of the upcoming Incolors – because I am so kind 🙂 🙂

colour boxes

This was one of the displays at Convention.  They are such lovely colours.  From top left we have Mint Macaron, Watermelon Wonder, Cucumber Crush.  On the bottom from the left is Delightful Dijon and Tip Top Taupe. I am sure you will see more of these over the next few weeks.  I don’t know what my favourite is yet.  Maybe Mint Macaron or Watermelon Wonder.  What do you think???

OK, stay tuned for more 🙂

Jenny

3D projects, cards, Masculine, Stampin' Up!

A MASCULINE GIFT BOX AND CARD WITH ‘GUY GREETINGS’.

I showed you my Convention swaps earlier.  I hope you like them?? When I was just finishing the cards off last week I realised how similar one of the cards were to a Gift Box I made recently and what a great gift set it would make.  What a coincidence!

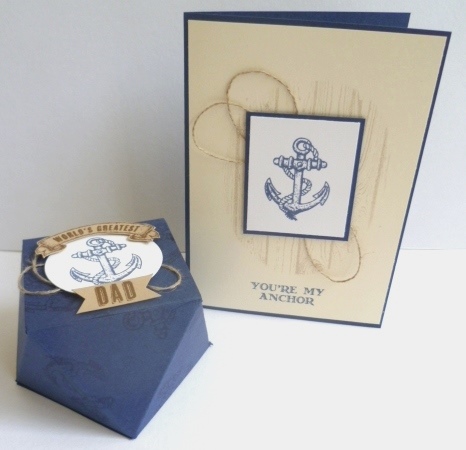
Here they are together. I have used the Guy Greetings stamp set.

P1160451

I did not plan this at all but how cool! If you want to see more details of this cute faceted box then you can check my blog post HERE.  It has the link to make your own box in that post too.

Maybe that will be just the idea to fill with chocolates for a masculine birthday – or maybe for Father’s Day????

Thanks for stopping by,

Jenny 

Stampin' Up!

PARTING IS SUCH SWEET SORROW!!!

That’s a bit dramatic for this time of the morning but it’s wet and windy here AND the retirement list is out! BOO HOO! So many favourites are going. This is a big clear-out but hey you are the winners here because some of the items are reduced up to 50% off.  So, you can’t muck around with this.  If you want something, grab it quickly! These are while supplies last. Here are the details.

You can view the list Online in my Store HERE.  If you order Online please use the Hostess code – D9VZ7SKT   This code will be available until Sunday night.

 OR

View it as a PDF.  Click on this link Here SP_retiredList then click on the link that shows up under that heading. 🙂

If you would like to order any of the products then shop Online or email/phone me your order.  I can ship to anywhere in Australia. So Happy Shopping.


cards, Catalogues, Stampin' Up!

CASE THE CATALOGUE!!

Sometimes when you sit down to create you get stumped what to do.  The MOJO is just not happening! I am sure I am not the only one that happens to.  But inspiration is everywhere and especially in our Stampin’ Up! Catalogues.  I know I don’t use the catalogues enough when I am trying to come up with something.  They have been designed that way not just to show the products but to inspire us with projects.  We might CASE (Copy and Share Everything) or might just use it as a springboard for our next project.  We might just pick out the colours they have used or the layout.

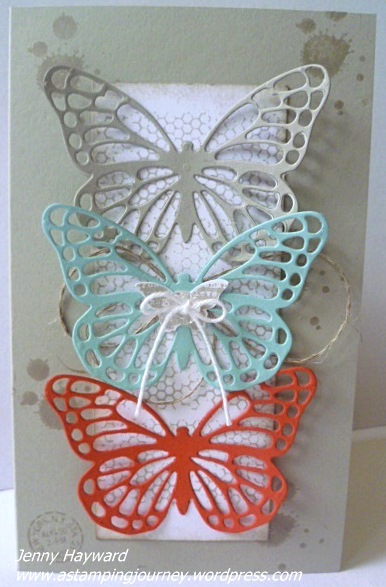
A few weeks ago I was flicking through the catalogue and this card caught my eye.  I love how it showcases the Butterfly Thinlets and the Butterfly Basics stamp set.  So I CASED the card shown.  I changed the base colour and a few other little changes.

This is the card you can find on p 27 of the Occasions Catalogue.

butterfly

Here is my card.

P1150845

The base card is a little taller than the standard size so I could fit the butterflies on there.  The base is Crumb Cake and the butterflies are Crumb Cake, Pool Party and Tangerine Tango.

So next time you get stuck, grab one of your Stampin’ Up! Catalogues and see what jumps out at you.  🙂

Have a Happy Day,

Jenny