cards, Catalogues, Sale-A-Bration, Techniques, Videos

SPONGING THE FLOWERING FOILS PAPER WITH A VIDEO!

I have mentioned already the gorgeous Flowering Foils Specialty Designer Series Paper.  You have probably seen lots around with it too.  Today I have a card to share with you using this paper and a video to show how you can very easily add the colour to the paper with the sponge rollers.

This card is inspired by a card in the 2nd release Sale-A-Bration brochure (p3)  I changed it up a little.

Here is the card.

Check the video below.

I used the Stitched So Sweetly Dies on the card and the sentiment is from So Sentimental. The card in the brochure uses one of these sentiments too but I just wanted to keep it simple rather than cutting around the sentiment seen on that card.  It does give it a good effect when you do that.

The leaves are from the Birthday Dies.  These are available as Co-ordination products that go with the Happy Birthday To You stamp set also for Sale-A-Bration.

The Flowering Foils Specialty Designer Series Paper is only available for March during Sale-A-Bration (or while supplies last) so you want to grab them soon.  You receive them as your free choice with orders over $90.  Check out my store now -> HERE.

Have fun sponging and colouring this paper.

Jenny


Catalogues, Stampin' Up!, Techniques

WEDNESDAY’S WOW! #97 – NATURE’S THOUGHTS DIES!

Wednesday’s WOW! #97 – Today I thought we need to take a closer look at the Nature’s Thoughts Dies.  These are a hidden gem and I have had so many comment lately about where the dies are from when I have used them.  Perhaps you have missed them yourself.

These dies co-ordinate with the Positive Thoughts stamp set in the Mini Catalogue.  They have recently been released as part of the Co-ordination products.  

I have die-cut them out so you can see them closer.

What I love particularly is the “dotted” frame die and the little flourish strip.  All the dies are great though. What about the largest feather? It has embossed lines on it which is really cool.

This card below I shared recently uses both the frame and the flourish strip.

This is the Positive Thoughts stamp set that these dies co-ordinate with.   The words are lovely in this set too.  I think these are a “Must-have” in your collection.


You can find these dies in my store now -> HERE.  Don’t miss them. You need them for your collection.

If ordering online please use the Host Code: MJMPAFFR.  After your order I will email out to you your free Project Tutorial Bundle available for this month.  This includes 12 projects using different Stampin’ Up! products.

Be sure to check them out.

Have a great day,

Jenny

cards, Catalogues, Stampin' Up!, Techniques

FLOWERING FOILS FAVOURITE FOR SALE-A-BRATION 2ND RELEASE!

Today is the 2nd release for Sale-A-Bration.  As if you didn’t have enough choices right!

You can see all the items in the catalogue -> HERE.

Of course there are some great choices.  I have to say though my favourite is the Flowering Foils Designer Series Paper.

We have had similar paper in past years.  These are just (if not more) as gorgeous.

There are 12 12″x 12″ white sheets with embossed designs in Rose Gold and Silver.  There are 4 designs and 3 of each sheet.

You can leave them plain or colour them with a sponge/dauber or with the Stampin’ Blends.

This is one of the cards I created with the paper coloured with the Stampin’ Blends.  I have used the Balmy Blue and coloured the background then used the Daffodil Delight for the flower centres.

The sentiment is from the Positive Thoughts stamp set.  Such lovely words.  I had the vellum diecut from the Flourishes Dies left over from another project and it worked well with this.

It’s hard to tell in the photo but I have used the ornate die strip from the Nature’s Thoughts Dies. You can see it better in the photo below.

These projects are created by Stampin’ Up! artists but it shows how pretty the paper is sponged.

So how do you get yourself some of this Flowering Foils paper??

It’s available free as part of Sale-A-Bration with orders over $90 AUD until the end of March.  

In Australia?  Head to my store now -> HERE and shop for your stamps, ink paper.  When your order totals over $90 you can select this as your free item.

There are other choices too and other options for over $180 too.  Don’t miss them.

Happy Shopping – and creating. 🙂

Have a great day,

Jenny

New Host Code now for March and new Tutorial Bundle available now sent out as a Thank You for your orders.

cards, Techniques

BEAUTIFUL MOMENTS WEEK – DAY 4 – WHITEWASHED GIRLS!

Day 4 of our Beautiful Moments Week.  This card is a technique I have wanted to try for a while.  I thought this set was a great one to try it.  This technique is known as the Whitewash Technique.  Have you tried it before?

Here is my card.

To create the Whitewash:

Stamp your image on dark coloured cardstock  (Crumb Cake used here) using Versamark and heat emboss with White Embossing Powder.  Using White Reinker, drop 1-2 drops on to a clear block.  Add some drops of water using the Aquapainter and mix the 2 together.  Pick up some white ink with the Aquapainter and paint the image in white.  Allow this to dry completely.  It may take a little time.

Once dry pick up some colour from the inkpads using the Aquapainter. (Be sure to clean the Aquapainter after using the white ink). Paint the image in your colour choices.

To finish the card:

Diecut the card.  I have used the new Nature’s Thoughts Dies.

On a side note: How pretty is this die??  Something a little different to the stitched effect.  Using the decorative die in the Nature’s Thoughts Dies diecut a strip of white card.  Trim to size and then adhere to the back of the Crumb Cake card.

Adhere a piece of the Lily Impressions Designer Series Paper from Sale-A-Bration on to Thick Whisper White card.  Raise up the stamped Crumb Cake card piece off the card using Dimensionals.

Stamp a Sentiment from the So Sentimental stamp set and diecut using the Stitched So Sweetly Dies.  Raise that up off the card.

Hope you get to try this technique.

Be sure to get  your Beautiful Moments stamp set in store but also I think you need to grab the Nature’s Thoughts Dies too.  They will be a great addition.  I will talk more about these another time but see them in store -> HERE.

Happy Stamping,

Jenny

cards, Catalogues, Stampin' Up!, Techniques

WEDNESDAY’S WOW! #96 – USING THE BRAIDED BORDER PUNCH!

Wednesday’s WOW! #96 today I want to show you the new punch in the catalogue.  The Braided Border Punch.  I think it is pretty but I think there are a few tricks to using it too.  So let’s check it out.

You can find it on page 29 of the 2020 Mini Catalogue.

As with most of the border punches, to punch your card.  Slide in your card, rest the card against the small ridge on the punch and press down.  Then to re-punch, slide the card along and you can match up the pattern on the base of the punch.  Then you can punch again.  Repeat this along the card for the length you want.

You can buy the punch on it’s own but it co-ordinates nicely with the Beautifully Braided stamp set. And getting the bundle saves 10%!

In the stamp set is a lovely “lattice” style stamp that can stamp over the punched Braided border.  There is also a flourish stamp strip too.

But how you can line this up easily on the punched piece? I have some tips for you today.

Using the Stamparatus will greatly help you.

Firstly punch your piece of card to the length needed.

Place your strip of card in the Stamparatus.  Place it in the corner to rest the card against the edge so it is lined up.

Position the stamp upside down on to the punched piece so you can line it up properly with the punched area.  Using the side plate close up the Stamparatus plate to pick up the stamp.

Ink up the stamp, Fold over the plate to stamp on the punched card.  If you need to stamp further along then, slide the plate down the hinges, ink up the stamp and stamp down again.

***

Hope these tips are helpful to get the best out of this gorgeous punch.  Below are some samples from Stampin’ Up! to show these lovely stamps and punch.

This is pretty with the rows of punched braids.  This one has the flourishes stamped.  I think it would help to line this up on the Stamparatus as well.

This one below has ribbon threaded through the braids.  That’s a clever idea!

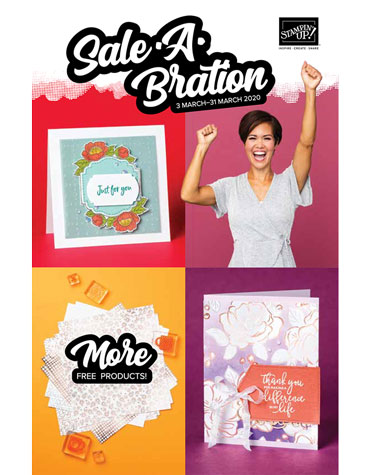
You will find the Beautifully Braided Bundle in my store now -> HERE.  $61 AUD.  Why not grab some card or some other items to reach the $90 so you can choose one of the free Sale-A-Bration products.

If ordering online you can use the Host Code – FURRYWCK  Thank You.

Be sure not to mark your order anonymous or I won’t be able to send out your gift and Thank You card.  And you will also receive the 12 project Tutorial Bundle (does not include projects with the Beautifully Braided Bundle).

Happy creating,

Jenny


cards, Catalogues, Techniques, Videos

WATERCOLOURED PAINTED POPPIES!

I want to share this card with you today.  I made it at our team Shoebox Swap last week.  I will show you the other cards we made later but thought I would show you this one today as I recreated it and filmed a video to show you how it was made.  Hope you like it.

It’s using the Painted Poppies set and is a fun card – although a little messy.  This card was shared to me by Deborah in our Inky Fingers Team.


Just a quick overview of how to make the card but be sure to watch the video (and you can subscribe to my channel on Youtube to catch new updates.  It’s early days but I am working on it!) 🙂

  1. Use your clear block and press the ink pad on to the block to get some ink.  Use the Aquapainter to spread the ink around and make it a little watery.
  2. Press the Painted Poppies “splodge” stamp on to the clear block to pick up some ink.  Press it on to your card.  I used Very Vanilla.  You could use Thick Whisper White, Shimmery White or Watercolor card.  Repeat this 3 more times over the card in a “circular” pattern.  Use the Aquapainter to spread the ink and also add some more ink from the block if you need to.
  3. Allow to dry then stamp the flower outlines over the “splodges”.  Stamp the leaves in black over the card.
  4. Use the large “splatter” stamp and ink it up in Mossy Meadow ink.  Stamp off first on scrap paper then stamp over the larger leaves.  Use the smaller “splatter” to stamp over the smaller leaves.  Clean the stamp, ink up the stamp in Gray Granite then stamp off first on to scrap paper. Stamp on the small leaves.
  5. Diecut flower centres add them to the card and stamp the sentiment.  Adhere the card to the card base.

Hope you have some messy fun with this card.

Have a great day,

Jenny


Catalogues, Stampin' Up!, Techniques

WEDNESDAY’S WOW! #95 – USING THE BIRTHDAY DIES!

Wednesday’s WOW! #95 – Today I am giving you some Tips using the Birthday Dies.

The Birthday Dies are now available as co-ordinating products with the Happy Birthday To You Stamp set from Sale-A-Bration.

When I went to use them for the first time it concerned me as the cake stand doesn’t line up with the cake stamp set.  It is a different shape.  That’s ok.  Just trim off under the base of the stand.  So you are cutting the leg of the stand off.

Then it’s easier to adhere the cake stand on to the cake.

I love these dies as they give a lot more layering to the set.  You have the 2 different leaf shape dies and there are 2 on each die making it quicker to cut.  They cut so easily too.

The other larger shape in the set is for the flowers.  To use this one, stamp your cake on your card then also stamp the cake on another piece of card.  After colouring the flowers on the additional piece you can diecut them and layer them on to your card.  You could have several layers of flowers by stamping and die-cutting them several times.

Below is part of a card I have made recently with the stamps and the dies.  I can’t show you the full card as this is my card for the Stamping Tutorials for this month.  It gives you a peak though. 🙂  I haven’t used the flower shape dies on this card but lots of leaves and I have cut the cake stand too.

I think this is a really great stamp set to begin with but having the dies now really adds to this set.  I love all the layering you can create.

The Happy Birthday To You set is a free Sale-A-Bration choice with orders over $90 AUD.  

Another tip: Purchase the Birthday Dies ($50 AUD), add another stamp set or ink/card to make your total to $90 then choose the Happy Birthday To You set for FREE.  Winner! you can get both together. AND – ordering with me you will receive the Tutorial Bundle with the card above as one of the projects. 🙂

Have a great day,

Jenny

cards, Catalogues, Sale-A-Bration, Techniques, Videos

WEDNESDAY’S WOW! #94- MASKING WITH THE GANG’S ALL MEER!

Wednesday’s WOW! #94 – Let’s look at these cute little meerkats in the The Gang’s All Meer set available for Sale-A-Bration.  You have just got to love the sweet smiles don’t you?? 🙂

This set is great for fun birthday cards whether it’s just from you or from a whole group.  They are very easy to colour with any of your colour mediums whether it is the inkpads, watercolour pencils or Stampin’ Blends.  It has some other fun elements in the set with the little party hat for those meerkats or the cactus, or even a cute gecko that can join in the party.

See the stamp set in action in this video and particularly the great way of using this set with the masking technique.  It’s so easy and you can have a card full of these cute critters.

Below is the card with the masked Meerkats so you can get a better view of it.  Stamp as many meerkats as you like. You could use any other image you have using this same technique.

Here are some other samples Brian shared in this video so you can have a closer look.


Now you can have these cute meerkats yourself.

Choose this for your Free choice with orders over $90 AUD (or choose any other of the options) as your Free Sale-A-Bration choice.  Check it out in store-> HERE.

Have a great day,

Jenny

cards, Catalogues, Techniques, Videos

HIMALAYAN POPPY CARD!

Last week I shared on my Facebook page this card with the Painted Poppies stamps.  I wanted to go with a different colour of poppy than what you might be seeing all around the internet.  I looked up some poppy colours and saw a gorgeous blue one called the Himalayan Poppy.  So I tried to recreate this.

The Balmy Blue card piece was embossed with the Stone 3D Embossing Folder. A new favourite of mine.  The Poppy was coloured with the Stampin’ Blends.

I put together a video showing how I created the card.  You can check out this video on Youtube -> HERE.

Apologies in advance.  I am still working this video thing out so be patient. 😉

If you need these Painted Poppies (or any other products) in your life then you can grab them in my store now -> HERE.

Please use the Host Code: R26WHBUN  Australian residents only.

Thank you and have a great day.

Jenny


cards, Catalogues, Techniques

WEDNESDAY’S WOW! #93 – LAYERING THE POPPY MOMENTS DIES!

Wednesday’s WOW! #93.  Today we are looking at the Poppy Moments Dies.  These are lovely dies in the 2020 Stampin’ Up! Mini Catalogue.  There are so many dies and what do you do with them??

Today’s Wednesday’s WOW! is Layering the Poppy Moments Dies.  See how these flower dies work together.

You will find in these dies a number of flower shapes and leaf shapes.  They can work on their own or layer them together.  You can see in the image above how I have layered them.

There are a number of small flower centres too.  The really small leaf shape that you can use for the small “bud”, I have also used as a small leaf.  I showed that in the little tags in the previous post.

Below is the dies to see what they actually look like.  One die I haven’t shown on the image above is that small shape in the top left.  This diecuts the pattern in your card.  It doesn’t completely cut the card.  I will share that in another post to show you how it works.

Hope this is helpful for you when you come to use the dies.  PIN the image so you have it as a reminder next time.

Have a great day,

Jenny


See the Poppy Moments Dies (HERE) and the other great Poppy products in my store now -> HERE.