cards, Stampin' Up!, Techniques

WEDNESDAY’S WOW! #153 – TONE ON TONE WITH VERSAMARK

Wednesday’s WOW! #153 – Get a Tone on Tone effect with Versamark Ink Pad.

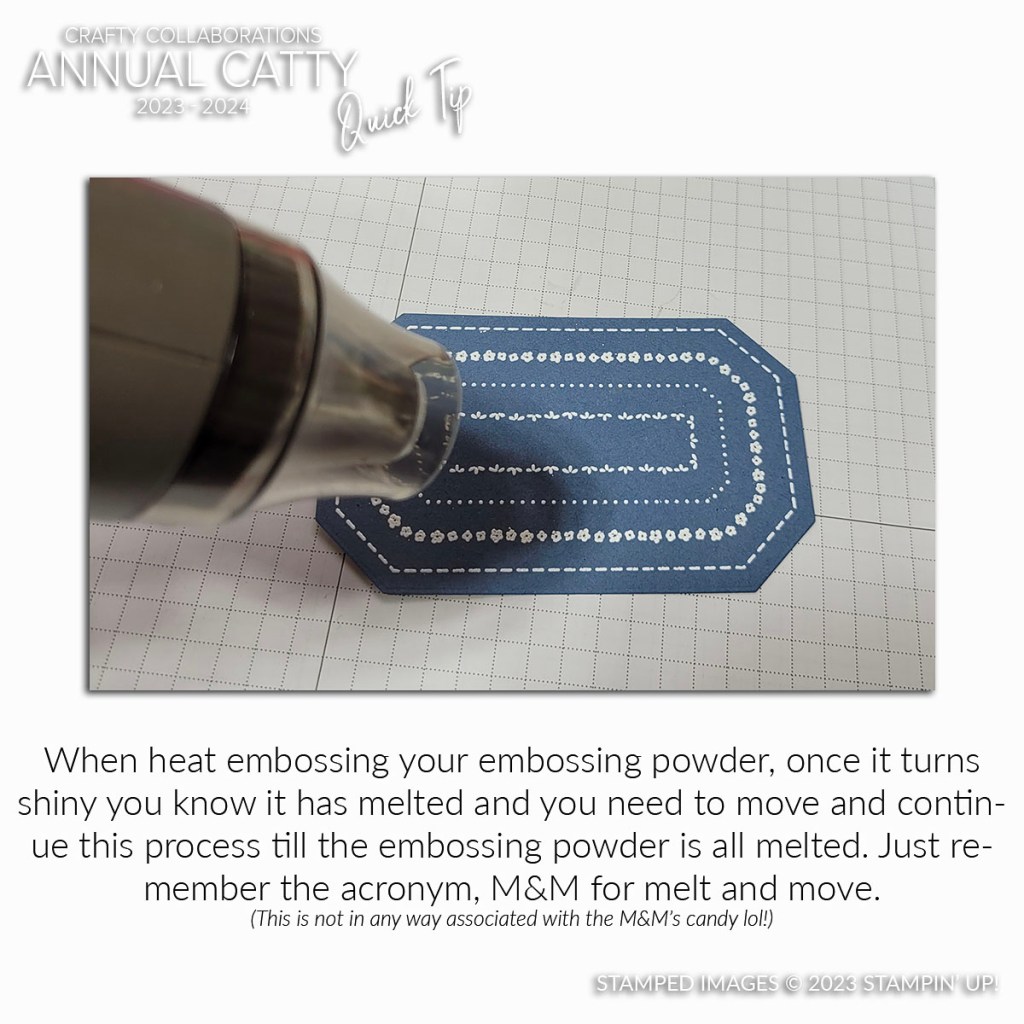
The Versamark Ink Pad is what you need to use when Heat Embossing. You ink the images with Versamark before adding your powder to heat up.

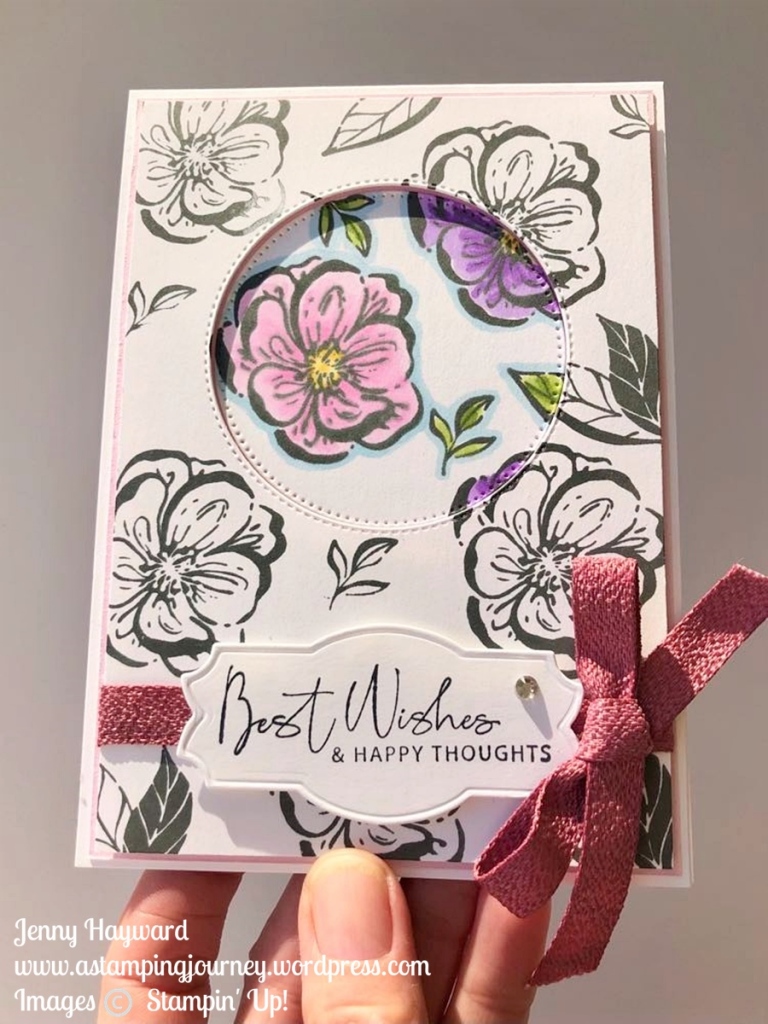
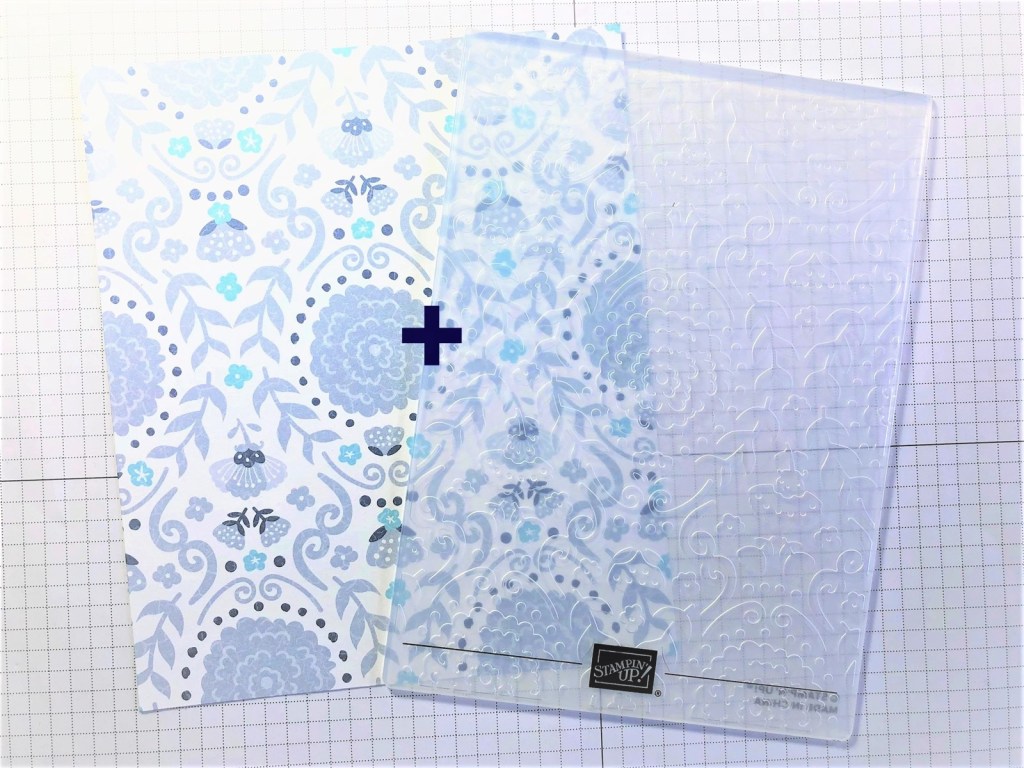
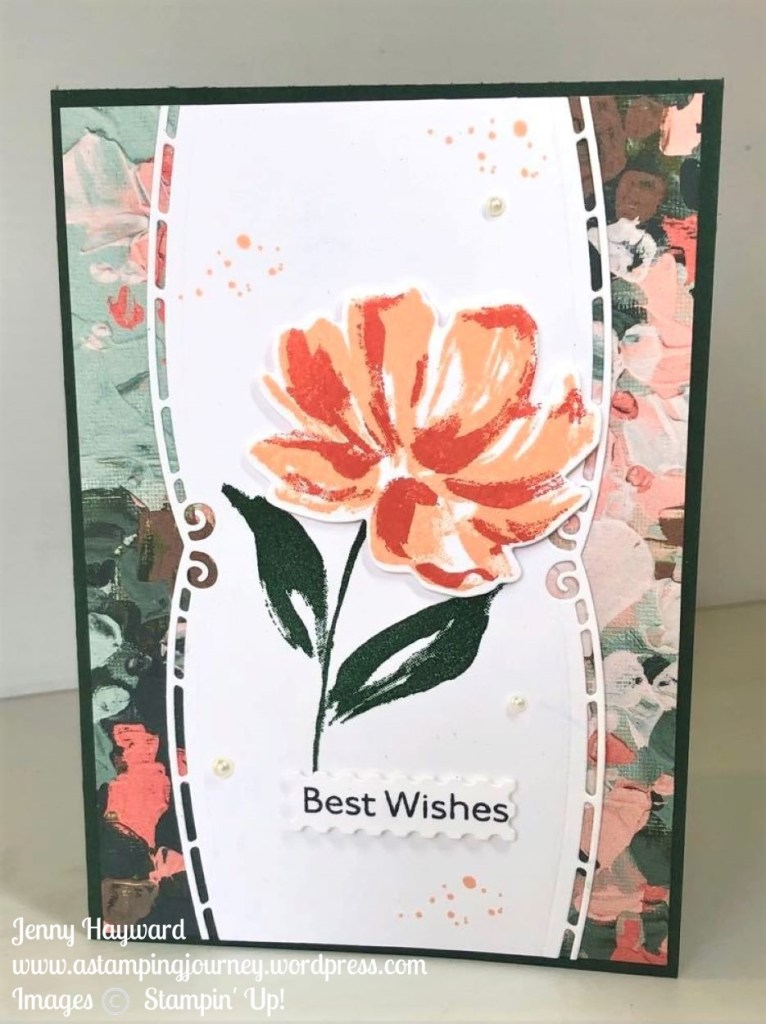
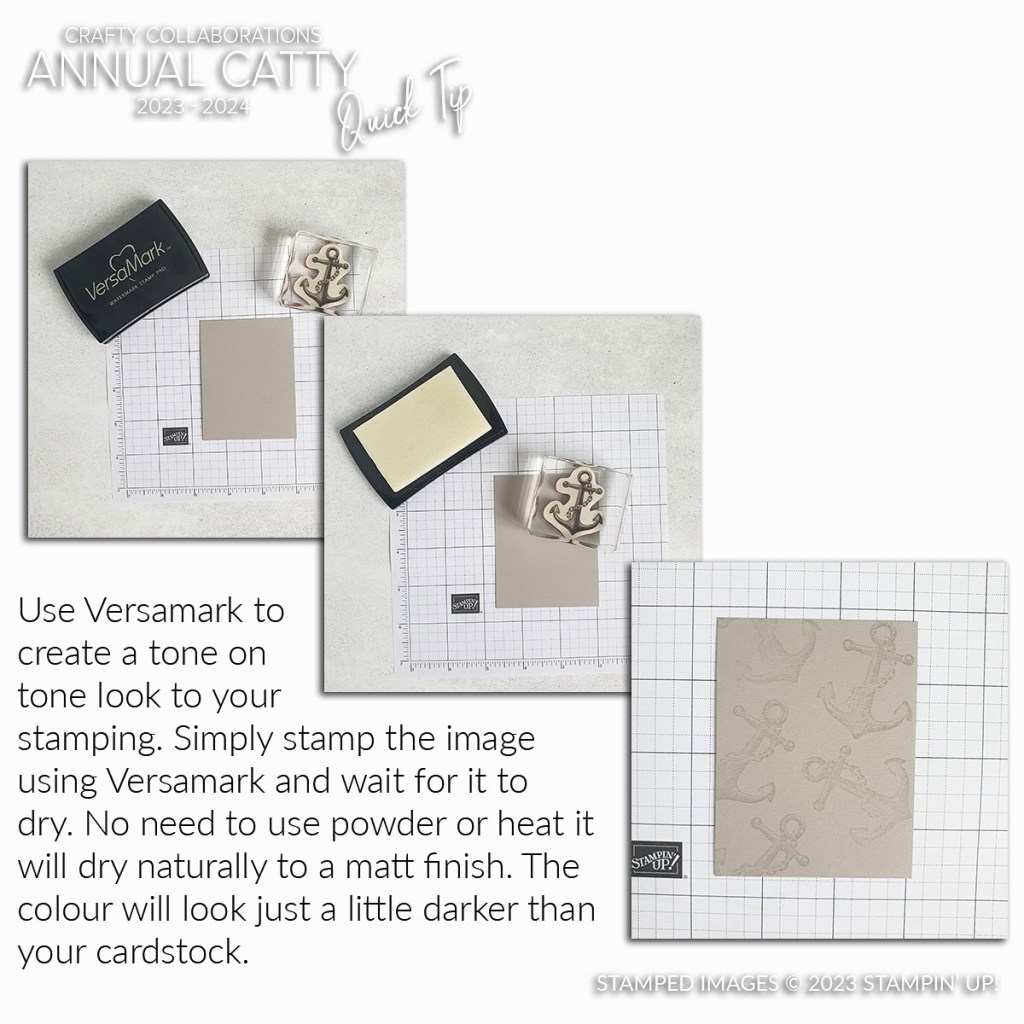
BUT Versamark is great to give a Tone on Tone effect. It’s really effective but also good if you don’t have the matching ink pad. You can use Versamark to stamp the images on the card and it gives a slightly darker tone. It does look cool!

Have you tried this?

What other ways have you used Versamark? Drop me a comment to let me know.

Hope you pull out your card and ink and start creating soon.

Happy Crafting,

Jenny

If you need some supplies and you are in Australia I would love to serve you. You can contact me directly

OR head to my store -> HERE. If ordering Online Please use the Host Code: PGECWEG9.

Thanks for shopping with me.

cards, Catalogues, Techniques

WEDNESDAY’S WOW! #152 – M&M

Wednesday’s WOW! #152 – M&M.

What???

Melt and Move. Not the chocolate variety. Although that would be nice right now …

Think M&M when you are Heat Embossing. That is Melt and Move.

Once your Embossing Powder turns shiny when heating you know that it has melted. Don’t stay heating there or it will burn. Keep on moving along to the next section.

So next time you are Heat Embossing think M&M.

Now I think I need some M&M’s. Some Crunchy Peanut ones. 🙂

Happy Crafting,

Jenny

Need some Crafty supplies and you are in Australia? I would love to serve you.

Head to my store ->HERE. Please use the Host Code: PGECWEG9

OR Contact me directly.

cards, Catalogues, Stampin' Up!, Techniques, Tutorials

WEDNESDAY’S WOW! #151 – FLAGGING YOUR RIBBON!

Wednesday’s WOW! #151 – Flagging your Ribbon ends.

Do you like to flag the ends of your ribbon? Flagging is cutting the ends to a ‘V’ Point. Don’t try and cut the points individually. They never turn out even…

Here is a tip for you to “flag” those ends. Fold the sides of one of the ends of the ribbon together in half and make one snip to a point. The longer part – the point is towards the end of the ribbon. It makes them cut so much easier.

Hope this helps you.

Happy Crafting,

Jenny

Need some supplies and you are in Australia?

You can head to my store -> HERE Please use the Host Code: R663PWDW.

Or contact me directly.

Techniques, Tutorials

WEDNESDAY’S WOW! #150 – OUTLINE YOUR DIES.

WEDNESDAY’S WOW! #150 – Outline your dies on the card insert.

Firstly – 150 WOW’s! That’s a lot of tips and tricks with your cardmaking that I have shared over the last few years. I hope they have been helpful for you. If you have missed some you can do check the “TAGS” in the side bar on my blog for Wednesday’s WOW! and it will come up with a lot of them.

Thanks for following along with me.

For today’s tip. Do you find when you take the dies off the card sheet you can never get them back right. It’s a bit of a game of Tetris.

So BEFORE you take them off, grab a pen or pencil and trace around the dies. Then you can easily put them back in place and it will show you if any are missing. Sometimes I add a magnetic sheet to my die card so you could trace around your magnetic sheet too if you do that.

Happy Crafting,

Jenny

Do you need some crafting supplies and you are in Australia?

You can shop in my store -> HERE. Please use the Host Code: R663PWDW

OR contact me directly. I would love to help you out.

cards, Techniques, Tutorials, Videos

SPOTLIGHTING TECHNIQUE WITH A VIDEO!

I’m back with another video for you. This one is using the Spotlighting Technique. Have you tried it?

The Spotlighting Technique is highlighting a part of an image with colour. The part highlighted can be created by diecutting any shape eg circle or square. The section can be raised up or sunk below the card mat.

You can see the video below to see how it is done. I share another version too in the video so stay tuned.

This is the card I created using the Irresistible Blooms. The sentiment is from the Nature’s Prints Stamp set and diecut with the Natural Prints dies.

It is a standard size card base. I have cut the card sheet down vertically for a different look.

The exact measurements I will send out in my newsletter this week. By the way, Are you on my newsletter?? You can head to the side bar, there is a tab there.

I will let you go and watch the video now. I hope you get to make one.

Happy Crafting,

Jenny

Are you in Australia and need some crafty supplies? You can shop in my store -> HERE. Please use the Host Code: QXJQDQ9U Or contact me directly.

cards, Stampin' Up!, Techniques

WEDNESDAY’S WOW #149 – HOLD DOWN THOSE DIES!

Wednesday’s WOW! #149 – Stop those dies moving.

Do you find your dies wriggle around and slip when you cut them?

Here’s a tip. Add a little Washi Tape to them. Or you could add a little tape. If you use tape you may want to dab it on your clothes or something to take off some of the sticky.

Check it out below.

Do you do this already? It’s a good idea.

Hope it helps you out if you didn’t know.

Happy Crafting,

Jenny

Are you in Australia and need some supplies?

Pop on by my store -> HERE. Please use the Host Code: QXJQDQ9U

Or contact me and I can help you out.

cards, Classes, Techniques

THIS MONTH’S TECHNIQUE CLASS – SMOOSHING!

This month’s Technique Class is looking at Smooshing.

Come along and have some inky fun with this technique and the different ways of doing this.

WHEN: Friday 16th June 10am and 7pm

WHERE: My studio East Corrimal.
Can’t make it? Grab the class by mail. See below.

RSVP: Wednesday 14th June

COST: $28 Includes a Stampin’ Spritzer.

CLASS BY MAIL:
Receive the card kits, instructions and the spritzer included in the class. $28 plus postage.

Drop me a comment or email me at jghayward@yahoo.com

I look forward to smooshing with you.

Jenny

cards, Catalogues, Techniques

WEDNESDAY’S WOW! #146 – COUNTRYSIDE PARTNERS ~

Wednesday’s WOW! #146 – Countryside Inn and Countryside Blossoms partner together.

I was playing with the new Countryside Inn Suite. And did you know – the Countryside Blossoms Embossing Folder matches one of prints in the Countryside Inn Designer Series Paper.

How clever! Now that is taking the Stampin’ Up! co-ordination to the next level right!

I thought I would show you the idea for our Wednesday’s WOW! Stamping tip today.

TIPS IN DOING THIS –

  • Cut your piece larger than the Embossing Folder so you can line it up exactly. It’s easy to trim it to size later.
  • When you position it in the Embossing Folder take your time to jiggle it around a little. There will be some points that won’t exactly line up but that’s ok they are not too far off.

Here is the finished card.

The sentiment is from the Cheerful Daisies stamp set and diecut with the label shape in the Cheerful Daisies Dies.

The leaves are punched with the Bough Punch and then some Night of Navy Bordered Ribbon added.

What do you think? Are you going to try this?

If you need any supplies and you are in Australia I would love to serve you.

Stop on by my store -> HERE. Please use the Host Code: 4RY72TBP when ordering online with orders under $250.

OR contact me directly. I can help you with your order.

Happy Stamping,

Jenny

cards, Catalogues, Techniques

LINING UP THE ELEGANT BORDERS DIES!

You might have seen the gorgeous Elegant Borders Dies. They have such delicate edging to add to your cards.

You can add one edging BUT if you were to add 2 how do you line them up? Let me give you a little tip.

If the images aren’t loading I will add the descriptions below.

1. Make a mark in pencil at half way on each side of the card.

2. Line up the middle of the die with the mark.

3. Then diecut.

Hope this helps.

Here is the finished card. I used the retiring Art Gallery Stamp set. The retiring Two Tone Flora Designer Series Paper and the Elegant Borders Dies (part of the Online Exclusives).

I would love to help you grab any of these Stampin’ Up! products. See how you can order below.

Happy Stamping,

Jenny

This month with your orders over $90 AUD receive a Tutorial Bundle in addition to your VIS Loyalty Points. The Bundle contains 52 projects that you can use for inspiration for your next project. There are some gorgeous projects for you.

In Australia? Head to my store now -> HERE. Please use the Host Code: RXX6ZW4V

Or contact me directly and I can help you with your order. Don’t forget the Last Chance List and grab your favourites before they go.

cards, Techniques, Videos

IT’S A ZIG ZAG FOLD + VIDEO!

Have you made a Zig Zag Fold Card before? They are so easy and fun. The great thing I love about this fold too is that you get to see both sides of the gorgeous paper. Who really wants to hide one side away!

Here is the card.

Don’t forget the inside when you make one.

I have used the Hues of Happiness Paper. So pretty! And with the Happiness Abounds Bundle.

You can catch the video now below to make your own.

Follow along with the video for the measurements or they will be sent out in next week’s Newsletter. Have you subscribed yet? I send out a different Tutorial each week. Some projects I haven’t shared before on Facebook or on my blog. Click on the link in the Right Hand Column on my Blog.

Hope you get to make one very soon,

Happy Crafting,

Jenny

If you need supplies to create this project or any others and you are in Australia then jump on over to my store -> HERE and pick them out. Please use the Host Code: B47Q7JP2

Or Contact me Directly. I would love to help you out. Thank You.