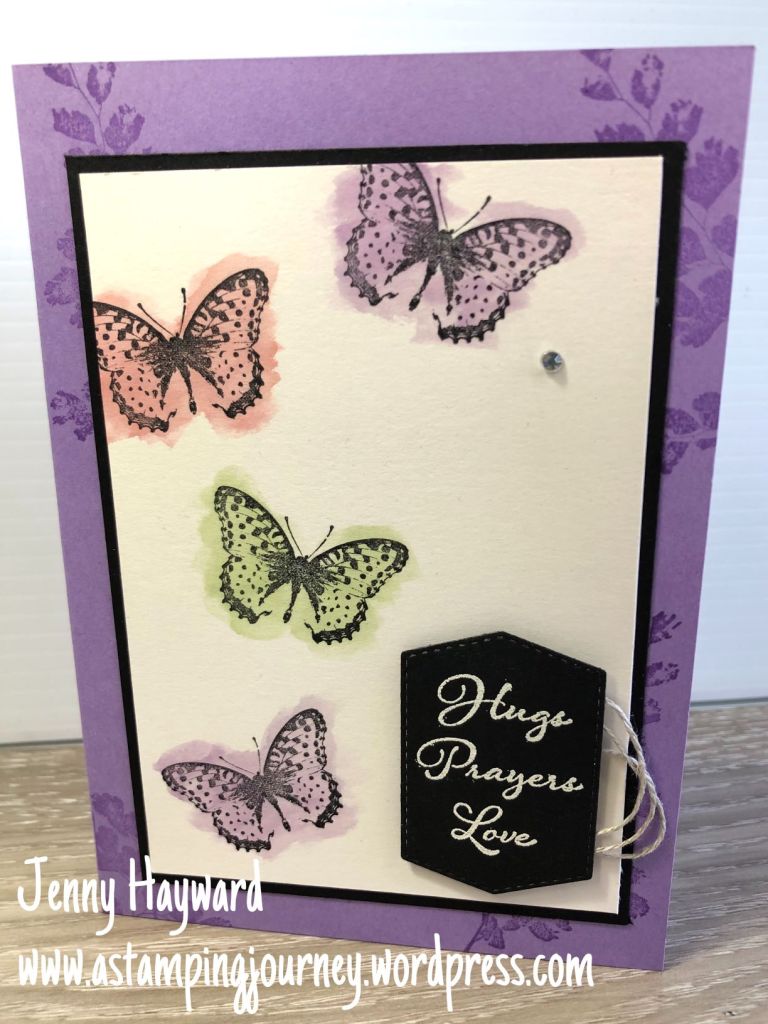
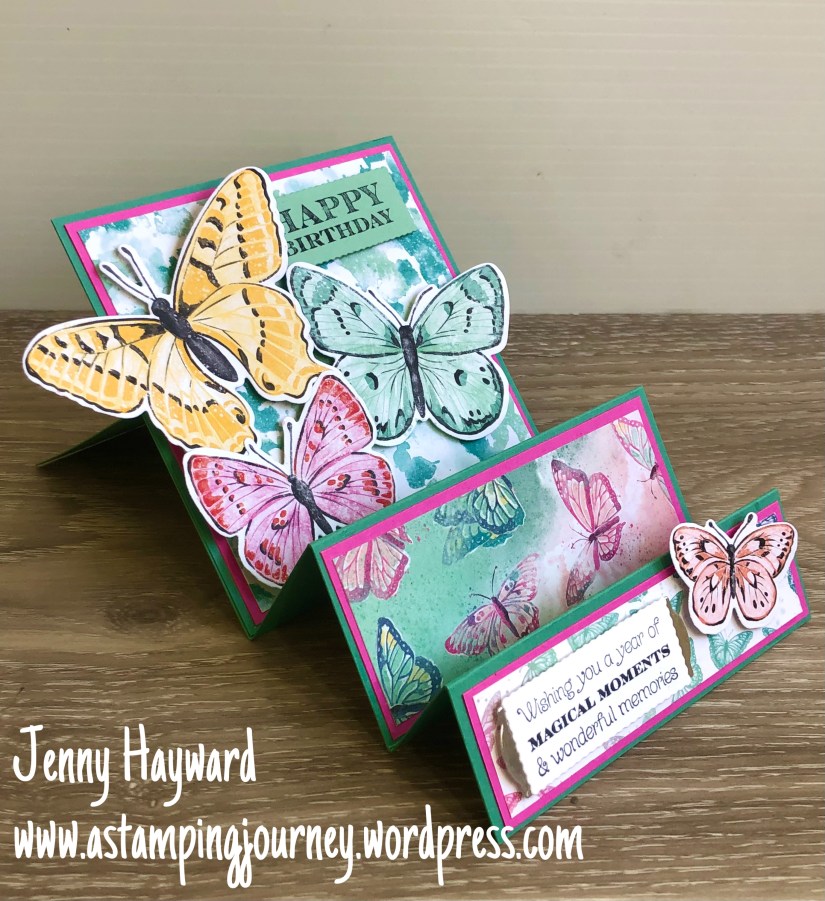
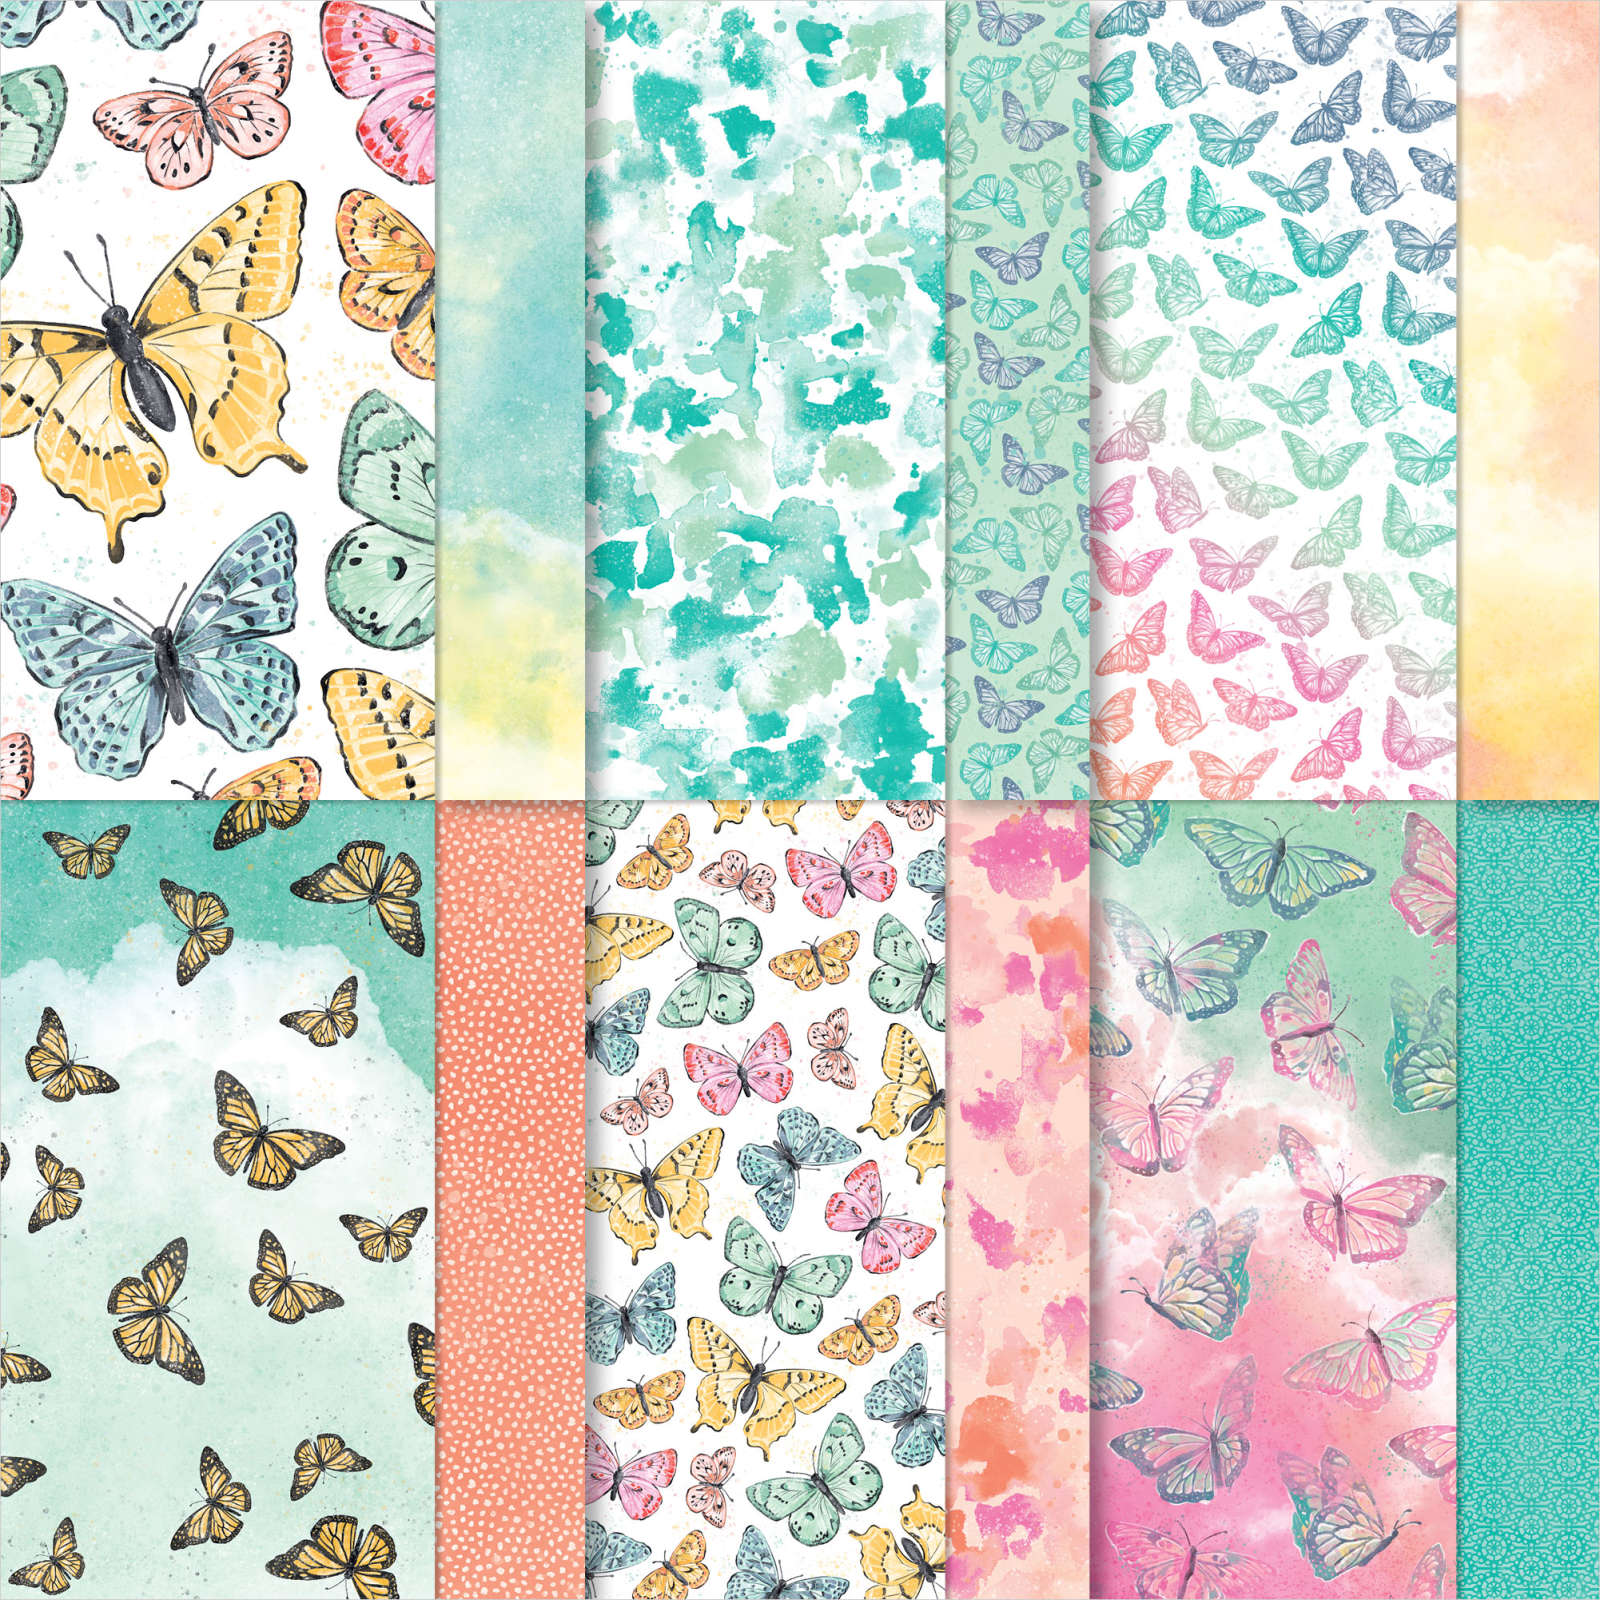
Stampin' Up!, Techniques, Tutorials, Videos

MASKED BACKGROUND WITH THE NEW STAMPIN’ UP! BLENDING BRUSHES

Have you seen the new Stampin’ Up! Blending Brushes?? I have had mine for a couple of weeks but have just pulled them out this week. I have been having so much fun with them. How soft and delicate are the bristles!! They are lovely.

On yesterday’s Facebook Live I used the brushes on the card and shared some tips in using them.

The edited video is now on Youtube. I will add it below too. If you are receiving this blog post via email it might not show up so head to my blog or you can go to Youtube directly.

I will be sharing some more cards with the Blending Brushes very soon so watch out for them.

A couple of tips with using them though. You will want to treat them differently than the sponges or the Daubers.

  • When picking up the ink from the inkpad you will want to “rub gently” not dab like you might with the sponges.
  • Dab off a little on scrap paper first. I do this with the sponges anyway.
  • When applying ink to your card move in a circular motion with light pressure.
  • Hold the brush down towards the brush head.
  • If you are sponging the whole card start off the edge of the card and work lightly in.

I hope these tips help. I will put together a video soon sharing some cool ways of using the brushes.

Here is the card from the video. I have used the Dragonfly Garden on the card.

On the Dragonfly I stamped the “solid” wing stamp on the wing outline in Blushing Bride and then coloured just the tip of the wings with the Soft Seafoam Stampin’ Write Marker or you can use the Stampin’ Blends.

The Blending Brushes are available in my store now -> HERE. for $21 AUD

Thanks for visiting today,

Jenny

cards, Catalogues, Stampin' Up!, Techniques, Videos

WEDNESDAY’S WOW! #118 – WHAT’S THIS NEW BASIC WHITE CARD?

Wednesday’s WOW! #118. You might have heard about some new White card that Stampin’ Up! has. Today let’s check it out closer to see how the Basic White compares to the previous Whisper White.

Sadly the previous Whisper White card and other products ended. So a frantic dash was made to source a new card. It was important that the new White card performed to the expectations that we as crafters need for all the stamping and techniques we do.

The new Basic White card seems to have passed the quality tests and it is now available in cardstock and envelopes and great to use for all your stamping, great for colouring with the Stampin’ Blends and for many of the Techniques you love to do.

I don’t need to say too much more about it as you can check out how it performs and with a little more explanation in the video -> HERE.

If you need some new White cardstock it is now available in my store.

Basic White -> HERE. Thick Whisper White -> HERE.

Keep on creating,

Jenny

cards, Catalogues, Classes, Stampin' Up!, Techniques

TWO STEP WITH A TOUCH OF INK!

Another card with you using the A Touch of Ink stamp set. This card is one we made at class a couple of weeks ago. It was inspired by a card I saw on Pinterest. I didn’t save the actual card so I can’t remember the original creator. I changed it up a little.

Two Step A Touch of Ink

With the A Touch Of Ink stamp set I love that it is a 2-step stamp set. You can colour the line art images but you have the great option of using the solid image stamps to “fill” the images.

For this card stamp the leaves on white card with Just Jade and use the Soft Sea Foam to colour the leaves with the solid leaf stamp. I ran the white card through the Subtles Embossing Folder and wrapped around some White Baker’s Twine.

For the hummingbird, stamp in Memento Black. To colour it I inked up the solid stamp with Flirty Flamingo. Before stamping I used the Daubers or you can use a sponge to lightly add ink on the edges. On the top I inked with Poppy Parade. Along the bottom edge of the bird I inked with Pumpkin Pie. Then stamp on to the white diecut circle. If you find the Flirty Flamingo too dark then before inking the edges lightly stamp off the bird on to scrap paper.

The sentiment on this is heat embossed with Silver Embossing Powder and diecut with the Messages Die.

I don’t want you missing out on this gorgeous A Touch of Ink stamp set. It’s only available for one more month. This is a Level 2 Sale-A-Bration choice. When you order over $180 you can choose this set.

As an added bonus this week I have a little special.

When you order over $180 you can choose the A Touch Of Ink stamp set (or you can choose any other of the products too). As a Thanks to you I will send out to you 2 card kits that you can create your own cards with as well as a sample of the lovely Oh So Ombre paper.

If you are in Austalia I would love to help you with your orders. You can contact me directly on 0439 844574 or head to my store -> HERE. Please use the Host Code: CJ7PPUEC

Have a great day,

Jenny

Catalogues, Stampin' Up!, Techniques

WEDNESDAY’S WOW! #116 – CUT THE MANY MESSAGES STAMP!

For Wednesday’s WOW! #116 I have a little tip for you with the Many Messages stamp set. What I’m going to tell you is … cut that stamp!

Yes I know it is pretty horrific to cut in to the rubber on a stamp. Why did I cut the stamp though??

When I first got the Many Messages stamp I realised it is one big stamp. Yes I was in a hurry when I ordered and didn’t read the catalogue properly. That’s ok though. 🙂

I loved many of the sentiments on the stamp but I didn’t want to ink the whole stamp or most of it to get the one sentiment. And I didn’t want to have a multiple of sentiments sitting around waiting to be used.

So … I cut it up.


With all the sentiments now separated I could use whatever one I wanted to.

TIPS WHEN CUTTING THE STAMP

First adhere the backing sheet (stickers) with the words on it on to the stamp. To do this, only remove half of the backing sheet. Line it up with the stamp and only put the one half of the sticker on to the stamp and press it down to smooth it out. Then peel off the other half and adhere the rest of the sheet.

When cutting the stamp, have the rubber of the stamp facing up so you can see the actual stamp. Cut carefully around the words being sure to leave an edge. It is better to cut them with the rubber side up rather than following the sticker as you don’t want to cut any of the words off. Use sharp scissors and take your time. After they are all separated you can then go back to each one and trim and straighten any of the edges.

The stamps can be stored directly on to the inside back of the case.

Another note on the Messages Die since we are talking about this. Don’t be limited just to the stamps in the Many Messages stamp set. Although they are a bundle and work together there are many other stamps you would have in your other stamp sets where the sentiments would fit in some of these spaces in the die. Check them out and see what you can find.

I hope you find these tips helpful when using this stamp set and the Die. You will find it so much more versatile.

The Many Messages Bundle can be found in my store now -> HERE.

Or you can contact me directly if you need help.

Have a great Wednesday,

Jenny

cards, Catalogues, Techniques

WEDNESDAY’S WOW! #114 – COLOUR THE EMBOSSING PASTE

For Wednesday’s WOW! #114 I wanted to show you the effect you can create by colouring the Embossing Paste. This paste is not something I have used a lot of but it is so cool!

Embossing Paste is available in a 118ml or 4 fl. oz. container. You can use the paste to add extra texture to your projects which is fun. Use it with the Palette knives to add the paste directly by smearing it on your project or through the Decorative masks which are available.

Stampin’ Up! carries the regular White Embossing Paste as well as the Shimmery White Embossing Paste. The extra sparkle in the Shimmery White paste adds that little extra to your projects.

This one below is the Shimmery White one although it is hard to see the sparkle.

As an extra step why not add a little reinker to the paste. Simple smear some on the Silicon mat or even a block. Add one or 2 drops of reinker and mix. Then you can add it directly to your project. Be sure to rinse off the paste straight away on your mat or block that you have used.

Check out the project below. Some Soft Suede ink refill has been added to the paste and then smeared through the mask. It has been applied to the Soft Suede card so gives an textured sparkle in the same tone as the card. Pretty cool right. 🙂

This project uses the Peaceful Boughs stamps and the Beautiful Boughs Dies.

So why not grab some texture paste and not only add the paste on your projects but colour it with the reinkers for some co-ordinated colour.

These are available in my store now. In Australia? why not head along to grab some now. Head -> HERE.

Thanks for visiting for another fun tip today for Wednesday’s WOW!

Happy stamping,

Jenny

cards, Catalogues, Christmas, Techniques

WEDNESDAY’S WOW #113 – DRESS UP YOUR ENVELOPES!

Shelli, (Stampin’ Up!’s wonderful co-founder) has stated that there should be no naked envelopes. 🙂 I’m guilty of that all the time I have to say. What about you?

I have discovered these fun products in the Holiday Catalogue to dress up our envelopes. They look really fancy. For Wednesday’s WOW! #113 – Why not dress up your envelopes with the Ornamental Envelopes Bundle.

I think these products are overlooked in the catalogue. The ornaments in the Ornamental Envelopes stamp set are gorgeous but I really wanted to focus on the Envelopes Dies.

Below is the Ornamental Envelopes Bundle.

Check out the Envelopes Dies closer though.

 The Envelopes Dies consists of 12 dies. 4 Envelope liners, 1-2 decorative edges, and some other elements to diecut in to your paper liners or directly on to the envelope. It also has the dies to cut the ornaments from the stamp set too. The Largest die measures 6-3/16″ x 2-1/2″ (15.7 x 6.4 cm).

So how do you use these dies?? Check out the samples below.

On this one create a decorative wrap for your envelope. How fancy is that?? You can line inside the envelope as well.

Not just line the inside but you can make a pretty decorative liner for inside. How sweet! Or you can diecut the outside and add a liner inside of pretty paper that you can see through the edge.

For this one below I am not sure but I think that for the envelope a mask was made with one of the decorative dies and some coloured texture paste has been added through the mask. This adds to the festive feel.

If you want to dress up your envelopes with the Ornamental Envelopes Bundle or even just the Envelopes Dies you can check them out and order them in my store -> HERE

Please use the Host Code – RCDPWPWK

Or you can contact me directly by email at jghayward@yahoo.com

Happy Wednesday,

Jenny

cards, Techniques, Tutorials

WEDNESDAY’S WOW! #112 – ROLLING A BACKGROUND!

Wednesday’s WOW! today #112. I want to share with you how to create the lovely sponged backgrounds.

I don’t know about you but I have been enjoying creating these backgrounds a lot lately.

Here is a tip from our Stampin’ Up! Catalogue.

The great tool to use for these backgrounds is the Sponge Brayers.

To use the Sponge Brayer build up the ink on the Brayer to roll over your project. I have shared this technique in a few videos recently. You will find those on Youtube or scroll back a few posts to catch them.

One tip I tell people when rolling to collect your ink is to not roll back and forward on the inkpad. It’s a “roll and lift movement”. Roll gently over the ink pad, lift the roller and roll again gently. Keep repeating this until you get the amount of ink you want.

When rolling on to your card it’s a good idea to start off the edge of your project and roll gently onto your card. Repeat building up the ink on your inkpad and roll on your project again starting off the card. Keep building up as much colour as you like.

The Sponge Brayers come with 2 handles and 4 sponge rollers. So it’s good to have a different Sponge for a different shade of colour. You can see them in store -> HERE

For creating your backgrounds you could also use the Sponges or use the Sponge Daubers but I think the Sponge Brayers are more effective as they cover a larger area at a time.

TIP: To create your “horizon” as shown in the projects above, place a piece of paper over a section to create a lined edge before you start rolling. Then if needed change your paper around to mask the edge again from the other direction to roll. Or on these cards they have elements stamped.

The stamp set used for these projects is the Sending Sunshine set seen -> HERE.

I hope you have a go at this technique. It’s a fun one to build up your coloured background.

In Australia? If you need any products to get creating these projects please stop by my store -> HERE. Thanks for your orders. Or you can contact me directly on 0439 844574.

Don’t forget to use the host code if ordering online. 9J63PU4C

Happy “rolling” 🙂

Jenny

cards, Catalogues, Stampin' Up!, Techniques, Videos

BUTTERFLY WATERCOLOUR WASH + VIDEO!

Today’s card uses a fun watercolouring technique.  I call it a watercolour wash.  It’s a great way of colouring your images freely without worrying about staying in the lines.  That’s so cool if you are not one for neat, “in the lines” colouring.

I have used the stamp set Positive Thoughts for this card.

You can check out the video below to see some tips in creating it.

Positive Thoughts is such a beautiful stamp set.  I particularly love the sentiments in it.

I hope you give this idea a go. Try it with different stamp sets.

Thanks for visiting me,

Jenny

cards, Catalogues, Stampin' Up!, Techniques, Videos

TASTEFUL TOUCHES EMBOSSED FEATHERS + VIDEO!

Today’s project is using the Tasteful Touches stamp set.  I love heat embossing and thought those feathers would look lovely in shiny silver.

Stampin' Up! Tasteful Touches Embossed Feathers

I have a video for you showing you how to create it all ready for Friday Flicks.  Check it out.

If you are receiving this blog post via email and the video is not showing then head to the post on my blog and you can view it there directly.  It is now on Youtube too so you can see it there.  (Be sure to subscribe if you haven’t already subscribed so you don’t miss out on any videos).

If you are in Australia and would like this gorgeous Tasteful Touches Bundle or any of the other wonderful products you can grab it now in store -> HERE.  Or contact me and I will take care of it for you.

Have a great day,

Jenny

cards, Catalogues, Techniques, Videos

LIFE IS BEAUTIFUL – DOUBLE LAYER CARD + VIDEO!

This card is one we made in class recently.  I wanted to share this video with you today to show you how to create it.

It is with the sweet Life Is Beautiful Stamp set and is using the Double Layer Technique.  That is using 2 layers of card mat that you stamp on and layer together.  The card was inspired by one I saw on Pinterest using the Sheltering Tree set.  It didn’t have a watermark and I couldn’t tell you who created it.  I changed it up a bit for this card though.

I found that it helped using the Stamparatus to stamp this to be sure to get a crisp stamping. It made it easy to re-stamp if I needed to.

I have the video below to see how you can create this card.


The Life is Beautiful stamp set has such lovely sentiments.

In Australia? Grab it in my store now -> HERE.

Please use the Host Code: TAWWBMRC

Or contact me directly and I can take care of your order.  Thank you so much for ordering. 🙂

Happy Stamping,

Jenny