I have just had the best weekend with a few stamping buddies. While at the Stampin’ Up! convention in May this year a group of us who shared together decided that since the Incentive Trip was beyond us for this year then we should hold our own.
Leonie N. and I have been planning it for the past few months. It all came together this weekend. It was such fun!!! Each of us shared a Make and Take, we had prize patrol, lots of special gifts and our “Night of Nights” Award Dinner. I thought I would share some of our ventures and creating over the next few days.
Firstly, I can show you what I made for each of my lovely friends.
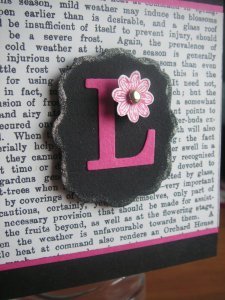
I used the Newsprint DSP with Melon Mambo and black cardstock. The black card measures 16.5cmx8.5cm. I scored it on the long side at 6.5cm. This enabled the piece to bend easily. I punched a circle in the top part with the 1 3/8″ circle punch. I cut a 1 3/8″ circle from melon mambo and then a scallop circle over this to cut it out. The label was cut with the “Lots of Tags” Die and I rubbed Champagne Shimmer Paint around the edge. I cut the letters with the alphabet die and adhered that to the tag. The small flower from the hostess set “Punch Potpourri” was stamped in Melon Mambo and punched out with the Boho Blossoms punch. I added a gold brad and raised that up off the letter with dimensionals. Here is a close up to see it.
This is what was waiting for the guests. Leonie had made up some fruit punch. Doesn’t it look exotic!!!
Here is everyone enjoying them.
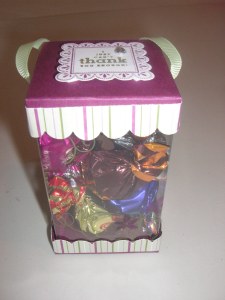
Andrea gave Leonie and I these special little chocolate boxes for organising the weekend. Aren’t they gorgeous???? I’m sure they will taste yummy too, but you won’t know that, will you!
Stop by over the next couple of days and I will show you some of the cards that we made. Maybe I can show you some other things we got up to too!!
I have been having fun creating this week. I can’t show you everything yet. That will have to wait until next week. What I can show you are these little tags I have been making. They are so quick to make. You can whip up a number of these in no time ready to adorn your gifts this Christmas. I have put together a simple tutorial to show you how they are done.
These are little tags using the set “Delightful Decorations” and the matching ornament punch. It is so great there is a matching punch for this set. I don’t think I could be bothered cutting them out!
What you will need:
Stamps: Delightful Decorations (121502)
Ornament Extra Large Punch (119847)
Whisper White Cardstock
Real Red Ink
Adhesive Rhinestones (119246)
1/8” (3.2mm) Real Red Taffeta Ribbon
1. Cut Cardstock 10cmx6cm. Score on long side at 5cm and fold on score lines.
2. Ink Ornament Stamp from Delightful Decorations in Real Red ink. Line stamp up over piece of card so tip of ornament hangs just over the edge of the folded card. Stamp image.
3. Place card into ornament punch. Line up image in the window. Have the top of the punch just off the edge of the folded edge of the card. See Photo 1 to assist you. Punch out the ornament.
Photo 1
4. Tie a bow with the Real Red Taffeta ribbon and adhere to the top of the punch with a glue dot. Add an adhesive Rhinestone to the centre of the ornament. See Photo 2
Photo 2
5. Now you have a tiny tag for Christmas that opens out for you to write inside.
Why not try other variation and different colours??? See Photo 3
Here I have used a different stamp in the set. The Old Olive Tag is simply stamped and punch out on a single layer of card and tied with gold cord at the top.
Photo 3
Enjoy making these. I have a fun weekend ahead with some stamping buddies. I can’t wait! I will have lots of stories to tell. (Although, there will be some things that can’t be shared!!!!) LOL
It has been a little while since I have been back here. I’m really sorry about that. I don’t like to leave it this long between posts. You’ll start to forget about me 🙂 – and I can’t have that!!! Life has just been crazy these last few weeks and with school holidays thrown in it has been a bit tricky to make it.
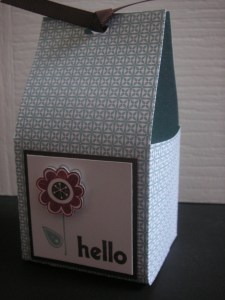
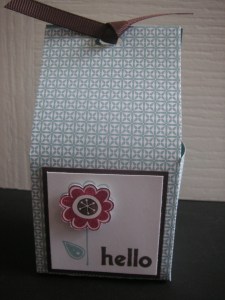
In this recent post I showed you the boxy bags. They are so cute. I said I would give you the metric measurements for them and I haven’t forgotten. I’ll do that right now for you. I will show you the bag I made some time ago when I tried these the first time. I made this one for a special friend using the stampset “Hello Again”. It was good I had a photo in the vault!
This is in the shadow a bit but it gives you an idea side on. This is the front view.
It is using some DSP from the recently retired catalogue.
Here are the metric measurements I used. The original instructions can be found here. The instructions can be a little confusing as to where to cut. So you can follow the instructions there as they have step by step photos to show what to do.
Cut card 28cmx12.5cm, (which is 11″x5″). On the 28cm (11″) side score at 11.5cm and 16.5cm. On the 12.5cm (5″) side score at 3cm and 9.5cm.
On the 3cmand 9.5cm scored lines cut from the end to the score line in the middle (that would be the 11.5cm scored line running down. Turn around and repeat on the other end. Cut off 7.5cm from these outside side flaps on each end. (Check the photo if you are unsure). Place adhesive on small tabs and adhere box together. You can decorate the box as you like. It is so cute – and very simple. It would be great with Christmas approaching very quickly.
Now I promise I won’t leave it so long next time to return here. I do have a lot I have been busy with. So stop by again soon. In the meantime go and make yourself a boxy bag!!
Last night we had our combined team Catalogue Launch. We took the opportunity to use it as a fundraiser for Cancer Council. It was a HUGE night, but I think everyone enjoyed it. There was over 75 people there and we raised over $2500 for the night’s effort which was fantastic! There will be more added to that over the coming weeks which can help in some small way to help in the research and treatment of Cancer. So, what a great night!!
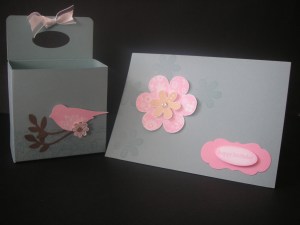
Each demonstrator had their own tables and did their own projects. This is what we created at our table. The lighting is not great, so I apologise for that.
Firstly the box, I was inspired by this cute little box that Helen did here. I altered the measurements and made the box larger, so you could fit small love note size cards (7.5cmx7.5cm) or a small cello bag with some choccie treats!!! I have my measurements further below.
I used the Very Vintage wheel across the front of the box in Baja Breeze. (NOTE: Do this before assembling!!!). I stamped the bird in Pretty in Pink with the new Level 1 Hostess set “Punch Potpourri”. This is a great set. It corresponds with a number of punches. I punched the bird out with the 2-step bird punch. The small flower is from the small flowers in the set and stamped in Soft Suede and punched out with the Boho Blossoms punch. The leaves are punched out in soft suede and adhered straight onto the front of the box. I have used dimensionals to raise up the bird and flower. The Rhinestone in the centre of the small flower is from some newly aquired self-adhesive Rhinestones. It didn’t take long to break open that pack!! I punched out a hole with the small oval punch and tied a small bow with some of the gorgeous new Organza ribbon and adhered that with a glue dot.
Here are the instructions to the box.
MINI CARD BOX
1. Cut card to 24cmx16cm. Score along the 16cm edge at 4cm and 12cm. Score along the 24cm edge at 4cm, 12cm and 16cm.
2. Fold on score lines. Along the 24cm edge, cut on each of the score lines until you meet the score line running along. Repeat this on the other side.
3. Cut off the small 4cm square that is formed at the top, on both sides of the shorter edge. This leaves a small tab in the centre measuring 8cmx4cm. This is just on one end! On this tab, use the small oval punch or Word Window punch to create a slot.
4. Stamp front of the the box as desired before assembling.
5. Use sticky strip or snail adhesive on side tabs and fold up on scored lines and adhere together.
6. Finish decorating box as desired.
Onto the card:
I used one of the new sets Printed Petals. This is such a versatile set. I stamped the small flower in versamark on the front. I stamped the large flower in Pretty in Pink and the smaller one in So Saffron. I cut these out and curled up the edges a little before raising them up on dimensionals. Some more bling in the centre of these flowers with the Rhinestones. The pink tag was cut with the Big Shot and the ‘Lots of Tags’ die. I adhered this straight onto the card. The greeting was from “Teeny Tiny Sentiments” stamped and punched with the small oval punch. I sponged the edges and raised that up with dimensionals. It is a very simple card. But it needed to be simple with so much else going on!!
I have rambled on a bit now but I will just show you a few photos of my lovely group of ladies hard at work.
Apart from some fun games we had to raise money we also had a large daffodil picture. Everyone could place coins on it to fill the daffodil. It was a great idea and I think we did well in filling it. There is in fact $144 on there. Isn’t that great!!!!
Just a “little” review of our night anyway. It was worth the hard work. I will be back soon with an account of my “Mystery Workshop” I had the other day. There were lots of creating to be had there too!!!
I’m back! Our new computer is up and running. I just need to get used to this new Windows 7 version. It’s a lot different, but it’s fast!
I have 2 more male cards to show you. These are done with the faux woodgrain effect. Have you tried this technique before? It is a fun thing to do and everytime you do it, the results are different. It’s a great manly technique. I’ll talk about the technique shortly. I will show you the cards first. These cards I made last year.
This is using the retiring ‘Wanted’ set again.
I have created the woodgrain and then mounted it on a Chocolate Chip base. I inked up the horses in Chocolate Chip and stamped them without reinking. It looks like wild horses running! I matted this on Chocolate Chip and adhered it to the card. I looped some twine and then adhered that with a glue dot. The greeting is from ‘Short and Sweet’. I punched that out with the Word Window punch and then layered that with a Chocolate Chip Word Window Punch out. I did stamp the inside with the paisley stamp onto Very Vanilla but I forgot to take a photo of that.
The other card is using ‘Owl Together Now’. I’m a bit sad I haven’t used this set has much as I thought. It is a very cute set.
I punched out a circle in the card with the 1 3/8″ circle punch. I stamped up a little owl with Old Olive Ink onto Very Vanilla card. I coloured just his wings with the So Saffron marker. I adhered that piece under the woodgrain card with mounting tape and wrapped some twine around it. Then mounted it all with mounting tape on a piece of Old Olive card. This was adhered to the Chocolate Chip card base. The greeting was from the set and punched out with the Large Oval punch. The edges were sponged with Old Olive and then layered on another Large Oval punched out in Old Olive. I offset them and adhered them with mounting tape again. This is very cute. It looks like the owl is peering out of his hole in the tree.
There are a lot of different versions of creating the woodgrain effect on the internet. I found a tutorial on Splitcoast here. I did mine on Very Vanilla card. I used Creamy Caramel, More Mustard and Chocolate Chip inks. A couple of tips I found:
– When you swipe your inkpad down the card, start off the edge of the card and try to run down in one movement. It doesn’t matter too much, but you get lines across the card where you stop. That just adds to the character of the wood effect though. Lay the inkpad flat to swipe down.
– Make your card piece a little larger than you want. You tend to get a dark edge, so you can trim it down.
– After I used the 3 colours (starting from the lightest first), I rubbed over parts of the card with white ink with a sponge (rubbing rather than dabbing). Just apply lightly. It might help sponging off on scrap paper first.
– After using the white ink, you can always touch up the card by sponging (rubbing) on the 3 ink colours you have used until you are happy with the result. That is, you might want to add a little more golden colour then sponge on more ‘More Mustard’, or if you want it darker sponge on more ‘Chocolate Chip’.
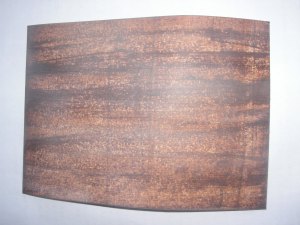
I was going to do up a tutorial for this, but I think the one on Splitcoast is simple to follow. I found it a bit hard to swipe ink with one hand while taking a photo!!!! Here is a sample piece I created while doing this though.
The card was curled up a bit that’s why it looks crooked. Sorry about that 🙂
So you can go and create some faux woodgrain cards just in time for Father’s Day. Until next time, Happy Stamping. 🙂
Recently we had some friends who had a new baby girl and I needed to make a card. I haven’t had to make one of those cards for a long time. I don’t have any cute little kiddies stamps, let alone baby stamps. A long time ago when I made some baby cards I used to make these cute little nappy (diaper) cards. So, I thought I would do another one of those, with a few additions. I still had some nappy cloth.
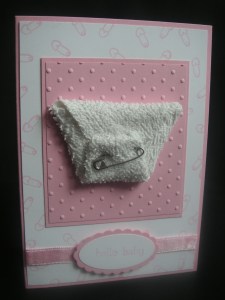
I used the little nappypin from ‘Short and Sweet’ to create some background card on the Whisper White cardstock. I ran some Pretty in Pink card through the Big Shot with the Perfect Polka Dots Textured Impressions Folder and layered this on some more Pretty in Pink card. I created the nappy (diaper) using the kite fold. I have the instructions below for that. I adhered this using Tombow adhesive, but Sticky Strip would work. I stuck a safety pin through the top layer. I don’t think many people use nappy pins anymore!!! I wrapped around some Pretty in Pink Taffeta ribbon. Then punched out the greeting from Teeny Tiny Sentiments with the Large oval punch and Scallop oval punch. I think it is quite cute, for a very cute little girl!!!!
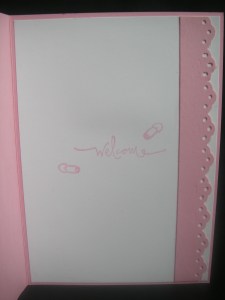
This is the inside of the card. Just a very simple strip of Pretty in Pink punched with the Eyelet border punch and layered on some Whisper White cardstock.
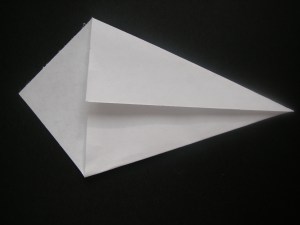
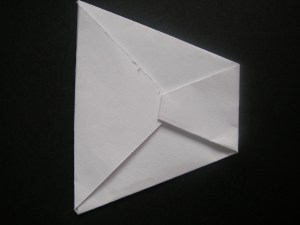
Here is the Kite fold nappy (diaper) that I did. I have used paper to show this here. Cut a piece 8cmx8cm.
Fold 2 of the corners in to the middle.
Fold down the top edge over the 2 folds. Then fold up the bottom point. I tucked the pointy end under.
There it is!!!
Hope you enjoyed this card??? I better go and do something with my day!!
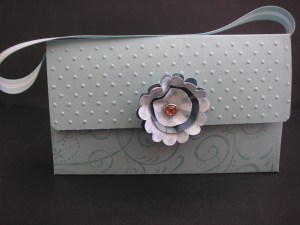
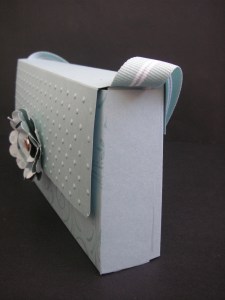
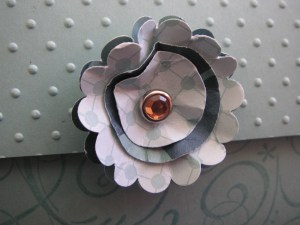
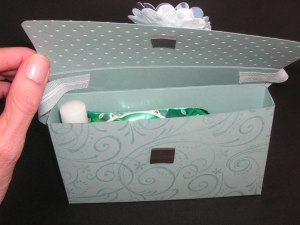
I have one more little thing to show you from convention. You are probably all convention-ed out now!!! I made this little bag for my roomie Leonie N. I wanted to make something special for her. The original idea came from Chiaki Haverstick. When I made it up though it was so tiny measuring 7.5cmx5cm (3″x2″). So I enlarged it and made a separate flap.
side viewClose-up of the paper flower.
I’ll give you the directions for the bag shortly but just to let you know what I did. I used the So Swirly wheel over the card in Baja Breeze. I assembled the bag. For the flap I ran it through the Big Shot with the dots impressions folder and rounded the corners. Now because of the width of the flap, the impressions folder didn’t cover it all. So I lined it up again and ran through what hadn’t been done. I rounded the corners of the flap and adhered it to the bag with Sticky Strip. I adhered the ribbon with Sticky Strip inside the flap. I created the flower by punching out several scallop circles and circles from DSP. I scrunched them up and layered them. Then added the Rhinestone brad before adhering it to the front of the bag. To close the flap I adhered magnets to the inside of the flap and the front of the box. I filled the bag with some little shampoo and soap and chocolate!!!! To create the bag: 1. Cut card 19cmx20cm. On the 19cm side score at 8cm and 11cm. On the 20cm side score at 2.5cm and 17.5cm. 2. Cut card for the flap measuring 15cmx10.5cm. Score on the 10.5cm side at 5.5cm and 8.5cm. Fold on the score lines. 3. Stamp bag with wheel if desired before assembling. Fold on score lines. Assemble bag. Run the widest part of the flap through the Big Shot if desired and round the corners. Add Sticky Strip to back piece of the flap and adhere to the back of the bag. 4. Adhere ribbon to inside of the flap. You could attach it to the outside of the bag with eyelets if desired. Hope all this makes sense. Happy Creating!!!
Now I can show you these little books I made as gifts for some of my stampin’ buddies at convention. I had grand plans for the gifts I wanted to make, but with 3 days to go and just finishing my swaps off – time was against me!
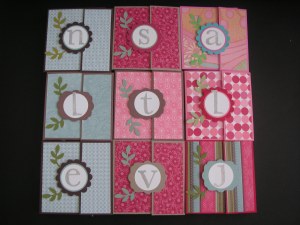
I created these little covers for the post-it notes. I’ll give you the dimensions below. Here they all are.
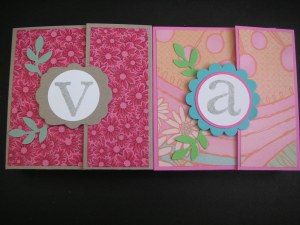
Here is a close-up of 2 of them.
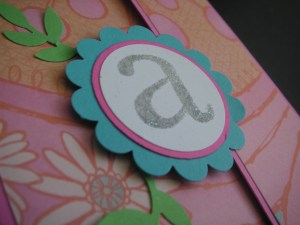
I added their initials on the front. Some I used the scallop circle punch and others I used one of the tags from the BIG SHOT ‘Lots of Tags’ die. The leaves are punched out with the 2-step Bird Punch. I embossed the initials. I didn’t want it just flat silver embossing, I wanted some bling to it. I added the silver EP with the Heat and Stick and embossed, and then added Dazzling Diamonds to it before it set. Then I heated it again. Not sure if it was the right way about it, but it did have a bit of sparkle to it! Don’t know if you can see that in the photo though????
Do you want to see inside????
Just a little Freddo Frog to keep their energy up over the weekend.
Here are the dimensions for the cover.
Cut card 24.5cmx9cm. Score card at 8, 10, 18.5 and 20.5cm. Fold on score lines. The short flap folds over and tucks under the tag or scallop circle that I added the front to secure it shut. I made the cover a little deeper to fit the Freddo in. I added various pieces of DSP to coordinate with the card that I used. A great way to use up those small pieces of DSP!!!
So there is a quick project for you to whip up. I have another project to show you from convention too. I’ll save that till next time.
Welcome! If you have just come from Jane’s blog on the ESAD Autumn blog Hop, then thanks for stopping by. If you have just joined in then enjoy!!
You better go and grab yourself a cuppa as you’ll be hopping for a while!
What is ESAD you say?
ESAD stands for Extra Special Australian (and New Zealand) Demonstrators and it is an online group just for Australian and New Zealand demonstrators for Stampin’ Up!
We so love what we do and not only do we love to share it with our customers, friends and wonderful blog visitors but we share our love for what we do with each other as Demonstrators. We run swaps, challenges, tutorials, product know how and cyberstamps and we are always there to help and support each other when its needed.
So if you are a Stampin’ Up! Demonstrator located in Australia or New Zealand then please feel free to click here to join our wonderful group.
Here are my projects to show you today. I am using the beautiful Cottage Garden DSP and Stamp Set and the Circle Scissors.
Firstly, I want to show you this cute Circle pocket. This was one of the projects we made at my Autumn Mini Launch last weekend. I found this idea some time back and stored it in the back of the vault to use sometime. I can’t remember where I first saw it.
With the Circle Scissors it makes life so much easier. I cut a 14cm circle with the circle scissors from Old Olive cardstock. Score it across at 4cm, this is your bottom score line.
Turn the circle 1/4 turn and score it at 2.5cm and 11.5cm. When scoring these lines, check the bottom score line is horizontal or you will have a crooked pocket!!!
Scoring the circle at 4cm.
1/4 turn, score at 2.5cm and then along at 11.5cm.
Turn the circle over and stamp the side sections as desired. Turn back over and fold up on the score lines. Place snail adhesive or sticky strip on the bottom flap before folding up.
Decorate as desired. I added a belly band using the Rich Razzleberry cardstock and Cottage Garden DSP. I stamped the flowers from the Cottage Garden set. This is a great 2-step stamp set. First I stamped the solid image in Orchid Opulence and then the outline in Rich Razzleberry. I did this twice, cut them out and layered them up. I added some Dazzling Diamonds with the 2-way glue and mounted it with Dimensionals.
I made up a quick Love Note size card to fit. I used the other gorgeous images from the Cottage Garden set, and the text from ‘Short and Sweet’.
My next project is a circle bag. I first came across these here on Kim’s blog. I was so amazed how small they were though when I made one up. They are about 11cm or 4 1/4″ high. They are so cute!!
Cut 2 x 14cm circles with your Circle Scissors. I used the gorgeous Cottage Garden DSP. Cut off 2cm from the bottom of each circle. Before any assembling, punch a circle from the top of the circles to create your handles. (Believe me it is sooooo much easier to do this first. I learnt the first time!). I used the 1 1/4″ circle punch. I also punched out 2 circles with the 1 1/4″ circle punch from Old Olive cardstock and punched around these with the scallop circle punch.
Here is what you should have.
Kim used a lunch sack inside her bag, but I didn’t have any so I created a box.
Cut cardstock 17cmx12cm. On the 17cm side scored at 4cm and 13cm. On the 12cm side score at 4cm and 8cm. On opposite sides cut up to the score line. This is how it should look.
Add adhesive to the flaps and fold up. To adhere your circle pieces on, place Sticky Strip to the long sides of the box. Do one side at a time. Place the circle down with right side down and line up the bottom edge of the box with the bottom edge of the circle, and adhere. It is so much easier doing it this way than lining up the circle onto the box. Turn over the box and repeat on the other side. Add your handles and tie up with a bow. I used some 5/8″ Old Olive Grosgrain.I added a tag using the Big Shot ‘Lots of Tags’ Die. I sponged around the edge with Rich Razzleberry and stamped the greeting and flower from ‘Short and ‘Sweet’.
PS. In my rush to get this out I forgot to show you the finished bag. DOH!!!
Here you go!
The cute little circle bag, with the Big Shot Tag from 'Lots of Tags'
Side view of the bag!
There you go! I hope you enjoyed these creations. It might be time to stock up on the drink and chocolate before you move on with your Blog Hop journey. You could be a while! You will now move on to Juliette’s blog. Don’t forget as you visit each blog to leave a comment. Then email Sharlene at stampwithsharlene@hotmail.com to be in the draw for some blog candy.
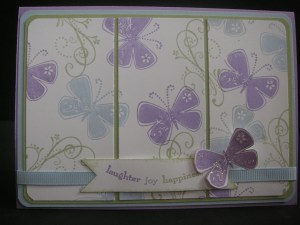
I’ve been a bad blogger this week! Sorry about that. I have been very busy creating, but they are for upcoming classes so I can’t show you them yet. I just realised though that I hadn’t shown you this card. On our team forum we had a challenge last month. To make a card with purple, blue and green AND to have butterflies and bling! How to combine all that on a card????
I wasn’t sure where to start. I had borrowed the “Priceless” set and wanted to use that, and I have been wanting to try a triple panel card too. So, I played around with that.
Here is a close up of the BLING!!
I used Bashful Blue, Lavender Lace and Certainly Celery. I don’t usually use the Soft Subtles colours but I liked these together.
Ink: Bashful Blue, Certainly Celery, Lavender Lace. (Ink pad and markers).
Other: Corner Rounder Punch, 1 1/4″ square punch (notches on the end of the text), 2 way Glue Pen, Dazzling Diamonds, Sponge, mounting tape, Bashful Blue Grosgrain Ribbon.
Here are the dimensions for the panels so you can make one up yourself. I apologise in advance for the “exactness” of the measurements. I like to have a 2mm border around my card edges, so working down from the base card it can get a bit “precise”. You change it to how you like.
Base Card: 29.6cmx10.5cm (Australian standard card size), scored at 14.8cm. (Lavender Lace)
Mat: 14.4cmx10.1cm (Bashful Blue)
2nd Mat: 14cmx9.7cm (Certainly Celery)
Panel Card: 13.2cmx9.3cm (Whisper White). Stamp image first before cutting. Cut card at 4.4cm and 8.8cm.
Got all that!!! Why don’t you try one yourself! I’m off to do more creating.
Don’t forget to get your FREE stamps for Sale-A-Bration. You have until the end of March to place an order for $100 and then choose your Sale-A-Bration set. Easy as that! Now is the good time to stock up on your inkpads and cardstock. If you don’t have your own Stampin’ Up! Demonstrator then you can email me your order and I can have it sent directly to you anywhere in Australia. You can click on the link in the right hand side bar to check out the catalogues.








 To create the bag: 1. Cut card 19cmx20cm. On the 19cm side score at 8cm and 11cm. On the 20cm side score at 2.5cm and 17.5cm. 2. Cut card for the flap measuring 15cmx10.5cm. Score on the 10.5cm side at 5.5cm and 8.5cm. Fold on the score lines. 3. Stamp bag with wheel if desired before assembling. Fold on score lines. Assemble bag. Run the widest part of the flap through the Big Shot if desired and round the corners. Add Sticky Strip to back piece of the flap and adhere to the back of the bag. 4. Adhere ribbon to inside of the flap. You could attach it to the outside of the bag with eyelets if desired. Hope all this makes sense. Happy Creating!!!