cards, Techniques, Tutorials

“SPARKLY TREE”

This post has been a while in the making.  I can explain and you might understand!!  A couple of weeks ago I had my ‘Christmas Bling Class’ and we did some fun cards using bling in different ways.  Christmas is a great time to go overboard with the ‘bling’.  I might show you some of the cards we did later, but this particular card got some attention.  This is a card I had as a sample but everyone wanted to know how I did it.  As time is running out to fit in another class, I promised them all I would do a tutorial on my blog AND now you can all benefit too.  So, finally here it is.  Now what has taken so long is that I needed to recreate the card to get some step-by-step photos.  Well, as what normally happens, it just wasn’t coming together right.  So I have had to redo the card AGAIN.  So ladies, I hope you appreciate this 😉

This is the original card. It is hard to see the sparkle in this photo but the whole tree panel is all sparkly!  Read on to find out more.
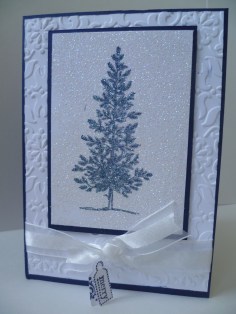
This glitter panel is created with Heat and Stick Powder and Dazzling Diamonds.  This really adds an impact – I think!  I am going to outline how to do this technique if you are not familiar with this.   Now I am a bit of a lazy stamper so I will also let you know a cheat step at the end.

Before you start here are some helpful tips:

Make sure you have a sticky versamark pad.  It really makes a difference.  That was where I went wrong when I first recreated this card.  I realised I was using an old Versamark pad and it was a bit dry.  Also, have your powder and Dazzling Diamonds ready to go so you can apply them straight away.

So, here you go:

GLITTER PANEL TUTORIAL

You will need:  Your stamped image, A versamark stamp pad, Heat and Stick Powder, Dazzling Diamonds, Heat tool.

1. Swipe your card firmly with your stamped image with the Versamark Pad.  Be careful to just touch the sides of your card with your fingers so you don’t wipe off any versamark from the card.

2. Pour over your Heat and Stick.  Yes, you want a good coverage!
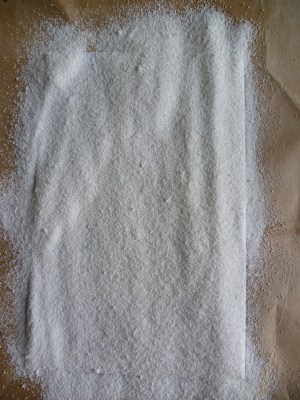
Tip off the excess and tip the extra back into your container.  Heat the Heat and Stick with the Heating Tool to melt the powder.

3. While the Heat and Stick is still hot and melted pour over your Dazzling Diamonds.
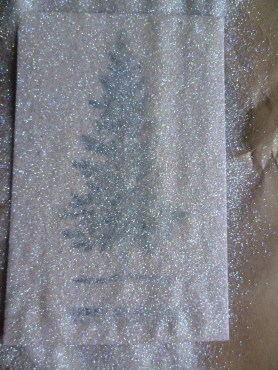
Pour off the excess back into the container and Heat set again with the Heat Tool.

4.  The glittery panel is done.
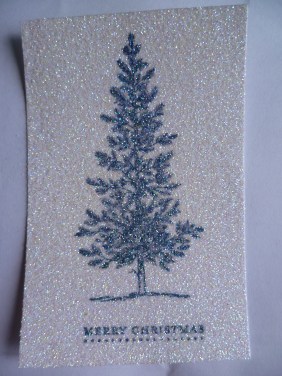
CHEAT TIME:

Sometimes I cheat a bit to save time.  You can combine the Heat and Stick and Dazzling Diamonds in a container about equal amounts.  After you swipe your card with versamark then tip the mix over your card and heat it all in one go.  It does work although it may not be as sparkly!

And so for the finished card:
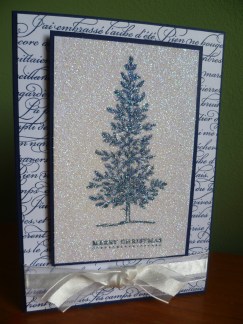
Psst! See the dark green behind the card.  That is my wall in my craft room.  It is a bit darker than in real life.  I have just taken photos of my craft room when I tidied up recently so I am going to post those soon.  We all like to spy on other stamping areas don’t we? So stay tuned for those very soon!

Anyway, here is a close up of the finished card.
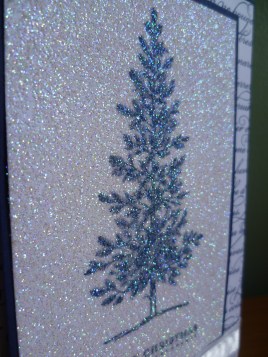
Oooh! Sparkly!!!!

Now it is your turn.  Why not have a go at this technique yourself.  Send me a photo of your card.  I might show them off here.  I look forward to seeing them.  Maybe I will have to dig up some blog candy!! 🙂

See you soon,

Jenny x
cards, Techniques, Tutorials, Uncategorized

MOTHER OF PEARL FLOWER

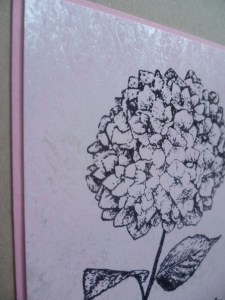
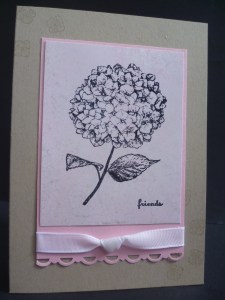
I wanted to stop by today and show you another Mother Of Pearl Technique card.  I created this card a few works ago as a Make and Take at a workshop.  I outlined the technique in the last post of the ‘Sail-Away’ Mother of Pearl card.  This weekend I took some photos while doing this technique again to help explain this a little easier.

Firstly,  here is the card.

The background is sponged with Pretty in Pink ink after creating the Mother Of Pearl.

Here is a close-up.  You can see the shimmer!

Here is the technique again – with photos this time!!! 🙂

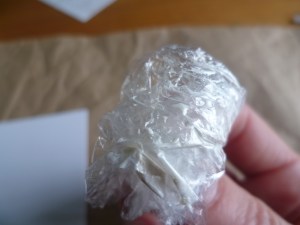
Pour out a little white shimmer paint on acetate or plastic lid.  Form a ball from Cling Wrap and dab into the paint.  You only need a very little.

Dab the ball of Cling Wrap over your Gloss card.  You don’t want to cover the card entirely.

This is what the card looks like when finished dabbing over the Shimmer Paint.  You need to leave this to dry or heat it with the Heating Tool.

Once dry, you can sponge over ink in what colour you choose.  Here I have used Pretty in Pink.

Give the card a polish over with tissue.  This really brings out the shine.

(Sorry the photos aren’t very clear.  It was quite overcast when I took them, but I hope it gives you some idea!)  🙂

Now once the card is prepared you can stamp the image on.  Remember to use Staz-On.

Now you know how it’s done you can get creating.  If you are in need of Shimmer Paint and you don’t have a local demonstrator, then let me know and I can order some for you.

Have a good day,

Jenny x

cards, Techniques, Tutorials, Workshops

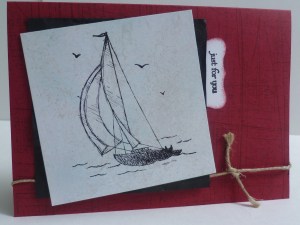
MOTHER-OF-PEARL SAIL AWAY!

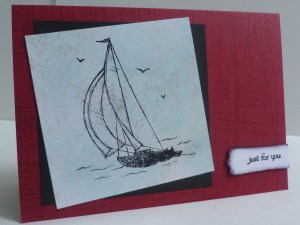
I thought with school going back this week that I would have lots of time to get back here, but I don’t know what happened.  Here it is the end of the week already.  I wanted to show you another card I have made using the fantastic stamp “Sail-Away”.  This one I created a couple of weeks ago for a workshop I did.  This is a great technique to use with this set and is so easy.  Here is the card.

If you are not familiar with the Mother of Pearl Technique, then I will describe how to do it below.  For this card, I used the sanded backkground on the Cherry Cobbler.  The greeting is from “Teeny Tiny Sentiments” and punched out with the Modern label Punch.  To stamp the boat I used Black Staz-on.  It is really important to use Staz-on as it is Gloss Card.

Here are the instructions for Mother Of Pearl Technique.  It probably would have helped to have some photos to help BUT I didn’t think of that this time.  So I hope you can understand it.

MOTHER OF PEARL TECHNIQUE

First off,  you need Gloss cardstock, white shimmer paint and a small piece of cling wrap.

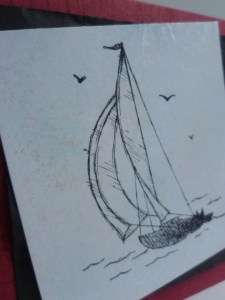
I poured a small bit of shimmer paint onto some acetate.  You could use a plastic plate or even the plastic cases from your stamps. (you can easily wipe this off them when you are finished).  You don’t need a lot.  A little goes a long way!  Scrunch your piece of Cling Wrap into a ball and lightly pounce the ball onto the shimmer paint to pick some paint up.  Lightly pounce the ball onto the piece of Gloss cardstock.  You don’t want to completely cover the card, just in patches.   (Hope that makes sense!!).  You need to let the paint dry.  You can use the heat tool to speed up the process if you are impatient like me 🙂  Once dry you can sponge ink over the card.  (On this card I sponged with Baja Breeze). Then polish the card with a tissue.  This really brings out the shine.  Here is a close-up of the card.  (Not all that clear really, but I hope it helps a little).

Here is a stepped up version of the card.

On this one.  I scrunched up the Basic Black cardstock before adhering it to the card.  But before adding this I punched out the sentiment with the Curly Label Punch and adhered this under the Black piece and added some twine.

Using this technique I created another card which I shall show you next time.  Thanks for stopping by and please say ‘Hello’.  It’s nice to know I’m not talking to myself here.

Until next time,

Jenny x

cards, Challenges, Tutorials

INKSPIRATIONS CHALLENGE #77

I thought I would have a go at the Inkspirations Challenge for this week.  The sketch looked interesting.  You can check it out all the great entries here but here is the sketch.

I tossed a few ideas around.  Then I decided on this.  It is a different style of card but I think it still fits the sketch.  Here you go!

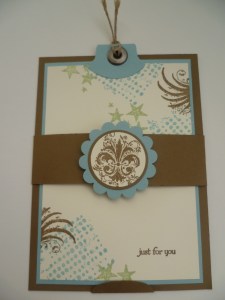
I call it my Tag Card.  I don’t know if it has any other name.  This is the size of a standard card  BUT Look ~~~

You can pull up the card. I thought it would be good to make something different – and it is a bit manly. Do you think?????

The stamps used are Extreme Elements and Teeny Tiny Sentiments for the greeting.  Colours are Soft Suede, Baja Breeze and Certainly Celery.  I added an eyelet to the top tag pull.  Here are the measurements:

TAG CARD

Card Holder: 14.4cm x 10.5cm.  (I made this slightly smaller than a card to allow for the tab if you wanted to use an envelope).

Centre Strip.  21cm x 3cm.  (You could just have a shorter strip that runs across the front and adheres just around the back.  I used the longer strip to wrap right around the card from the back and joins at the front.  Just to look neater.  The strip doesn’t quite join at the front so I just joined it with a short piece.  You can’t notice that under the scallop!).

Card:           Mat – 13.4cmx9.5cm.             Card – 13×9.1cm.

I was a bit bothered about the card staying in the holder, so I punched out a small oval from Soft Suede.  This was folded in half and then 1/2 adhered on the back with Tombow and then at the front I added small dots of Tombow glue at either end of the front half so the card will slip in at the top of it.  (Does that make sense???) .

There you have it – my entry for the Inkspirations Sketch Challenge #77.  I have to say though, it is nothing fancy compared to those other gorgeous creations over there.  Go on over and check them out.

Thanks for stopping by today.  Come back soon  🙂

Jenny x

3D projects, Challenges, Tutorials

ALL ABOUT THE BOX!!

Last post I showed you the Black and White box I created for the Just Add Ink Challenge this week.  I thought I would show you now how I put all the elements together.  (As if you really want to know!!!)

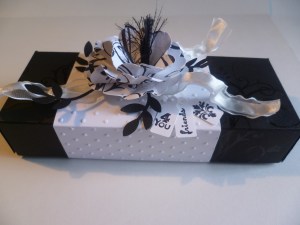
This is the box.

A Black and White Box!!

I will go through each part.

BOX:

I used the box template on Keesh’s blog here.  This is how I made it.

Cut your card 21cmx21cm.  On one side score your card at 3cm, 9cm, 12cm and 18cm.  You should have 3cm left on that side.  Turn your card and score at 3cm in on both sides.  Cut all the score lines on the long side up to the score line that runs across.  Fold on your score lines.  (Before you assemble the box you need to stamp/emboss first as I have done.  I will explain that lower down**).  To assemble your box add Sticky Strip or Snail adhesive to the small tabs and adhere them together.

**Before assembling my box I stamped the swirl from Baroque Motifs in versamark and then clear embossed it.  You can see it a bit clearer in this photo.

Close up View.

BOX BAND:

The box band was done in Whisper White card measuring 21cm x 8cm.  I used the Polka Dot Embossing Folder.  It was too long to run through all at once, so I placed half the card in the folder and ran it through. Then I turned the card over.  I lined up the last line of dots on the card with the dots on the Embossing Folder and  ran the card through.   I wrapped the card around the box with the ends underneath the box.  I ran some sticky Strip on one end to join them together.

THE FLOWER:

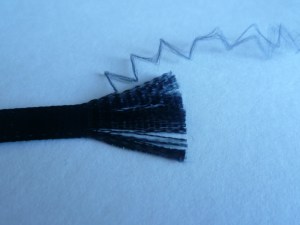
To create the flower I stamped the swirls from ‘Baroque Motifs’ with Staz On on Whisper White card and punched out 3 scallop circles with the 2 1/2″ Scallop circle punch.  I scrunched them up several times to distress them.  I layered them together.  I find the Tombow Glue to be the best to adhere them together.  The whispy black centre was created with the Black Grosgrain ribbon.  Cut a small length of the ribbon.  Grab one end and start pulling a thread.  One end will pull more easily than the other, so if it doesn’t work try the other end.  Once you have a thread then grab it and pull for a bit to fray the ends.  Stop before you reach the end!!!!!

Here is a photo to give you an idea.

I used a glue dot to stick the end of the ribbon into the centre of the flower.

 RIBBON CURLS:

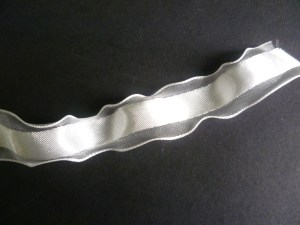
The white ribbon curls are created with the White Organza ribbon.  Use the heating Tool to GENTLY heat the ribbon.  The heat will make it curl up.  Don’t heat too long or it will melt the ribbon.  (How do I know that!!!! LOL).

Here is a picture to show you it curling up.

I did 3 short lengths and adhered them on top of the band with Sticky Strip before adding the flower.

ASSEMBLING:

I assembled everything directly onto the band.  First the ribbon curls, then some black leaves punched from the 2-step bird punch, then the flower.  The tags were created from the set “Lots of Tags” stamped in Basic Black and punched out with the tiny tags punch.  I tied them with cotton thread and adhered them with a glue dot just under the flower.

There you have it.  I think I included all the parts.  Have fun creating your own.  If you have any questions, please don’t hesitate to contact me.

Thanks for stopping by,

Jenny xx

3D projects, Tutorials

PUNCH BUNCH GIFT BOX AND CARDS!!

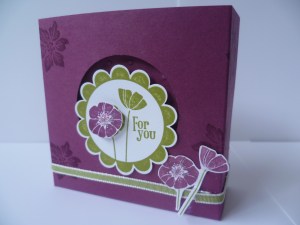
I recently had my Punch Bunch Gift box class.  I can now finally get around to showing you.  I used the Sale-A-Bration set ‘Punch Bunch’  and created this little box big enough to fit 4 3″x3″ cards.  These were a lot of fun to put together.  I used Rich Razzleberry, Old Olive and Whisper White to create them.

This is the box with the cards in them.

I will give you instructions for the box at the end.  This box was inspired by a box on our Stampin’ Up! Demonstrator website.  I adjusted it to fit these little cards in.  On the box I created a little window by punching out the front with the 1 3/4″ circle punch.  (Do this before you assemble the box!!).  I thought it was nice to have the window.  No matter what card you have at the front it shows through.  I had stamped over the box with the flower from ‘Bliss’ Sale-A-Bration set.  For the flowers on the front I used markers to colour the flower on the ‘For You’ stamp.  After stamping I cut them out.  They were adhered to the front after wrapping around some narrow taffeta Old Olive ribbon.  You can’t really tell but I added some bling to the flower with the 2-way glue pen and Dazzling Diamonds.

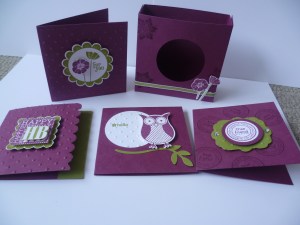
Here is the box with all the cards showing.  I will show you the cards close-up below.

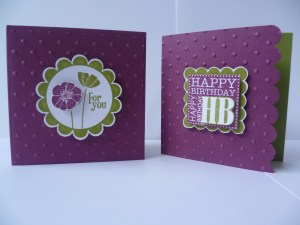
For the cards I used the Big Shot and various punches. 

Here are the instructions for this cute Window Box.

Cut card 19cmx14cm.  On the 19cm side, score at 8cm and 11cm.  On the 14cm side, score at 3cm and 11cm.  Fold on all the score lines.  Cut the small score lines on the long side up to the score line running across.   (Remember to stamp your box and punch the circle before assembling).  Add Sticky Strip on the side tabs and small tab and assemble.

I hope these are clear enough.  Email me if you have any problems. 🙂

Have you got your Free Punch Bunch set yet, or any of the other Sale-A-Bration sets??? You only have 2 weeks left, so get to it.  You can select any of the Sale-A-Bration sets with a $100 order, or have a workshop and when your sales are over $600 you can select another SAB set for FREE.  See your demonstrator, or if you don’t have one you can contact me and I can have it shipped anywhere in Australia.

Have fun creating your own box and cards.  Until next time, Happy Stamping!!

Jenny xx

Tutorials

NOW A CHRISTMAS BOX!

I have shown you some bags for Christmas.  Here is a Christmas box I have been working on.  I found the instructions here.  I will add the metric measurement for this at the end of the post.

Before I assembled the box and ran the So Swirly wheel around the bottom edge.  I stamped the tree from ‘Christmas Classic’ in Soft Suede on Very Vanilla Cardstock and the Merry Christmas in Real Red.  I stamped the flourish from ‘Tiny Tags’ in Crumb Cake and sponged the edges.  It gives it a Vintage feel.

Here is a view from the top:

The top is a scallop square cut with the Big Shot, then I ran the card through the Big Shot again with the Vintage Wallpaper Die to add the texture.  I tied up some of that lovely striped Grosgrain ribbon and added tags from the ‘Tiny Tags’ set.

Here are the measurements:

TALL SCALLOP SQUARE BOX

Cut card 21cmx28cm. Score on the 21cm at 6.3cm. Score on the 28cm at 6.3cm, 12.8cm, 19cm and 25.4cm. With the long side running horizontally, cut up on each of the short score lines until they meet the score line running across. On the small tabs place your adhesive on the wrong side of 3 of the tabs. Also, place adhesive on the right side of the narrow tab on the side. Assemble your box

For the lid. Cut a scallop square with the Big Shot. Score on 2.3cm on each side. Cut up on the small tabs on 2 opposite sides. Place adhesive on these tabs and assemble.

UPDATE:  The lovely Lynda asked about how to create the lid without the scallop square die.  I have had a little play and come up with some dimensions for you. 

Lid (without Scallop Square Die)

Cut card 12.6cm.  Scallop the edge of the card.  TIP:  Punch opposite sides of the card first.  Then go back and do the other sides.  It doesn’t matter if the corners don’t match as they will tucked inside.  Emboss the card with the embossing folder of your choice.  I used the vintage Wallpaper Folder.  Score card at 2.2cm on each side.  Cut up tabs up to the score line running across.  Place Sticky Strip on the tabs and assemble the lid. 

You probably have your Christmas wrapping all sorted by now. So you could use this box for any occasion.  But if you are like me you still haven’t got the wrapping done.  That’s my children’s job this week!!  They’re going to love that!!


3D projects, Tutorials, Uncategorized

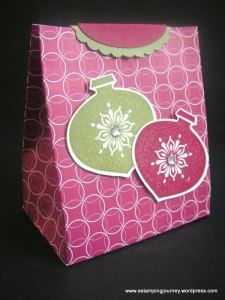
ANOTHER CHRISTMAS BAG!

Here is another Gift bag I have been making recently.  This bag was inspired by one in our monthly Demonstrator magazine recently.  I set about to recreate it.  I will give you the instructions below.

I have used the Jolly Holiday DSP and then used the Delightful Decorations stamp set and the punch to decorate it.  I added some Rhinestones in the middle of the ornaments.  To seal the bag I punched out a scallop oval from Old Olive and an oval from Cherry Cobbler.  I adhered these together and attached them to the bag.  You can use a velcro dot to the front so it is easy to open and close to get the goodies out!!!

I had made another one previously to this Christmas bag using the DSP Lap of Luxury.  I punched 2 butterflies, one from the DSP and another stamped from the Hostess set ‘Punch Potpourri’.  These were adhered to the front and a Rhinestone added to the centre.  To close this bag I punched out a piece with the small Oval punch from Pretty in Pink and used a glue dot for this one. I just changed this yesterday and  added a bow with the Pretty in Pink Satin ribbon.  I also added some tags with the Tiny Tags.  One from the DSP and one stamped on Pretty in Pink.  These were punched out and tied on with Hemp Twine.  I really liked how this turned out!


You can decorate these any way you like.  It is better to use DSP for them though as they bend easier than card.

Here are the instructions to create these cute bags:

Cut DSP to 28cmx14cm.  Score on the 14cm side at 5cm.  Turn and score on the 28cm side at 8cm, 13cm, 21cm, 26cm.

Cut on the score lines along the long side up to the 5cm score line.  You can cut off the small tab at the end.  Add adhesive to the bottom tabs (on the right side of the 2 small tabs and on 1 of the large tabs), and to the narrow side tab (on the wrong side).  Does that make sense?  Assemble the bag together.  Pinch the sides in.  To seal you can use a velcro dot.  Decorate as desired.

These are very quick to make.  So you have no excuse not to make any of these to put little treats in!


3D projects, Tutorials

I’VE BEEN MAKING BAGS!

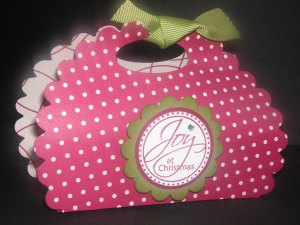
I have been making up a few different Christmas bags recently.  This one I showed at some Christmas workshops.  It is a very simple Scallop Circle Bag.

I cut 2 Scallop Circles with the Big Shot from Jolly Holiday DSP.  I cut off 10 scallops across the bottom to create a flat edge.  To create the box inside I cut card 15cmx10cm.  (I cut this from Cherry Cobbler but sorry you can’t see that!)  On the 15cm side I scored it at 3cm and 9cm.  On the 10cm side score at 3cm and 7cm.  Cut up on the score lines on 2 opposite sides until it reaches the score line running across.  Place adhesive on these tabs and assemble.  

For the bag: Punch ovals from the scallop circle before assembling, it is much easier.  I found it helped to add some dotto to the scallop circles to hold them together and punch them out together.  That way the ovals line up.  Place Sticky Strip on the wrong side of the DSP.  Then adhere them to the box.   I found it easiest to lay these pieces with the Sticky Strip facing up and lining up the bottom edge of the box with the straight edge of the scallop circle.  Does that make sense???

The ‘Joy at Christmas’ is from Perfect Punches set.  I punched the circle with the 1 3/8″ punch and then punched a scallop circle from Old Olive which I sponged the edge with Old Olive ink.  I adhered this to the bag with mounting tape and added a  Rhinestone.  I then tied on some Old Olive ribbon.  This is a nice size for some choccies or a gift card for Christmas.

I have some other bags for you that I will show you next time so pop back soon!

3D projects, Tutorials

MAKE SOME CHRISTMAS BON BONS!

I have been making some Christmas Bon Bons lately. These are so easy to make.  You can whip a few up for you Christmas festivities.


I found the original instructions here.  I will give you the Metric measurements below to help you out.  On the one above I used the Jolly Holiday DSP.  The tags are created with the set ‘Tiny Tags’.  I frayed the Old Olive Grosgrain ribbon, but not sure about that effect!  The next one is using the reverse side of this DSP.  I tied bows around the ends from the Real Red Taffeta ribbon.  I think it is missing a tag though!

BON BON MEASUREMENTS:

Cut paper 15cmx15cm.  Score one side at 3.2cm, 6.5cm, 9.5cm and 12.5cm.

Turn and score the other side at 3cm and 12cm.

You can follow along with the photo instructions found in the tutorial.  Just a note:  I used the Crop-A-Dile to punch the holes on the score lines rather than the small square punch.  AND, Don’t forget to fill it BEFORE you seal it up!!!  If you have any trouble following the instructions you can drop me an email and ask. 

There is still a couple of weeks left before Christmas to put a few of these together. So, get to work.   I do hope things are not getting too frantic for you with all the last minute shopping and creating.  I still have quite a bit to do myself and there are only 3 days of school left!  I did have big plans to make a few presents this year, but I’m not sure if that is going to happen. 

Pop back again soon and I will show you some more Christmas projects.