cards, Catalogues, Stampin' Up!, Techniques, Tutorials, Videos

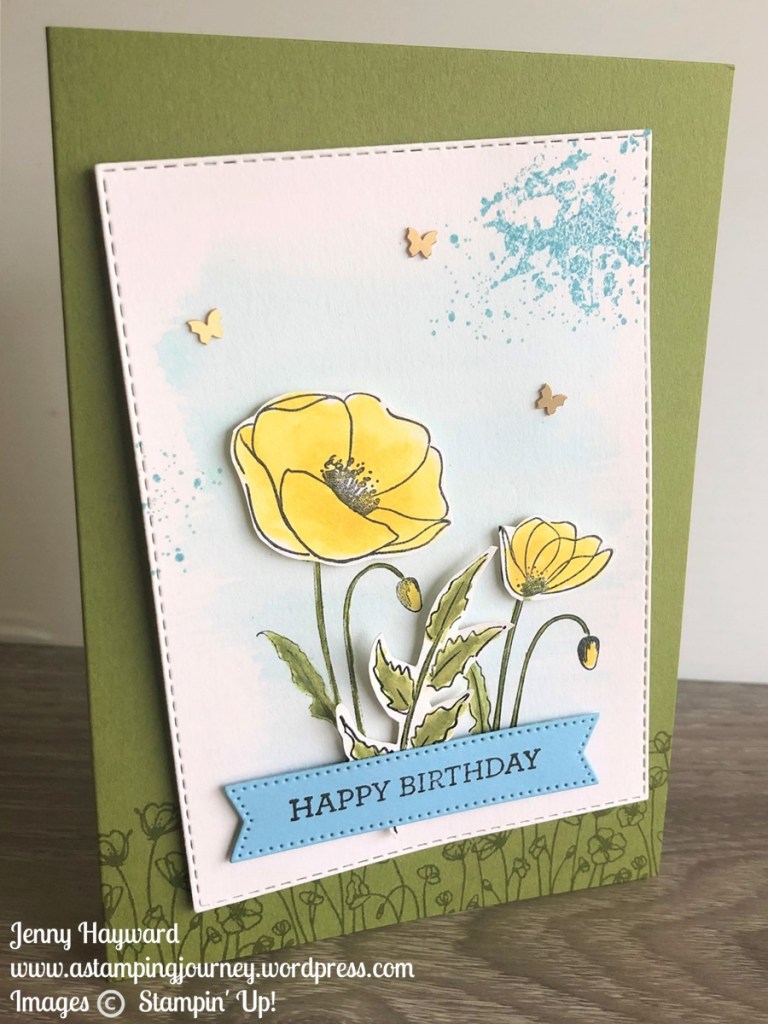
WATERCOLOURING WITH PAINTED POPPIES + VIDEO!

Did you know it’s World Watercolouring Month?? A month of celebrating and sharing all things watercolouring.

I’m no expert at watercolouring. But I have picked up some tips along the way. And practice makes perfect right. 🙂

There are lots of different ways to watercolour and different mediums to use. I shared a video recently on using Watercolor Pencils. In today’s video I’m using the Ink Pads and Water Painters to create a watercolour wash and more detailed watercolouring.

I pulled out the Painted Poppies Stamp Set. I haven’t used this in a while.

Check out the video below.

This card was inspired by one in the current Annual Catalogue on Page 29.

I hope you pull out your inkpads and Painters and get watercolouring.

Have a great day,

Jenny

Need some supplies and you are in Australia?

Stop by my store -> HERE. Please use the Host Code: 99CMHTER

Or contact me directly.

Catalogues, Techniques, Tutorials, Videos

ANOTHER TUNNEL CARD WITH HUES OF HAPPINESS!

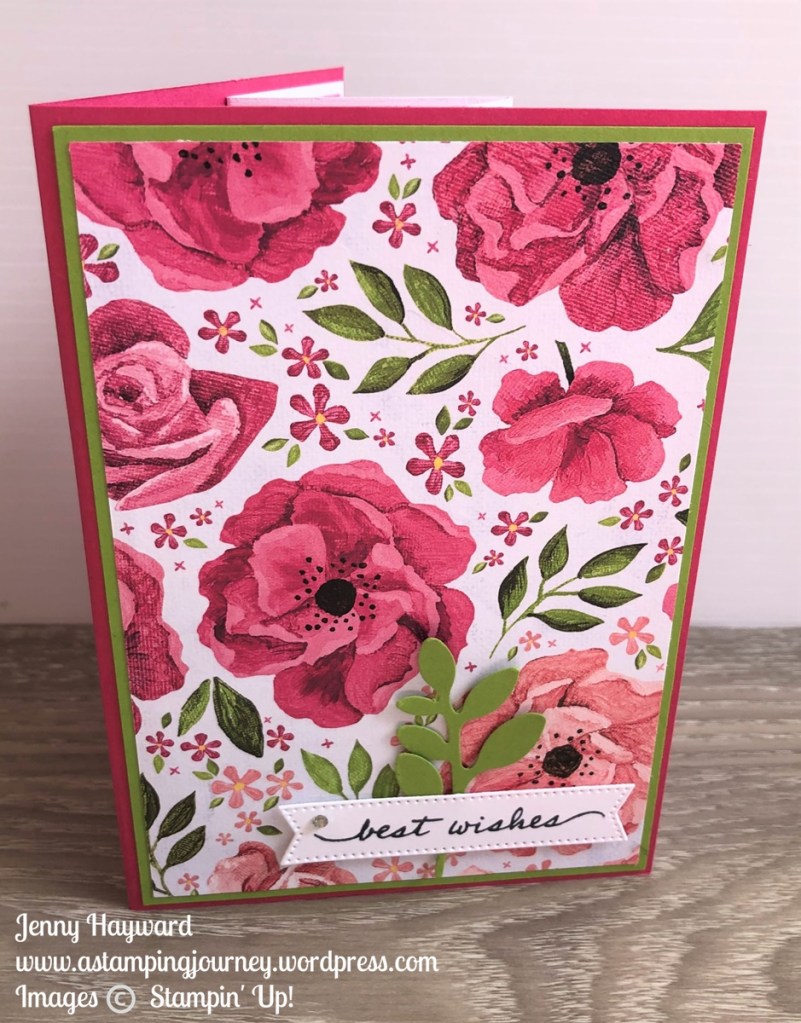
I shared a Tunnel card recently. That one was in Gorgeous Grape. I thought I would share another version I made. This one in Melon Mambo.

I used the gorgeous Hues of Happiness Designer Series Paper. You can’t go wrong with that paper. It is gorgeous. I know, I already said that but it is. 🙂

Also used for this card was the lovely Happiness Abounds Bundle (Stamps and Dies).

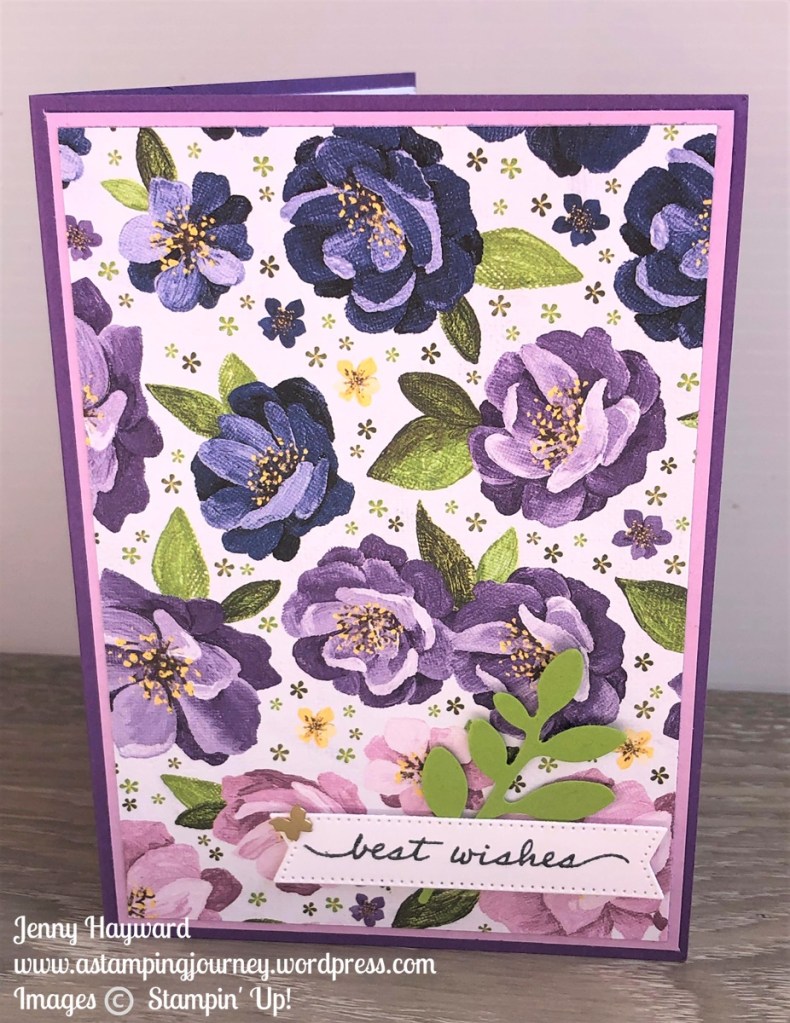
You can see the Gorgeous Grape version. And you will also find the video and the measurements on that post too.

Check the blog post out with video and instructions ->HERE.

Happy Stamping,

Jenny

Need some supplies and you are in Australia?

Don’t forget the Last Chance List of retiring items from the January – June Mini Catalogue. See them in store.

Head over to my store and you can order. Head -> HERE. Please use the Host Code: 46HJZACA

Or contact me directly.

cards, Catalogues, Stampin' Up!, Techniques, Tutorials, Videos

CREATE A TUNNEL CARD WITH A VIDEO!

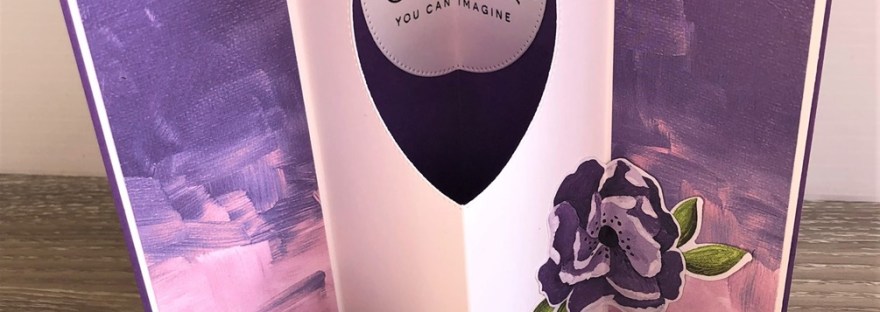
Today’s video I have a Tunnel Card. Have you tried this fold before?

It is really easy. I show you how in the video below. The measurements with scoring are further down.

I have used the gorgeous Hues of Happiness Designer Series Paper on both of these cards and the Happiness Abounds Bundle.

I will share the other version in another post so be sure to stop by.

CREATE YOUR OWN TUNNEL CARD

Base Card 14.8cm x 21cm Scored at 10.5cm 8 1/2″ x 5 1/2″ Scored at 4 1/4″

White Card (Inside) 14.4cm x 20.6cm Scored at 5.2cm, 10.3cm and 15.5cm

8 3/8″ x 5 3/8″ Scored at 2 1/16″, 4 3/16″ and 6 1/4″

Designer Series Paper (Inside) 2 @ 4.8cm x 14cm

1@ 2″ x 5 1/4″ (left side) 1@ 2 1/8″ x 5 1/4″ (right side)

FRONT – Card Mat – 10.1cm x 14.4cm 4 1/8″ x 5 3/8″

Designer Series Paper 9.7cm x 14cm 4″ x 5 1/4″

Follow along with the video to see how to put the card together.

Have fun with it,

Jenny

Need some supplies for your next project and you are in Australia?

Head over to my store -> HERE Please use the Host Code: CMDF9NBR

Or contact me directly.

cards, Techniques, Tutorials, Videos

A MERRY LITTLE CHRISTMAS SERIES – WEEK 4 – A WONKY CHRISTMAS CARD!

Week 4 of A Merry Little Christmas Series. Today is a “wonky” card.

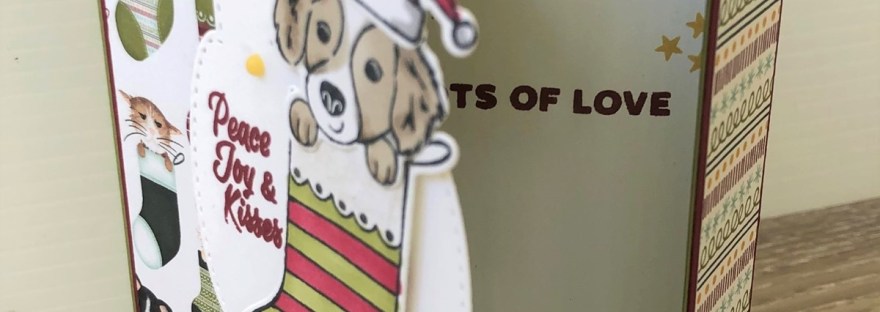
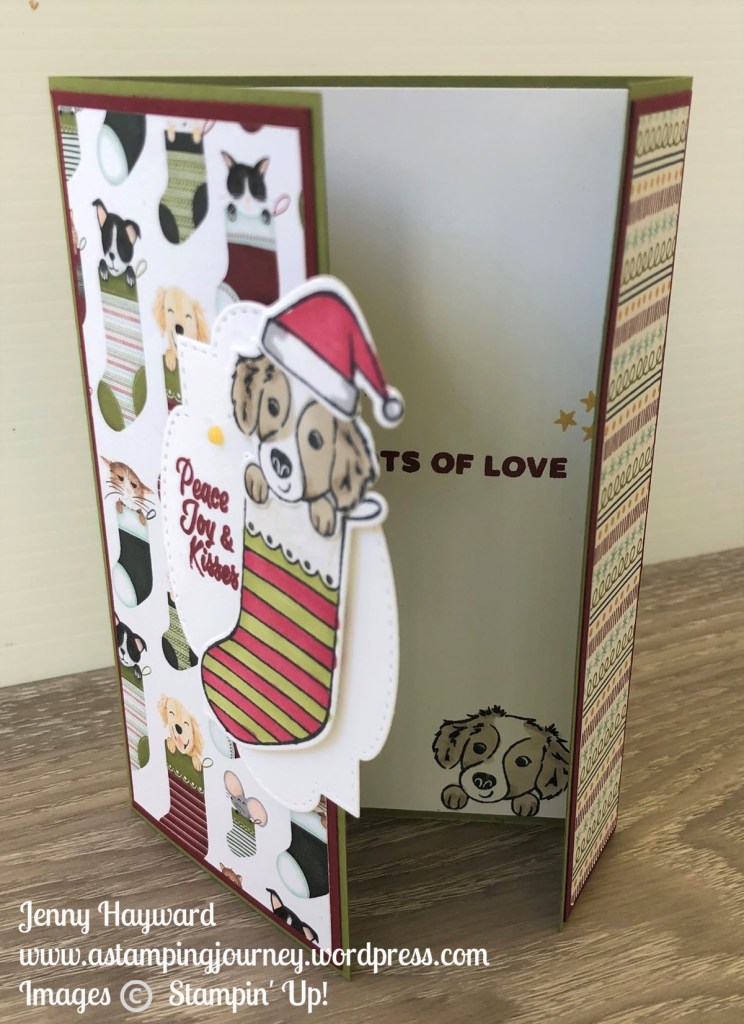
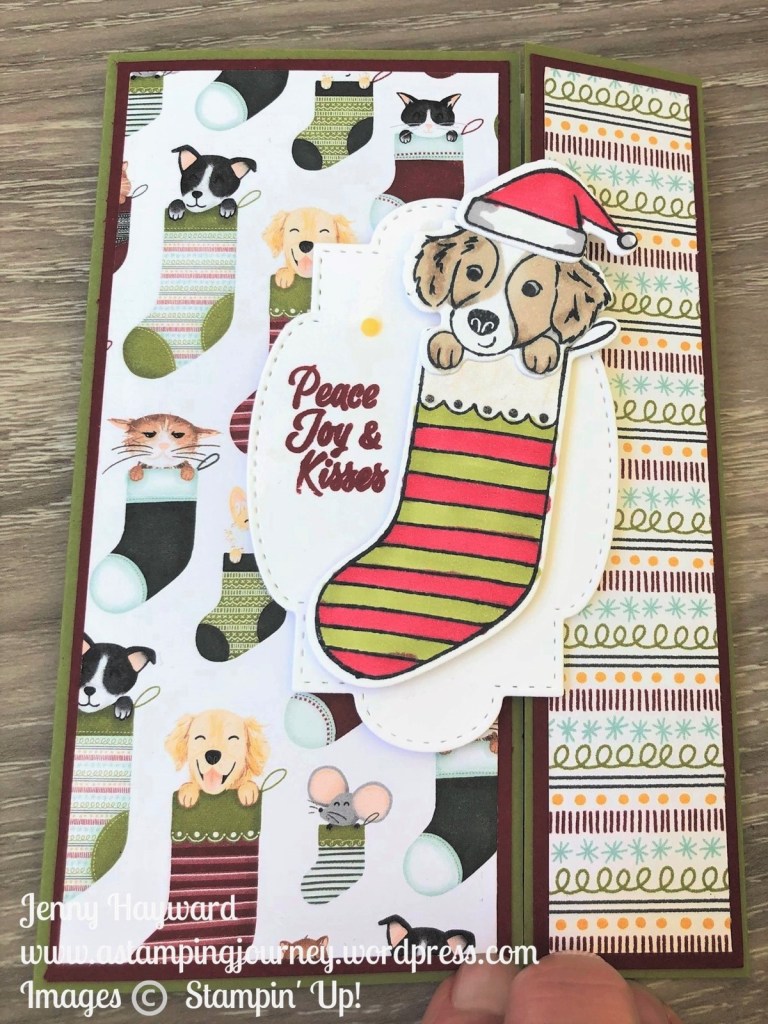
This card is an Off-set Gatefold Card. You might have seen them around. This one uses the Sweet Stockings Suite. (very cute!).

This is the card closed.

This is the inside.

Catch the video below. I have the measurements further below.

OFF-SET GATEFOLD CARD MEASUREMENTS

Base card: 14.8cm x 21cm Score at 7cm, 17.5cm 5 1/2″ x 8 1/2″ Score at 2 3/4″, 7″

Left hand panel pieces: 6.6cm x 14.4cm DSP: 6.2cm x 14cm

2 5/8″ x 5 3/8″ DSP: 2 1/2″ x 5 1/4″

Right hand panel pieces: 3.1cm x 14.4cm DSP: 2.7cm x 14cm

1 3/8″ x 5 3/8″ DSP: 1 1/4″ x 5 1/4″


Here is the other version I shared in the video.

I hope you get to make one.

Have a great weekend,

Jenny

In Australia and need supplies? Head to my shop now -> HERE. Please use the Host code: CFW6WCHA or you can contact me directly.

cards, Christmas, Tutorials

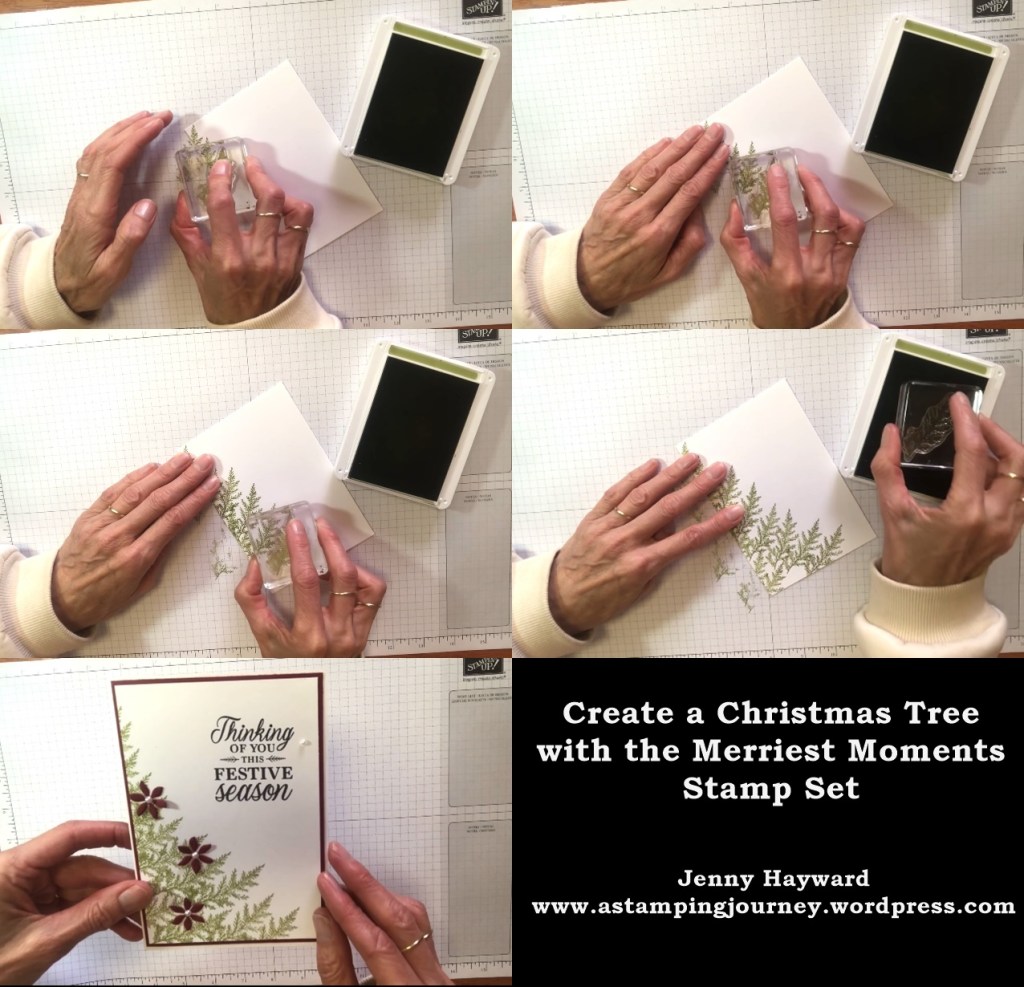
WEDNESDAY’S WOW! #129 – A MERRIEST MOMENTS CHRISTMAS TREE!

Wednesday’s WOW! #129 – Creating a Christmas tree with the Merriest Moments stamp set.

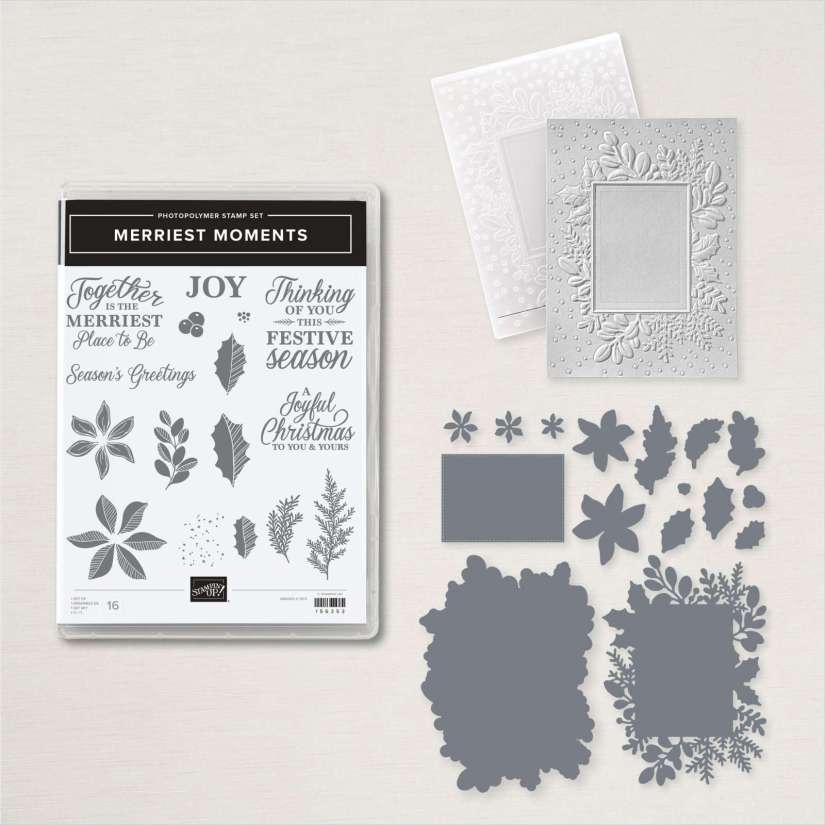
I have shared a lot of projects with the Merriest Moments bundle recently. This card was one shown in my 5 Ways with the Merriest Moments Video I shared in a recent post. Just back a few posts to find it if you missed it.

For this card I wanted to show you how to create the Christmas tree with the “branch” stamp. If you are on my Facebook page or Instagram I share a quick video for it. You can check that out but I will share a step-by-step image for you.

You can shop the Merriest Moments Bundle in my store now -> HERE. Australian residents. ($94.50 AUD) Please use the Host Code: F4PDXAY7

Or contact me directly.

BONUS: During October I’m extending Sale-A-Bration. Choose an extra gift with your orders over $90 AUD. Get in soon to get your pick.

Have a great day,

Jenny

cards, Catalogues, Stampin' Up!, Tutorials, Videos

5 WAYS WITH THE MERRIEST MOMENTS BUNDLE + VIDEO!

You would have noticed the Merriest Moments Bundle I am sure. It is a gorgeous bundle with the Merriest Moments Stamp Set, Dies and the Merriest Frames Hybrid Embossing Folder.

I have had lots of fun creating with this bundle recently.

Today’s video brings you 5 Ways with the Merriest Moments Bundle. Check it out and be sure to catch them all. I will share some tips in using it too.

Here is the card I created in the video.

I will share the cards individually soon but tell me what your favourite card from the video is.

You can see the Merriest Moments Bundle in my store -> HERE.

In Australia? You can order directly there. ($94.50 AUD) Please use the Host Code: GS9S4AY9

Or Contact me directly and I can help you with your order.

Have a great weekend,

Jenny

3D projects, cards, Catalogues, Stampin' Up!, Techniques, Tutorials, Videos

2021 INCOLOR COMPARISON CHART AND COLOUR RESOURCES!

Today I have a number of great FREE resources for you that I hope might help you in your creating. I mentioned it in this week’s video.

So help yourself.

Head to the link I have shared and download them to your computer ready for you to refer to often. Or you can PIN these images to Pinterest for later.

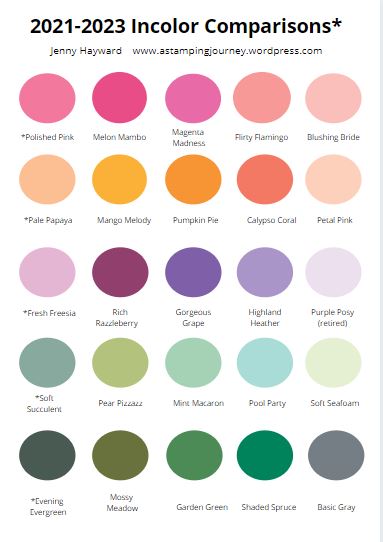
2021-2023 Incolor Comparison Chart

See how the new 2021 Incolors compare with other current colours.

Check them out -> HERE.

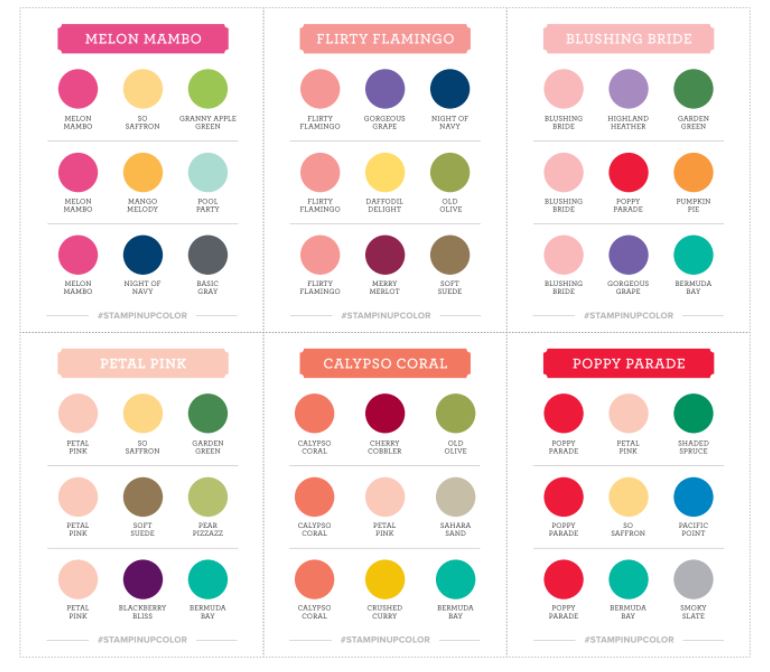
Colour Co-ordination Charts

A great resource to help you with some colour co-ordinating when you create your next project. Head -> HERE

Paper, Ink, Marker Chart

They are available for all the colour Collections. Print the chart off and mark off the colours you have so you can keep a track of what you have. It’s a great way to see them at a glance having the chart.

Head -> HERE.

Project Tutorials

I have a large number of Projects and Techniques on this blog for you to access. Many you will find under the tab at the top of the page under ‘Free Tutorials’. Some I have still to update so also click on the TAG in the right hand column of Techniques or 3D or Fun Folds. Whatever you would like to see.

Blog and Newsletter

Don’t forget to subscribe or follow along on my blog here to be updated when I post.

OR

And also Subscribe to my newsletter list to receive a project tutorial each week to help inspire you in your creating.

Facebook crafting group

Come and join my ‘A Stamping Journey’ Facebook group where we share what we have been doing and occasionally have a challenge. Head -> HERE.

Happy creating now with lots of colour inspiration,

Jenny

Shop

In Australia? Shop in my store 24/7 -> HERE

or Contact me directly on 0439 844574

Stampin' Up!, Techniques, Tutorials, Videos

MASKED BACKGROUND WITH THE NEW STAMPIN’ UP! BLENDING BRUSHES

Have you seen the new Stampin’ Up! Blending Brushes?? I have had mine for a couple of weeks but have just pulled them out this week. I have been having so much fun with them. How soft and delicate are the bristles!! They are lovely.

On yesterday’s Facebook Live I used the brushes on the card and shared some tips in using them.

The edited video is now on Youtube. I will add it below too. If you are receiving this blog post via email it might not show up so head to my blog or you can go to Youtube directly.

I will be sharing some more cards with the Blending Brushes very soon so watch out for them.

A couple of tips with using them though. You will want to treat them differently than the sponges or the Daubers.

  • When picking up the ink from the inkpad you will want to “rub gently” not dab like you might with the sponges.
  • Dab off a little on scrap paper first. I do this with the sponges anyway.
  • When applying ink to your card move in a circular motion with light pressure.
  • Hold the brush down towards the brush head.
  • If you are sponging the whole card start off the edge of the card and work lightly in.

I hope these tips help. I will put together a video soon sharing some cool ways of using the brushes.

Here is the card from the video. I have used the Dragonfly Garden on the card.

On the Dragonfly I stamped the “solid” wing stamp on the wing outline in Blushing Bride and then coloured just the tip of the wings with the Soft Seafoam Stampin’ Write Marker or you can use the Stampin’ Blends.

The Blending Brushes are available in my store now -> HERE. for $21 AUD

Thanks for visiting today,

Jenny

Blog Hops, cards, Catalogues, Stampin' Up!, Tutorials

ESAD JANUARY-JUNE MINI AND SALE-A-BRATION HOP!

Welcome to today’s Blog Hop with some of the ESAD Demonstrators. We are focusing on the new January – June Mini Catalogue and the Sale-A-Bration. Woo Hoo! Who is excited! I can’t wait to start sharing with these amazing products.

You might have come from Odette’s blog -> HERE or just starting with me. That’s ok. Join in and hop around.

Just first off – What is ESAD??
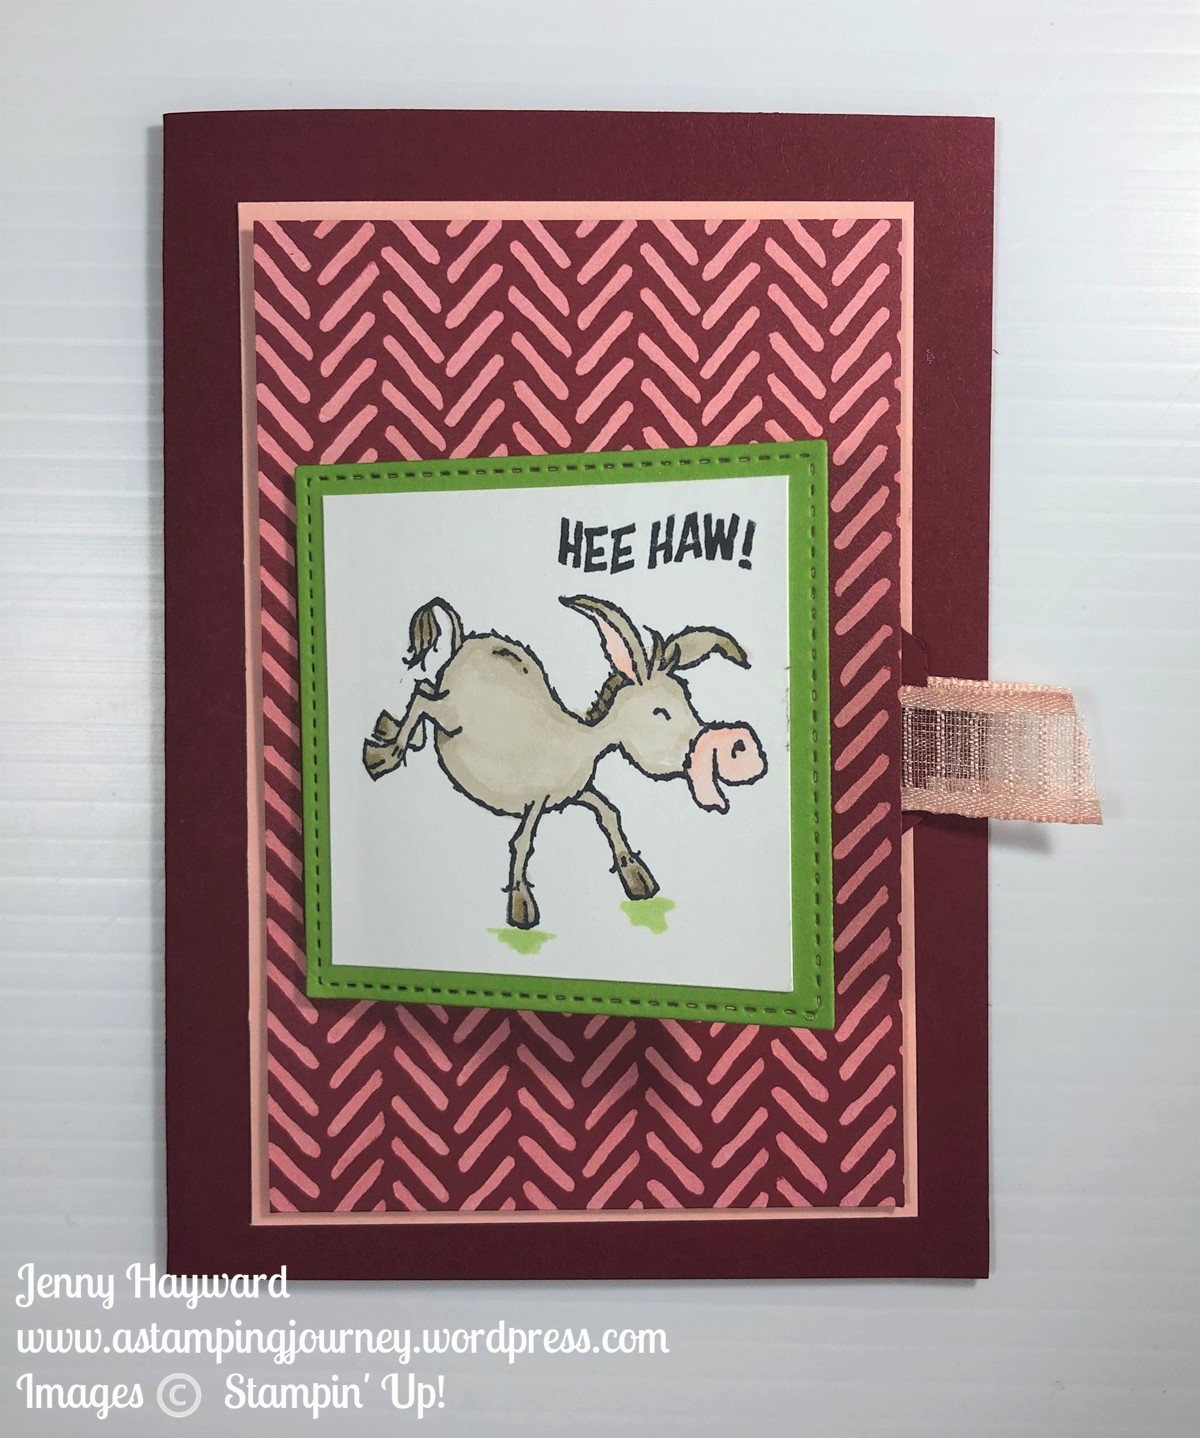
For my project today I couldn’t resist the Darling Donkeys stamp set. How cute is it??? This is a free choice for Sale-A-Bration this year.

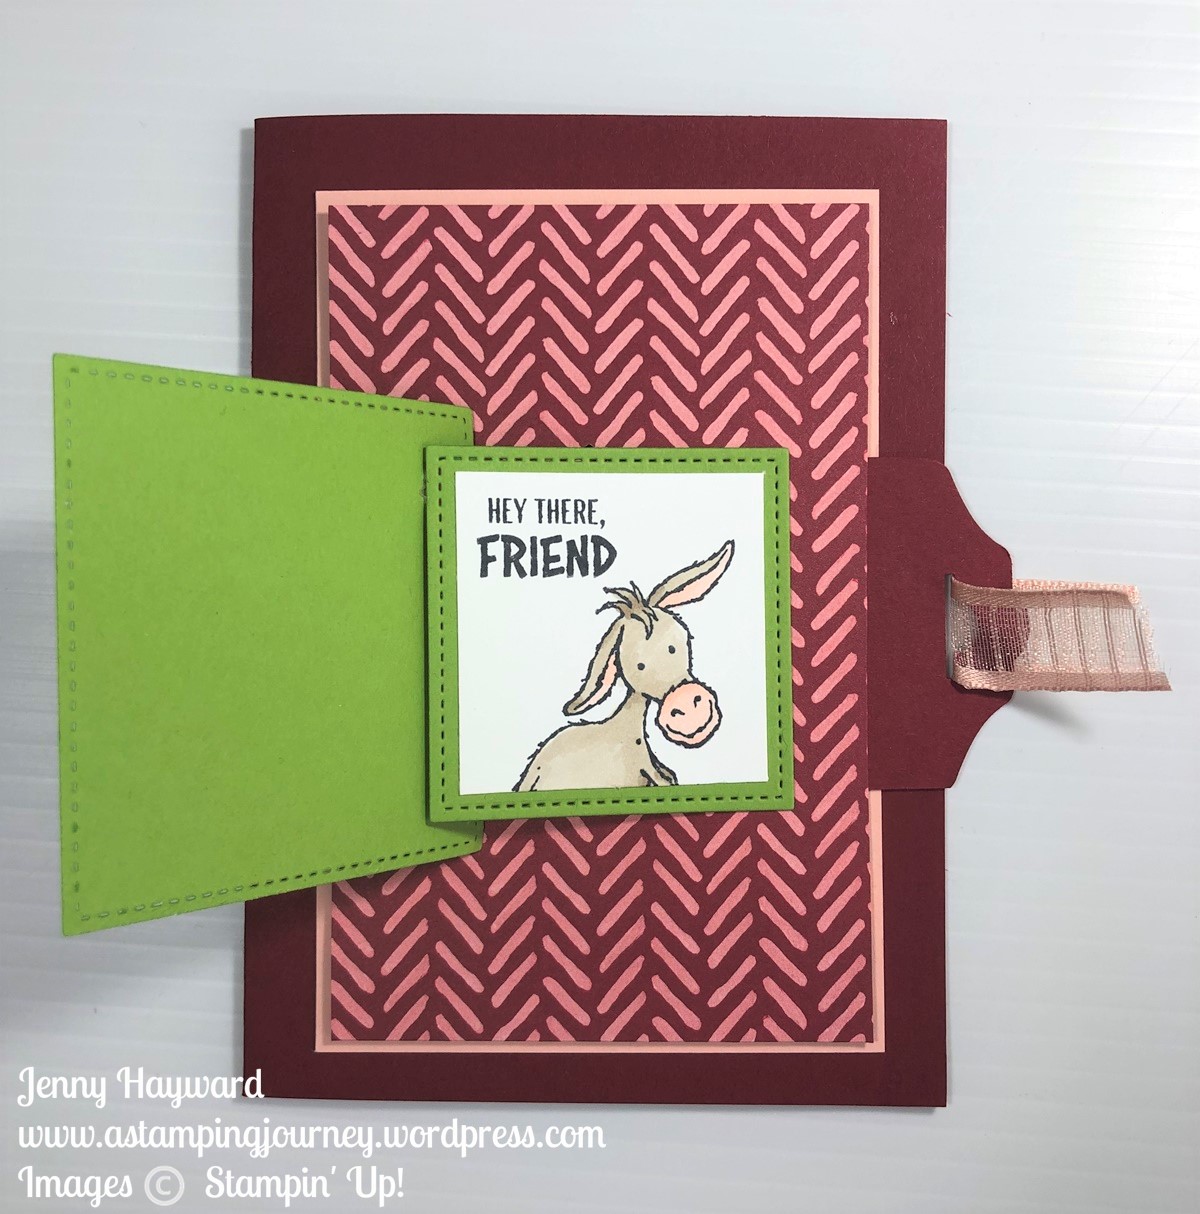
The card is a Pull Tab Flap Fold. It’s really quite easy – and fun! I think I need to make more of these type of cards.

Firstly the front of the card with the cute donkey.
Pull the tab and it opens to another sweet donkey.
Inside the card I added some white card to write on – and another donkey.
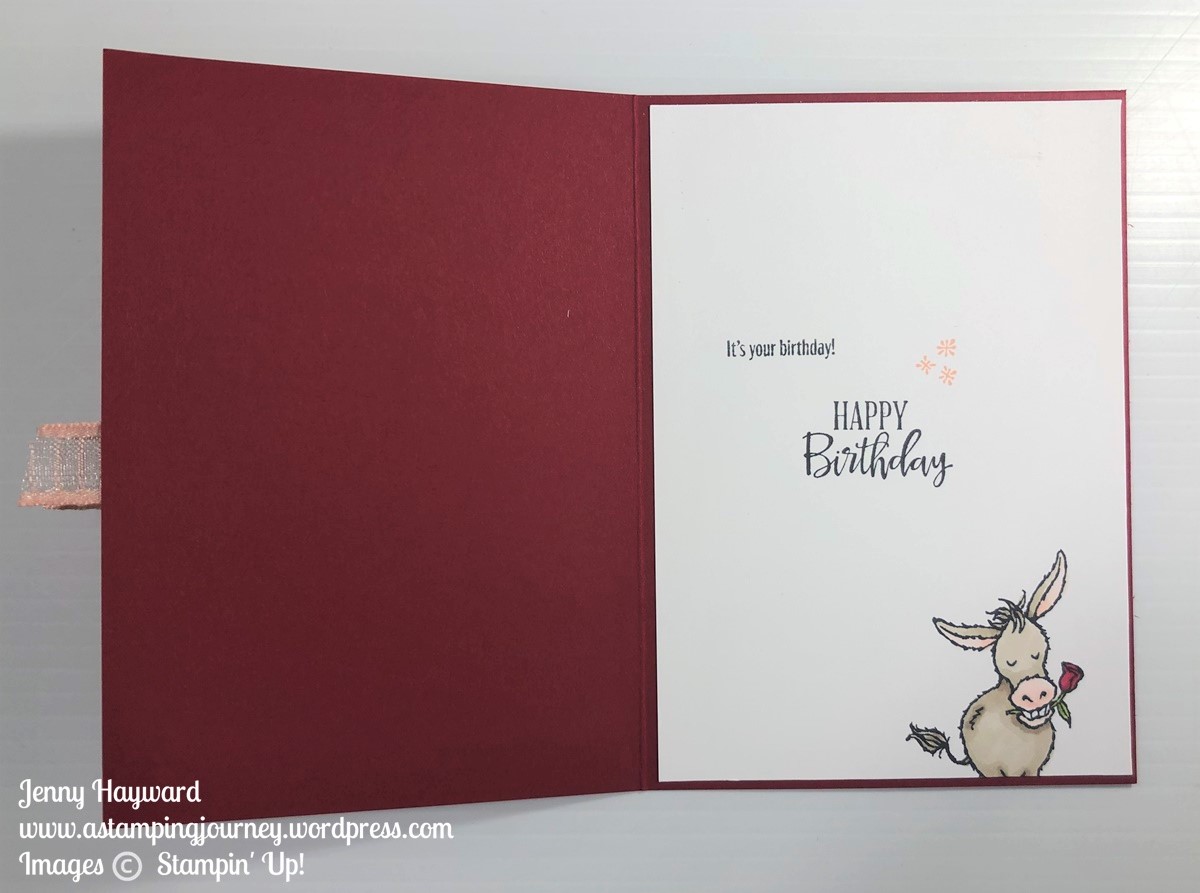
All the donkeys were stamped in Black Memento ink and coloured with the Stampin’ Blends.

The Designer Series Paper panel on the front is from the Flower and Field pack also a free choice for Sale-A-Bration.

Want to make one of these cards yourself?

I will add the measurements just below in Metric and Imperial. Rather than recreating a video of putting the card together you can check out Lisa’s video here. She explains it so well. View it -> HERE.

PULL TAB FLAP CARD

Base Card:    21cm x 14.8cm score at 10.5cm 5 ½” x 8 ½” score at 4 ¼”

Card for Tab Pull: 5cm x 15cm score at 5cm, 6.2cm 2″ x 6″ score at 2″, 2 1/2″

Card Mat:     12.8cm x 8.5cm      3 ¾” x 5”

Designer Series Paper:   12.4cm x 8.1cm   3 ½” x 4 ¾”

White card for inside:    10.1cm x 14.4cm 4” x 5 ¼”

Scrap card for stamping and small card squares

—

Continue on the Hop. You can head to Wendy’s Blog -> HERE or click on the arrow below.

Happy Hopping. Be sure to check out the Catalogues and Sale-A-Bration too. You will love it!

Jenny

3D projects, cards, Christmas, Tutorials, Videos

DOVE OF HOPE TRIANGLE EASEL CARD!

Today’s project I recently shared with my newsletter subscribers. I send out a tutorial for them each Tuesday. (If you don’t receive my newsletters yet – why not?? – Just click on the link in the right hand side bar to add yourself to the email list).

I wanted to share this project as my little Christmas gift to you. HAPPY CHRISTMAS. I have a video to help you create it. It’s now on Youtube too. (Be sure to subscribe to my Youtube channel too so you can get notified of videos I post).

This card is a Triangle Easel card. I have made a number of them over the years. They are really easy to make. I am using the Dove of Hope stamps and Dies. I am so sad these are leaving us.

I will add the measurements below too so you can follow along later.

DOVE OF HOPE TRIANGLE EASEL CARD

Base card: 10.5cm x 21cm Scored at 10.5cm 4 1/4″ x 8 1/2″ scored at 4 1/4″. Scored the angle on the left hand square from the bottom centre score line to the top left corner.

‘Tis The Season Designer Series Paper 10.1cm x 10.1cm 4 1/8″ x 4 1/8″

Whisper White card 10.1cm x 10.1cm 4 1/8″ x 4 1/8″

Card scraps: Vellum, Shaded Spruce, Gold Foil, Whisper White.

I hope you like the card.

The Dove of Hope stamps and the Dove Dies are available in my store now. They are on the Year-End Closeout list so will leave very soon. TIP: Buy the stamps and the Dies separately as they work out cheaper than buying them as a bundle. 🙂

In Australia? Shop now.

Dove of Hope Stamp Set -> HERE.

Dove Dies -> HERE.

Still time to grab your Free pack of Red Rhinestones with your order in the next week. Of course it may not arrive by Christmas BUT you can enjoy opening it still shortly after.

Thanks for visiting. Now go and enjoy the video – and then shop. 🙂

Jenny