cards, Catalogues, Sale-A-Bration, Techniques, Videos

SPONGING THE FLOWERING FOILS PAPER WITH A VIDEO!

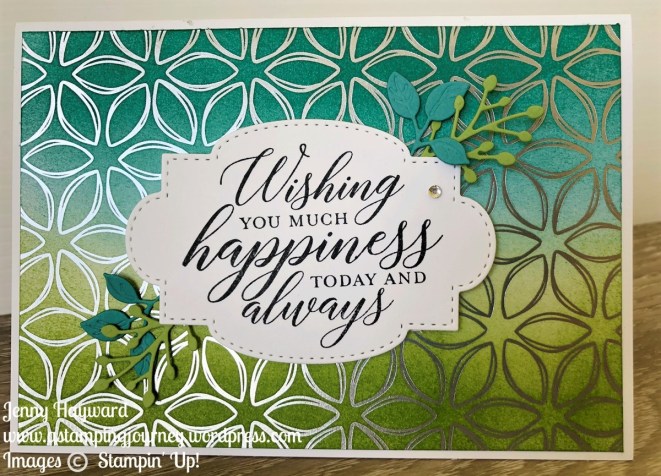
I have mentioned already the gorgeous Flowering Foils Specialty Designer Series Paper.  You have probably seen lots around with it too.  Today I have a card to share with you using this paper and a video to show how you can very easily add the colour to the paper with the sponge rollers.

This card is inspired by a card in the 2nd release Sale-A-Bration brochure (p3)  I changed it up a little.

Here is the card.

Check the video below.

I used the Stitched So Sweetly Dies on the card and the sentiment is from So Sentimental. The card in the brochure uses one of these sentiments too but I just wanted to keep it simple rather than cutting around the sentiment seen on that card.  It does give it a good effect when you do that.

The leaves are from the Birthday Dies.  These are available as Co-ordination products that go with the Happy Birthday To You stamp set also for Sale-A-Bration.

The Flowering Foils Specialty Designer Series Paper is only available for March during Sale-A-Bration (or while supplies last) so you want to grab them soon.  You receive them as your free choice with orders over $90.  Check out my store now -> HERE.

Have fun sponging and colouring this paper.

Jenny


cards, Catalogues, Techniques, Videos

WATERCOLOURED PAINTED POPPIES!

I want to share this card with you today.  I made it at our team Shoebox Swap last week.  I will show you the other cards we made later but thought I would show you this one today as I recreated it and filmed a video to show you how it was made.  Hope you like it.

It’s using the Painted Poppies set and is a fun card – although a little messy.  This card was shared to me by Deborah in our Inky Fingers Team.


Just a quick overview of how to make the card but be sure to watch the video (and you can subscribe to my channel on Youtube to catch new updates.  It’s early days but I am working on it!) 🙂

  1. Use your clear block and press the ink pad on to the block to get some ink.  Use the Aquapainter to spread the ink around and make it a little watery.
  2. Press the Painted Poppies “splodge” stamp on to the clear block to pick up some ink.  Press it on to your card.  I used Very Vanilla.  You could use Thick Whisper White, Shimmery White or Watercolor card.  Repeat this 3 more times over the card in a “circular” pattern.  Use the Aquapainter to spread the ink and also add some more ink from the block if you need to.
  3. Allow to dry then stamp the flower outlines over the “splodges”.  Stamp the leaves in black over the card.
  4. Use the large “splatter” stamp and ink it up in Mossy Meadow ink.  Stamp off first on scrap paper then stamp over the larger leaves.  Use the smaller “splatter” to stamp over the smaller leaves.  Clean the stamp, ink up the stamp in Gray Granite then stamp off first on to scrap paper. Stamp on the small leaves.
  5. Diecut flower centres add them to the card and stamp the sentiment.  Adhere the card to the card base.

Hope you have some messy fun with this card.

Have a great day,

Jenny


cards, Catalogues, Product Share, Videos

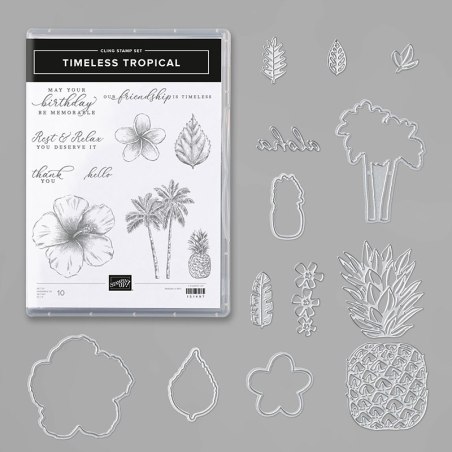
DAFFODIL TIMELESS TROPICAL!

This weekend I am having my Tropical Fiesta Catalogue Launch.  I am sure it will be fun and with this weather it will certainly be feeling tropical.  I thought I would start sharing some of my cards using this suite.

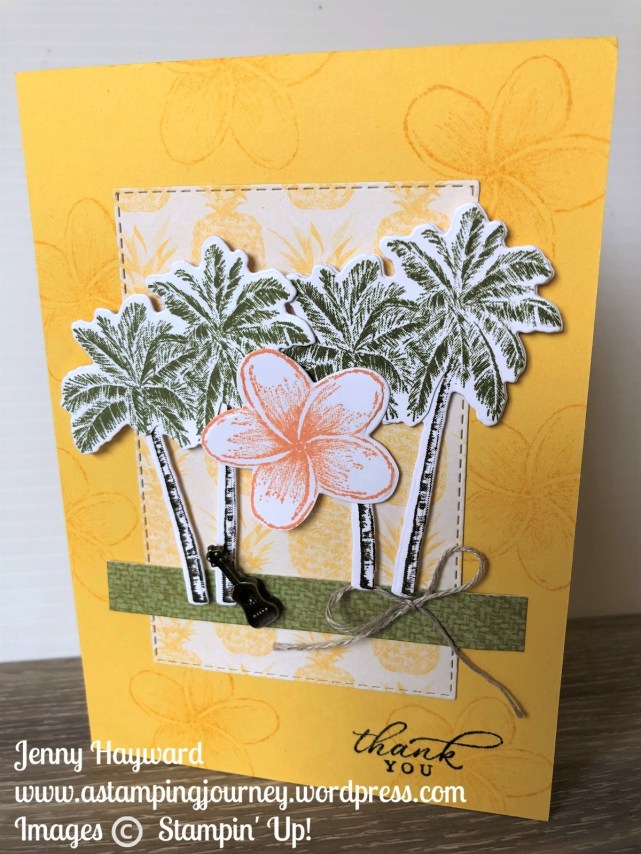
To start off with I CASED the Catalogue.  You can find this card on p38 of the Mini Catalogue.  Isn’t it sunny and fresh??  I have to say I am loving the cute little Tropical Oasis Trinkets.

The card is just a little stamping with the Timeless Tropical stamp set and then diecutting.  Easy with the co-ordinating In The Tropics Dies. I find it easiest to adhere the little Trinkets on with Glue Dots.

If you notice the Palm Trees the leaves are stamped in Old Olive and the trunks Early Espresso.  On the card in the catalogue I think they have been coloured with the markers.  I didn’t do mine that way though.  I put together a video last week showing how I created the trees which I shared on my Facebook page when we went looking through the catalogue.  (BTW: Do you follow me on Facebook?? Just click on the social media links in the right column on my blog).

What I did was stamped them twice, once in Old Olive and once in Early Espresso.  I diecut them then trimmed off the leaves on the Old Olive one.  It is just simple snipping.

When I created the card on the video I didn’t fully complete it.  It was just to give you the idea of stamping the trees mainly.  Afterwards I put the card together but this time I did it a little different.  You can see that one below.

Which one do you like better??

This is the Timeless Tropical Bundle.  Available in my store now -> HERE. $90.75 AUD – which means you can pick up a Sale-A-Bration choice FREE. 🙂

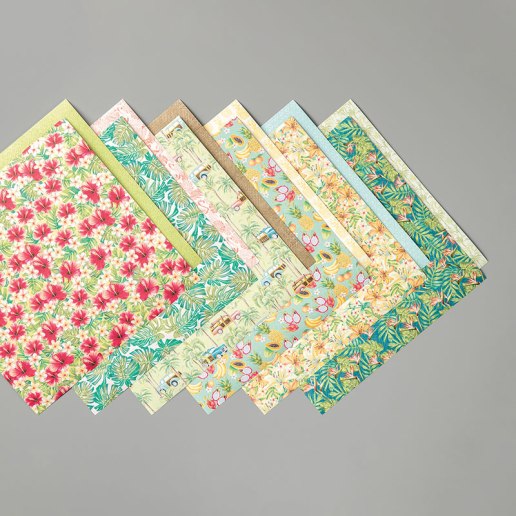
Of course, don’t miss the beautiful Tropical Oasis paper.  (This one is available in my Paper share too.  Just head back a post or 2).

The Timeless Tropical is a great suite and I will be sharing more with it so stay tuned.

Have a great weekend.  I’m off to practise my hula dancing.

Jenny

cards, Catalogues, Sale-A-Bration, Techniques, Videos

WEDNESDAY’S WOW! #94- MASKING WITH THE GANG’S ALL MEER!

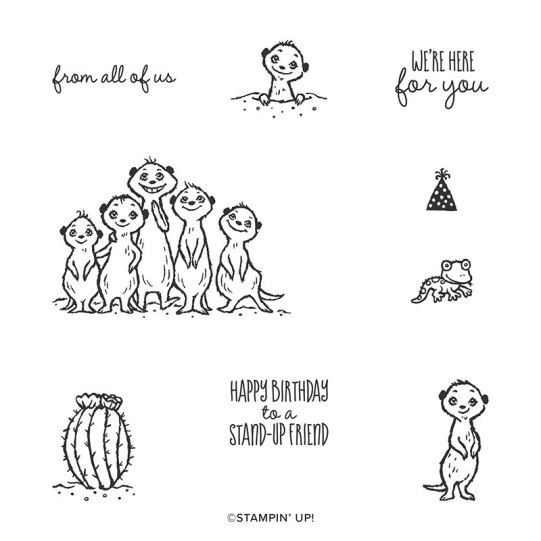
Wednesday’s WOW! #94 – Let’s look at these cute little meerkats in the The Gang’s All Meer set available for Sale-A-Bration.  You have just got to love the sweet smiles don’t you?? 🙂

This set is great for fun birthday cards whether it’s just from you or from a whole group.  They are very easy to colour with any of your colour mediums whether it is the inkpads, watercolour pencils or Stampin’ Blends.  It has some other fun elements in the set with the little party hat for those meerkats or the cactus, or even a cute gecko that can join in the party.

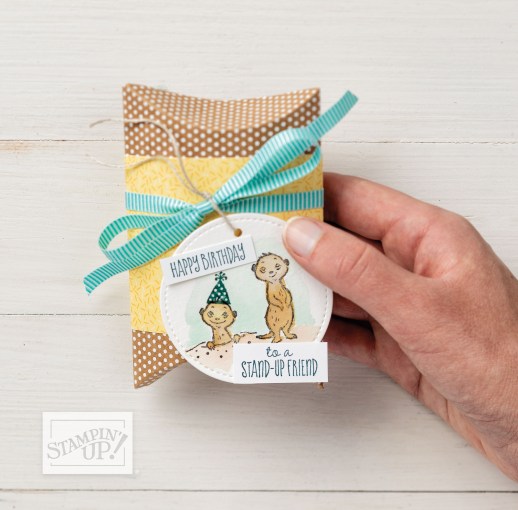
See the stamp set in action in this video and particularly the great way of using this set with the masking technique.  It’s so easy and you can have a card full of these cute critters.

Below is the card with the masked Meerkats so you can get a better view of it.  Stamp as many meerkats as you like. You could use any other image you have using this same technique.

Here are some other samples Brian shared in this video so you can have a closer look.


Now you can have these cute meerkats yourself.

Choose this for your Free choice with orders over $90 AUD (or choose any other of the options) as your Free Sale-A-Bration choice.  Check it out in store-> HERE.

Have a great day,

Jenny

cards, Catalogues, Techniques, Videos

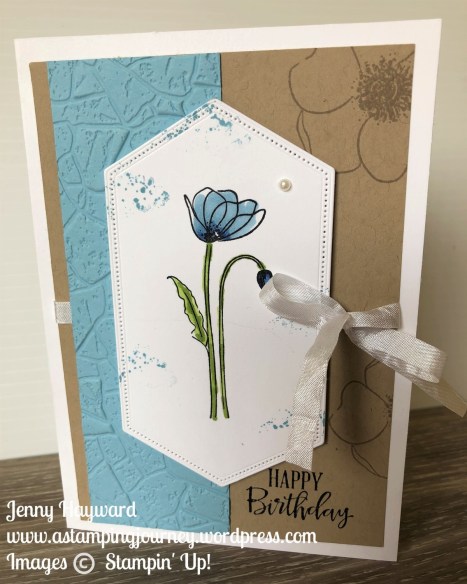
HIMALAYAN POPPY CARD!

Last week I shared on my Facebook page this card with the Painted Poppies stamps.  I wanted to go with a different colour of poppy than what you might be seeing all around the internet.  I looked up some poppy colours and saw a gorgeous blue one called the Himalayan Poppy.  So I tried to recreate this.

The Balmy Blue card piece was embossed with the Stone 3D Embossing Folder. A new favourite of mine.  The Poppy was coloured with the Stampin’ Blends.

I put together a video showing how I created the card.  You can check out this video on Youtube -> HERE.

Apologies in advance.  I am still working this video thing out so be patient. 😉

If you need these Painted Poppies (or any other products) in your life then you can grab them in my store now -> HERE.

Please use the Host Code: R26WHBUN  Australian residents only.

Thank you and have a great day.

Jenny


3D projects, cards, Catalogues, Stampin' Up!, Videos

SUNDAY SUITES – BEST DRESSED SUITE!

Sunday Suites are back for 2020.  This week since I have been sharing projects with the Best Dressed Suite let’s have a closer look at the whole suite.

I think the Best Dressed Suite is a really fun one and can be quite classy too.

This is what is included in the entire Best Dressed Suite Bundle.

The Best Dressed Suite Bundle includes:

* Dressed to Impress Photopolymer Stamp Set (10% off)
* All Dressed Up Dies (10% off)
* Best Dressed 6″ x 6″ (15.2 x 15.2 cm) Designer Series Paper
* Mint Macaron 1/8″ (3.2 cm) Sheer Linen Ribbon
* Best Dressed 3″ x 3″ (7.6 x 7.6 cm) Note Cards & Envelopes
* Best Dressed Tassels

Colours used in the suite are: Blackberry Bliss, Daffodil Delight, Lovely Lipstick, Old Olive, Petal Pink, Pretty Peacock, Purple Posy, Mint Macaron.

Let’s have a closer look at the Best Dressed Designer Series Paper.  It is gorgeous.  One side has stylish images, the other side has floral prints either large or small.

One thing I learned when preparing my projects for Onstage was that the larger floral prints have been designed with white spaces around the flowers so you can easily fussy cut them to add directly to your projects.  I will share more about that on another post.
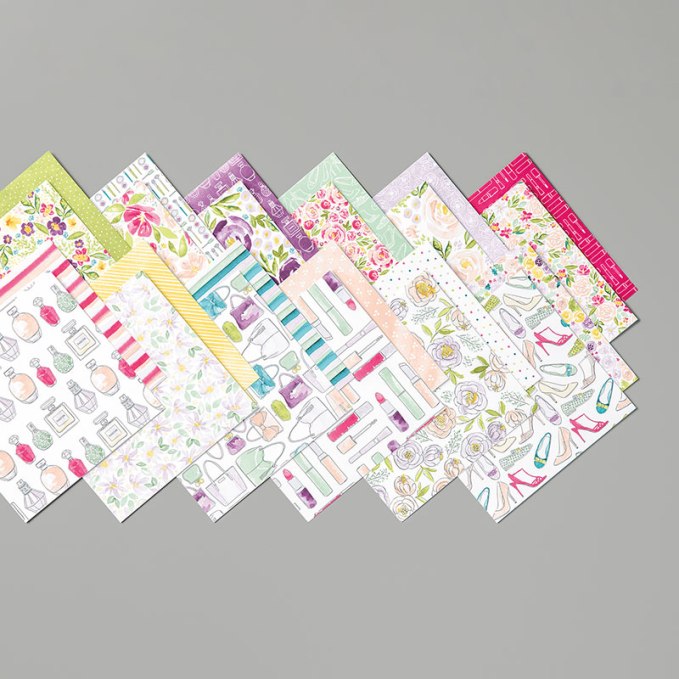
The Best Dressed Notecards and envelopes make really quick note cards to give to others.  They have a partly printed “swoosh” on the front of the card and the envelopes are printed on as well.  There are 24 in total with the cards and envelopes and they come in Daffodil Delight, Purple Posy and Petal Pink.  They are really sweet.  They are little cards measuring 3″x3″ or 7.6cm x 7.6cm.

What about some samples with these mini notecards.  These are straight from the catalogue. The notecards fit nicely inside the bag too so that gives you an idea of the size of the bag.
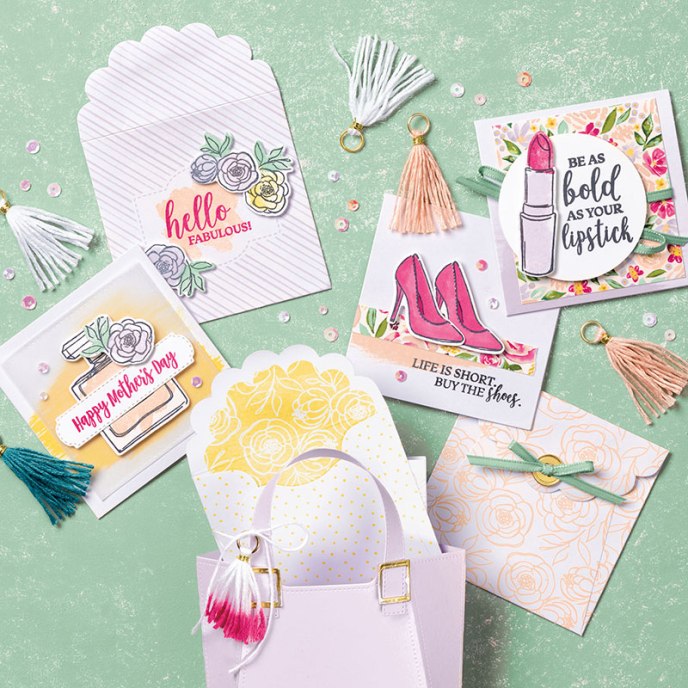
The All Dressed Dies are really fun.  They make the sweetest little bags.  You can change them up anyway you like.  See the samples below.  I have created a few fun bags already that I will share with you soon.

Don’t forget the Best Dressed Tassels as well.  There are 18 in total. 6 each in Petal Pink, Pretty Peacock and Whisper White.  With the White ones too you can colour them with the Stampin’ Blends or sit them in a little dish with reinker and water.
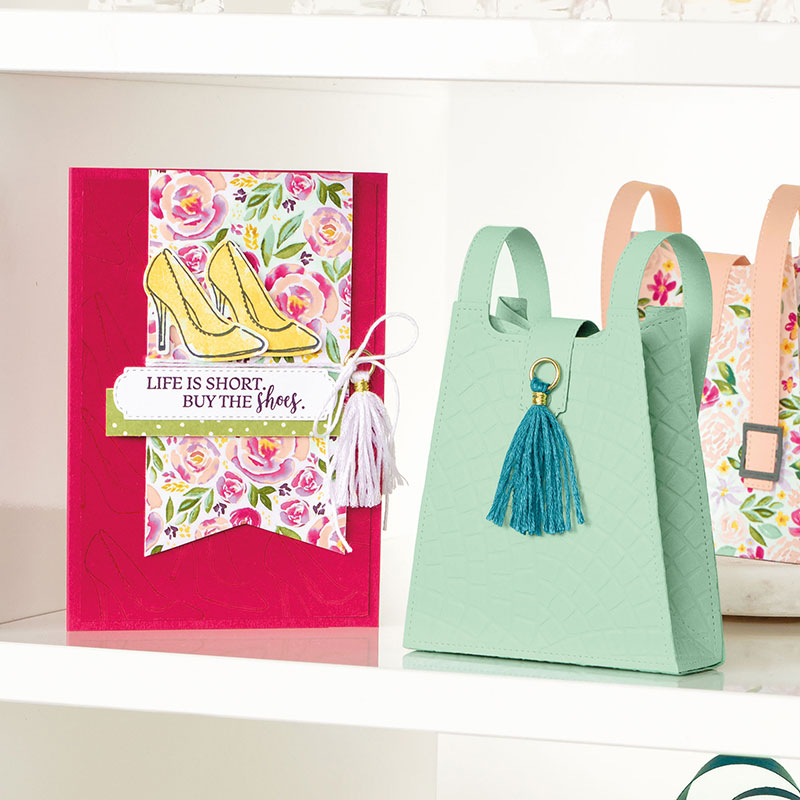
In the dies set is the long stitched die.  It’s great for the handles on your bags or I have used it as an edging but what about this fun idea.  Add the strips to the front of a card to create added texture.  This card sample is from Stampin’ Up!
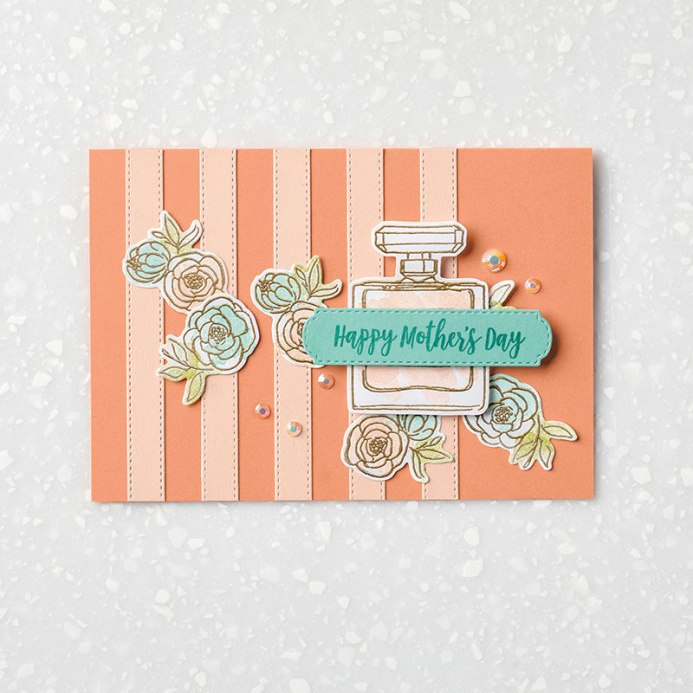
So what do you think of the Best Dressed Suite?? Fun hey??

If you want to see more about them check the Youtube video out -> HERE.

You can see and shop the Best Dressed Suite in my store now -> HERE.

Shopping in my store? Please use the Host Code: R26WHBUN.

If you are in Australia and need some of your Stampin’ Up! supplies and don’t already have a demonstrator then come and shop with me.  I can help you out in all that you need and have them shipped directly to you.  Head to the link just above for the store.

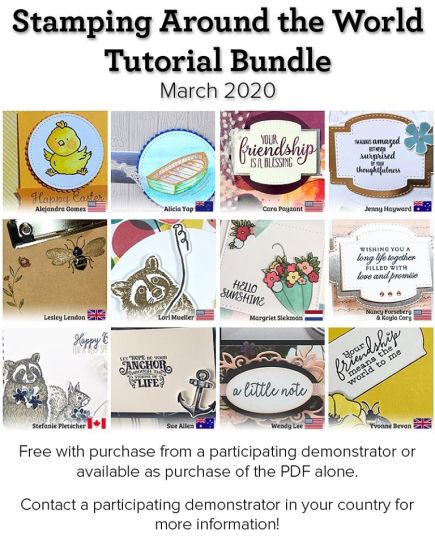
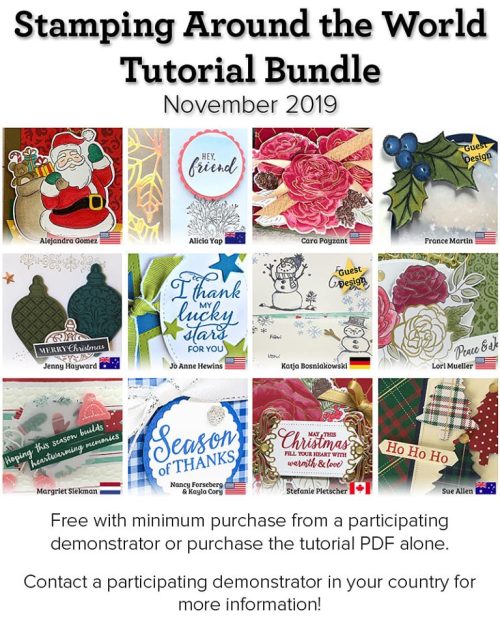
Thanks for your orders.  All orders will receive a 12 project Tutorial Bundle emailed to you and a little card and small gift to say Thanks.  Happy shopping.  Don’t forget to pick up your free Sale-A-Bration choice with orders over $90.

Happy Sunday,

Jenny


cards, Catalogues, Christmas, Techniques, Videos

WEDNESDAY’S WOW! #89 – TAGS, TAGS, TAGS!

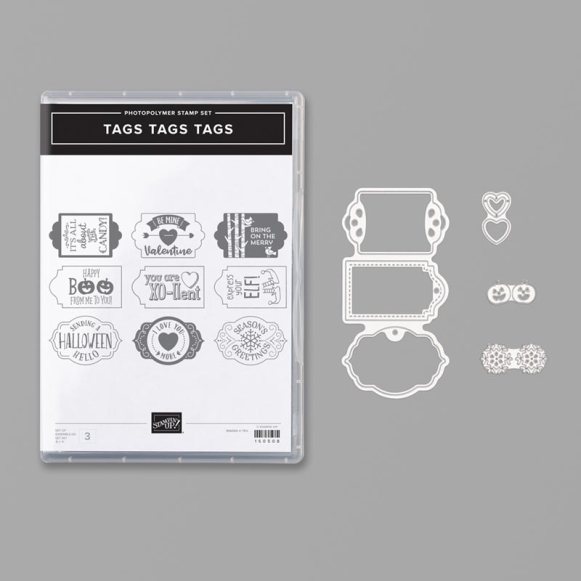
Wednesday’s WOW! #89.  I have a cool new bundle to share with you today that I just discovered about.  It’s the Tags, Tags, Tags Bundle in the Holiday Catalogue.  Really I am a little slow sometimes.  Perhaps you haven’t noticed it yourself so I thought I would tell you about it.

The Tags, Tags, Tags Bundle is on p56.  There are 9 images in the stamp set on 3 stamps.  They are connected together. The 3 tags are cut at one time with the Trio die.  How cool is that! A bit of a time-saver.

Each tag die is a different shape.  And you could use these tags dies for any of your other sentiments that fit in the shape.  I love the shapes of them and one is stitched!

I really overlooked these dies. Did you?

Here is a closer look at how they cut.  These are using the Valentine’s stamps in the set but you get the idea.

While we don’t celebrate Halloween here or even Valentine’s Day all that much, the Christmas stamps are really sweet, but really those dies!!

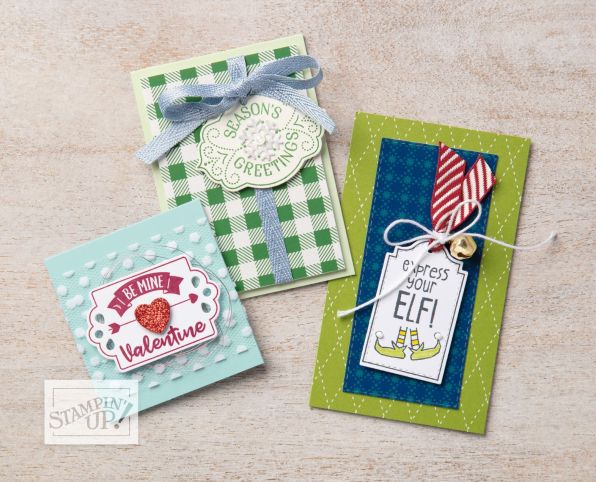
What about some ideas from the catalogue of how to use these little tags.

Some more samples.  You could use these on cards not just tags.

If you want to check the Youtube video out to show these more clearly then head -> HERE.

If you want to see them in my store and/or order then head -> HERE.

If ordering please use the Host Code:3F2MRZYP

Also, Don’t forget there are only a few days left to go in the draw to win a new Stampin’ Up! Paper Trimmer.

Thanks for visiting me.  I love your visits,

Happy Stamping,

Jenny


cards, Catalogues, Christmas, Videos

SUNDAY SUITES – CHRISTMASTIME IS HERE SUITE!

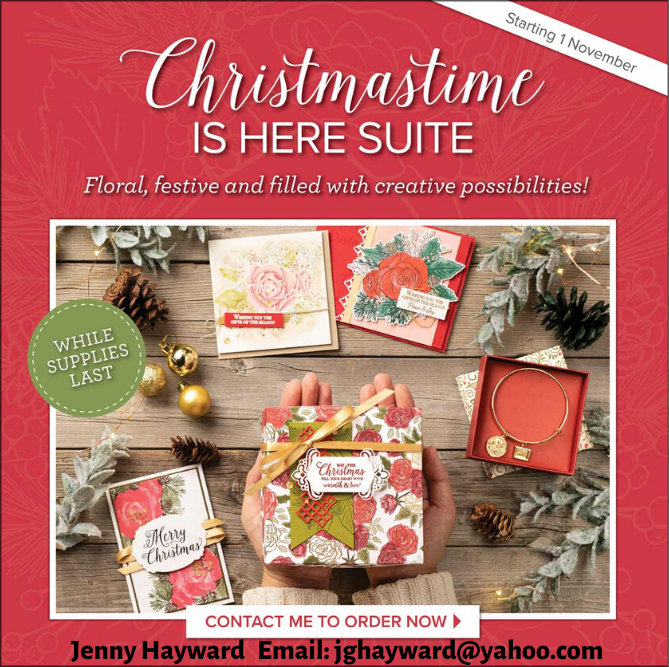
I mentioned the Christmastime is Here Suite last post but since it’s Sunday Suites I thought we would look a little closer at it.

Firstly, let’s look at what you get in this suite.

You can purchase the complete Suite with one item code ($195.25) or select the products individually that you like.

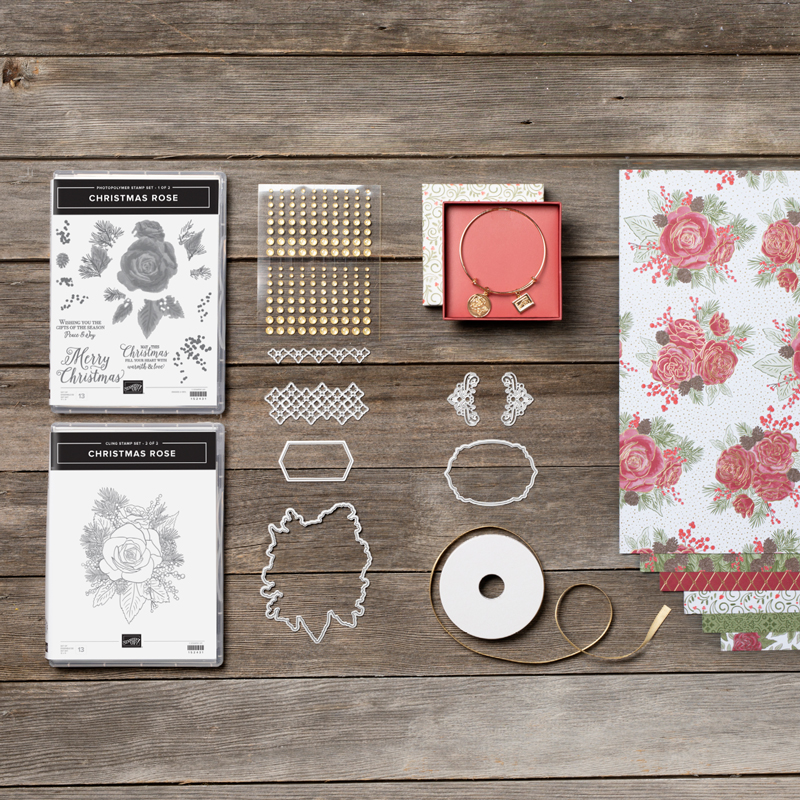
The Christmastime is Here Suite includes:

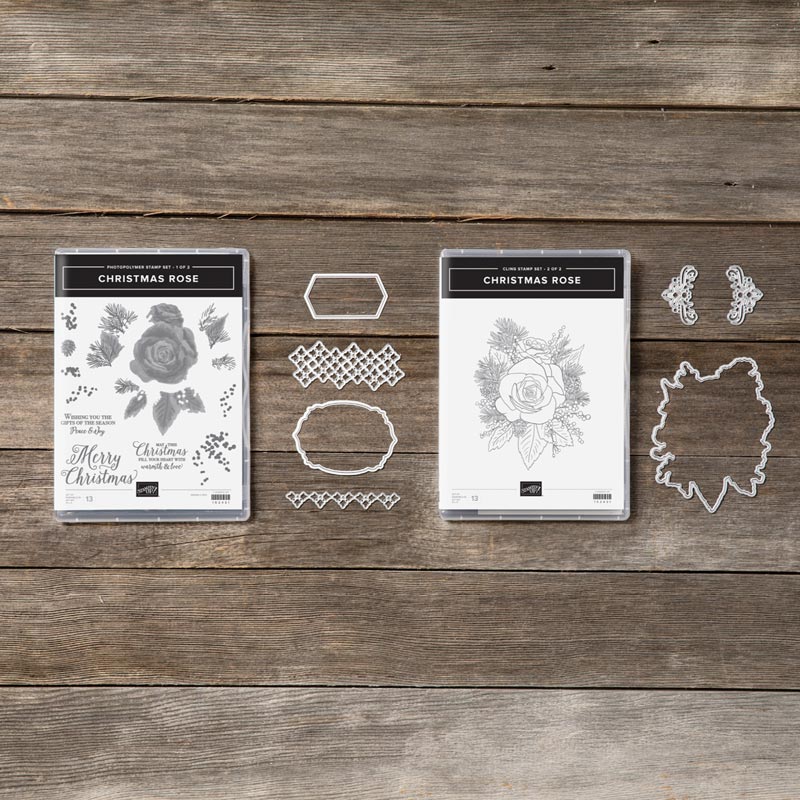
* Christmas Rose Stamp Set (10% off)
* Roses Dies (10% off)
* Christmastime Is Here Specialty Designer Series Paper
* Gold 1/4″ (6.4 mm) Shimmer Ribbon
* Gold Glitter Enamel Dots
* Charming Rose Bracelet

To see them better check out this video about them.  You have to have a close look at the papers.

Below is the Christmas Rose Bundle with the gorgeous Christmas Rose stamp set and the Rose Dies. $106  The Rose stamp would work make a lovely birthday card or even a gorgeous Wedding card.

The Christmastime is Here Specialty Designer Series Paper has gold accents on the beautiful floral images on one side, with more “Christmas-sy’ prints on the reverse.  This makes them great to use any time of the year. They come in 12″ x 12” size and you receive 2 each of 6 double-sided designs.  $25

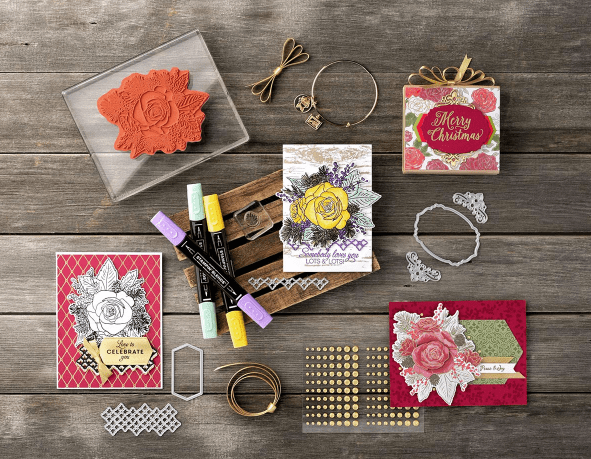
Here is a closer look at some of the projects from the video.

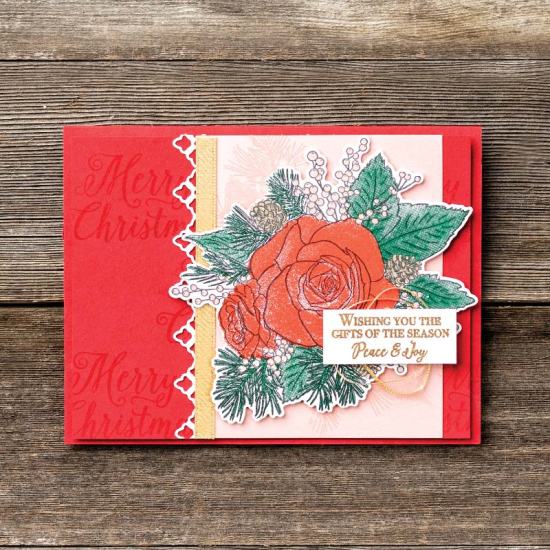
This first card uses the stamps to fill-in the rose and leaves outlines.

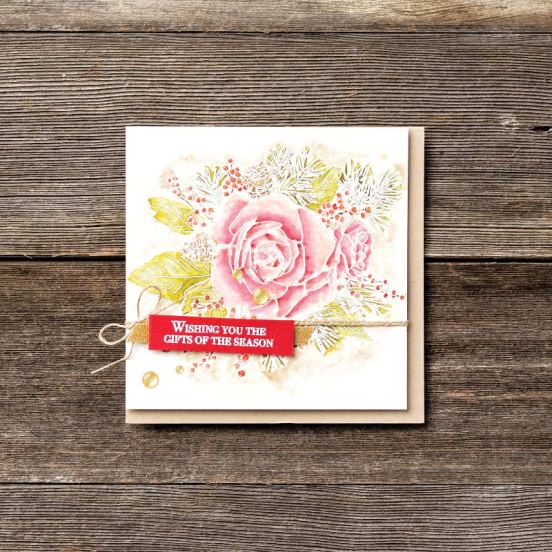
This one below the rose and leaves are heat embossed in white embossing powder and then watercoloured with the inkpads and Aquapainter.

Need some more inspiration?  Head to my Pinterest board -> HERE.
To see the Christmastime is Here Suite and to order visit -> HERE.

Please use the  Host Code: 3F2MRZYP

Don’t forget your chance to go in the draw to win a Stampin’ Up! Trimmer.

Thanks for visiting me.  I hope your Sunday is going wonderfully,

Have a great week ahead,

Jenny
cards, Catalogues, Christmas, Stampin' Up!, Videos

CHRISTMASTIME IS HERE SUITE – IS HERE!

Ooh! There is a gorgeous new suite available this month.  I think you will love it.  I have to say the paper is so gorgeous.  Don’t Stampin’ Up! do the papers so well!! 🙂

We have the Christmastime is Here suite.  I won’t go in too much depth for you as that will be for next post but I couldn’t wait to tell you about it.

Gorgeous Christmastime is Here Specialty Designer Paper that has gold accents. ($25)  Beautiful Christmas Rose Bundle ($106), lovely embellishments with the ribbon and gold dots and even a Gold Bracelet if you wish.

Grab individual items or the whole Suite for $195.25.

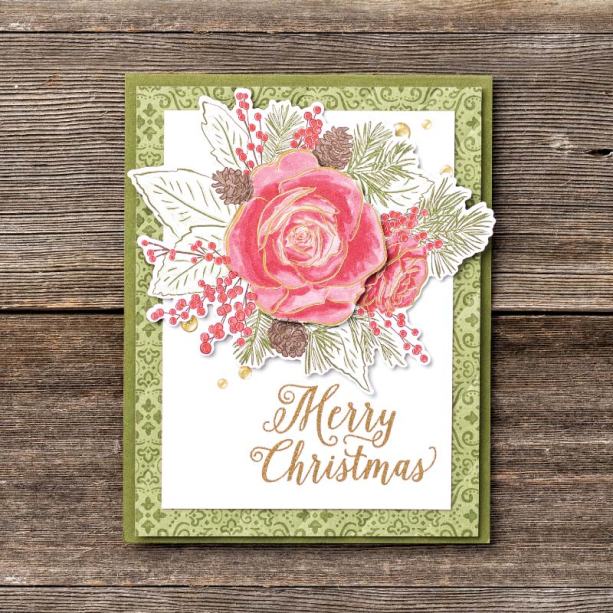
I will tell you more about it soon but check it out in my store.  But below is some inspiration for you.

Need some more inspiration?  Head to my Pinterest board -> HERE.

To see the Christmastime is Here Suite and to order visit -> HERE.

Please use the  Host Code: 3F2MRZYP

Thanks for visiting me.  Be sure to stop by and see some more inspiration next post.

Jenny


cards, Catalogues, Stampin' Up!, Techniques, Videos

WEDNESDAY’S WOW! #85 – REVERSIBLE CUP OF CHRISTMAS!

Wednesday’s WOW! #85 – Did you know there are reversible stamps?  That’s what we will check out in this post.  The Cup Of Christmas stamp set – which is reversible.

This is the Cup of Christmas stamp set. You can find it on p34 of the Holiday Catalogue. I love the font on the sentiments. The really clever part of this stamp set though is that the cups are reversible. You can stamp either side of the stamp.
I wasn’t sure how it would really work.  If you are like me check this video out to see it close up.


Here is a graphic taken from the Catalogue.  Pin it so you can have reference to it later.

How about some fun samples using this stamp set.  Have the cup facing either way.  How cool!

I wonder what other reversible stamps Stampin’ Up! might come up with??  We will have to see.

You can grab your Cup of Christmas set and experiment with the cups yourself.

Grab it in my store now -> HERE.

Please use the Host Code: 6CCRNYH6

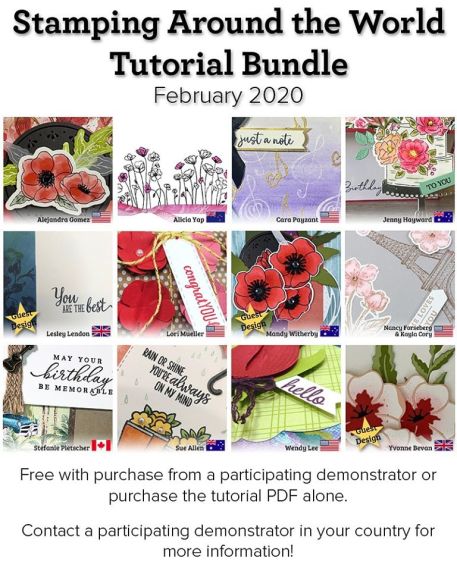
Receive a Tutorial Bundle of 12 projects as a Thank You.

Thanks for visiting me,

Jenny