cards, Catalogues, Tutorials, Videos

TIPS WITH THE CHARMING CAFE BUNDLE!

Have you seen the Charming Cafe Bundle in the Occasions Catalogue?  I was quite taken with this bundle as I saw great new options when making your cards like the Tri-fold card it shows. So this bundle was one of the first on my order.  I haven’t seen much done with this Bundle around so I thought I would share a few tips with using it.

This is the Bundle shown in the catalogue on page 25. It has the really sweet Charming Cafe stamp set and the Cafe Builder Framelits.

For the first card I made with this bundle I CASED this card which is in the Catalogue.
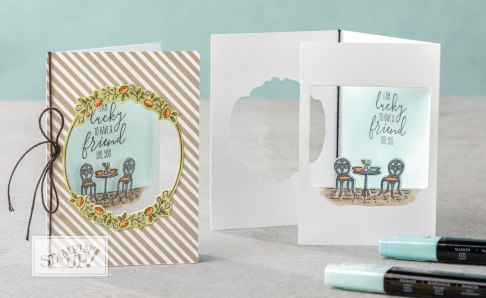
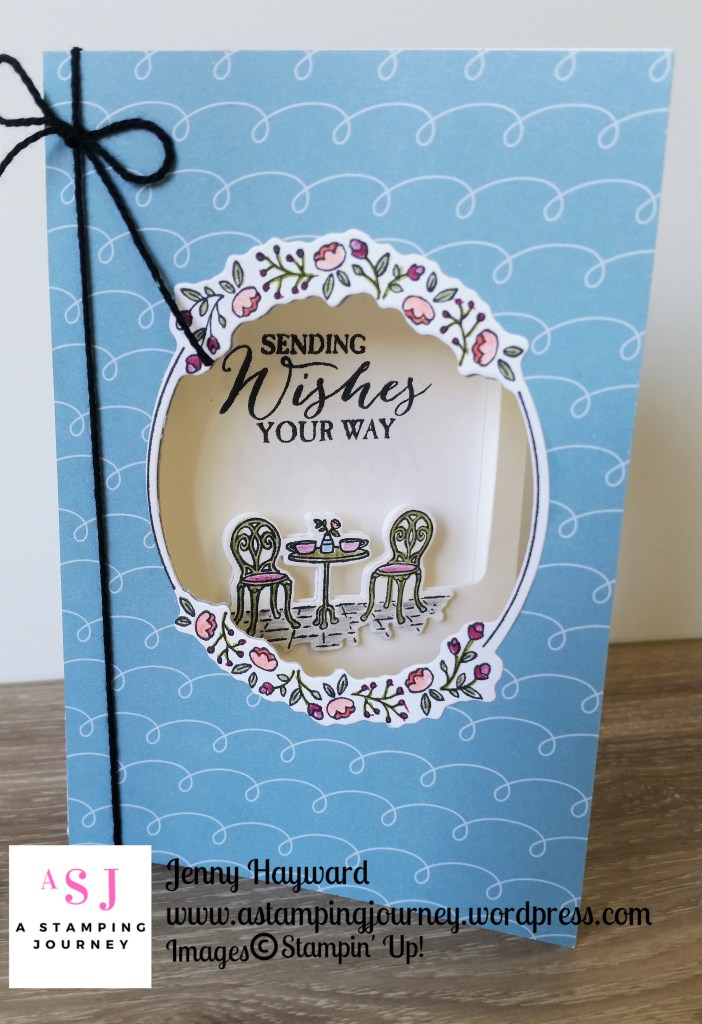
I will be honest it didn’t go as smooth as I thought, but that’s just me …  😉  Here is my card.

The front view
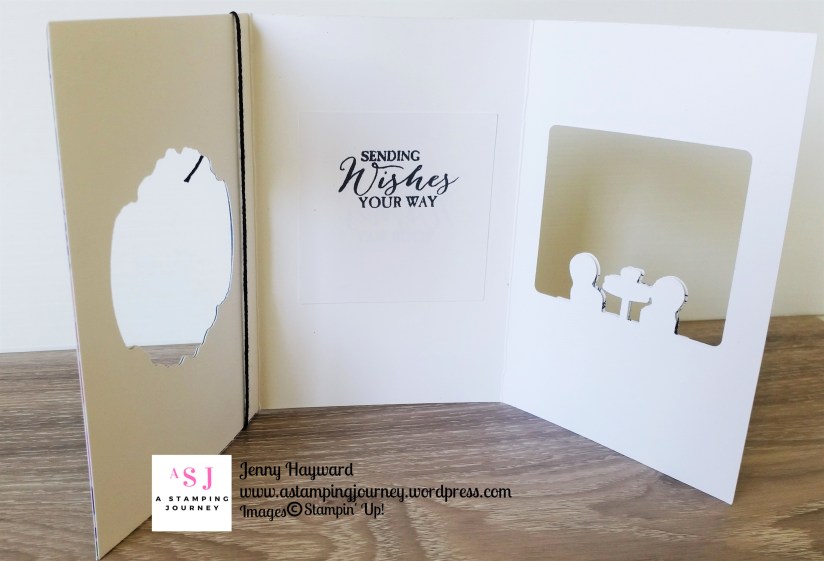
Inside

Open
It all came together well in the end.

I have a video below to show you some tips that I discovered using it.  I apologise in advance.  I am new at the video business but hopefully it helps.  I will outline the tips below too.

(NB: If you receive this blog update by email and the video is not showing please head to the blog post directly and view it there.


SOME HELPFUL TIPS

– Adhere your designer Series Paper BEFORE you cut the front window.  Much easier. 🙂

– Use the smaller rounded shape for the front window so you have something to adhere the flowery circle on.

– After you cut your front window.  Fold the card and sit the next Framelit inside to get the correct position to look through the front.  Open your card before you cut it.

– To stamp your sentiment or the inside image close up the centre fold so you can position the stamp THROUGH the window. 🙂

Since I put together this video I discovered Stampin’  Up! have a video on these but I think I can share a few “user errors”.


SOME ADDITIONAL CARDS

All is not lost though with my “mistakes.  Here are a few of the other cards that I salvaged.  I cut off the centre flap and made standard fold cards with them. Note: All the images were coloured with the Watercolor Pencils. It’s hard to tell but I coloured some of the flowers and the Topiary bush with the Clear Wink of Stella pen.  I have used the gorgeous Whisper White Organza ribbon too.
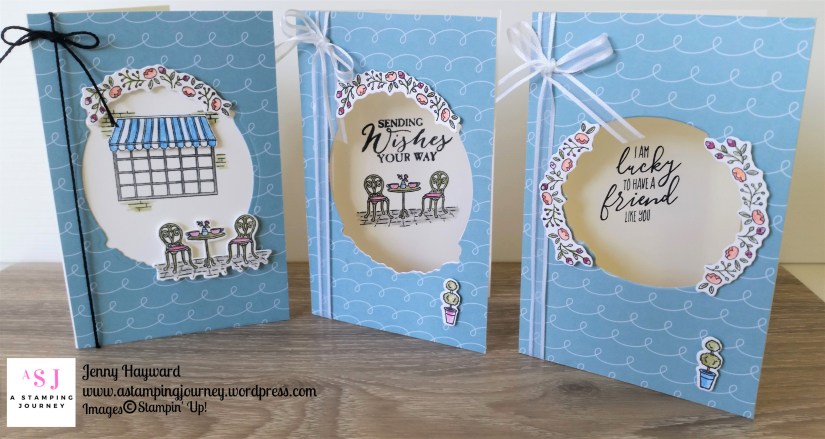
Close-ups.

I cut the large Circle shape from the front which wouldn’t work trying to adhere the diecut flower circle on it. So I added one flower strand to the top and stamped the chairs and sentiment inside.
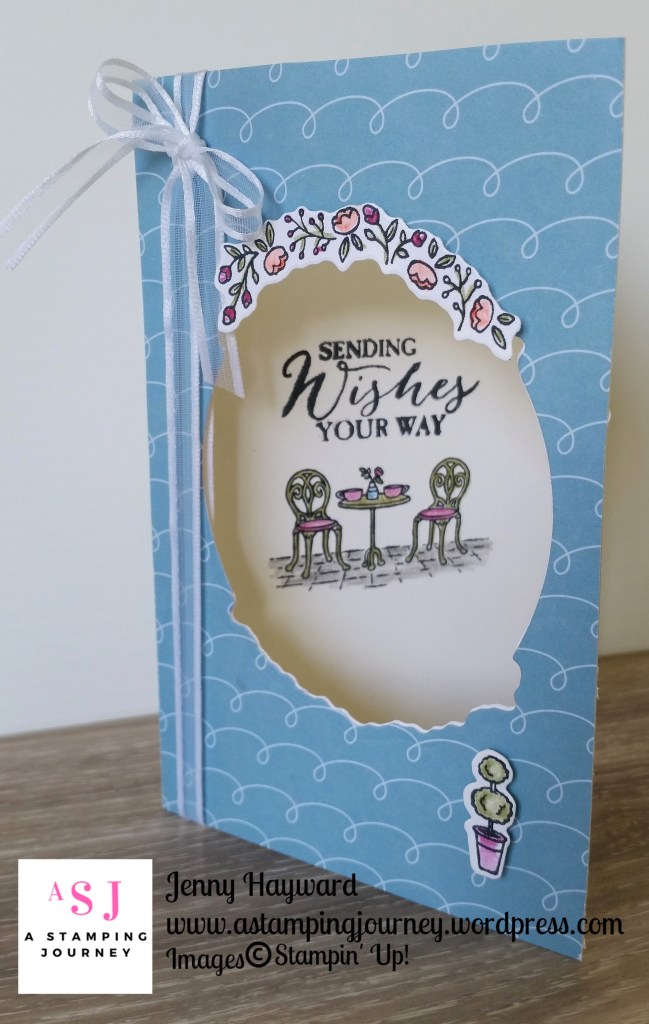
You would have thought I learnt the first time not to cut the large circle shape. No! So I stamped the awning image on a piece of Whisper White and adhered that to the inside of the front flap on the card.  I stamped the window a second time and cut just the awning and raised it up.

Look! I cut the smaller circle shape in the front.  DOH! It was on the side.  It doesn’t matter too much as I cut the flower strands and raised them up off the card.  I kept it simple and stamped the Topiary for the front and I added one to the inside of the card too.
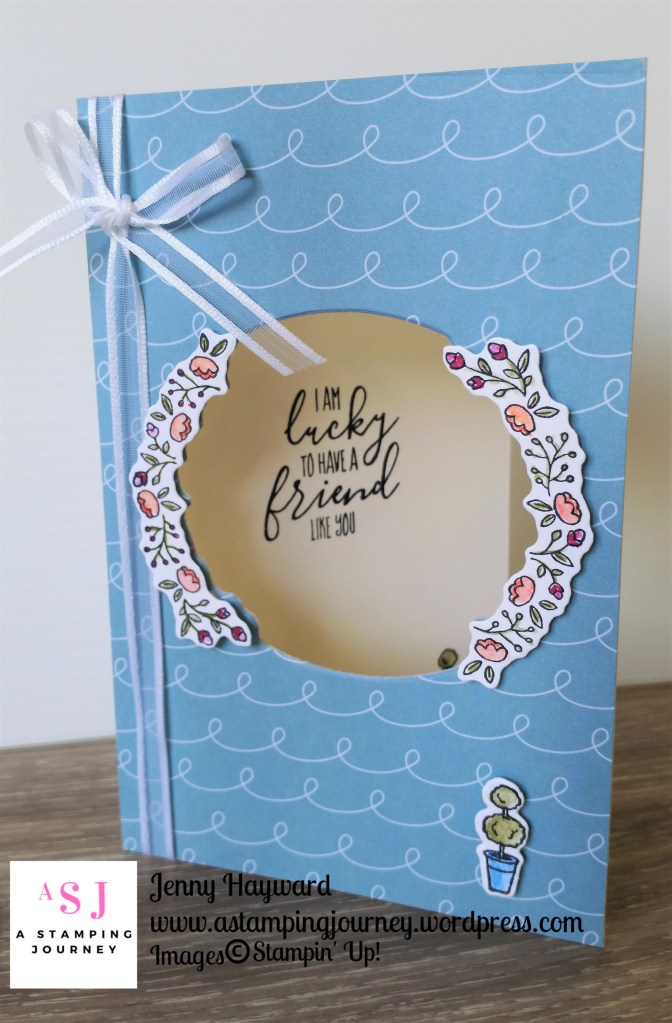
So I hope you find these tips helpful.  I do love this bundle.  We are using it at my Catalogue Launch this weekend so I will show you the card next week.

You can buy the Bundle in store now -> HERE.  It is available in Wood mount ($88AUS) or Clear Mount ($75.50AUS)

Have a great weekend,

Jenny


Catalogues, Stampin' Up!, Videos

FINAL DAYS NOW TO RESERVE YOUR STAMPARATUS AND FOR THE YEAR-END SALES!

Some important final updates I need to share with you.  So please take a moment so you know what is happening.

STAMPARATUS RESERVATION ENDS TOMORROW!

If you want to reserve your Stamparatus – the YOU-BEAUT stamp positioning tool from Stampin’ Up then do it now.  After the 31st you won’t be able to get one until the new 2018 Catalogue in June.

Head -> HERE to reserve it.  You will need a valid credit card but the amount won’t be debited until the Stamparatus are shipped in early March. NB: The link is to my store, if you don’t already have an account there yet you will need to first.

If you are still not sure about the Stamparatus then check my slideshow I posted on Youtube the other day.  See it -> HERE.


YEAR-END SALE ENDS JANUARY 2ND

With the end of the 2017 Holiday Catalogue many items won’t be returning and some are reduced.  You will want to check this out and you might just grab a bargain.  Head -> HERE. While you are there check the Clearance Rack for more crazy reductions.  

When  you order, Please use the HOST CODE: MFJY7AKX

or contact me directly to order.


2018 OCCASIONS CATALOGUE AND SALE-A-BRATION STARTS JANUARY 3RD

I am starting to send out the Occasions Catalogue.  Contact me to order your own catalogues.

I hope you are all caught up now but don’t delay on these.  Time is running out.

Jenny

cards, Catalogues, Stampin' Up!, Techniques, Tutorials, Videos

HEDGEHUGS WITH THE STAMPARATUS!

I have been playing with new products the last few days.  I am loving this new set Hedgehugs coming out in the new Occasions Catalogue on January 3rd.  I think you will love it too.

I have recently got the Stamparatus and have used that to stamp this so all the images are evenly spaced.

Today I put together a video showing how to use the Stamparatus for this.  It’s a different type of video.  I spent the last 2 days to put together one and it just wasn’t happening.  What do you think of this format.  Would you like to see more of this type or would you like the traditional type of videos?  Do let me know.  The video is below. (Please note: If you are receiving this post by email subscription the video might not show up so head directly to the blog post by clicking on the post title above).

If you missed the card size for the Whisper White on the video here are the measurements again.

Metric       14.8cm x 7cm.

Imperial   5 1/2″ x 2 3/4″.

Hope that is helpful.

Other details on the card:

Paper:  Sweet Soiree Specialty Designer Series Paper, Old Olive card base.

Ink: Berry Burst, Old Olive, Marina Mist.

Other: Whisper White Organza Ribbon.

————-

STAMPARATUS RESERVATION

While we are talking Stamparatus, you only have a few days left until the end of the month to reserve your Stamparatus.  This will be shipped out early March.  After that you won’t be able to order one until the new catalogue in June 2018.

To reserve your Stamparatus: Head -> HERE. Scroll part way down the page and click on the box on the right hand side of the page under Stamparatus.

The Stamparatus is $85 plus shipping.  You won’t need to pay until it ships in early March.  You will need add your credit card details when you reserve it though.  If you have any further questions, please drop me a comment or email me.

Jenny


cards, Catalogues, Stampin' Up!, Videos

WATCH IT WEDNESDAY #12 – USING THE 3D TEXTURED IMPRESSIONS EMBOSSING FOLDERS!

For this week’s WATCH IT WEDNESDAY #12 I came across this video from Stampin’ Up! using the 3D Textured Impressions Embossing Folders.  There are a number of these in the catalogue along with the regular Embossing Folders.

There are a couple of tips to remember when using the 3D ones that I thought it might be good to share this with you to help you get a deeper, crisper impression on your card.  I hope you find this helpful.

I don’t know about you but I always forget to mist my card when I am using these folders.

Now this video used the lovely Layered Leaves but this week two of the 3D folders are on special for Extravaganza week.  These are the Cable Knit and the Hexagons 3D.

The Cable Knit folder is 30% off this week at $11.90.  See that in store->HERE.

The Hexagons Folder is 10% off at $14.40.  See that in store -> HERE.

Shop for these or any other of the products reduced during Extravaganza week from 20th – 27th November.  See all the details in the previous blog post.

Thanks for stopping by,

Jenny

cards, Catalogues, Classes, Stampin' Up!, Tutorials, Videos

WATCH IT WEDNESDAY #11 – COLOURING BEAUTIFUL YOU WITH THE BLENDS!

I have been sharing a lot of projects using the Stampin’ Blends.  I am really enjoying them.  So easy to use and I am feeling like an artist!!!  Well, maybe I have a little way to go.  A few weeks ago I played with the Blends with the Beautiful You set.  So I thought I would show you these in Watch It Wednesday #11.

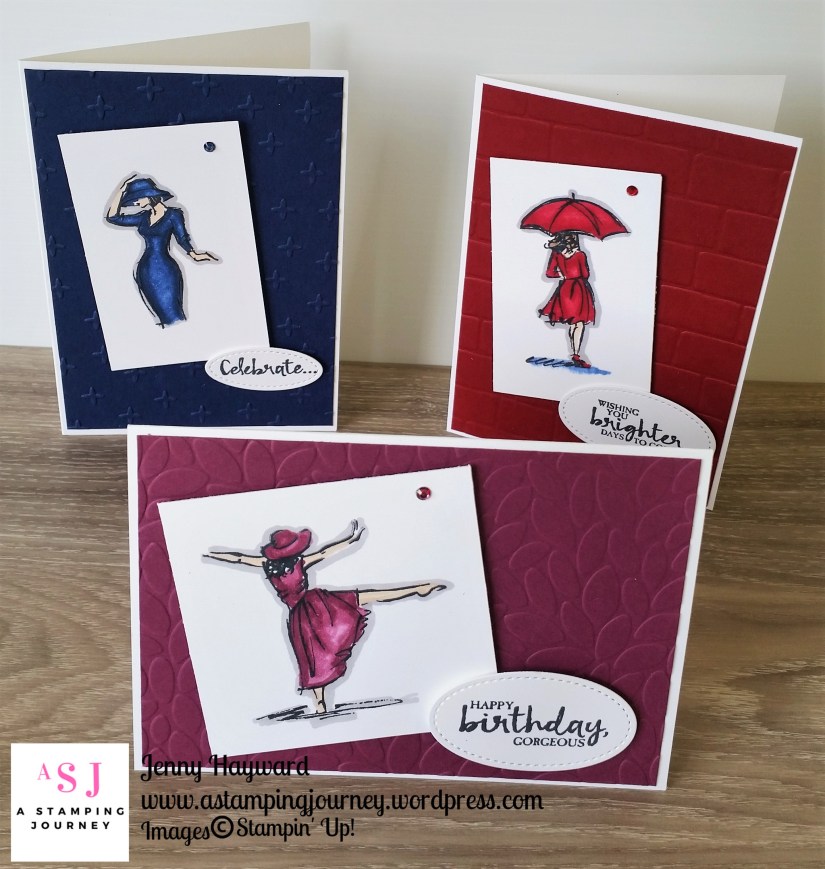
Here are the 3 cards but I will show you them individually further below.

I did colour these a few weeks ago and I have worked on my colouring a bit more but you might find it helpful.

Here is the video for your enjoyment.

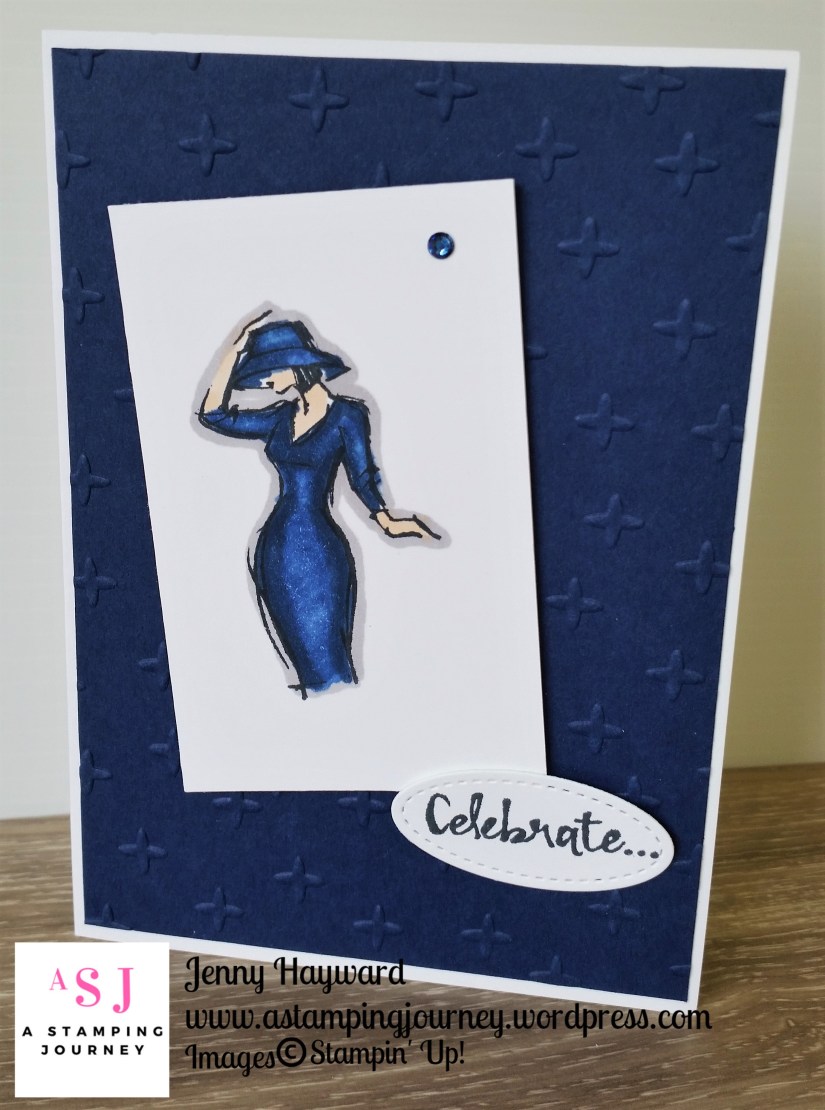
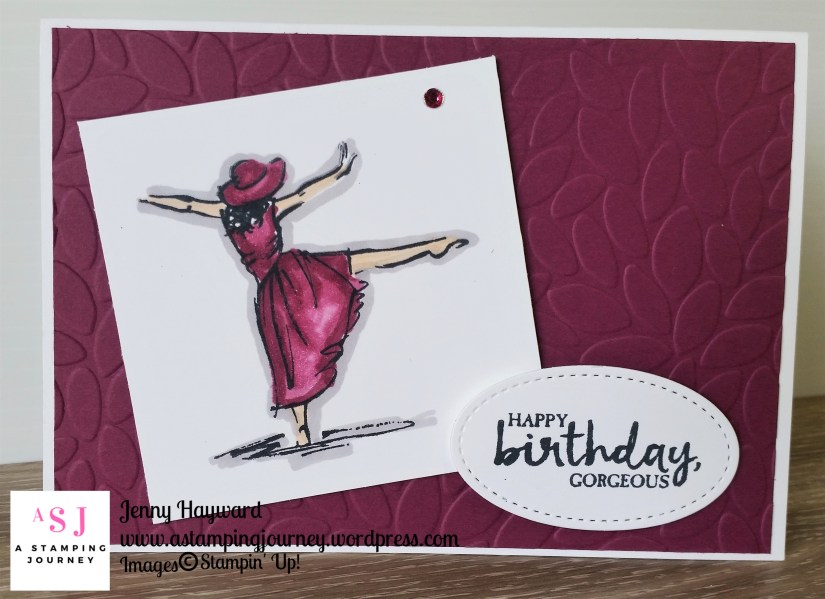
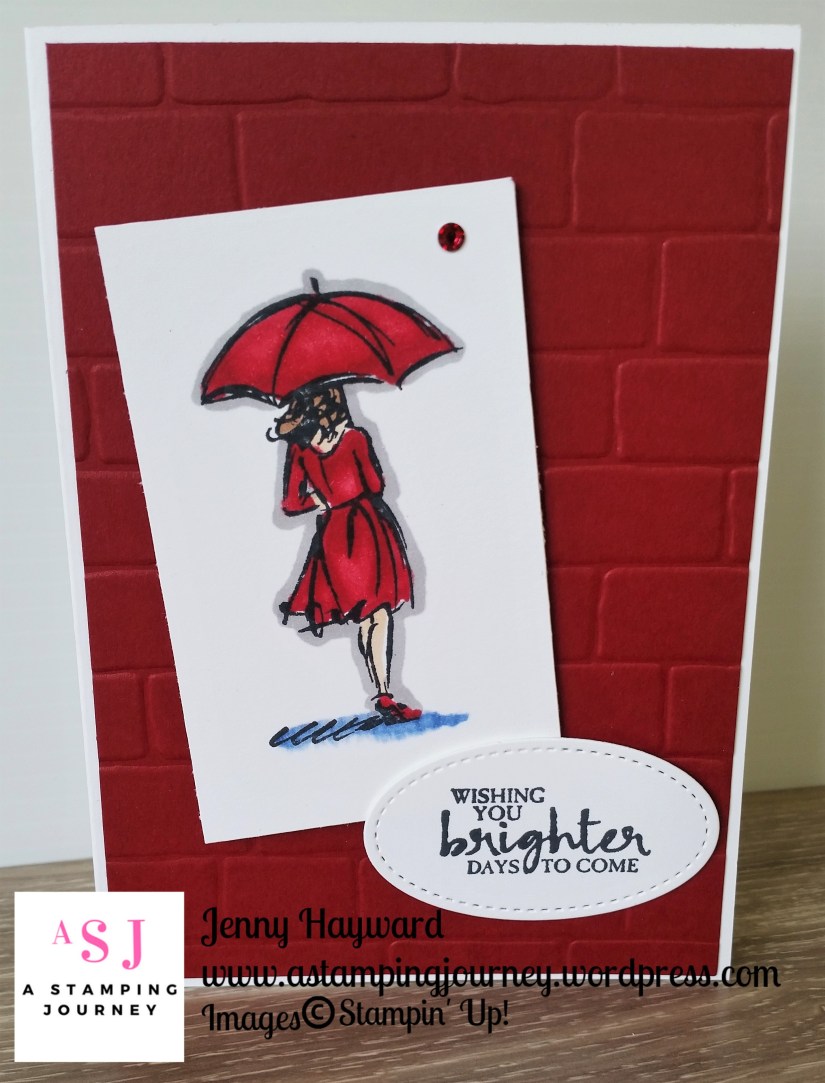
Here are each of the cards so you can see them close-up.  I have kept the layout similar but created them in different colours and changed the Embossing Folders.

Night of Navy with the Sparkle Embossing Folder.

Rich Razzleberry with the Petal Burst Folder.

Cherry Cobbler with the Brick Wall Embossing Folder.

Did you notice the Rhinestones?? You can colour them with the Blends too.

So I hope you might have a play with them.  They are really not hard at all to use and I love the effect with them.

Thanks for stopping by,

Jenny

Catalogues, Personal Ramblings, Stampin' Up!, Techniques, Videos

WATCH IT WEDNESDAY #10 – KEEPING THOSE LITTLE DIES SAFE!

I have a very short video to share with you today for this week’s edition of WATCH IT WEDNESDAY #10.  I don’t know about you but sometimes those tiny little dies gets buried or dropped on the floor and you spend so long looking for them.  Well! I saw an idea somewhere quite a few months ago and just recently introduced this in the classroom.  I have to say this has been fantastic!! No more lost dies! Everyone loves the idea too when they come so I thought I would share it with you.

I hope you found that useful and you might be able to adapt it to your classroom or your own craft room.

If you want to keep up with the videos I share then be sure to subscribe to my Youtube channel -> HERE and if you haven’t already then be sure to Subscribe to my blog here (click on the link in the right hand column) to keep updated.

Thanks for visiting today,

Jenny


Catalogues, Stampin' Up!, Techniques, Videos

THE STAMPIN’ BLENDS ARE HERE!! WATCH THEM NOW! WHY NOT JOIN THE BLENDS CLUB TOO!

The day has finally arrived.  The Stampin’ Blends are here now for you to order.  I think you will love them.  They are so easy to use and to blend.  You will feel like an artist!!

Just a few features of them:

  • There are 12 colours of Markers available.
  • In each colour there are 2 colour shades – a Dark and a Light colour.  They are available as single pens or as a Combo pack with the 2 colour shades.
  • Colours available are Bermuda Bay, Calypso Coral, Cherry Cobbler, Crumb Cake, Daffodil Delight, Night of Navy, Old Olive, Pink Pirouette, Pool Party, Pumpkin Pie, Rich Razzleberry, Smoky Slate.
  • In addition there is a Bronze marker, Ivory marker and also the Color Lifter.
  • Each marker has a Brush tip end and a Bullet tip end.  These are marked on the outside of the barrel.
  • These markers are not refillable.
  • Stamp the images you intend to colour with Memento Black Ink.

For an individual marker they are $7.75 AUS.  For the Combo pack they are $15.50 AUS.

The Collection of 26 colours – Dark and Light of the 12 colours, plus the Bronze and Ivory plus the Color Lifter is $209.75 AUS.  **This month receive 2 Clear Cases with inserts to hold them FREE to store your markers in when you buy the full Collection. (see the cases down below).

Do you want to see how they work??  This is very timely for a Wednesday and so it is this week’s WATCH IT WEDNESDAY #9. Let’s have a close up look at the Stampin’ Blends.

NB: If you get this post via email updates and the video is not showing, please head to my blog and view it there.

So what do you think?  Can you wait to get these?? They are available in my store now -> HERE  Please use the Host Code this week: EJJVSDME

OR you can order them by contacting me directly.

OR Why not join my BLENDS CLUB!

Here are the details.

Each month for 3 months receive 4 Combo Colour Markers and 1 Single Marker (either the Ivory, Bronze, or Color Lifter).

**Receive 2 Clear Cases with inserts in to hold them Free the first month to store your Markers.             

Total Includes Shipping and Handling      $73.25 (Local)  or  $75.70 (Non-Local)

The Clear Cases include and insert and front cover to store your Markers securely.


Jenny


Stampin' Up!, Techniques, Videos

WATCH IT WEDNESDAY #9 – THOSE HIDDEN STITCHED SHAPE FRAMELITS!

For today’s episode of Watch It Wednesday I want to share a  product that sometimes gets missed in the catalogue.  Every time I use these in class my class members are amazed.  Where had these been hiding all the time?? So I wondered if you had really discovered these yourself.

Today let’s look at the Stitched Shapes Framelits.

I think these Framelits are great and I do use them all the time.  They give an extra dimension around your shape without being too fussy.  What do you think of them?  You need them in your stamping supplies for sure.

Here are a couple of cards that I have used them on.

Thanks for visiting.

Jenny

Stampin' Up!, Techniques, Videos

WATCH IT WEDNESDAY #8 – WHO KNEW YOU COULD EMBOSS WITH WATER!

I have been heat embossing today.   I always love heat embossing.  It’s what first drew me in to stamping.  I love the magic as the powder melts and sets.

I came across this video today from Stampin’ Up!.  I was so surprised that you can actually use water when you heat emboss.  It looks so cool! You will have to check the video out.  There are some other cool tips in the video too so be sure to watch it.

WATCH IT WEDNESDAY #8 – HEAT EMBOSSING WITH A DIFFERENCE.

Now when I spill water on my card I can just heat emboss them right!   🙂 🙂 🙂

I hope you enjoyed these tips. I thought they were so cool and I just had to share them with you.

Thanks for stopping by.

Why not drop a comment and tell me what you think of these videos I am sharing and maybe some suggestions of what you would like to see.

Have a great day,

Jenny

Catalogues, Stampin' Up!, Videos

WATCH IT WEDNESDAY #7 – I’M EXCITED TO SHOW YOU THESE!

I have something exciting to share with you today for WATCH IT WEDNESDAY #7.  I was going to hold off for a couple of weeks before I shared it …but I can’t wait!!!

There is something new coming to Stampin’ Up! and Demonstrators can now buy them.  I received them yesterday and unpacked them.  So I had to take a video as I unveiled them.  So today we meet the Stampin’ Blends. 

In the video I said I used paper but it was actually Whisper White cardstock.  Just remember to use Memento Black ink when using these markers as they are alcohol based markers. Also, to have some scrap paper underneath your work as the ink does bleed through to the back but that’s ok.

I was very impressed with them when I played with them – and kind of excited if you could gather that. At the moment there is no official date for them to be available for customers.  So you will need to sit tight and wait.  I will let you know when I know.   As demonstrators we can order them until October 15th.  Just a tip:  If you are impatient to wait, then you can get them as part of your kit when you join the family until October 15.  Something to think about… Ask me for more info.

I hope you enjoyed this WATCH IT WEDNESDAY episode.  I have been playing around with them this afternoon so hopefully I will actually show you some finished  projects soon.

Have a great day.

Jenny