3D projects, cards, Catalogues, Challenges, Stampin' Up!

A FUN CAROUSEL BIRTHDAY CARD FOR COLOUR INKSPIRATIONS #07 CHALLENGE!

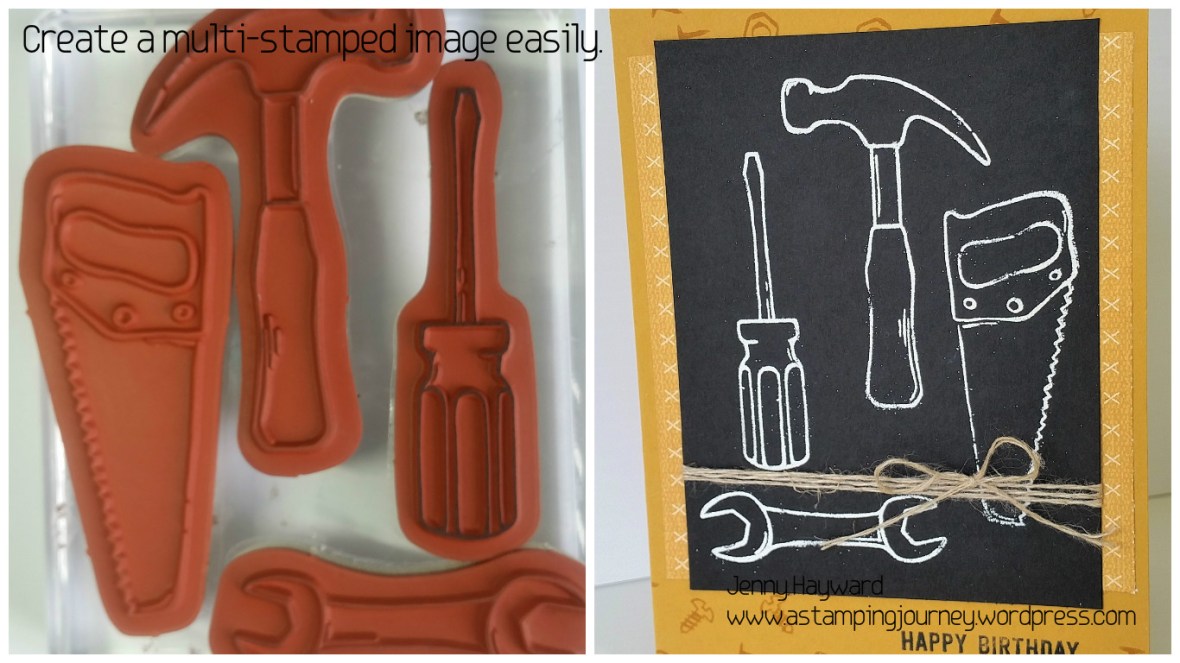
I have wanted to make a Bendi card for some time.  I had actually forgotten about it until I saw it on Splitcoaststampers last week.  I thought this would be a great idea for this week’s Colour Inkspirations Challenge #07 and Carousel Birthday set might just work well for it. Why not use it too when it will be leaving us very soon. Boo Hoo!

So here are the colours for this week.

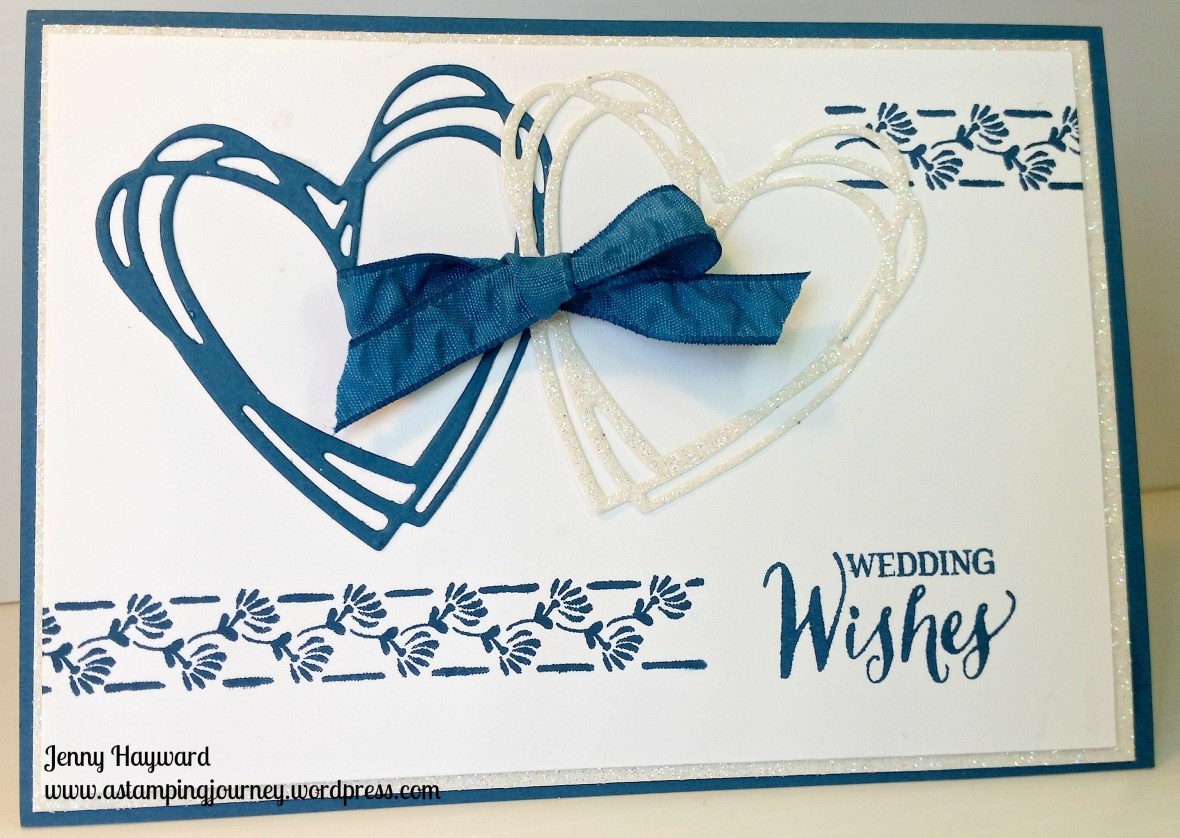
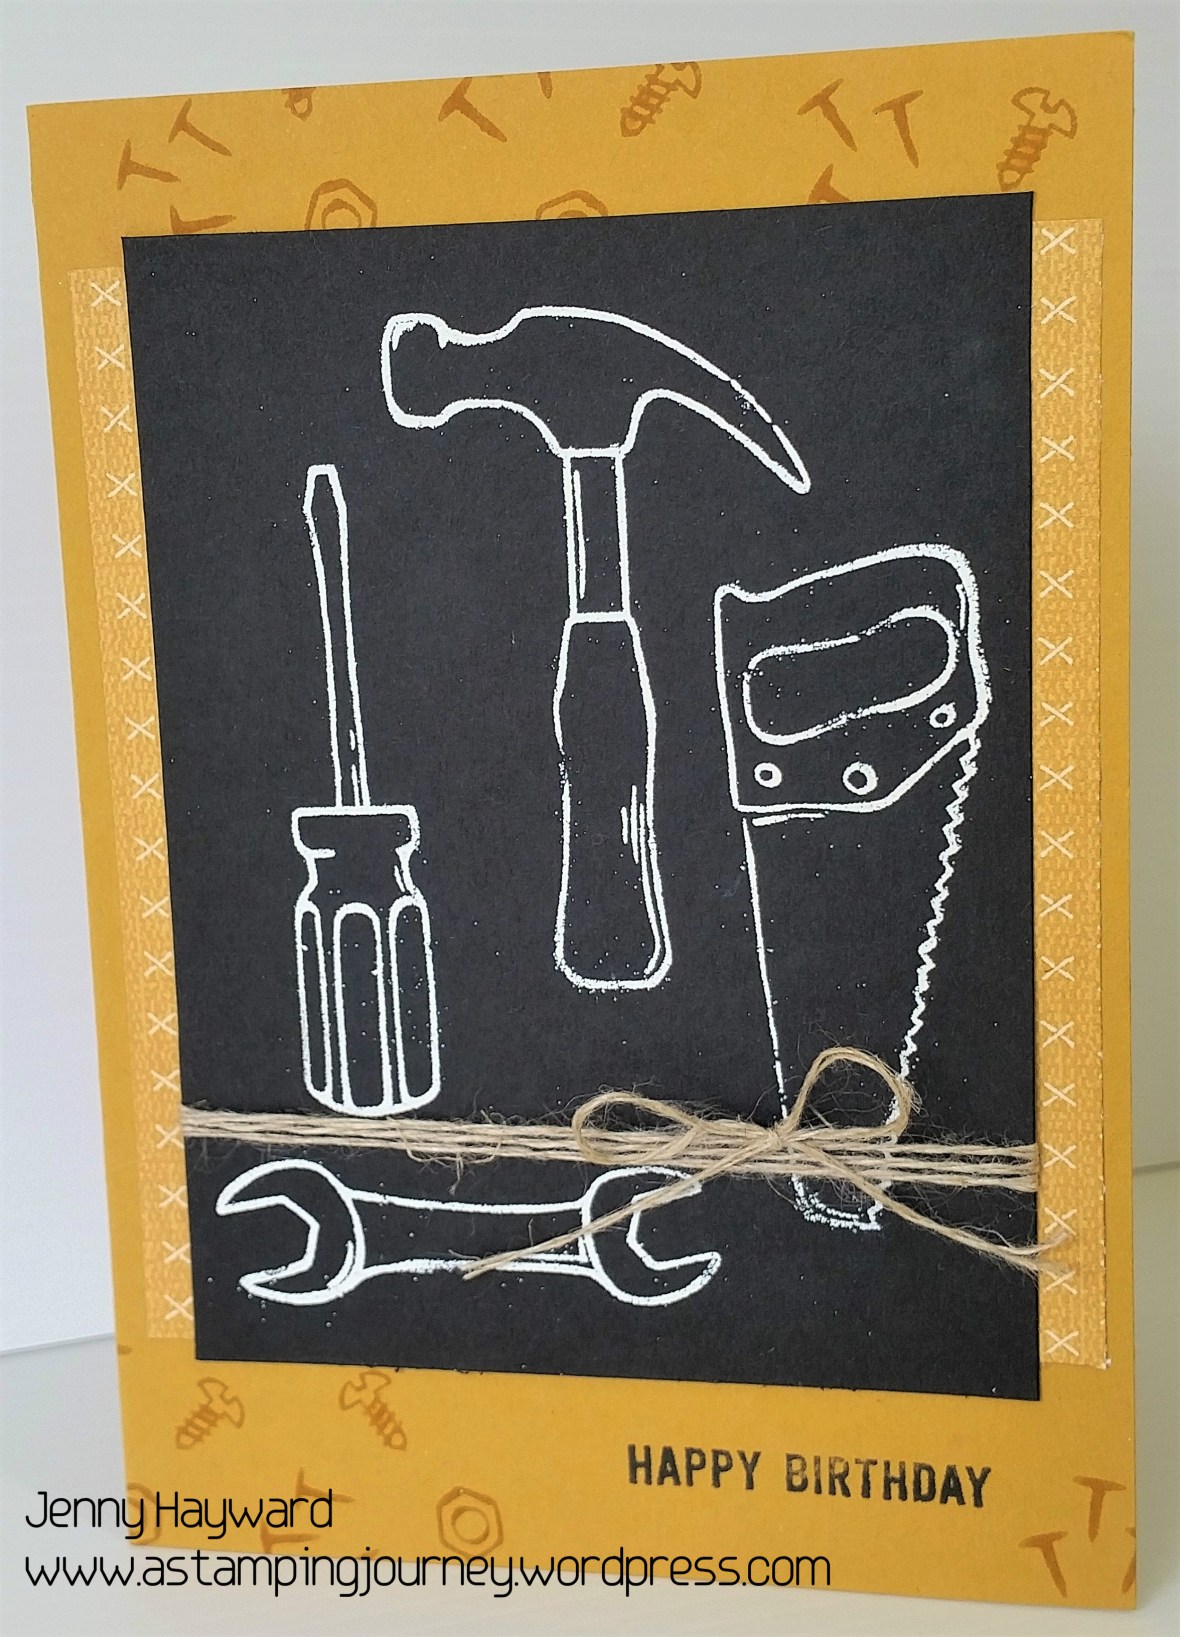
And here is my card…

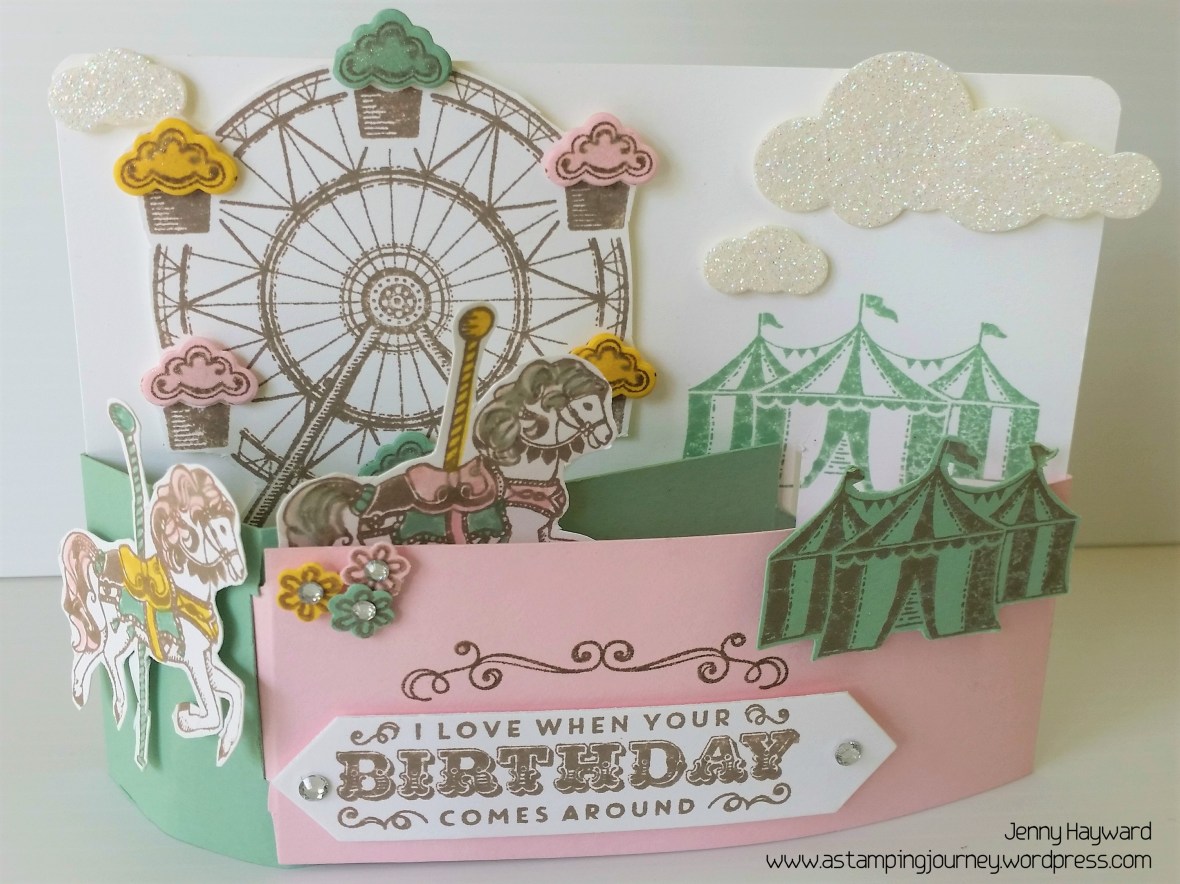
Can’t you just hear that Carnival music playing. 🙂

If you would like to make your own Bendi card then you can find the tutorial HERE on Splitcoaststampers.com.

Just a tip with the tutorial:  I spent a lot of time stressing about where to line the slits up and how long the tabs should be.  Don’t worry too much about it though.  If you mark the pencil lines as it say on the tutorial. Mark the tabs in first that will slide in your slits. Make them how wide or the angle you want then cut the tabs.  Then line up the tabs on the pencil line where the slit is to be and mark the widest part of the tab in pencil on the line.  I then cut the slits with my Stampin’ Trimmer.

Have fun making your own,

Jenny

Get your Carousel Birthday set in store ->HERE while it is still available.  Wood Mount $47.00 AUS  Clear Mount $33.00  AUS

cards

FLORAL PHRASES WEDDING CARD!

Last weekend I had a wedding to go to.  It was a lovely occasion and special to see.  I thought I would show you the card.

The base card is Dapper Denim.  You might be able to see the sparkling card mat.  I have layered the stamped white piece on to Dazzling Diamonds Glimmer Paper.  Just a tip:  Save your Glimmer paper and cut a rectangle from the centre of the Glimmer Paper to use on another project.  You have the frame shape to use for this project. On the white card I stamped the floral strips and layered on 2 hearts from the Sunshine Wishes Thinlits.  One heart is from Dapper Denim and the other heart from Dazzling Diamonds Glimmer Paper.  The sentiment is from Rose Wonder.

I stamped the inside too.  (The photos seems a bit washed out sorry!).

I stamped the floral strip again and this sentiment is from Rose Wonder also.  This is a great set for weddings.

To finish the card I added a bow with the Dapper Denim Ruched Ribbon.

Thanks for stopping by,

Jenny

3D projects, Classes, Tutorials

CLEAR BUNNY BOX FOR EASTER!

Easter is this weekend. Are you all sorted?? I had these little Lindt chocolate bunnies left over from class last week and wanted to make a special box for them.  I will show you what I created and I have the tutorial below to make your own.

It’s a little shallow box with a clear Acetate lid on top.  I realised one of the bunnies was a bit squashed but hey! I went with it still!! 🙂

TO MAKE YOUR OWN CLEAR BUNNY BOX

I have included Metric and Imperial but please check the Imperial measurements first. 🙂

Base:

15.4cm x 5.4cm. (6 1/8″ x 2 1/8).

Score at 1.2cm (1/2″) on all 4 sides.

Cut up on the small score lines on opposite ends.  Fold on all the scored lines. Add adhesive.  I used Fast Fuse.  Assemble your box.

Lid: 

*For Imperial measurements please test them first.

17cm x 14cm (6 3/4″ x 5 1/2″)

On the 17cm (6 3/4″) side score at 2cm and 15cm (1 3/16″and 5 7/8″)

On the 14cm side (5 1/2″) side score at  5.5cm and 8.5cm (2 3/16″ and 3 3/8″).

*Apologies for the photo quality.  It is a bit hard with the lighting and the shiny acetate.

Cut up on the small score lines on each side.  Fold on the score lines.  The acetate is hard to fold over but run along the folded line with your bone folder to press it down. Add your adhesive to the small tab at the side and down one of the side tabs.  Adhere together to form a box.

Hope that is clear?? Decorate as you like.

I wrapped around some Sweet Sugarplum Ruched ribbon, then decorated it with the diecut flower with the Stylish Stems Framelits.  The sentiment is from the Little Cuties set, cut with the Stitches Shapes Framelits and a small Layering Ovals Framelits.  I actually had these little “bits” on my desk from a project I didn’t end up using so that worked well.

I hope you like the cute box?? There is just enough time to make your own.

Jenny

cards, Challenges

TOP 5 PICK FOR COLOUR INKSPIRATIONS #06!

I am a little excited!  I have just been chosen as a TOP 5 Pick for this past week’s Colour INKspirations Challenge #06.  This was for my Dragonfly Dreaming card I showed recently. It’s nice to know they liked my card.  I can now proudly display the badge on my blog. 🙂

This was my card if you didn’t see it.

I am really enjoying taking part in these challenges.  It has helped me think about my stamping a bit more and to give things a go.  Life is crazy, busy but it has been good to take some time out and stamp something for myself.

If you want to join in too then head over to the Facebook Group Page HERE and check it out.

Wishing you a happy day/night.

Jenny

Catalogues, Stampin' Up!

THE 2016 STAMPIN’ UP! CATALOGUE RETIREMENT LIST HAS BEEN ANNOUNCED!

It’s that time of year where we start saying Good-Bye to many of our favourites from the 2016/17 Stampin’ Up! Catalogue.  You can view it now HERE.

Some items have been discounted.  They are available until 31st May or while stocks last.  I am particularly sad about some things going.  Gorgeous Grunge and Joyful Nativity.  The Butterfly Punches and Papillion Potpourri.  And what will I do without the Adhesive Remover!!

Don’t wait a minute to order any of these items as many sell out very quickly.

TO ORDER:

Order by contacting me directly

OR

Order Online at the above link.  Host Code for this week is KR2QZH2T

Jenny

cards, Catalogues, Challenges, Techniques

DRAGONFLY DREAMING FOR A COLOUR CHALLENGE!

I didn’t get to the Stampin’ Up! Onstage event this weekend for a number of reasons which was sad BUT I did get to hang out with my beautiful girl for Brunch and a movie and we had a lovely family wedding yesterday AND as a bonus I got to stamp today.  So while I missed all my stamping buddies and all the sneak peek into the new catalogue I had a special weekend. 🙂

This Colour INKspirations Colour challenge has been running for the last 3 weeks but I haven’t had a chance to look at it and to be honest I was a bit daunted as to how to put all those colours together!

This week’s colours for Challenge #06 were Night of Navy, Pool Party, Calypso Coral and Gold.  Yep! I would not normally put those colours together.

Here is what came together today.

It’s hard to tell by the photo but the front of the Night of Navy base card is actually cut and the sponged strip is set behind the cut section rather than layering it on top. To do that, I cut down on the left side of the Night of Navy card to leave a small border. I then adhered the sponged panel behind that on the left. Then with the portion of card I had cut off I cut it down to about 3cm (just over an inch). I adhered that over the sponged piece on the right. I hope that makes sense?? 🙂

To Create the Sponged Panel:

On a piece of Whisper White firstly wipe over the piece with the Embossing Buddy.  Stamp your dragonfly from Dragonfly Dreams with Versamark and then add Clear Embossing Powder and heat with your Heat Tool.  Using sponges and starting at the bottom sponge over Night of Navy ink, then Pool Party in the middle and Calypso Coral at the top.  Ink up the “spots” from Timeless Textures with Versamark and then add Gold Embossing Powder and Heat.  

After adhering the piece to your card as described above stamp the “dots” from Dragonfly Dreams in Night of Navy ink down the right hand side of the card base.  On a strip of Whisper White stamp the sentiment from Dragonfly Dreams in Versamark and then Gold Embossing Powder.  Add some loops of Gold Thread behind the sentiment and add that to your card with Dimensionals.  Cut some small dragonflies from Gold Foil and add 3 to your card.

I actually didn’t think I would get a card done for this challenge so that was a nice accomplishment for the day.  Hope you like it.

Have a great week,

Jenny


cards, Masculine, Stampin' Up!, Techniques, Tutorials

QUICK MULTI STAMPING WITH YOUR STAMPS!

Last post I showed you a card using the Nailed It set and I used the stamps to create a background on your card.  You can go back to the last post to see that if you like but here is the card again.

Now when creating this card I didn’t stamp each tool individually.  I couldn’t get them so evenly spaced!  I thought I would share with you today how I did it quickly and easily.

Rather than ink and stamp each one, add your stamps to one large block and then you can stamp that multiple times over your card.   See below what I mean.

These all fit on the clear block ‘E’.  You can try this with any stampset and make life so much easier on yourself. 🙂

While I had these assembled on the block I created this card.

The stamps were inked in Versarmark and then heat embossed with White Embossing Powder on to black card.  Don’t forget to wipe over with your embossing buddy.  While I did do that I still picked up a few stray specks of the embossing but it doesn’t matter right. 🙂

Some Linen Thread was wrapped around the card several times and then I added some strips of the Urban Underground Specialty Designer Series Paper to the back of the black card. Before adhering it to the Delightful Dijon base card stamp your screws, bolt and nails with Delightful Dijon ink.  For this I also added all those little stamps to one block to stamp.  The sentiment from the Confetti Celebration stamp set is stamped in Memento black. 

The layout of this card was from Freshly Made Sketches #278.

I have just created a little visual for you which I will add to Pinterest.

Thanks for stopping by,

Jenny


cards, Masculine, Stampin' Up!

TOOLS AND URBAN UNDERGROUND!

I started sharing some cards with the Nailed It set a few weeks ago and then got in to Sale-A-Bration so I thought it was time to revisit this set again.  I have a couple of cards for you and some tricks.

This card was CASED from Pinterest.  It really is a simple card but you don’t need complicated right and the boys usually don’t care anyway. 😉

The tools were stamped onto the Smoky Slate Background with Smoky Slate ink.  Quite evenly mind you.  I will share a trick to that in the next  post.

I cut a strip of the Urban Underground Designer Series Paper and cut a banner with scissors.  This piece is too wide to fit in the Banner Triple Punch. I wrapped around some Black Baker’s Twine. (You can have bows on boy’s cards!). Then punch the black card with the Best Badge Punch.  The No. 1 is stamped in black ink on to white card and punched out.  This is from the set ‘Badges and Banners’. They were raised up with Dimensionals.  To finish I added a star from the Urban Underground Embellishments Pack.

Stay tuned for the next post with this cool set and a tip for you.

Jenny

3D projects, Classes, Stampin' Up!

EASTER GIFT CLASS THIS FRIDAY!

Easter is less than 2 weeks.   Yikes! Better get some gift packaging ready.

Class this Friday will help you get some sorted.  Come along if you are in the Wollongong area.

We will be making a gift box ready to fill, a treat holder which includes a mini Lindt bunny and also 2 tags that you can add to your own store-bought Easter treats.

Here are the details.

Come and join us.
When:
Friday 7th April 10am or 7pm
Cost: $20.  Includes all materials and mini Lindt Bunny.
Please RSVP: Thursday 6th April.

Let me know ASAP to reserve your seat.

Jenny

cards, Catalogues, Sale-A-Bration, Stampin' Up!

FAREWELL AVANT GARDEN!

I have my last Sale-A-Bration class on tonight.  I needed 3 cards.  Two of them I already had from past classes but I needed one more card.  I have been a little time poor this week with a few things going on so I headed to Pinterest – and that’s OK. 🙂

I wanted to showcase Avant Garden one more time and found THIS card by Lyssa on songofmyheartstampers.com  It is such a pretty card.  I think I am loving Sweet Sugarplum lately.

So I CASED this for the class tonight.

So farewell Sale-A-Bration 2017.  You have been fun!

Have a great weekend,

Jenny