Catalogues, Stampin' Up!

ONE DAY LEFT FOR HOLIDAY CATALOGUE AND CLOSE-OUT SALE!

yearendcloseout_shareables_eng_1

Time is running out to grab those retiring items from the Holiday Catalogue and get yourself some bargains in the Close-out Sale.  They end tomorrow 3rd January.  You might have some Christmas spending money???

Check them all out HERE on my store. You can order directly there or contact me… BUT please,  don’t come to Wednesday and kick yourself for not getting them.  If you want it NOW, then get it.  🙂

If you are ordering Online please use the Host Code ZTRGFCH2

Jenny

2 Days to go for the Occasions Catalogue and Sale-A-Bration to begin.  Woo Hoo!!!

cards, Christmas, Stampin' Up!

FAVOURITE CARDS FOR 2016!

It’s been a big year of creating.  I thought we would take a little recap of some of the favourite cards from this year.  Perhaps you have missed them or would like to see them again. 🙂

If you click on the title of the card you can head directly to that post to find out more details.

Rose Wonder 

sponged rose

Something For Baby

baby blue

Card in a Box for a 2 year old.

image-6111

Swirly Bird Pinwheels  This card amazes me.  It is just a simple funky card that I was playing around with one day with the Swirly Bird set. It has had a huge reaction on Pinterest with it being repinned 5,400 times!!

Pinwheel Swirly Bird

Ombre Detailed Floral Thinlits

20160926_134833-copy

Cookie Cutter z-fold

Z-fold with Cookie Cutter

Cookie Cutter Tag.

I realised I had never posted this tag.  I made this tag the same time I made the Z-Fold card above. It was just a simple tag and I didn’t bother sharing it. I shared it on a group I am on though and someone Pinned it to Pinterest. It has now been repinned 5,700 times!  Sorry you missed out on seeing it. 🙂

star-tag-with-cookie-cutter

Birthday Fiesta Llama.  This guy just makes me smile.  I had to share him again. 🙂

fiesta-birthday

Star of Light Christmas

gold-star

I am looking forward to another exciting year ahead of creating and sharing with you.

Be safe for the New Year.

Jenny

cards, Stampin' Up!, Techniques

BEAUTIFUL YOU WATERCOLOURED!

I have finally  had a chance to play with some new products.  I have been so busy with Christmas and all these new toys have been sitting there looking at me.  The first thing I pulled out was the set ‘Beautiful You’ and the Watercolor Pencils.  I was really keen to give them a try.

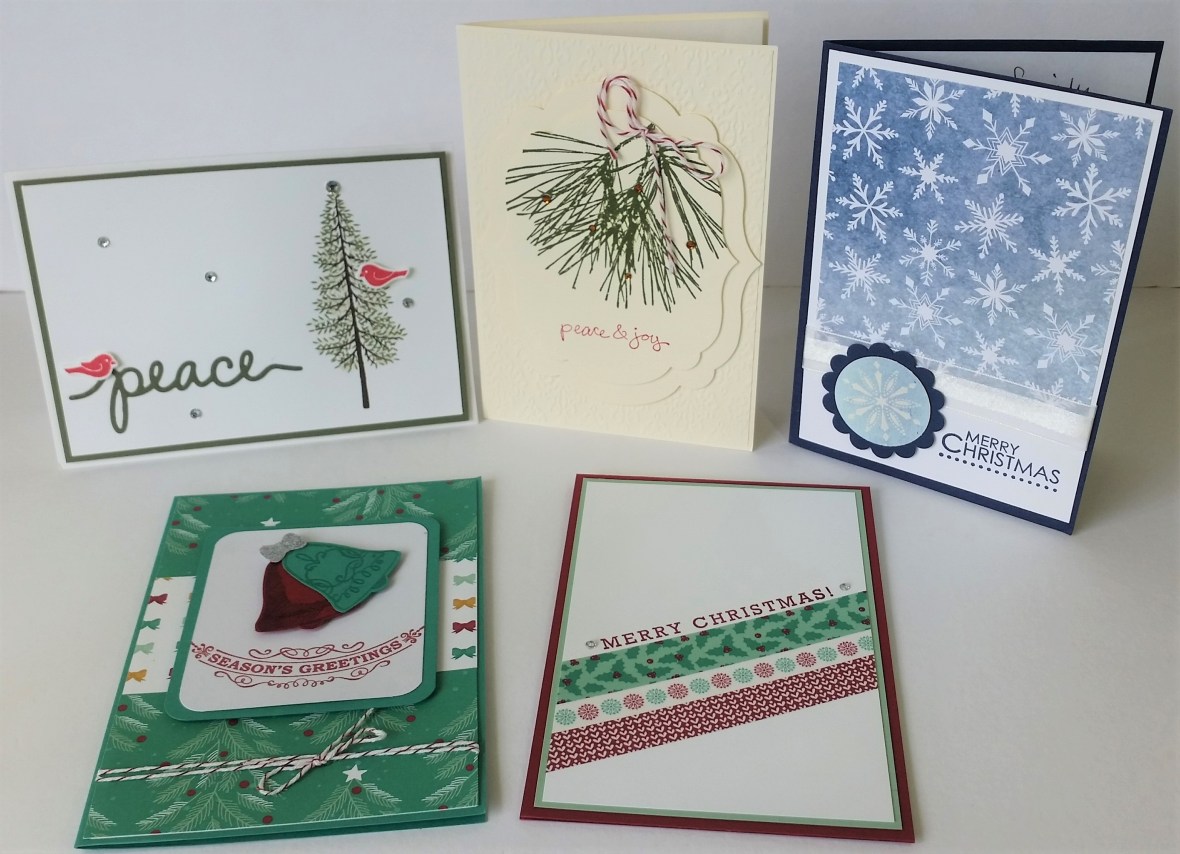
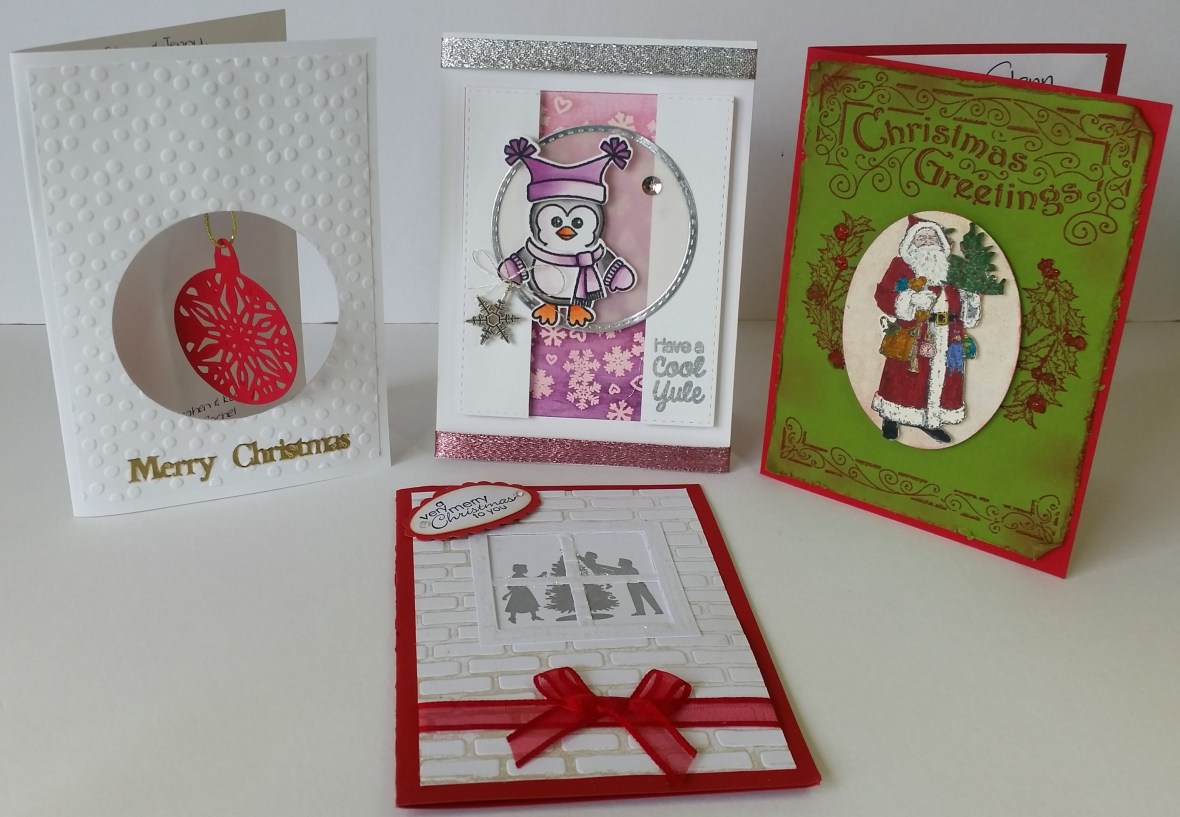
This is the set of cards I created with them.

beautiful-you-_-group

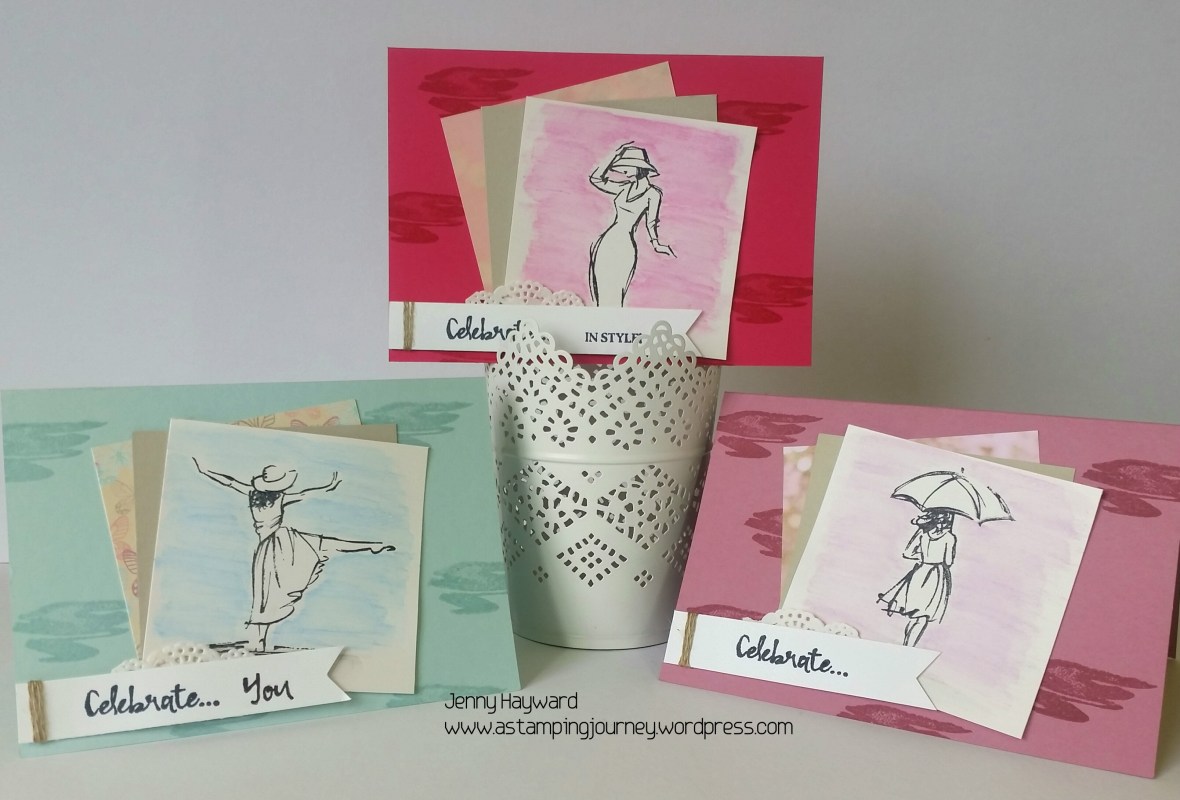
I kept the layout the same with each card.  I will tell you how I created them below.

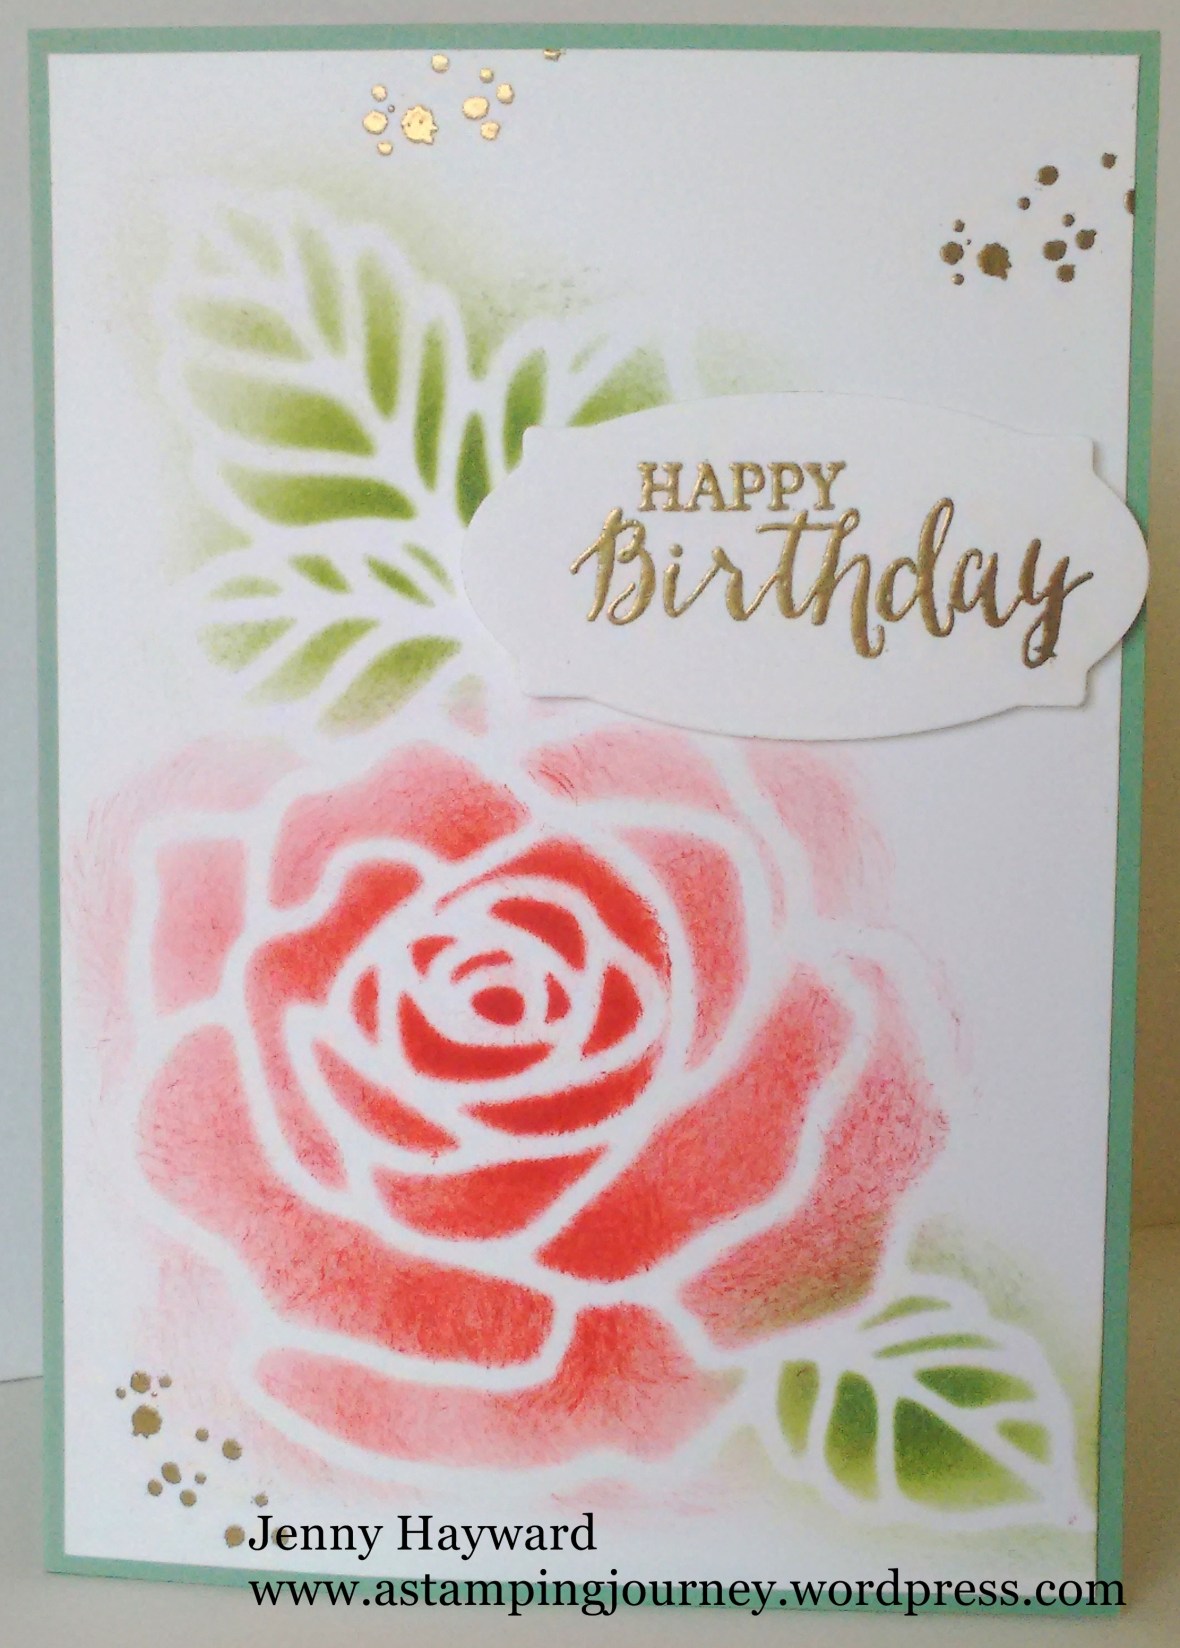
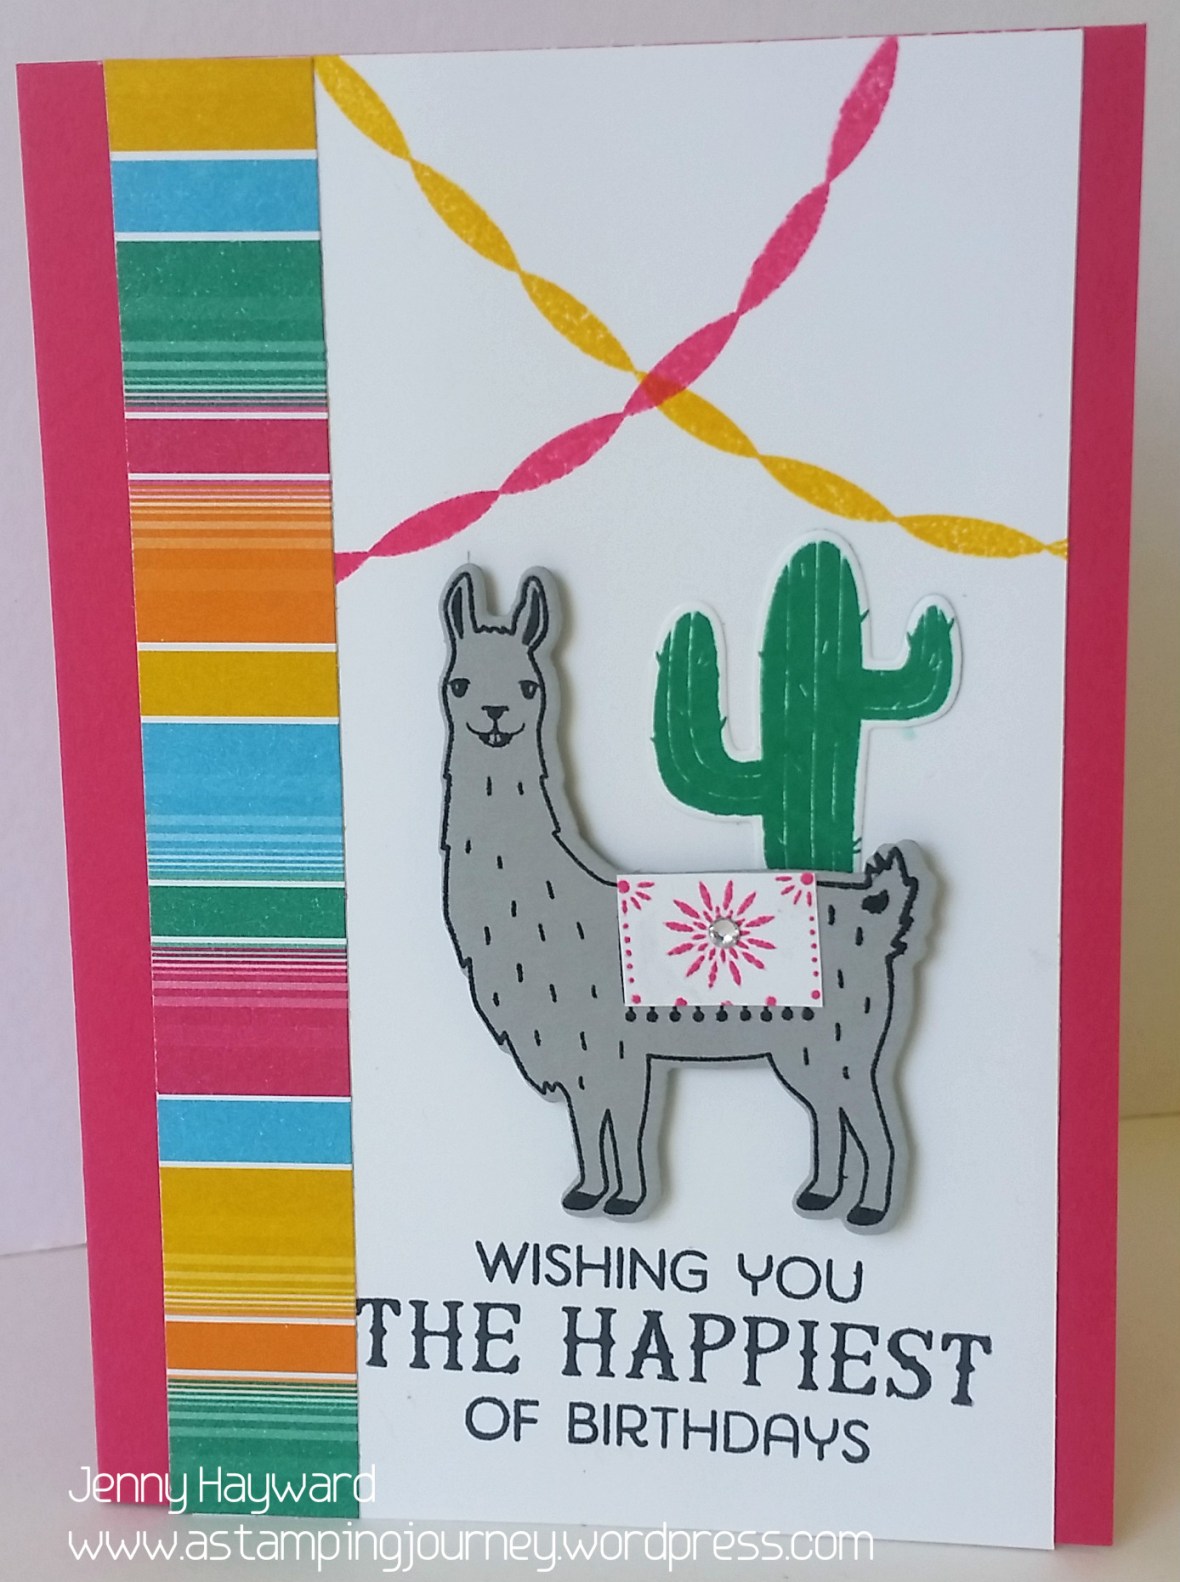
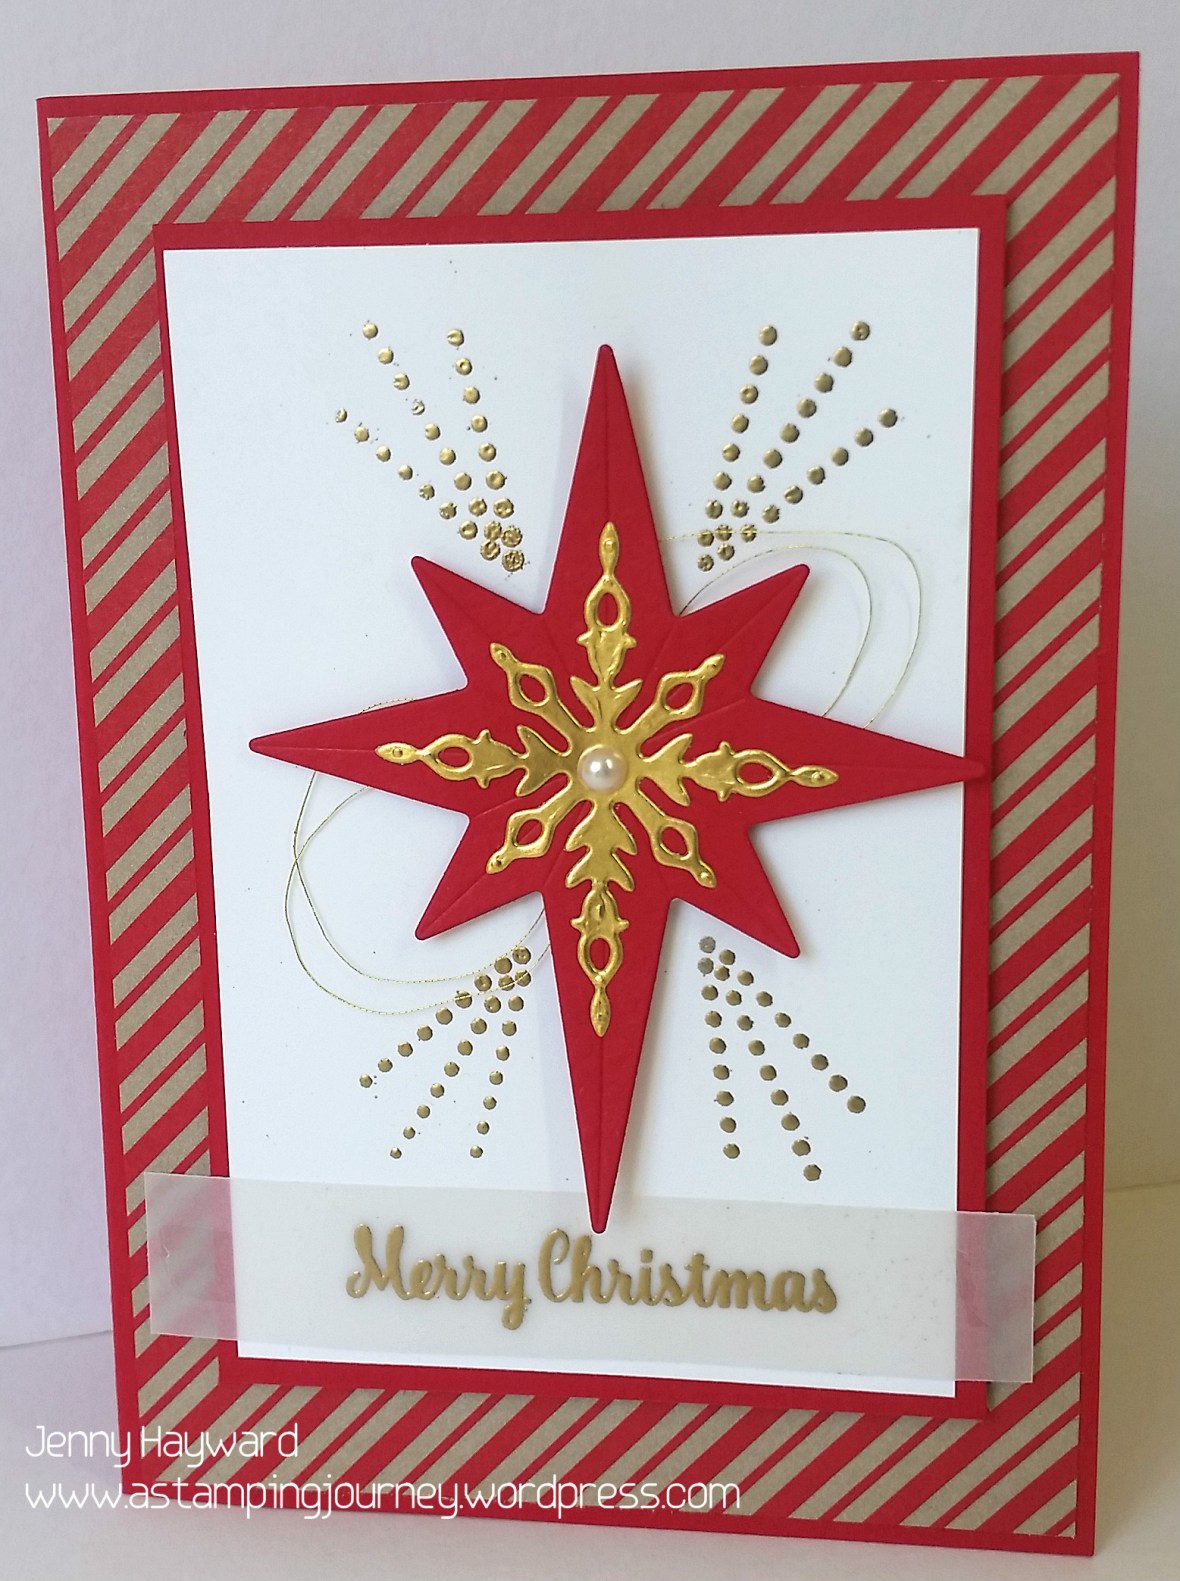
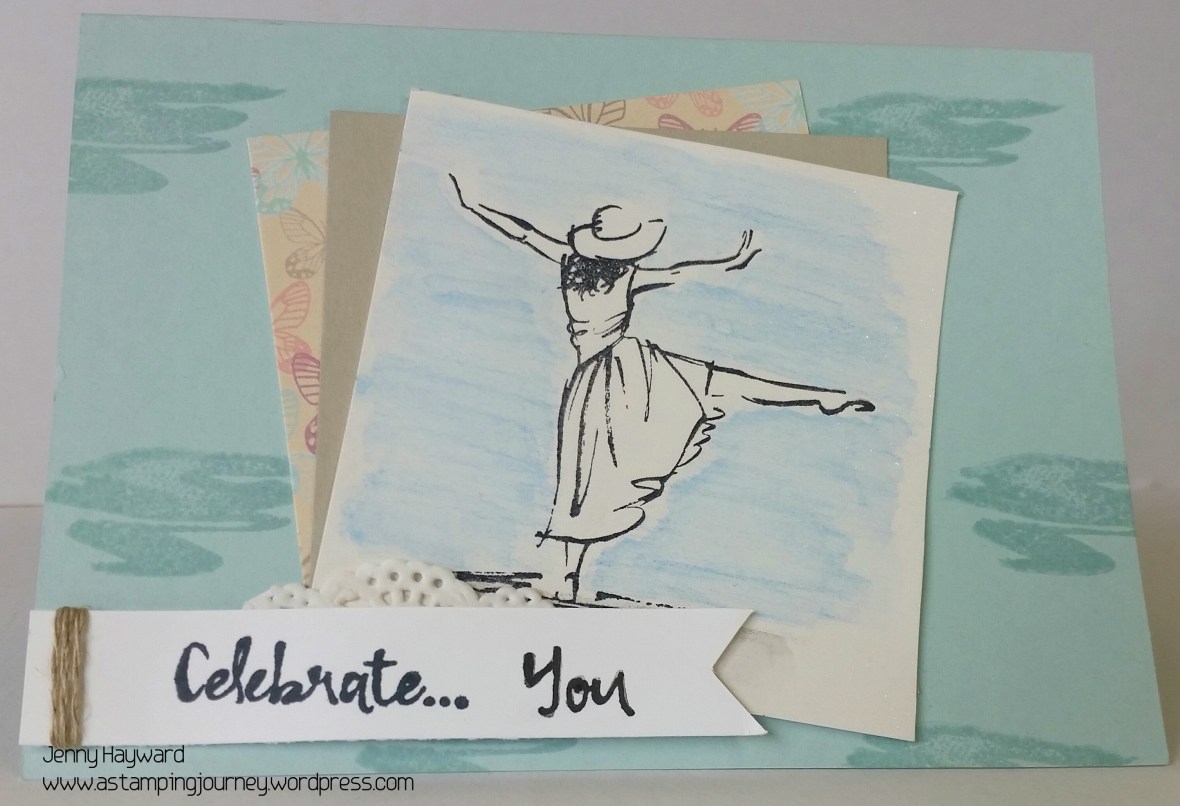
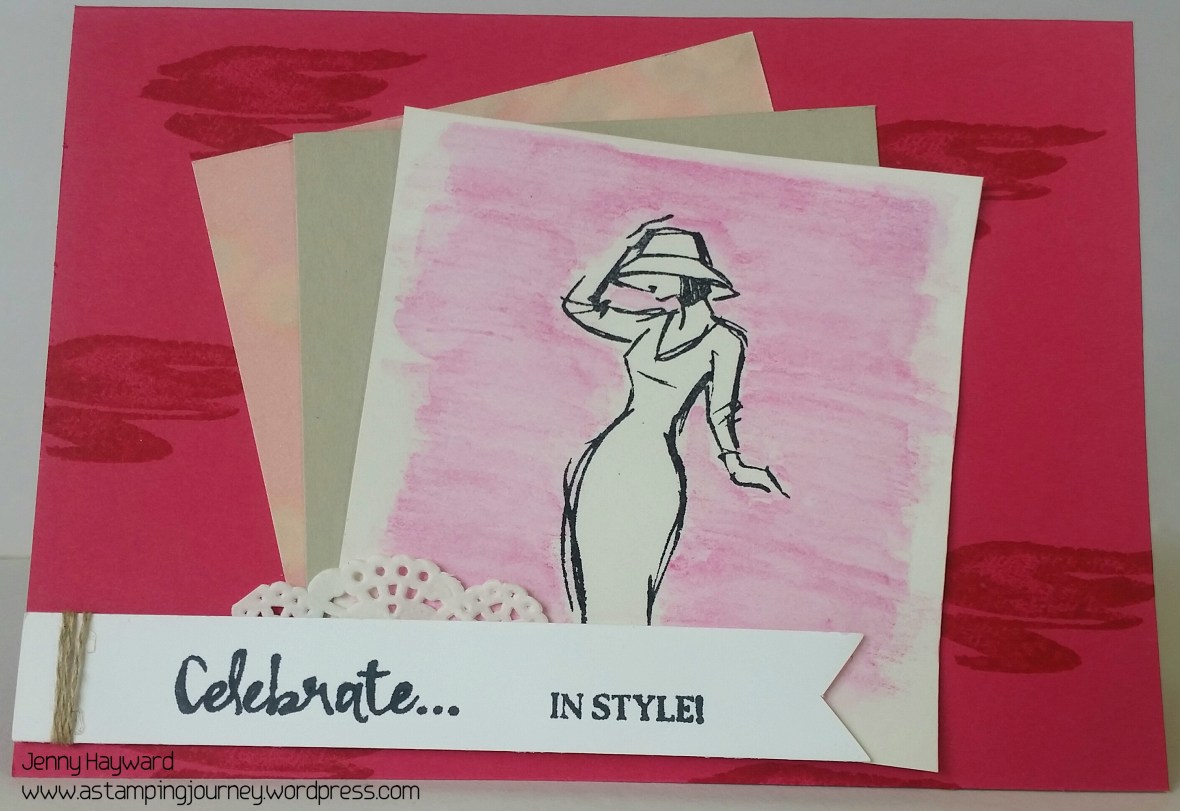
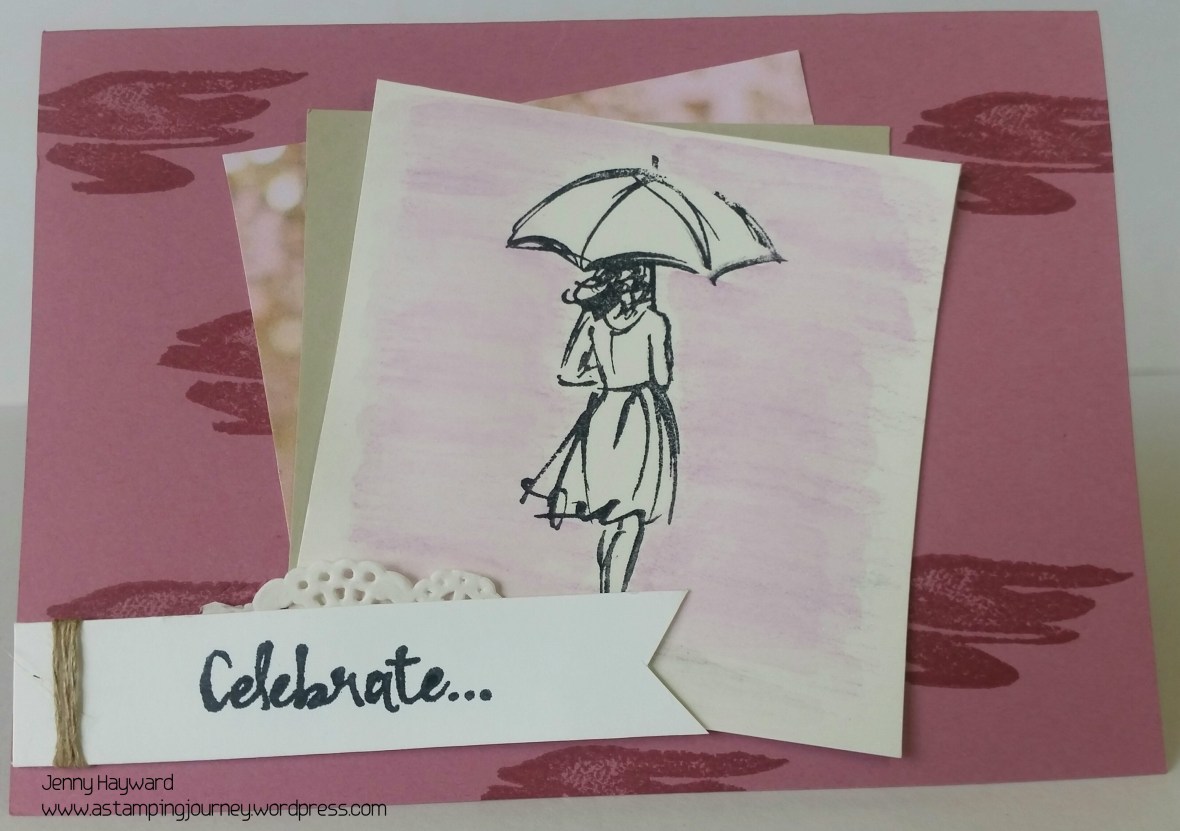
The image:  There are 3 beautiful line images in this set.  I stamped each one on a square of Thick Whisper White using Black Stazon.  It is fine to use this thicker white card to do a little watercolouring.   I coloured around the images with the Watercolor Pencils.  Then using the Aquapainter I gave it a wash over to blend the colours.  These pencils just blend so smoothly.

The Paper squares: I wanted to keep the layout fairly simple.  I layered the image onto squares of Sahara Sand and then on to squares of the ‘Falling In Love’ DSP coming in the Occasions catalogue. This is such gorgeous paper.  Although I seem to have hidden most of it under the squares!!  Each of the squares are the same size measuring 8cm x 8cm (4″x 4″).  I fanned them out before adhering them to the base card.

Assembling the card: The “squiggly” line stamp was stamped over the base card with the co-ordinating ink colour.

The sentiment:  There are some really lovely sentiments in this set.  I used the “celebrate” on each one stamping them on a strip of Whisper White cardstock. One was just using that word.  Then on one card I coloured the “you” on one of the sentiments with the Black Marker and stamped that with the “celebrate”.  That’s the great thing with clear blocks you can line it up closely to where you want it.  If you are unsure eyeing it you could use the stamp-a-ma-jig.

On the other card I inked up the “in style” sentiment and stamped it with the “celebrate”. On each one I snipped the end to flag the end and then wrapped around some Linen Thread several times before adhering  small piece of Paper Doily behind the card strip. Then it was raised up on to the card using Dimensionals.

Here is a close-up of each of the cards for you to see.

Soft Sky

soft-sky-dancer

Melon Mambo

style-girl-in-mambo

Sweet Sugarplum

sweet-sugarplum-girl

Only a few days to go (January 4th) before the Occasions Catalogue goes live. Sale-A-Bration starts to. I can’t wait to play more with these gorgeous products. Have you got your catalogue yet?  If you still need to get your hands on one and you are in Australia then drop me a comment and I will send one your way.

Thanks for stopping by,

Jenny


cards, Christmas, Personal Ramblings, Stampin' Up!

SOME SPECIAL CHRISTMAS CARDS!

I hope you all have had a lovely Christmas??  We received some lovely cards over Christmas both store-bought and hand-made.  I like both let me say. 🙂 I thought I would show you the hand-made cards as it is all about sharing here.  There were some beautiful cards from family and friends.  Maybe they will inspire you.

20161226_145744

20161226_150007

Thanks for those of you who have sent us cards.

Enjoy the rest of the festive season and the New Year celebrations but please keep safe.

Jenny

Christmas, Personal Ramblings

AN AUSSIE MERRY CHRISTMAS TO YOU!

koala

I just wanted to stop by and wish you all a very Happy Christmas.  I hope that it is a time surrounded by all the special people in your lives.  It is a time of celebrating the love, joy and peace of the season.  I know though that for some this is a very hard time of year. So my love and prayers go out with you.  I hope that you do find some love and joy in this season.

Thank you for following along in my creative pursuits over this past year.  I love that you visit me.  I know that I have visitors from all over the world and I thank you for stopping by.  I wish you a very Happy Aussie Christmas.

I look forward to creating and sharing more with you over the coming year.

So to a Happy, Crafty 2017!

Jenny x

3D projects, cards, Catalogues, Christmas, Stampin' Up!

CHRISTMAS GIFT BOX WITH HOME SWEET HOME!

Not a lot of time left to get everything done for Christmas.  If you still need some quick treat boxes and you have the Home Sweet Home Thinlits then I have a very speedy box for you.

christmas-treat-box-_side

christmas-treat-box-_-front

I cut 2 pieces of the house Framelits shape from the Candy Cane Lane DSP.  It was then simply adhered together by folding on the score lines and placing your adhesive on the side tab and the bottom tabs to assemble.  I used Fast Fuse for this as it is strong.  Punch 2 holes in the top section and then you can thread some Real Red Baker’s Twine to close it.

I had a left-over detailed tag in the Merry Tags Framelits cut from Red Glimmer Paper. I could then quickly stamp a ’25’in Real Red from the Merriest Wishes set and I cut that out along with a circle from Early Espresso.  These were raised up off the box with Dimensionals.

You could easily make a few of these  in no time.  They might make nice place settings at your Christmas Dinner Table.

Jenny

3D projects, cards, Christmas, Stampin' Up!

STAMPIN’ UP! CHRISTMAS GIFT CARDS!

How is the Christmas shopping going?  Are you stuck for ideas for some special people OR are others unsure what to get you?? Maybe a Stampin’ Up! Gift Card is the answer. Saves joining in the crazy Christmas traffic and the crowds.

If you are local there is still time to grab one from me OR you can contact me and I will email one to you if you are not in the area.  Posting by snail mail this week it may not arrive in time. 🙂

Here they are nicely decorated and ready to go for you.  Just choose the amount.

christmas-gift-card_1

Now this will be a great idea for perhaps a partner or family member to get you.  You know saves them the worry thinking about what to get.  We need to help them out. 😉

Contact me ASAP though.

Jenny

cards, Personal Ramblings, Stampin' Up!, Techniques

ROSE WONDER WEDDING CARD!

Today we went to a wedding.  It was a really lovely service and special to be a part of it. This was for friends of Josh’s and he was one of the Groomsmen.  He looked pretty swish if you ask me but I can say that because I am his mum. 🙂

We managed to grab a family snap.  It is not often that we are all together. I don’t often share family stuff here but today I will….. 🙂

at-jono-and-felicitys-wedding

Anyway, you didn’t come here to see family snaps you want to see crafty projects.  I wanted to share the Wedding card I made.  Now I have known about this wedding for months as you do but I just didn’t know how to go about this card.  The Invitation had Ombre blue stripes so I considered working something in with that but I ended up with this.  Hope the Bride and Groom like it.

wedding-_-rose-wonder-2

I went with Dapper Denim card base and Soft Sky mat.  On the White card I stamped the sentiment from Rose Wonder. If you can see closely at the bottom is a new Embossing Folder from the Upcoming Occasions Catalogue.  I broke it out of it’s package just for this! This is the ‘Falling Petals’ Textured Impressions Folder.  They look like falling hearts.  Just a couple of Tips with this folder:  1) When you emboss you might get little marks or the “hearts” squished looking.  I added a piece of scrap paper in the folder on top of the card when I embossed it which prevented this. 2) This embossing folder covers the full card but I didn’t want all the card covered only to emboss just the bottom edge. This was hard to do because of the position of the hearts.  So I cut a separate small strip of Whisper White card the width of the full white card piece and embossed just the strip.  Then I adhered that piece straight on to the card. You wouldn’t even know!

The ribbon used is not Stampin’ Up!  The larger swirly hearts are cut from the Sunshine Wishes Thinlits.  I cut one in Dapper Denim and one in Dazzling Diamonds Glimmer Paper. The little sparkly heart is a heart punched from the 2-Step Owl Punch in Dazzling Diamonds Glimmer Paper.  It adds a little sparkle.

This is the inside of the card.

wedding-_rose-wonder-_inside

Mmm? Shame the lighting isn’t great.  The weather has been a bit funny.  Hope you get the idea anyway.

This sentiment is also from Rose Wonder set.  I thought it needed something else to the inside so I punched some little hearts from the 2-Step Owl Punch in Dapper Denim and Dazzling Diamonds Glimmer Paper.

Thanks for visiting today.

Jenny

 PS. If you haven’t already done so then subscribe to my blog posts by email so you don’t miss any of the exciting creations I make.  You can find the link for that in the right hand column.  Why not sign up for my regular newsletters too while you are at it. I always love sharing cardmaking with you.

3D projects, cards, Christmas, Classes, Stampin' Up!

TEAM CHRISTMAS PARTY!

Wednesday night was the last Team meeting of the year with a Christmas Party.  This is the larger Inky Fingers Team I am in with Vanessa Webb.  We are a funny bunch! 😉

Each month we get to share swaps although not everyone gets around to it.  (I know I don’t!) I think being the last meeting and our Christmas party most people made a special effort.

These are the tags I made for a swap.  I was pressed for time for anything too complicated. They are based on some tags I made recently and shared here.  These use the ‘Holly Jolly Greetings’ set and some scraps of the Candy Cane Lane DSP.  So quick to make. 🙂

holly-jolly-christmas-tags

These are most of the swaps I received in return.

team-swaps

What a fantastic selection of cards and little treat holders. (Oops! I forgot your gift bag Katie!). Look at that gorgeous Dragonfly card given to me by Vanessa.  That’s a beautiful stamps and dies set coming out soon. 😉

Here are some of the crazy Inky Fingers Team.  It is a very creative bunch of people.

inky-fingers-team-2016

I have to show you the little make and take we made.  I have been wanting to make one of these for ages but haven’t had a chance to.  Barbara surprised us all in getting us to make it.  So cute! Just the size for a little Ferrero Chocolate or a Lindt ball.  Something nice to add to a table setting or as a simple gift.

ferrero-coffee-cup

Thanks for visiting.  How are your Christmas celebrations going?  It has been a little crazy this end.  I think we are now at the end of the end of year activities and presentations, classes have finished and cards have been sent out.  Still to put up the tree and finish shopping.  I feel it is never going to end!  Never mind.  We still have a week.  🙂

Have a wonderful day and stay sane,

jenny-_-signature

cards, Christmas, Stampin' Up!

HOLLY JOLLY LAYERS CHRISTMAS!

Some quick cards using the Holly Jolly Layers stamp set (which is a Hostess set from the Holiday Catalogue).  I made them a few weeks ago and used one of the versions for a Stamp-A-Stack.

holly-jolly-layers

I kept the layout the same on both and used different stamps in the set. On both of the cards the base is Real Red. Then a Crumb Cake mat on which I stamped the string of lights down the bottom in Crumb Cake. The piece was then run through the Big Shot with the Softly Falling Embossing Folder.  Once adhered to the card base I added a strip of the Candy Cane Lane Designer Series Paper.

TO STAMP THE IMAGES.

For the card on the Left: I stamped the greeting in Real Red and cut the piece with the Layering Squares Framelits.  A larger square in Chocolate Chip was cut with the next size up square in the Framelits and then a Scallop Square from the Layering Squares was cut from Real Red Glimmer Paper. They were all adhered together and then raised off the base card with Dimensionals.

For the card on the Right: I stamped the circle greeting in Real Red and cut this out with  a Scallop Framelit from the Layering Circles Framelits.  After cleaning the stamp then ink it up with Garden Green BUT BEFORE stamping use your Blender Pen to wipe off the “berries”in the centre of the holly.  This is done by wiping off the ink on the stamp and then wiping the tip of the Blender pen on to scrap paper to take off excess ink. It might take a couple of goes. Once it is clean you can use your Real Red Marker to colour in the berries.   THEN, you can stamp the image on to Whisper White card and cut it out with (I think) the 1 1/4″ Circle Punch. (Just check the size.  It could have been the 1 3/8” Circle punch.  It was some time ago that I made it).

These pieces were then adhered together with Dimensionals in between and then using Dimensionals to raise it up off the card.

Hope all your plans are coming together for Christmas.

See you again soon,

Jenny