cards, Christmas

12 WEEKS OF CHRISTMAS – WEEK 9 – EMBOSSED VELLUM SNOWFLAKES!

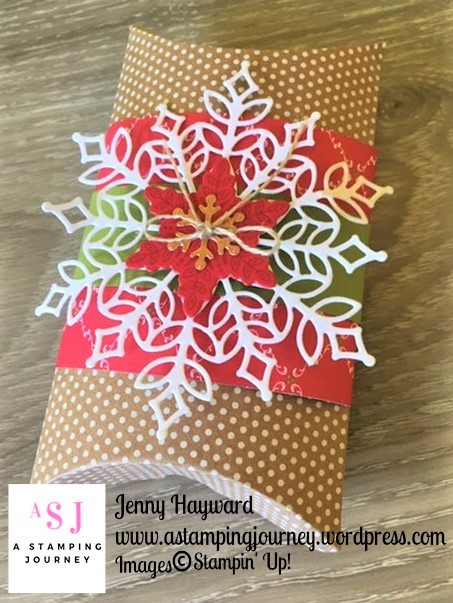
For Week 9 of our 12 Weeks of Christmas series I am giving the Snowflake Showcase one last hoorah!  It is such a nice suite.  So sad that it is going.  So for today’s project I wanted to give embossing the snowflake dies a whirl.  I have seen a few cards with this idea recently.

On this card I thought I would emboss the snowflakes on Vellum cardstock.

I like how this turned out.  How great is it that you can emboss with your dies.  It gives the cards a whole different effect.

Have you tried embossing with your dies yet?  I did do it some weeks back and shared how to do it.  You can see that post -> HERE.

Just to remind you the layers when embossing I have added a graphic here for you to PIN.  I know I always forget and I have to look it up.

With vellum you need to be careful it doesn’t tear.  If you have a problem with that you can add a piece of scrap paper in between the card and the die.

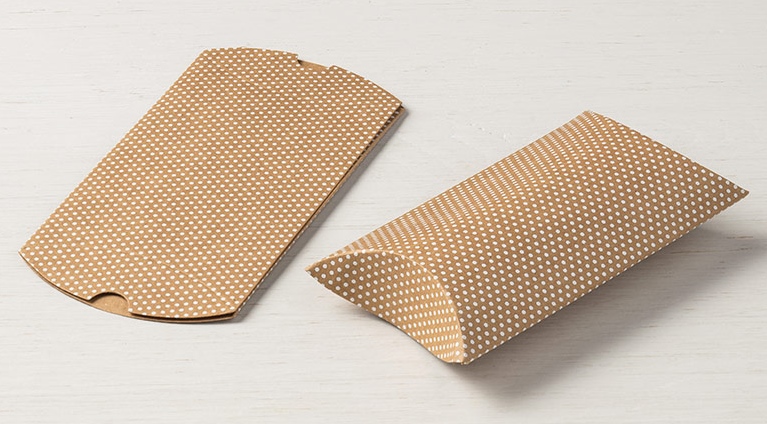
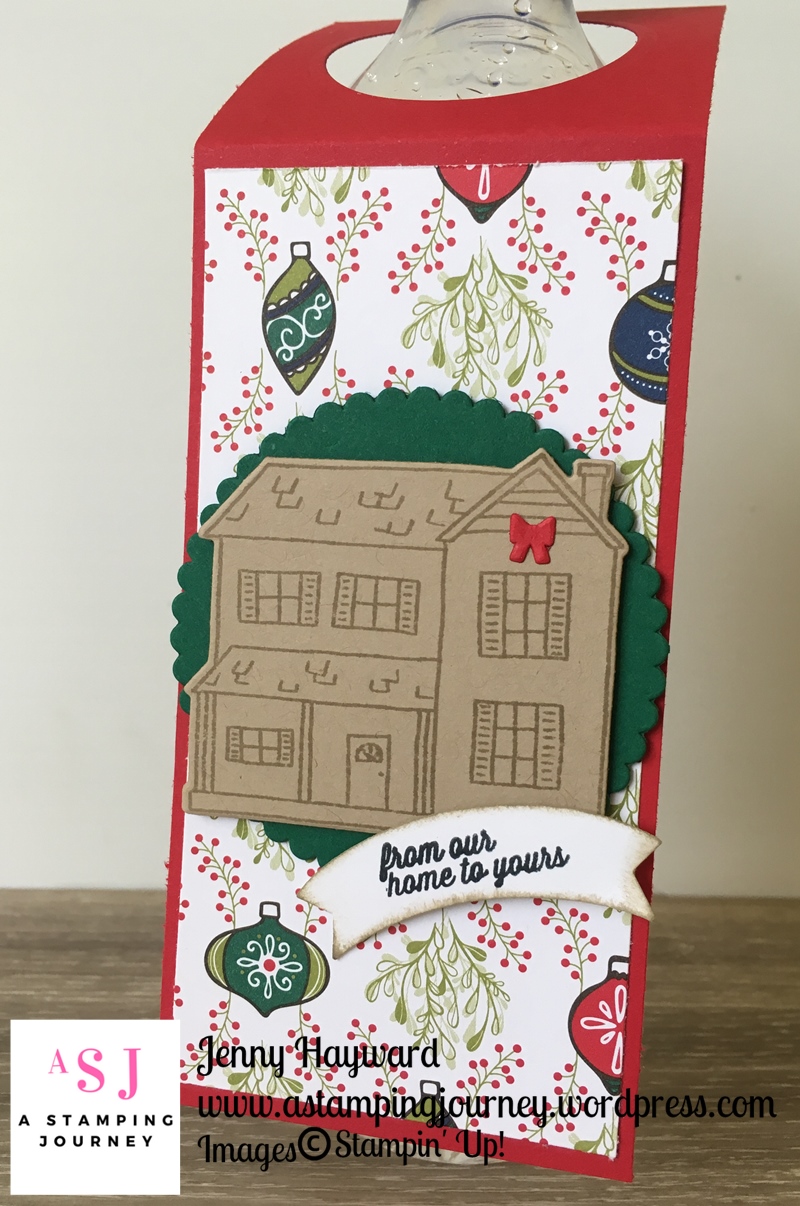
The paper on the card above is from Under The Mistletoe Designer Series Paper.

I love that you can stamp the snowflakes from the Snow is Glistening stamp set and cut them with the Framelit dies from the Snowfall Thinlits or you can diecut the very detailed snowflakes straight from card or the Foil Sheets.  It’s very versatile.

I hope that you have got hold of this suite now as it ends today.  If you need to still grab it you have just a few hours left to grab it in my store -> HERE.

Please use the Host Code: BZ6KB7SU    Thank You.

Thanks for visiting me,

Jenny


3D projects, Catalogues, Christmas, Stampin' Up!

12 WEEKS OF CHRISTMAS – WEEK 8 – PILLOW BOX CHRISTMAS!

Week 8 today for our 12 Weeks of Christmas series.  Are you enjoying these?  I would love to hear what you think.  I hope they are inspiring you. 🙂

Today’s project is a gift box.  The Kraft Pillow Boxes make really quick gift packaging.  They are large enough to add a gift card and even throw in a few chocolates.

For this one I have use the Snow is Glistening Stamp set and the Snowfall Thinlits.  Not much longer to get these products if you want them.

I made a wrap for the Pillow Box using the Under The Mistletoe Designer Series Paper.  Then added a strip of Old Olive cardstock around it.  TIP: Assemble the Pillow Box before you adhere the paper so you have the right dimensions with it being expanded.  The larger snowflake is cut with the White Velvet Paper, then a snowflake is stamped in Real Red on to Red card and cut with one of the snowflake Thinlits.  A tiny snowflake is cut from the Copper Foil.  I added a small bow from the Linen Thread. I just realised I edited this photo upside down as the bow doesn’t sit the right way.  Oops! Oh well! That’s OK right. 😉

Simple but very easy to do.  You can dress up any treat with these.

You can grab these Kraft Pillow Boxes in my store now -> HERE.  Unfortunately they are not one of the discounted items for the Extravaganza but they are still great value at $8.75 for 10 boxes.

The Under The Mistletoe DSP is one of the papers at 10% off today and tomorrow for Extravaganza.  Grab your pack at $17.32 in my store -> HERE. I have used this paper a lot this Christmas. Make sure you grab some for your Christmas creating.

Thanks for stopping by today,

Jenny

Online Extravaganza is on now.  Check all the reduced papers and embellishments HERE but this ends on the 24th.


cards, Catalogues, Christmas

12 WEEKS OF CHRISTMAS – WEEK 7 – PEEK A BOO GINGERBREAD MAN!

Today is Week 7 of our 12 Weeks of Christmas series.  This card is a cute one if I can say that.

I haven’t used this stamp set for quite some time and was reminded of it recently. So I thought I would just have to use it for this week.

Here is my card.  I call it my Peek A Boo Gingerbread man.

I have used the Festive Farmhouse Designer Series Paper.  A circle was cut in it with the Layering Circles Framelits and then adhered the legs of the gingerbread man behind the circle.  Then a piece of white card was adhered to the back of the paper.  Once it was all adhered on to the crumb cake mat and the card base I stuck an Dimensional behind his head to prop him up a little.  The Crumb Cake card was embossed with the Sparkle Embossed Folder.  The sentiment was stamped on a strip of Old Olive card and finished with a Red Rhinestone.

Hehe! Don’t you think he is cute?

Thanks for visiting me for our 7th week.  Have you caught the past weeks projects? Be sure to click on the tag  of 12 Weeks of Christmas at the bottom of this post on my blog to see them all.

Jenny

cards, Catalogues, Christmas

12 WEEKS OF CHRISTMAS – WEEK 5 – TIMELESS TIDINGS HOLLY!

I have a relatively simple card for you today for Week 5 of our 12 Weeks of Christmas series. This is using the Timeless Tidings stamp set.

The card mat and stamped piece is actually White.  It does look Very Vanilla in the photo.  Lighting wasn’t great this morning.

The Holly was stamped on Thick Whisper White in Memento ink and coloured with the Stampin’ Blends.  The piece was cut with one of the squares in the Layering Squares Framelits.  A Gold Foil Scallop square was cut with the scallop in the Layering Squares Framelits.

Of course it needed some loopy, loops of Copper Thread.  I don’t seem to make many cards without it do it. 🙂

The sentiment from the Timeless Tidings set is stamped in black.  The card base is Cherry Cobbler.

I have to say I wasn’t sure of this card and I am still sure.  What do you think?? I think it might be missing something.  Never mind.  I hope it inspires you to create a version of it.  Do share with me if you do.  I love to see what you create.

Here is the Timeless Tidings stamp set.  I love the sentiments on it.

You can find this set in my store now -> HERE.  Clear Mount $35.  Really it is not that expensive for all these lovely images.

Ordering online?  Head to the link just above. Please use the Host Code:  KGQKCBA4  Don’t forget don’t mark your order as anonymous as I can’t send you a Thank You gift.

Thanks for stopping by.  Have a great weekend.

Jenny 


3D projects, cards, Christmas, Tutorials

12 WEEKS OF CHRISTMAS – WEEK 4 – A TAG FOR YOUR WINE!

Today for Week 4 of 12 Weeks of Christmas I have a cute tag for you.  Quite often we might give a bottle of wine to a workmate, a neighbour or to a friend when we visit for dinner.  Why not dress up the bottle and add a tag to it.  These are very quick to make and good to have on hand.  I have been making them for the Craft Fairs I do and they are very popular.

I actually have 2 tags to share with you today that I have made recently.

The first one is on Shaded Spruce card with some of the gorgeous Under The Mistletoe Designer Series Paper.  The deer from the Detailed Deer Thinlits is cut from Copper Foil.

This tag below is used the Farmhouse Christmas bundle.  I stamped the farmhouse in Crumb Cake on to Crumb Cake card and cut that out.  I kept it simple so I didn’t have to colour them in. 🙂  The paper is also from the Under The Mistletoe Designer Series Paper. 

Do you want to make them? They are very easy.  Let me tell you.

MAKE YOUR OWN WINE BOTTLE TAG

You can create these any size you like.  I will give you the measurements for these ones.

Metric: Cut your card 7cm x 21cm.  Score at 7cm.    Imperial: Cut your card   3″ x 8 1/2″. Score at 3″.

Use one of the smaller circle dies from the Layering Circle Framelits and cut a circle in the small square section at the top.

Decorate as you desire.  I cut the piece of Designer Series Paper slightly smaller than the lower length of the tag.

I made some of these tags a few years back.  If you want to see these versions then head to this post -> HERE.

Thanks for stopping by,

Jenny

cards, Catalogues, Christmas

12 WEEKS OF CHRISTMAS – WEEK 3 – REINDEER TAG CARD!

Week 3 of our 12 Weeks of Christmas special.  Today’s card was inspired by some tags I made for the special treat bags my guests received at my Holiday Catalogue Launch last month.  I thought they were cute – and very easy to make.  So I thought why not add the tag to create a card.

Firstly, the base card is Real Red and a piece of Garden Green cardstock which had been embossed with the Woodland Embossing Folder was adhered to the card base. To create the tag, I cut a strip of paper from the Under The Mistletoe Designer Series Paper and flagged the end. Then cut a vellum scallop circle using the Layering Circle Framelits and cut a deer from Early Espresso card from the Detailed Deer Thinlits.  The deer was raised up with Dimensionals off the Banner shaped strip.  The sentiment is from the Star of Light stamp set and heat embossed with Gold Embossing Powder before cutting it with one of the dies from the Bunch of Banners Framelits.  If you want to make this card quicker you can simply stamp the sentiment perhaps in Early Espresso ink.

Hope you like this one.  Thanks for stopping by,

Jenny

cards, Catalogues, Christmas, Stampin' Up!

FESTIVE FARMHOUSE CHRISTMAS CARD!

A couple of weeks ago for my Week 1 of 12 Weeks of Christmas I showed how quickly your Christmas cards can be made using the lovely Designer Series Paper from Stampin’ Up!. (Head back a few posts if you missed it).

Today I have another Christmas card for you using Designer Series Paper.  This one uses the Festive Farmhouse Designer Series Paper.

The sentiment from the Farmhouse Christmas set is stamped in Old Olive on Granny Apple Green and cut with one of the Layering Circles Framelits.  It was stamped again in Real Red on white and cut with the Stitched sentiment label die in the Farmhouse Framelits dies.  Before they were raised up off the card I added a couple of leaves punched from the Sprig Punch from Real Red and vellum.  I finished the sentiment off with a double bow from Linen Thread.  The base card is Old Olive and the Real Red.  I have to say the colour in the paper is actually Cherry Cobbler but it worked with red.  I don’t know why I used that but I think because I was making the other card that I had shared at the same time and just used the same colours.  I have to say you don’t notice it though.

So there is another quick Christmas card for your collection.

Thanks for stopping by,

Jenny

cards, Catalogues, Christmas

12 WEEKS OF CHRISTMAS – WEEK 2 – HOLLY CHRISTMAS!

Week 2 of 12 Weeks of Christmas.   Today I am sharing a card with the Timeless Tidings stamp set.

Today’s card is not exactly quick but if you had a small number of cards to send out I think these would be pretty special.  You could simplify it to make it quicker if you like.  Although you are colouring the leaves they are simple to colour.  I used the Old Olive and the Cherry Cobbler Stampin’ Blends.  You could leave off the loopy Gold Threads and if you didn’t want to emboss the Cherry Cobbler strip either that would make it quick.  I had embossed this strip with the Subtle Embossing Folder. But really there isn’t a lot to do on the card.   I hope you like it anyway. 🙂

Thanks for stopping by,

Jenny

cards, Catalogues, Christmas

12 WEEKS OF CHRISTMAS – WEEK 1 – ALL IS BRIGHT CHRISTMAS!

I am excited!  Today starts a special series on my blog.  Every Friday I will share projects with you for 12 Weeks of Christmas.  Yes, it is getting that close. Eek!

My plan for this series is to bring you reasonably quick cards and projects to help you in your Christmas creating.  So stay tuned for them.

My first project is a very quick card.  How much quicker can it get with the beautiful papers that Stampin’ Up! offer.

Add a piece of the lovely paper on a standard card mat.  This paper is from the All is Bright Designer Series Paper from the Holiday Catalogue.

The sentiment is from the Farmhouse Christmas set.  Firstly stamped on Whisper White which is cut with one of the circles from the Layering Circles Framelits and then layered on a Scalloped Circle from Gold Foil.  The sentiment is stamped again on Real Red and then cut with one of the framelits from the Farmhouse Framelits.  Before adhering that to the card with Dimensionals I punched out some leaves from Old Olive with the Sprig Punch.   

With one sheet of Designer Series Paper you will be able to get 6 cards.  They won’t take long at all to put together.

Thanks for stopping by.  Remember each Friday to check in with our 12 Weeks of Christmas countdown.  Of course, check in before that as I will be sharing lots of other projects too. 🙂

Jenny

3D projects, Christmas

12 WEEKS OF CHRISTMAS – BONUS PROJECT!!

Latte 12 weeks Header

Wait! it’s not Thursday when we usually post our 12 Weeks of Christmas projects.  I know.  We have a Bonus project for you today created by Leonie.  This is a really cute Santa Slider Card.

SantaPocketSliderCard

So you pull the tab and ribbon and this is what happens …

SantaPocketSliderCardopen

He is a pretty excited Santa jumping up and down with glee at all the presents he has left you. 🙂

Leonie had a lot of fun making this card and she has included a Video Tutorial as well as a written Tutorial as some things are hard to put into words. While it may seem a little fiddly at first they do become easier the more you make them.

Here’s the Video Tutorial ….

Now as always we have a special Latte Girls 12 Weeks of Christmas Bundle …

Latte Girls 12 Weeks of Christmas Bonus Bundle 2 – just $60 plus shipping.

bundle

Now maybe you’d really like that tree punch so lets add that and you can get all four items for $80 plus shipping!  Now how nice would that be wrapped under the tree?  Now if you want it for Christmas you’ll need to order it within the next couple of days to make sure it arrives in time and you may like to opt for tracking for an extra $3.95 to be sure.

Remember you’ll need to contact me to get this bundle at this price as its exclusive to the Latte Girls 12 Weeks of Christmas Design Team!

Want the written tutorial? No worries – simply comment here with your email address and I’ll send you a copy!

Thanks for stopping by.  Have a Happy day 🙂

Jenny