cards, Catalogues, Stampin' Up!

LET’S MEET THE 2017 INCOLORS!

You have possibly had a chance by now to see the 2017 Incolors.  Stampin’ Up! releases 5 exclusive new colours each year usually to freshen up the Colour Collections and be on trend.

What do you think of this year’s colours??  I thought we would get to know them a little better.

We have Berry Burst, Fresh Fig, Lemon Lime Twist, Powder  Pink and Tranquil Tide.

BERRY BURST

A deeper shade of Pink to Melon Mambo and a little richer.  I think this colour complements the other pinks so well and really brightens most other colours when they are used together.

FRESH FIG

This rich purple colour is darker than Rich Razzleberry which so many people love. It is slightly lighter than Blackberry Bliss which was an Incolor a few years ago.

LEMON LIME TWIST

OK.  Hands up.  Who didn’t like this colour when it first came out?? I have to say I nearly lept out of my chair when I first saw it.  I LOVED IT!  If you have seen my craft room and my studio you would know that I have a lot of the Lime Green colour around.  I was so excited. 🙂

I think this colour is so bright and fresh and happy.  It brings life to all the other colours.  I am in Looove. ❤

POWDER PINK

This pink is a darker shade to Pink Pirouette which I am glad.  And it is a more true pink than Blushing Bride.  I do use that colour a lot for pink but I am glad that this shade of pink has joined the team.

TRANQUIL TIDE

I do love this shade of Green.  It is darker shade than Emerald Envy and certainly Bermuda Bay. Quite a rich calming green I think.

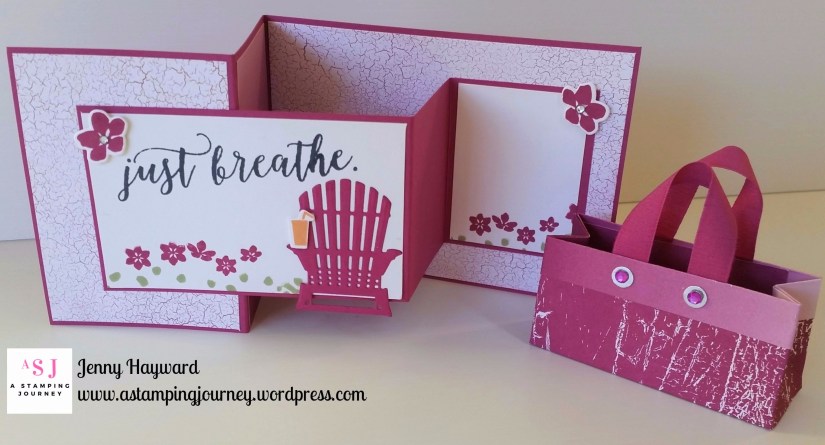
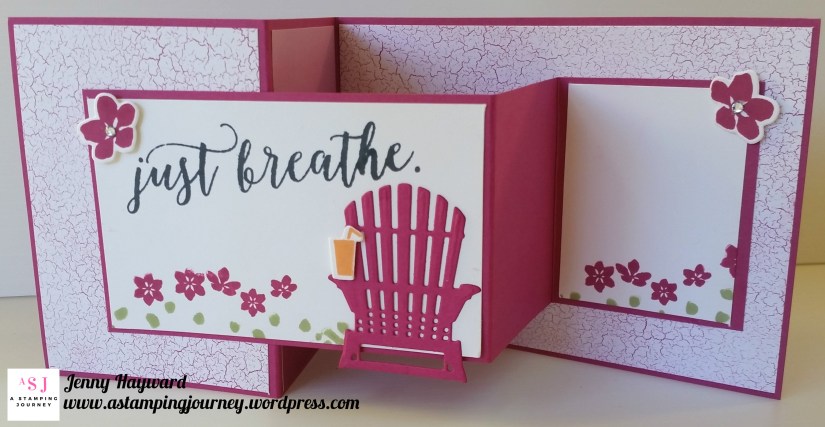
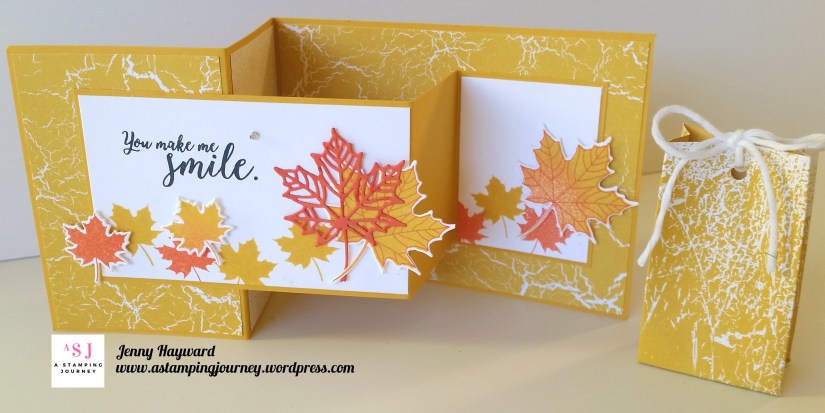
Here are all the cards together for you.

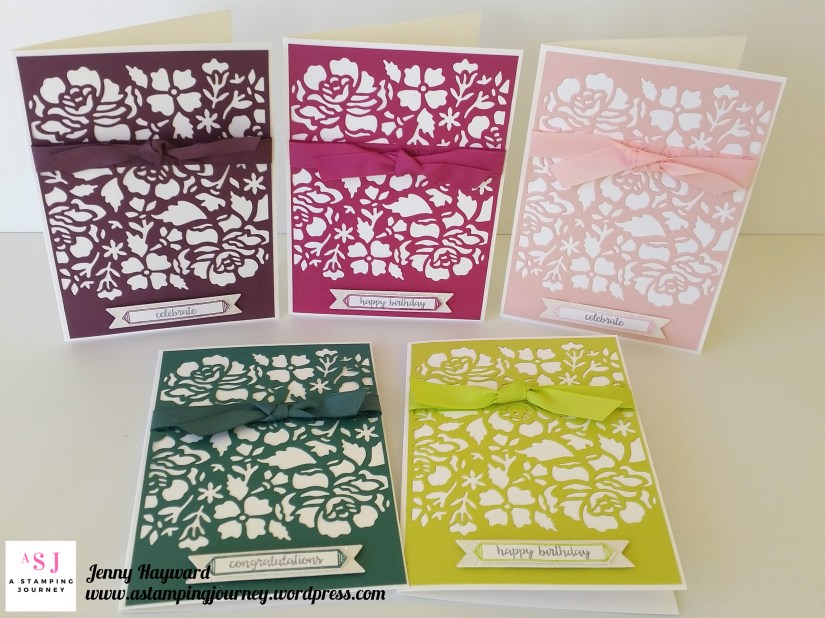
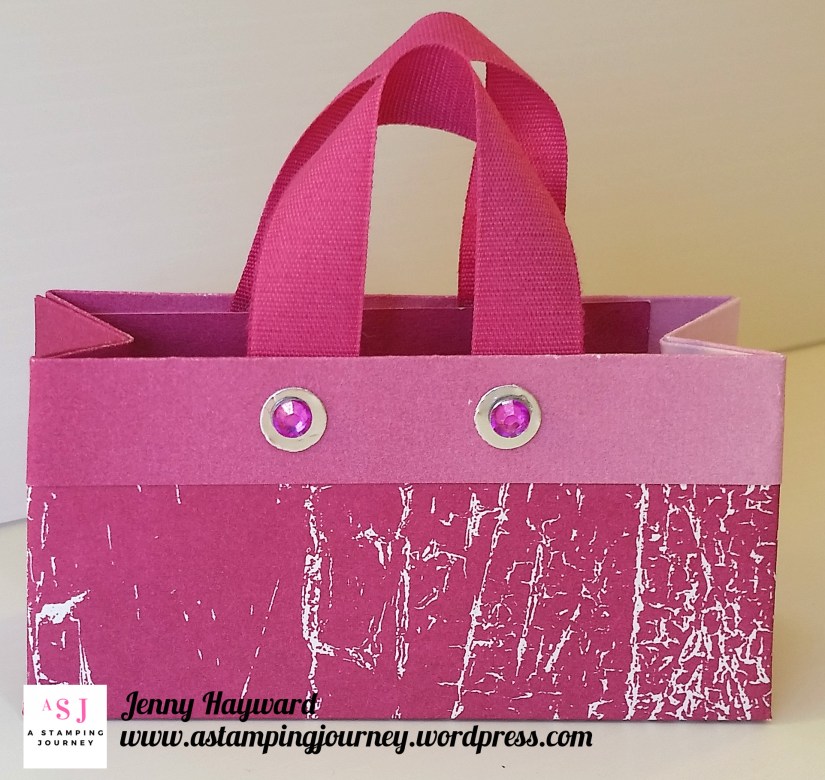
I have used the Detailed Floral Thinlits for these and used the 2 Thinlits together.  The ribbon, which is the Incolor Fine Woven Ribbon covers the small line that you get when you emboss them.  The sentiment and stamped banner are from the Happy Birthday Gorgeous set and punched out with the Classic Label Punch. I discovered that one of the Banners from the Bunch of Banners Framelits dies will fit with the Classic Label Punch when it is punched out.   I was excited about that.

I put together a Colour comparison Chart which is what I usually do each year.  It is good to compare the Incolors to other current colours.  I thought I would share that with you.  The lighting is hard to capture each colour accurately.

I would love to know what your favourite Incolor is??  Drop me a comment.

Thanks for stopping by,

Jenny

Jenny

cards, Catalogues, Stampin' Up!

TOP 5 FAVOURITES FROM THE 2017 CATALOGUE!

I have had the 2017 Stampin’ Up! Catalogue for a few weeks now.  That’s one of the bonuses as a Demonstrator. 🙂  I thought I would share with you my TOP 5 FAVOURITES from the Catalogue. Yes narrowing it down to just 5! 🙂

Here they are:

1. 2017-2019 Incolors (p184). How can you go past this year’s Incolors.  I will have a separate post just on the Incolors but they still had to get a mention here in the TOP 5 count.

The colours are just gorgeous but I think my favourite colour is Lemon Lime Twist.  It is so bright and fresh and I think gives life to the other colours.

2. Colorful Seasons Bundle.(p146-147). $92.50AUS I have had so much fun already with this bundle.  I think you will love this.  The images in the stamp set are so versatile and the sentiments are so inspirational.  Watch out for more creations with this Bundle.

3. Happy Birthday Gorgeous.  (p76-77) $64.75.  Lots of cute flowers and leaves in this stamp set with sentiments in a beautiful font.  Mix and match the images to create your projects.  The Happy Birthday Thinlit is a  great addition for your Big Shot diecutting.

4. This Little Piggy. (p48) $49 W  $33 C AUS  This cute set had to get a mention.  The “Three Little Pigs” Nursery Rhyme was such a favourite with my children ( and maybe me …)  I have to get this set. Those piggies are so adorable.


5. Layered Leaves 3D Dynamic Textured Impressions Embossing Folder. (p211)  $16 AUS  I will be interested to try this Embossing Folder when I get it next week.  These Dynamic Embossing Folders have a deeper, more 3D appearance. (if you remember the Cable Knit folder recently??).  


So there is my Top 5.  What are your favourites??

Want to see a fun Stampin’ Up! video showcasing the great products?


Thanks for stopping by,

Be back soon to tell you all about the Incolors.

Jenny

VIEW THE CATALOGUE NOW ONLINE HERE.

Catalogues, Classes, Stampin' Up!, Workshops

SEE THE NEW COLOURS, HAVE FUN CREATING! IT’S ALL PART OF MY OPEN HOUSE!

For Local Wollongong people: Come along and have a fun time creating and seeing lots of new products at my Catalogue Open House. I can’t wait to share it all with you.  If you haven’t been before don’t be shy.  We are nice people – I think.  😉

Bring a friend with you or if you can’t come why not pass the invite on to a friend. The more the merrier!

The details are below.  Please reply early as seats book out very quickly.  

Jenny

3D projects, Blog Hops, Catalogues, Stampin' Up!, Tutorials

A CUTE BAG WITH 6″x6″ PAPER!

Yesterday I showed you some my projects for the 2017 Catalogue Sneak Peek Bloghop. It was 2 Double Z-fold cards and mini bags, (If you missed the HOP head back to my last post to see).   Today there is a little more time and I can show you how to make the cute little Berry Burst bags.  They are so easy and only use 1 square of 6″x6″ Designer Series Paper.  There are a few different versions of cute little bags on the blogosphere but I will show you how I made these ones. Here is the cute bag to show you again.  I have used the Color Theory Designer Series Paper Stack. 

MAKE YOUR OWN 6″x6″ BAG.

This bag would fit a couple of small chocolates or Lip Balm.

1. Take a piece of 15cm x 15cm (6″x6″) paper and you are going to score  your paper.  

Just a note first: If you are using the Color Theory DSP the colouring in the paper is an ombre effect ie going from dark to light.  You will want to think about how your paper will sit when you make it.  I have a turn-over edge on the bag at the top so you will want the colour running in a similar way for both sides.  So from dark to light.  Position your paper how you want it.  If the paper you are using is an all over pattern then you don’t need to worry too much how it runs.

Score your paper at 1.5cm (5/8″) and 6cm (2 1/4″).  Turn your paper 180′ and score the same on the other side at 1.5cm and 6cm (5/8″ and 2 1/4″)

Turn your paper 90′ to score the next sides.  Score at 3.2cm (1 1/4″).  Turn your paper 180′ and score 3.2cm again (1 1/4″).

Below is how it will look if you can see it OK.

2.  On the side score lines (widest score line) cut up on the 2 middle score lines up to the score line running down.  Fold on all of your score lines.

3. You will want to create your turn-over edge so turn your paper over to the other side.  Run your adhesive along the small tab on the top and bottom of your piece.  Then fold them over to adhere.

Place adhesive also on the centre tabs on the side which would be the pattern on the outside of your bag.

4. Fold up the centre tabs and adhere your side piece on to this.  Then place adhesive on the inside on the other tabs (as shown below) to fold up to form your box.  

<– Place adhesive on these lower tabs on the inside.

5. Once your box is assembled, push in on the ends to fold in.  Pinch on the folds to crease a little.

6. Add your handles as you like.  For this one I placed adhesive on each end of some ribbon and adhered to both ends of the bag.  To make the clasp, I punched out a strip of card with the Classic Label Punch and adhered this on to the bag with glue dots.  The flower is from the new ‘Seasonal Layers Thinlits’.  I added a Rhinestone to the centre. 

TIP: Colour your Rhinestones to match your project with a Sharpie.

Here is your finished bag.

Here are the 2 bags together.  Which is your favourite finish? I think I like the one with the snazzy clasp.

I hope you found this tutorial helpful and you could follow it OK?? I did make a video to show how to make this but between low flying planes and dogs barking and my bumbling along it wasn’t getting anywhere fast.  Let me know though if you would find a video helpful. 

Thanks for visiting,

Jenny


3D projects, Blog Hops, cards, Stampin' Up!, Tutorials

ESAD 2017 ANNUAL CATALOGUE SNEAK PEEK!

Welcome to the ESAD 2017/2018 Annual Catalogue Sneak Peek Blog Hop.  Today you can hop along to 26 Demonstrators showcasing some of the exciting new products coming out VERY SOON!! I hope you have a cuppa in hand while you take your journey – and be ready for lots of inspiration!  You might have come from Kristel’s blog or just starting out here.  You can join in anywhere along the way.  So let’s get going!

Today I am sharing some projects from the Colorful Seasons bundle – the Colorful Seasons stamps and the Seasonal Layers Thinlits as well as the Color Theory Designer Series Paper Stack. I have lots of photos but I know you want to get on your way with the rest of the Bloghop so come back tomorrow and I will share a tutorial with you. for the cute little bag below.

I have two Double Z-fold cards for you and little matching bags.

These bags just use 1 square of 6″x 6″ Designer Series Paper. So cute!!

I love the new Berry Burst Incolor.  What am I saying? I love all the new Incolors!

The card folds flat to your standard size card so it is easy to put in an envelope.

You can find the Tutorial to make the Z-fold Card HERE on Amanda’s Craft Spa Blog.  This is in Metric.  If you would like the Imperial Measurements then you can find the Youtube by Dawn’s Stamping Thoughts HERE. 

Now for the bag.  This will fit 2 small chocolates inside or perhaps a Lip Balm. This would make a lovely little gift for a friend to cheer them up or to add to their birthday gift.  Check the Rhinestones! I coloured the Adhesive Rhinestones to match using Sharpie markers. (Edited: Head to the next post to see the tutorial to make these cute little bags).

This version of Z-fold card below is using the Crushed Curry paper in the stack.  This card is with a different style of bag.  I am planning on making the card and different bags with each of the colours in the stack.  I will share those with you soon.

I love the patterns in this Color Theory paper stack.  You have crackle look and a marble look, the Ombre effect and paint chip style strips.  It’s really fun!  I have used 2 different types of the paper. One for the front and back and another one inside the card.

A close up of the larger leaves.  I inked the solid leaf in the stamp set in Crushed Curry ink then sponged some Tangerine Tango ink to add a little colour variation.  Then I stamped over with the “lined” leaf stamp in Tangerine Tango before cutting it out with the co-ordinating Thinlit.

This little cute bag stands about 7.5cm tall (3″).  You can find the tutorial for this on Pootles blog HERE.  You could add a tag or a different closure?? I just kept it simple for this project and tied it up with some Thick White Baker’s Twine. 

Be sure to pop back tomorrow and I will share the tutorial for the cute Berry Burst bag.

Now you can be on your way to Carly’s blog.  Head HERE

Thanks for stopping by today,

Jenny


3D projects, Blog Hops, cards, Catalogues, Stampin' Up!

NEW CATALOGUE BLOGHOP TOMORROW. BE SURE TO STOP BY!

The excitement is building for the 2017 Catalogue to start on June 1st.  Not many days left now!

Just to give you all a sneak peek we are having a Blog Hop TOMORROW to get you inspired.  Be sure to stop on by tomorrow and take the little “hop”.  I don’t know about you but I am excited to see everyone’s creations using some fun new products – and don’t forget those new Incolors! Woo Hoo!

See you 6pm tomorrow (about this time!). 🙂

Jenny

Catalogues, Stampin' Up!

ORDER YOUR 2017 STAMPIN’ UP! CATALOGUE!

The new Stampin’ Up! Catalogue goes live on June 1st.  Not long now.  There are lots of awesome products as usual and I am loving the new Incolors! (more on that later though)

BUT

You can order your new Catalogue to be sent out to you now.

If you don’t have a current Demonstrator in Australia then contact me to have a brand new catalogue sent your way.

Email me directly at jghayward@yahoo.com

OR

Click -> HERE and fill out the form.  It will be on your way in just a few weeks.

Jenny