Blog Hops, cards, Catalogues, Personal Ramblings, Stampin' Up!, Tutorials

STAND UP SEASIDE NOTIONS EASEL CARD

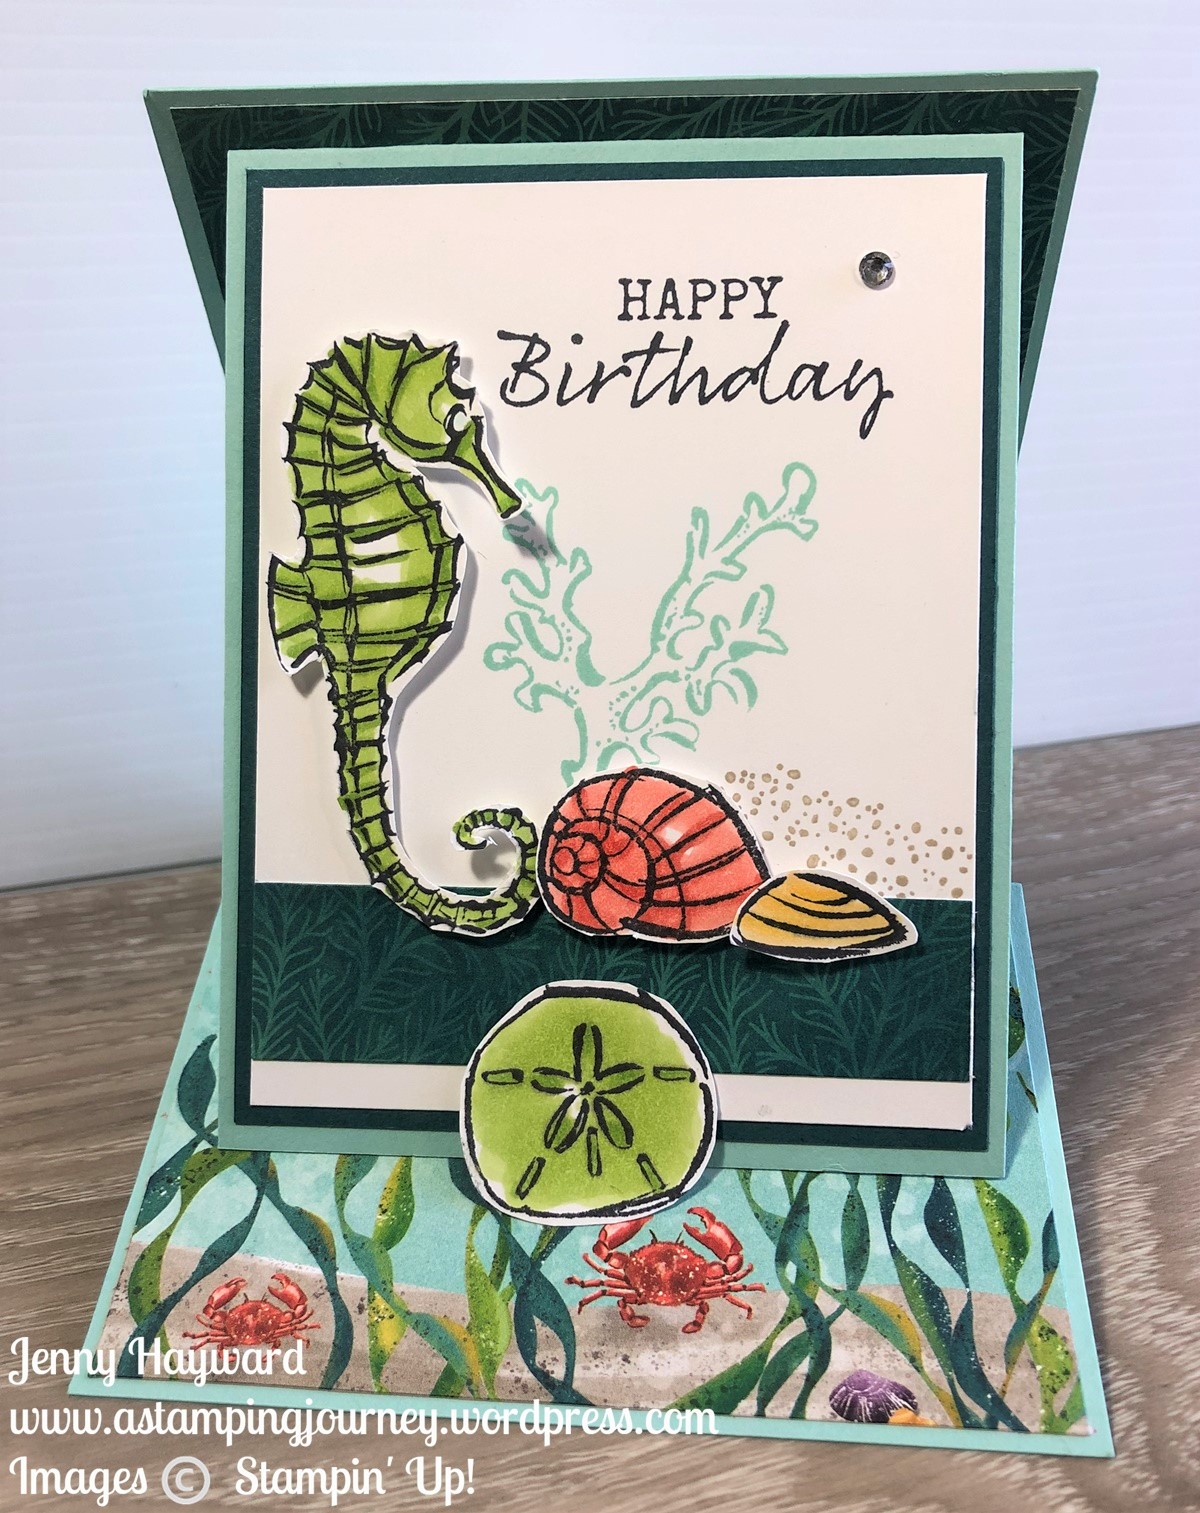
Last post I shared a fun Easel Card for the World Cardmaking Day Blog Hop. I said that I would tell you how it was made so you can make your own. So … Here it is.

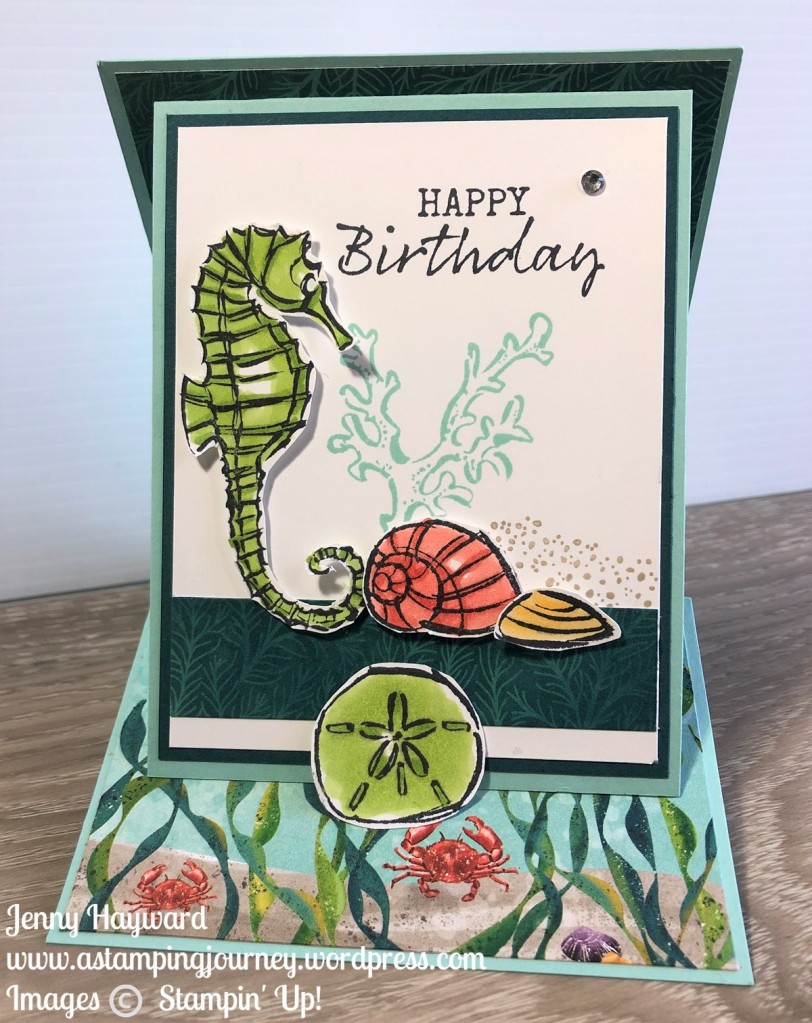
Firstly, here is the card again for you. It’s a Stand Up Easel Card.

The original idea I found on Connie’s blog -> HERE.

I will give you the measurements in Metric and Imperial.

STAND UP EASEL CARD

Base Card:

Card – 10.5cm x 28cm (4 1/4″ x 11″) Score at 7cm and 14cm (2 3/4″ and 5 1/2″). Fold on score line.

Piece of Designer Series Paper 10.1cm x 13.6cm. (4 1/8″ x 5 3/8″)

Bottom piece of Designer Series Paper 10.1cm x 6.6cm (4 1/8″ x 2 5/8″)

Front Flap:

Card – 9cm x 23cm (3 1/2″ x 9″) Score at 11 1/2cm (4 1/2″). Fold on score lines.

For Inside of Front Flap: One piece of white card 8.5cm x 10.9cm (3 1/4″ x 4 1/4″)

Piece of Designer Series Paper 2.5cm x 8.5cm (1″ x 3 1/4″)

For outside of Front Flap: Card mat 8.6cm x 11.1cm (3 3/8″ x 4 3/8″)

White card for Front 8.1cm x 10.6cm (3 1/4″ x 4 1/4″)

Piece of Designer Series Paper 8.1cm x 2.5cm (3 1/4″ x 1″)

Decorate the card as you like. You will need an element on the bottom of the base card on the front to be able to tuck the flap in to for it to stand. This can be anything you like to use.

Have fun with it.

If you need any stamping supplies and you are in Australia? Please stop by my store -> HERE.

Thanks for shopping with me. I do appreciate each and every order.

Jenny

Blog Hops, cards, Catalogues

WORLD CARDMAKING DAY BLOGHOP!

It’s World Cardmaking Day.  How great is it that there is a date that we celebrate all things cardmaking whether it be creating the cards and the pleasure it brings or in  sharing the joy of giving the cards.

Today to celebrate we have a Blog Hop with lots of Demonstrators from around the world.  The theme today is sharing a corner of your world.

For me,  I live on the East coast of Australia just south of Sydney.  I live about 200 metres (1/4 mile) from the beach. I spend a lot of my time at the beach all year around.  It’s my happy place, my place to escape and leave the worries of the day behind.

This is my local beach.  We have so many beaches up and down the coast though which I do visit too.

So of course since the beach is a big part of my life I had to create a card for that.  I chose to use the Seaside Notions stamp set.

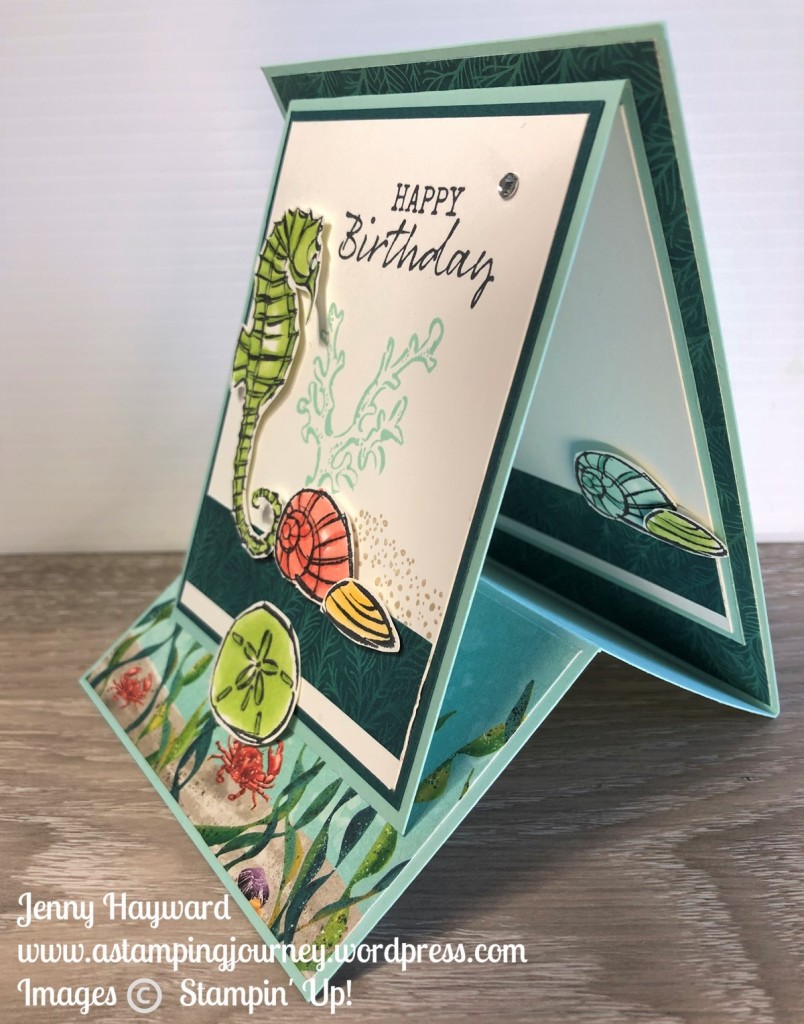
I love different folds too so wanted to make something a little different.  This is a type of Easel card.

Front on.

Side view you can see the fold and the flaps.

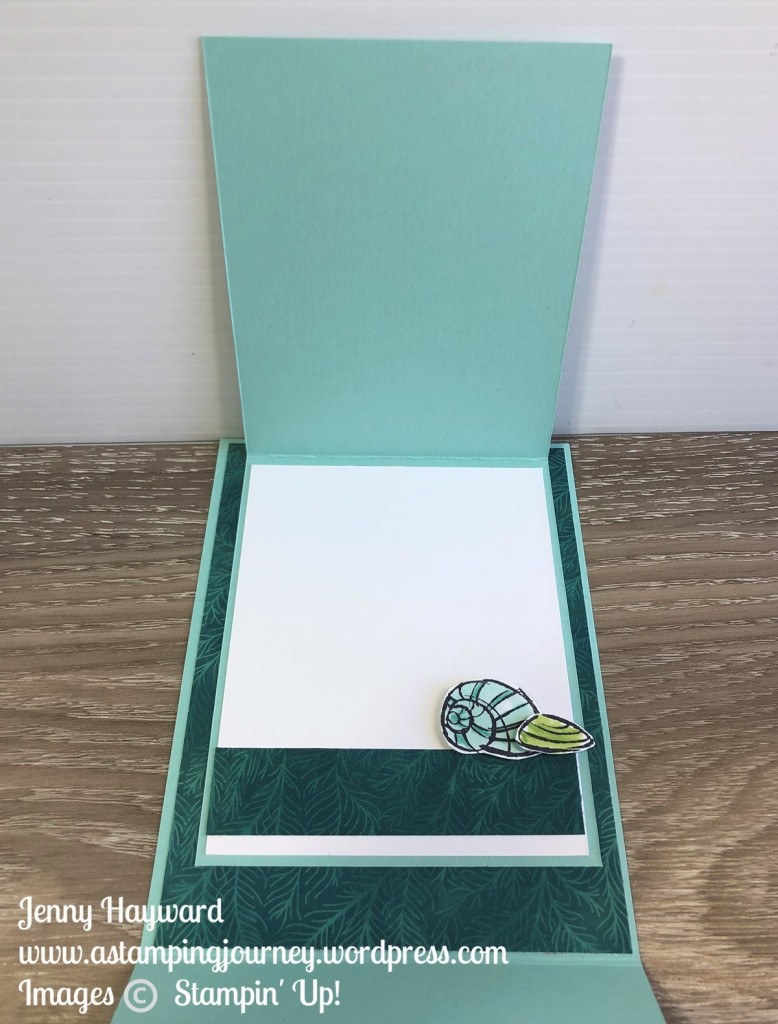
Don’t forget to decorate the inside.

See it open.

This was a fun card to make.  To save time I won’t share how to make it today.  Come back and visit me again tomorrow and I will give you the details.  Be sure to PIN one of the images to Pinterest so you know how to head back here.

You can now continue on the hop by heading to the link below where it says Click here.

Powered by Linky Tools

Click here to enter your link and view this Linky Tools list…

Happy hopping around the world.

Jenny

If you need to order your supplies to get creating your own projects and you are in Australia, I would love you to shop with me.  Visit -> HERE.

Blog Hops, cards, Catalogues, Christmas

CHRISTMAS IN JULY BLOG HOP!

Today I am hopping along for Christmas in July with a great group of crafters.  There is some amazing talent in this group and I am honoured to be joining in.

For the Blog Hop we are featuring products from the new Holiday Catalogue beginning on August 4th.  I am excited to start creating with these products.  I know we may not feel too much like Christmas yet but once you start creating with these fantastic products you will quickly get in the mood.

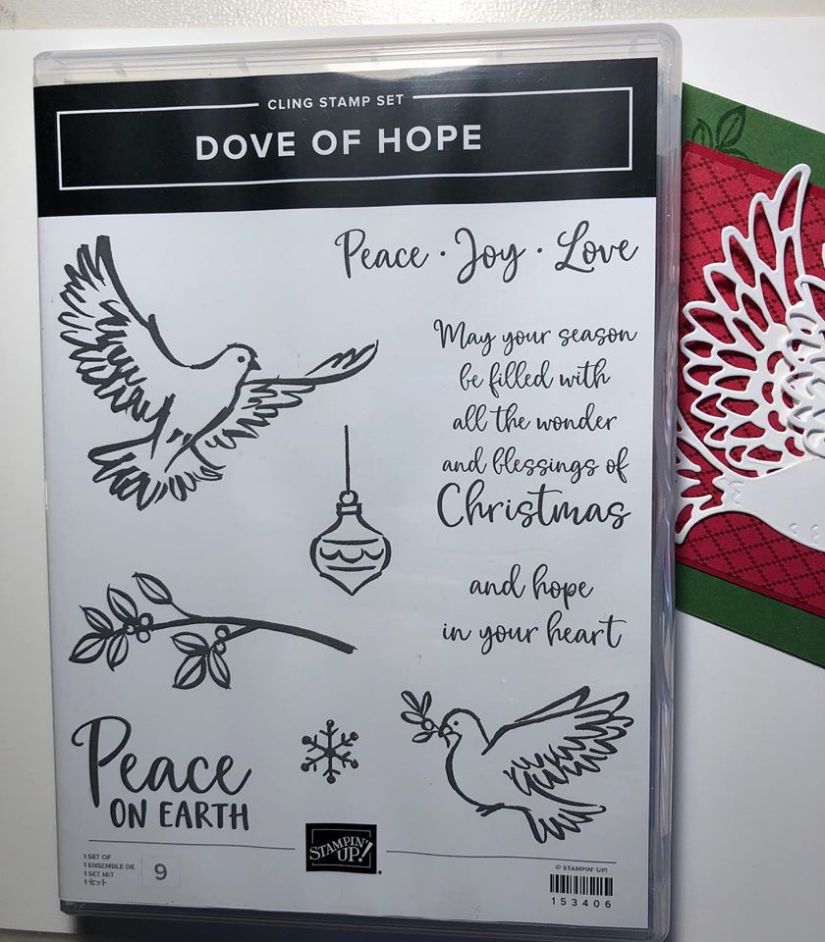
For the Blog Hop today I am using the Dove Of Hope Bundle which has the gorgeous stamp set and dies.  I made 2 projects to share with you today.

The first card is a more simple design.  The dove is diecut with Whisper White card and it really shows off the crispness of the dove as well as the little embossed details.  Don’t you love the detail in the wings??

To complete the card I used a piece of the ‘Tis the Season Designer Series Paper adhered on to a Real Red card mat.  The leaves were stamped over the Garden Green card base in Garden Green ink.  For the sentiment it was stamped in black on to white card and then punched with the Timeless Label Punch. 

The next card is a stepped up version.

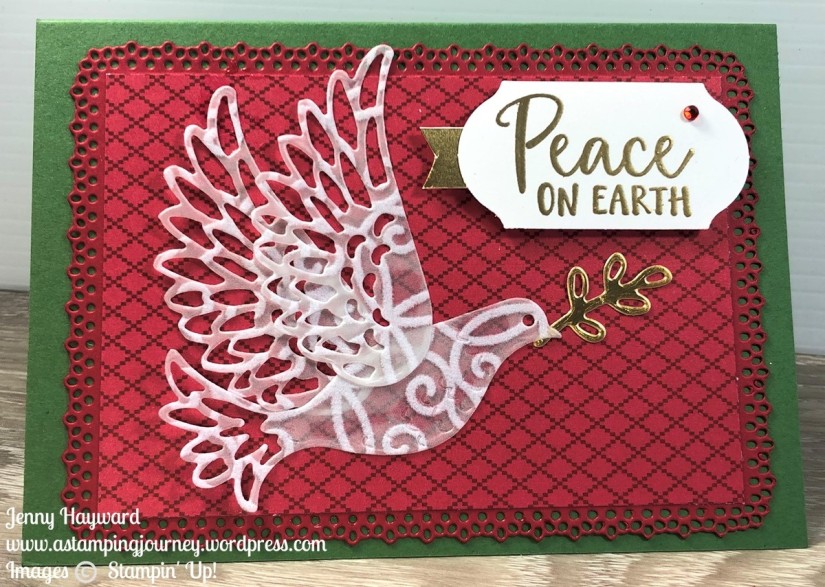
The red card mat was diecut with one of the Ornate Layers Dies with piece of the ‘Tis the Season Designer Series Paper added.

On this dove I diecut it with some of the Plush Poinsettia Specialty Paper.  This paper is gorgeous and has flocked designs on vellum There are 3 different designs in the pack.  I went for this “flourish” style.  I wasn’t sure how it would work.  I did find that some of the flocked pattern was flattened but you still get the pattern on the dove.

The sentiment this time was heat embossed in gold on to white card and punched with the Timeless Label Punch.  To add a little extra shine I cut a small strip of Gold Foil and flagged the end to go under the sentiment.

Now you are off to continue your Hop.  I hope the links work for you. 🙂

CONTINUE THE HOP NOW.  Click on the “Click here” below.

Powered by Linky Tools

Click here to enter your link and view this Linky Tools list…

If you are in Australia and need your own copy of the Holiday Catalogue (of course you need to), then drop me an email at jghayward@yahoo.com and I can drop one in the mail for you.

The Dove of Hope and all the other gorgeous products will be available to order from August 4th. Head to my store -> HERE.

Thank you for your order.

Jenny

Blog Hops, cards, Catalogues, Stampin' Up!

ESAD ANNUAL CATALOGUE BLOG HOP!

Today’s Blog Hop with the ESAD team is showcasing the 2020-2021 Annual Catalogue.  SO MANY gorgeous new products.  It’s hard to choose. 🙂

You would have come from Narelle’s blog HERE or just starting out.  Either way grab a cuppa and take the Hop.

First things first.

For my project today I have used the Celebrate Sunflowers Bundle  and created a Pop-Up card.

I have used the gorgeous Flowers For Every Season Paper too.  How pretty is this paper?? I have only just discovered it.

Do you want to make your own Pop-Up Card?? Download the Tutorial by clicking -> HERE.

Now continue on your Blog Hop.  Head to Maria’s Blog Here or clicking the NEXT arrow.  The list for all participants in the Blog Hop are listed just below.

Blog participant list

  1. Nicole Wilson
  2. Lou Kitzelman
  3. Denise Buetler
  4. Libby Dyson
  5. Lauren Meiklejohn
  6. Narelle Fasulo
  7. Jenny Hayward
  8. Maria Henderson
  9. Sharni Haines
  10. Monique Fielder
  11. Sharon Dalton
  12. Kayla McCreadie
  13. Rebecca Scurr
  14. Bronwyn Eastley
  15. Lynsey McCord
  16. Cathy Pinchbeck
  17. Melissa Gifford
  18. Kelly Kent

***

Before you go, this is the Celebrate Sunflowers Bundle.  

In Australia? Order The Celebrate Sunflowers Bundle available now -> HERE.

Place an order over $100 and receive a 2 card kits with the Celebrate Sunflowers Bundle with one of them a card kit for this card.

Happy Hopping,

Jenny

Blog Hops, cards

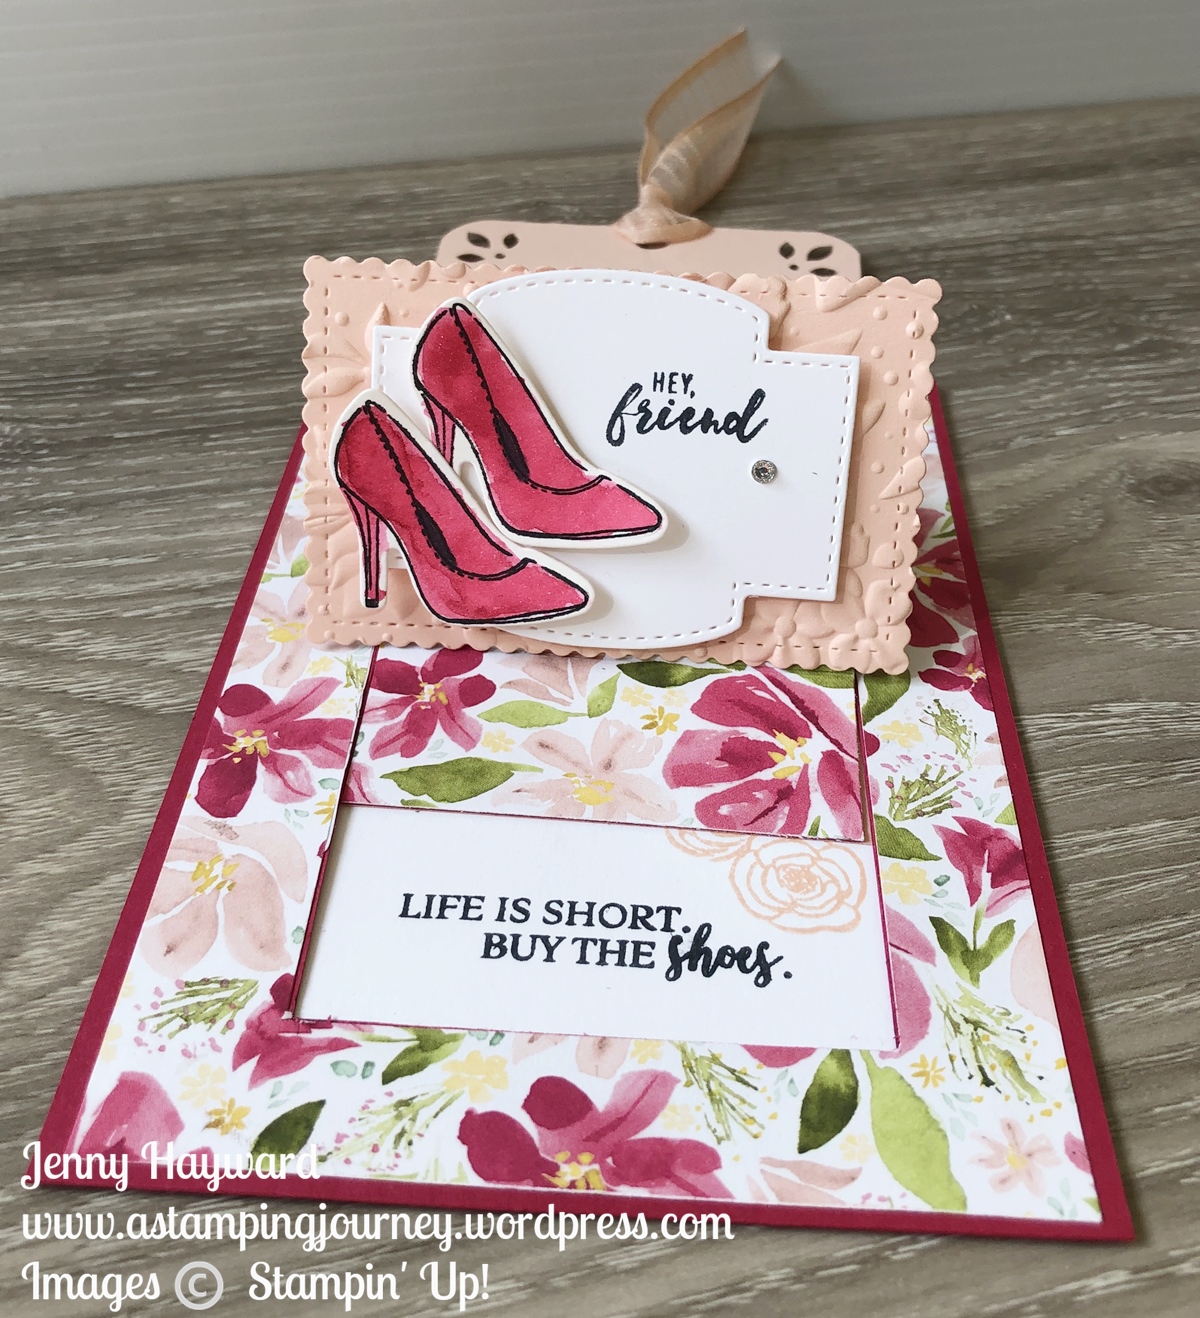
STAMPING AROUND THE WORLD APRIL BLOG HOP – BEST DRESSED SLIDER CARD!

Back with another Blog Hop with the Stamping Around The World Team.

The project I have created for you today is a Slider Card using the Best Dressed Bundle.  I have a video how to create it but have the link to the Tutorial for you to follow along so you can create it too.

Here is the Video for you.

If you want to get the Tutorial to create this card then head -> HERE.  Measurements are available in Metric and Imperial.

Now continue your Hop. Click on the blue frog below.

Have fun hopping,

Jenny

Remember that you can receive the Month’s Tutorial Bundle to create 12 different cards.  It is sent out free after you place an order with me either directly or through my store.  OR you can purchase the Tutorial Bundle wherever you are in the world via Paypal.


Blog Hops, cards, Catalogues, Sale-A-Bration

ESAD 2020 MINI CATALOGUE AND SALE-A-BRATION BLOG HOP!

Time for another ESAD Blog Hop.  This time we are sharing projects from the new 2020 Mini Catalogue and Sale-A-Bration.  I can’t wait to see what everyone has created.  You might have come from Cathy’s Blog -> HERE or starting from this blog.  The full list of participants will be below.

Firstly with the Blog Hop.  What is ESAD anyway??  

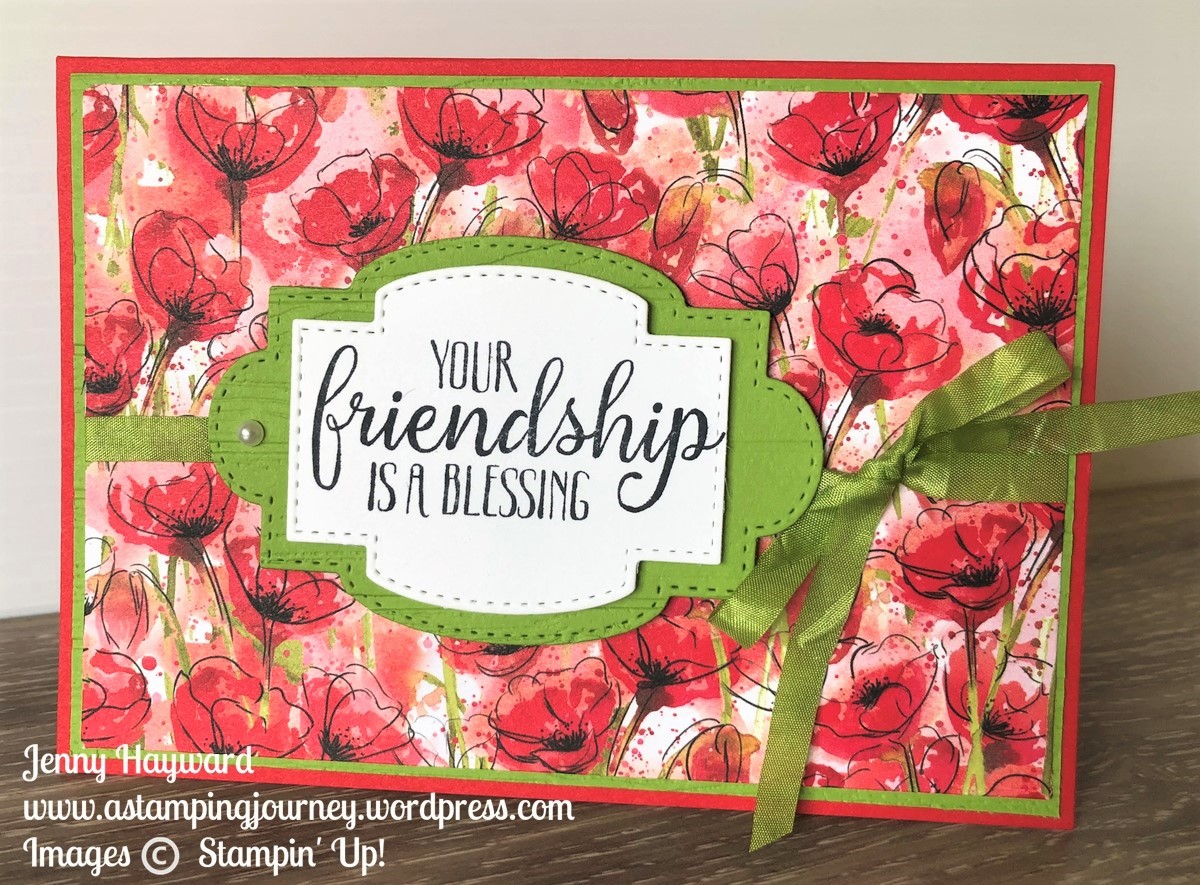
Now for my project.  It’s a very hard decision to work out what you are going to use with these Blog Hops.  There are so many new and exciting products.  What’s a person to do?? 🙂  In the end I chose to use the new So Sentimental Bundle because I love the Stitched So Sweetly Dies.  I think many people will love them.  I have made a few projects with them recently but today I have this one to share with you.

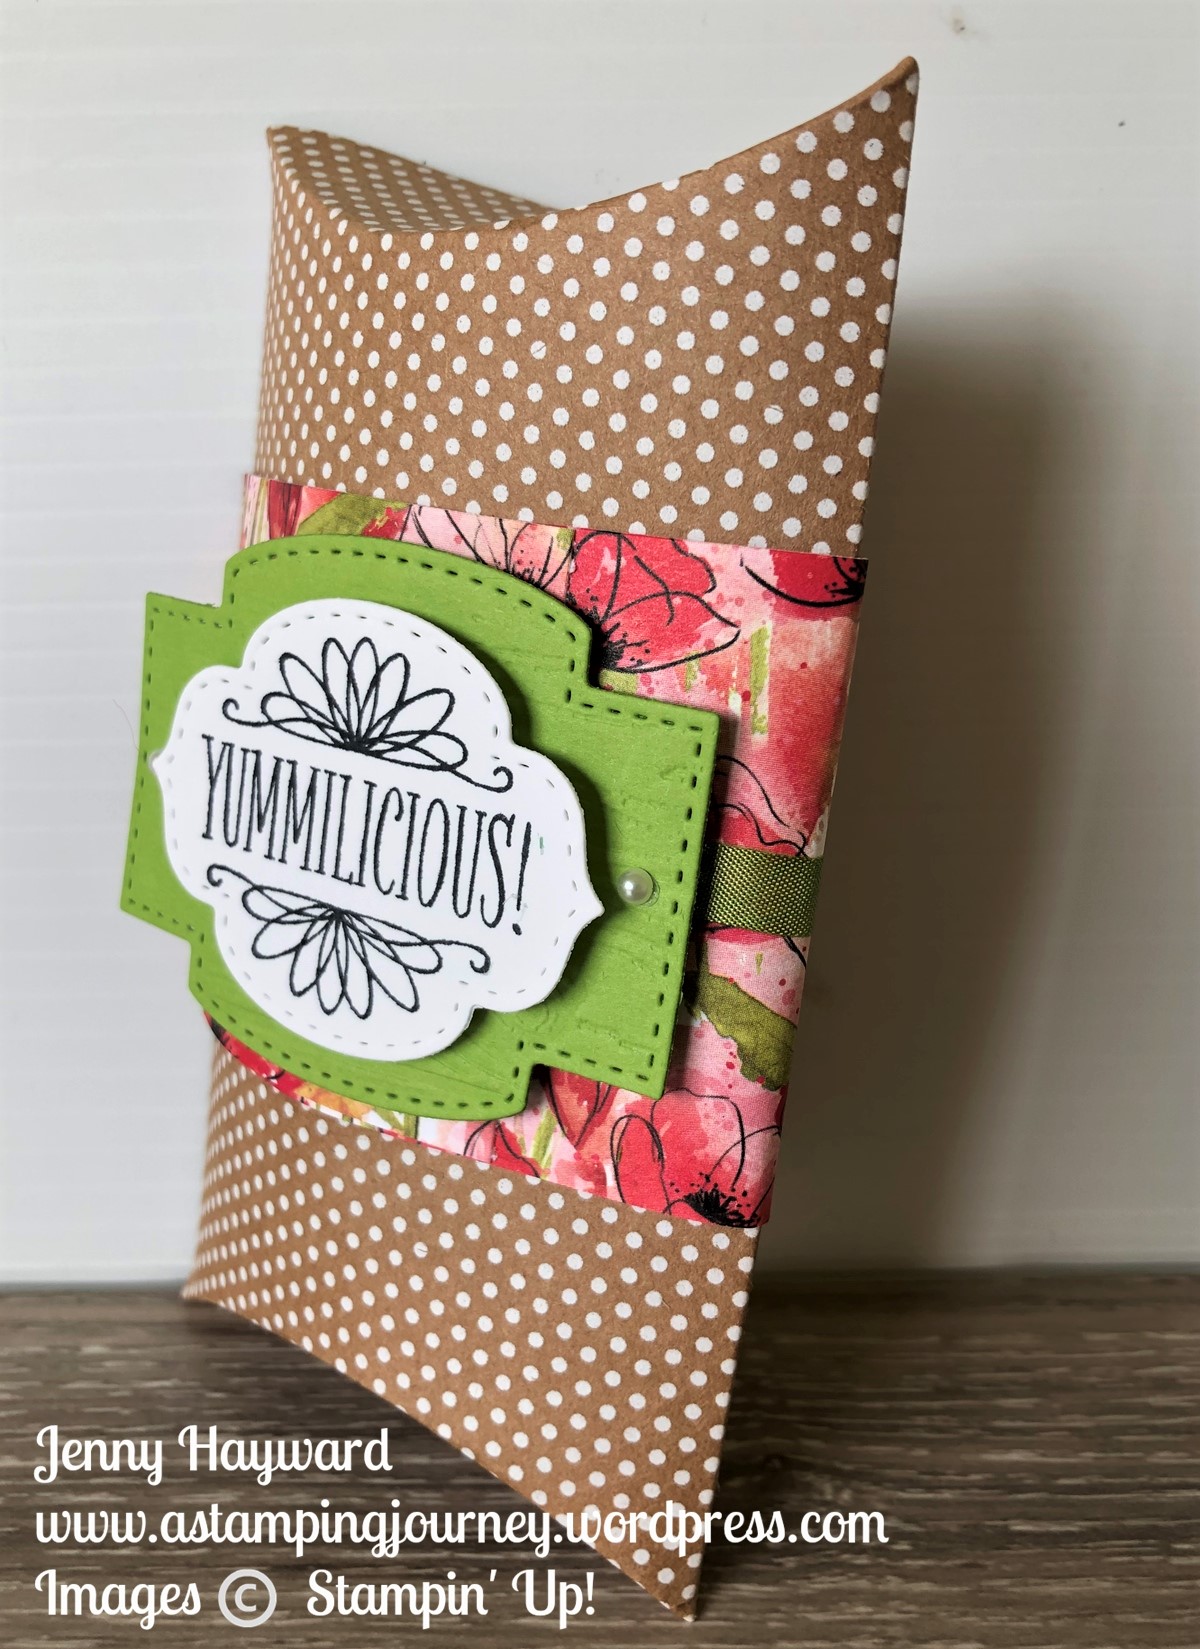
I created a card and a little treat holder with the Kraft Pillow boxes.

With the card you don’t need too much with the gorgeous Peaceful Poppies Designer Series Paper.  Add a piece of this to a Granny Apple Green card mat and add this to the Poppy Parade card base.  The Granny Apple Green is not a colour that is featured in the paper but I think it gives it a little POP against the Poppy Parade colour.

The sentiment from the So Sentimental stamp set was stamped on white and cut with one of the label shapes in the Stitched So Sweetly Dies set.  This was layered on to a piece of Granny Apple Green cut with one of the other label die shapes.  It’s hard to tell but I embossed the green card with the Pinewood Planks 3D Embossing Folder to give it some texture.

I tied around some Granny Apple Green Crinkled Seam Binding Ribbon.

Wait, what?? Granny Apple Green Crinkled Seam Binding Ribbon.  Where is that in the catalogue??

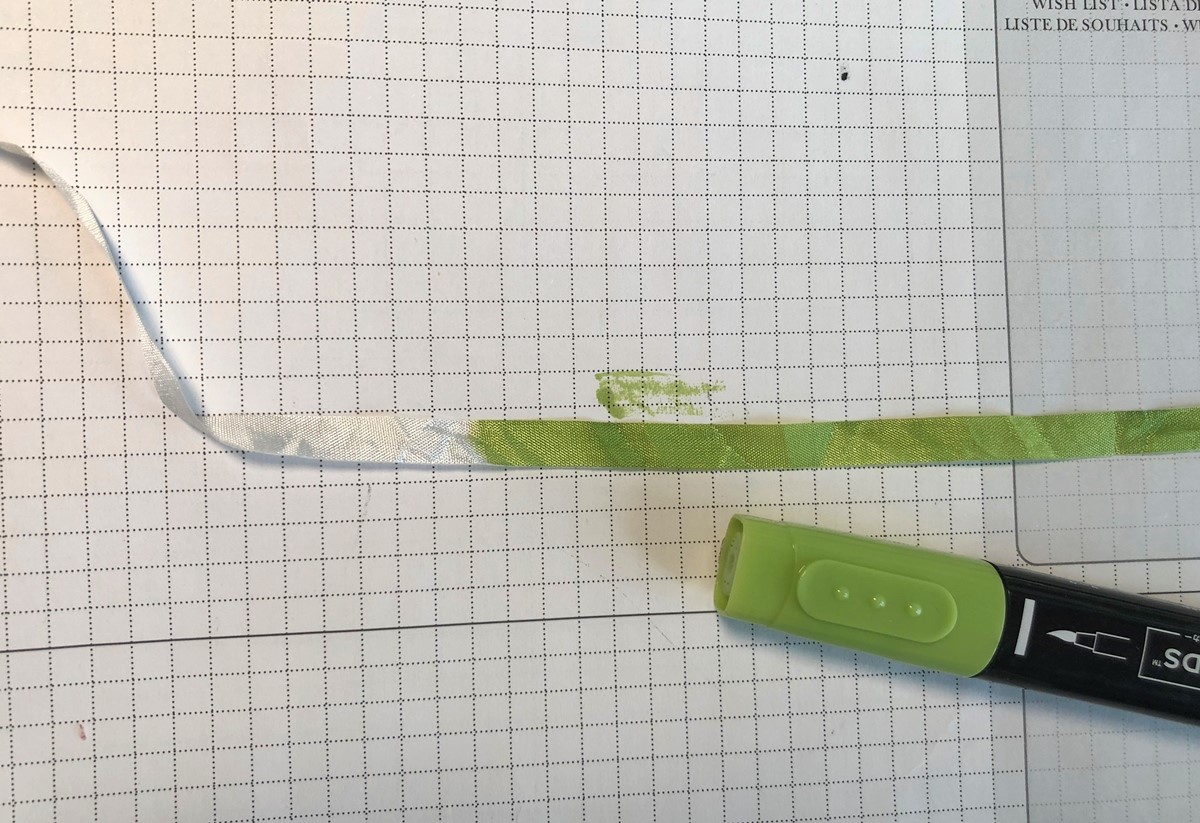
It’s actually the Whisper White Crinkled Seam Binding Ribbon on p 25 of the 2020 Mini Catalogue.  You can create any colour ribbon you like with the Stampin’ Blends.

Check it out below.  Just run along the ribbon with the Stampin’ Blends Marker. It dries quickly and ready to use on your projects.

Now for the Treat Holder.

Assemble the Kraft Pillow Box. Then wrap a strip of the Peaceful Poppies Designer Series Paper around the Pillow Box.  I wrapped around some more ribbon I had coloured around the box too.

The label for this box was using a different stamp in the So Sentimental stamp set and cut with different dies in the Stitched So Sweetly dies.  The Granny Apple Green card was embossed with the Pinewood Planks 3D Embossing Folder as well.

If you haven’t noticed the So Sentimental Bundle you can find it on p 20 of the Mini Catalogue. It has the different label shapes and Stitched Scalloped Rectangle dies of varying sizes. Great for layering together.  Available for $56 AUD.

Order in my store -> HERE. Please use the Host Code: R26WHBUN

Now you are off to Mae’s blog to continue your Hop.  Head -> HERE.  Follow along on the Hop with the list below if you get lost.


Blog participant List:

  1. Nicole Wilson
  2. Shannon Kissane
  3. Rochelle Laird-Smith
  4. Denise Buetler
  5. Rachael Lewsley
  6. Bronwyn Eastley
  7. Lou Kitzelman
  8. Libby Dyson
  9. Sue Vine
  10. Peta Stephen
  11. Monique Fielder
  12. Narelle Fasulo
  13. Cathy Pinchbeck
  14. Jenny Hayward
  15. Mae Collins
  16. Cheryl Algie
  17. Richelle Fletcher
  18. Kathryn Ruddick
  19. Kayla McCreadie
  20. Jenny Bowman
  21. Charmaine Black
  22. Sharon Dalton

Thanks for visiting me today.

Also, you can order these So Sentimental in my store -> HERE.  Please use the Host Code: R26WHBUN

All orders receive this month’s Tutorial Bundle as a little Thanks. And also select your Sale-A-Bration free product with your order over $90.

Jenny


Blog Hops, cards, Catalogues

TO A WILD ROSE FOR JULY STAMPING AROUND THE WORLD BLOG HOP!

Hello and welcome to another Stamping Around The World Tutorial Blog Hop.  I am excited to share again with this amazing, talented group.  You might have come from Jo Anne’s blog -> HERE or just starting out.  Either way, enjoy the hop.

Each month this group compiles a Bundle of Projects to send out free following orders from our customers, or people are able to purchase the tutorials regardless of where they live in the world.

We also come together to Blog Hop this time each month.  For our projects for the Blog Hop we create a project using the same stamp set we used in our Tutorials.  This month I used To A Wild Rose.

This is the card I have to share with you today.  It is not an original design and I have seen it on a few blogs but I am not sure what it is called.  I am calling it a Topper Card. 🙂 I have the measurements below.

THE TOPPER CARD

I have used the Perennial Essence Designer Series Paper for the front of the card. Isn’t it pretty?
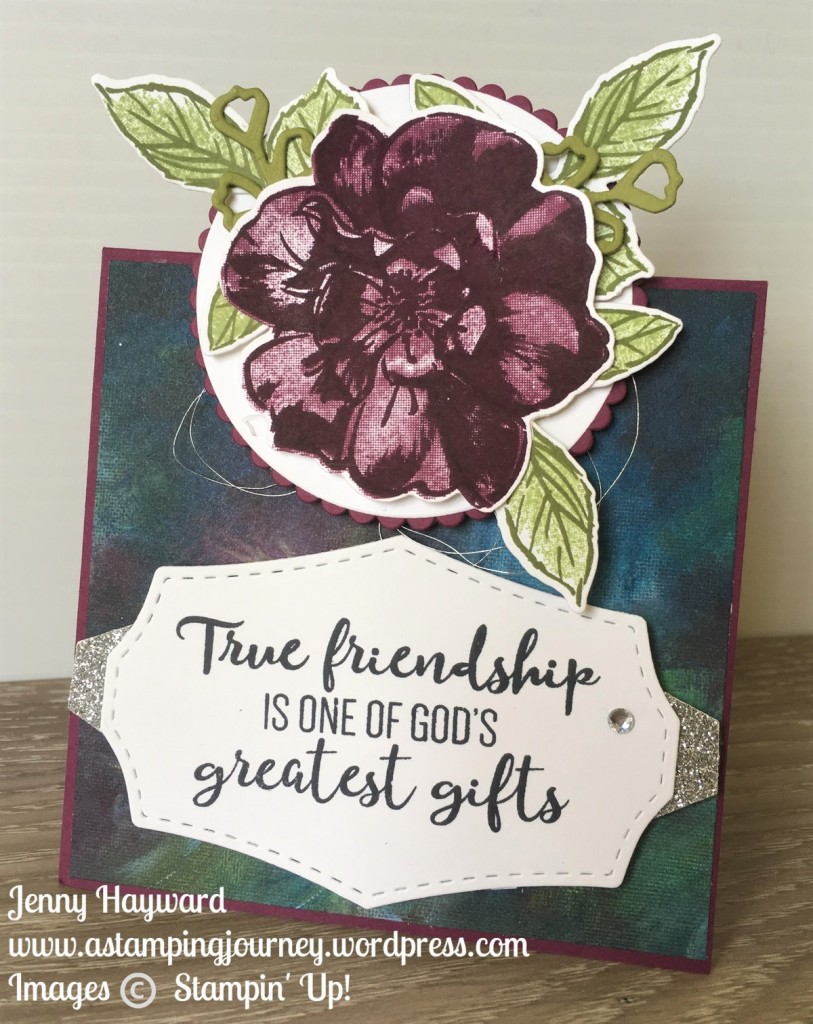
I stamped the large sentiment image on the first card.  It is a beautiful sentiment.  What a blessing it is to have a true friend.  I am very thankful for the blessing of a number of true friends.  I really loved the sentiment and wanted to use it.  The sentiment was diecut with the stitched label shape in the Wild Rose dies.  I backed it with some Silver Glimmer Paper which I had punched out with the Tailored Tag punch and cut in half.

When I finished the card the sentiment seemed to be too large and out of proportion or so I thought.    What do you think?  I re-stamped a smaller sentiment to go on the front.  The smaller sentiment was diecut with the Stitched Labels dies.

The rose in this set is created with 3 stamps.  You can use one, two or all three stamps together. I used all 3 in this one. The rose was stamped on scrap white paper.  Firstly stamp the outline rose image in Blackberry Bliss, the sparser filler image was stamped in Blackberry Bliss and the more detailed centre stamp was stamped in Rich Razzleberry.  I love how you get the depth to the flower with the multiple images.

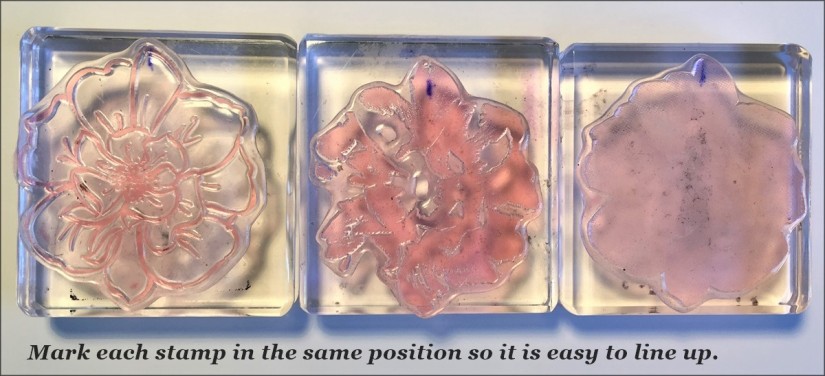
I will say it can be a little tricky lining up the 3 images for the rose.  I will share a tip with you.

TIP FOR STAMPING THE ROSE: On each of the stamps I made a mark in pen on the back of each stamp in the same position.  When you stamp you can position the stamp in the same orientation each time.  It saves so much time and frustration – let me tell you.  Here is a photo showing the marks on the stamp. I hope this tip helps.
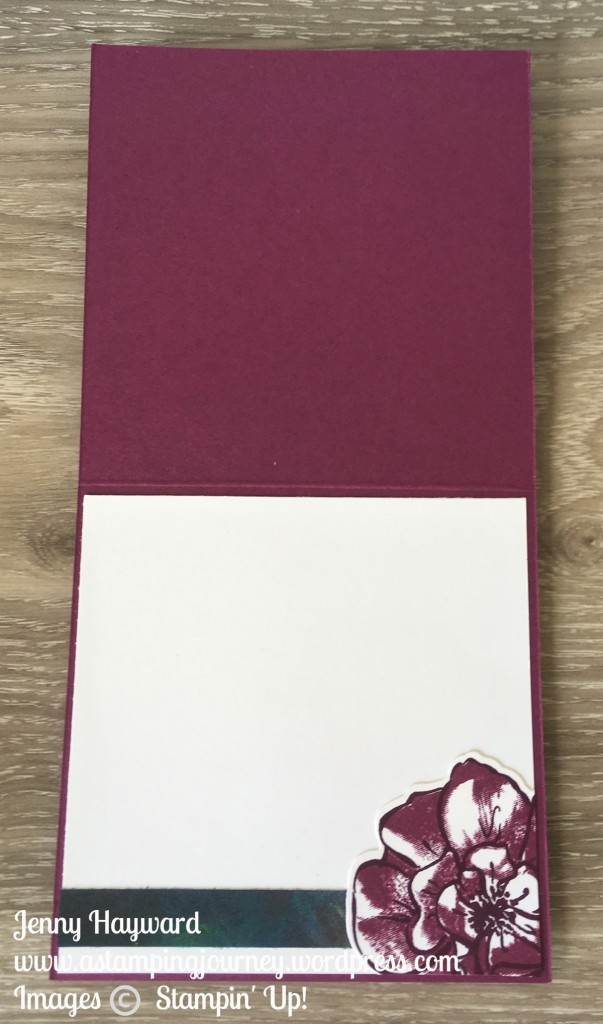
THE INSIDE OF THE TOPPER CARD

Of course, don’t miss the inside.  I had a strip of designer series paper over so I adhered that on to a piece of white card.  I had stamped an extra rose as I wasn’t sure which one to use for the front.  So I adhered that to the bottom right corner and trimmed off the overhang.  (This rose was stamped in blackberry Bliss for the outline image and Rich Razzleberry for the centre).
MAKE YOUR OWN TOPPER CARD

For the base card, cut card to 10.5cm x 21cm, score at 10.5cm.   (4 1/4″ x 8 1/2″, score at 4 1/4″).

Cut Designer Series Paper to 10.1cm x 10.1cm (4 1/8″ x 4 1/8″)

Cut White card for inside to 10.1cm x 10.1cm (4 1/8″ x 4 1/8).

To create the Topper part.  Make this any shape you desire.  I have used the Layering Circles Framelits. 

The topper is placed on the base card on the fold line with half of the topper overhanging. Remember when you add the topper to the top of the card only place your dimensionals to the lower half of the Topper shape so you don’t see them at the back. 

SEE IN STORE

You can see the To A Wild Rose Bundle in my store now -> HERE.  $93.50 AUS.

Now if you grab this bundle this month you will get a Bonus Day Voucher to get $9 off to go towards next month’s order,  AND you will receive the Tutorial Bundle of 12 exclusive Projects including my different project with the To A Wild Rose bundle.

GRAB A TUTORIAL FREE

Don’t want to miss anything?  Sign up for my Newsletter and receive one Tutorial as a Thank You.  This will be a project from a previous Tutorial Bundle.  Check the Right Hand Column.


CONTINUE THE HOP

Thanks for hopping with me today.

Now you are ready to move on to the next blog in the hop.  Now head off to Sue’s Blog -> HERE.  There is a list below if you get lost.


Eva Pottsova (Crafting with Angels)

Stefanie Pletscher (The Crafty Medic)

Margriet Siekman (Creatief met Marsie)

Jo Anne Hewins (Luv 2 Create)

Jenny Hayward (A Stamping Journey)

Sue Allen (Sue Allen Simply Craft)

Linda Handford (Stampin by the Beach)

Lori Mueller (Stampin’ Dreams)


Blog Hops, cards, Catalogues

STAMPING AROUND THE WORLD JUNE BLOG HOP – DAISY LANE!

It’s time for another exciting Blog Hop with Stamping Around the World Team.  You might have come from Linda’s Blog HERE or starting on my blog.  Either way.  Enjoy seeing all the amazing projects from Demonstrators around the World. 

Each month the team all contribute tutorials to send out as a Thank You for  when you order with any one of us.  That’s pretty exciting – and I can tell you these projects have been pretty amazing AND they are exclusive too so you won’t see them anywhere else.  I am honoured to be a part of it.  

The idea with these Blog Hops is to share a project with you with products we have used in our Tutorial for the month.  I have used the new Daisy Lane Bundle.  

Today I have 2 cards using the Daisy Lane stamp set and the Medium Daisy Punch.  I have also used the larger Daisy Punch.

The layout for the cards was based on the Freshly Made Sketches #339.  I thought it was a great way to use the paper. On these cards I used the Mosaic Mood Specialty Designer Series Paper.

It’s great way to show off the both side of the paper.  The Designer Series Paper needs to be square and to be the width of the white card mat whatever size you choose to make the card in.  These are standard card sizes.  See the measurements below.

Card Measurements:

Card Base: Mint Macaron 14.8cm x 21cm Scored at 10.5cm (5 1/2″ x 8 1/2″ Scored at 4 1/4″)

Soft Suede Card Mat: 10.1cm x 14.4cm (4 1/8″x 5 3/8″)

Whisper White Card Mat:  9.7cm x 14cm (4”x 5 1/4″)

Designer Series Paper:  9.7cm x 9.7cm (4″x 4″).

Cut the DSP diagonally and flip one side.  For these cards I used 2 different prints in the pack and actually swapped one half with the other as I thought the colours worked better together.

See the cards close up

I have punched 2 flowers of each size and layered them together.  The flowers were stamped in Soft Suede. and I used the Gold Faceted Gems in the centre of the flowers.

The sentiments are from the Itty Bitty Greetings stamp set.

Now the Daisy Lane Bundle is in store now -> HERE for $61 AUS When shopping in store please use the Host Code: H2BBRFTE

If you have the Daisy Delight set and the larger Daisy Punch then this is a great compliment to them and will really extend your creating so you can make the layered daisies in both sizes.  You can grab those in my store too if you haven’t already got them. With your qualifying orders you will get the Tutorial bundle with 12 projects that I will send out to you.

Now you can head off on the hop again and head to Jo Anne’s blog HERE or follow the arrows.  If you get lost follow the list below.


Eva Pottsova (Crafting with Angels)

Rebecca-Jo Unwin (Rebecca-Jo Unwin)

Stefanie Pletscher (The Crafty Medic)

Donna Gray (Stamping with Donna G)

Sue Allen (Sue Allen Simply Craft)

Linda Handford (Stampin by the Beach)

Jenny Hayward (A Stamping Journey)

Jo Anne Hewins (Luv 2 Create)

Lori Mueller (Stampin’ Dreams)

Margriet Siekman (Creatief met Marsie)


Thanks for visiting. Enjoy hopping! 🙂

Jenny

cards, Catalogues, Christmas, Stampin' Up!

SO SANTA MOPED!

I shared some cards yesterday using the So Santa set for a Blog Hop.  Did you see them?  Jump back a post to check them out if you missed them.

Today I have another card for you using the So Santa set.  I love the cool Santa on the Moped.

I coloured this image with the Watercolor Pencils.   I looped around some Silver Thread onto the back of the stamped piece.  This piece was adhered on to a piece of the All Is Bright Designer Series Paper and then adhered to a Real Red Card base.

The sentiment was stamped on black card in Versamark and heat embossed with White Embossing Powder.  To finish the card I added a Real Red Rhinestone.

Do you like this cool dude?  It’s such a fun set.

This set is available in the 2018 Holiday Catalogue. You can see it and order it in my store now -> HERE. Please use the Host Code: ME4VSE3W   or order directly to me (Australian residents only).

Thanks for visiting me.

Jenny

Blog Hops, cards, Catalogues, Stampin' Up!

RAZZLEBERRY BOTANICAL BLISS!

A couple of weeks ago when I was creating a card for a Blog Hop I was in I created this card.  I wasn’t happy with it for the Blog Hop but I thought I would share it with you now.  It is not my usual style so I didn’t feel comfortable with it. 🙂

At the time the theme of the Blog Hop was to be using a product from the current Catalogue.  If you go back a few posts (or head -> HERE) you can see what I ended up with.

I was having trouble working out what to make for it initially so I thought I would CASE a card from the catalogue.  The card on page 99 of the catalogue caught my eye so I thought I would use that as inspiration.

This was the inspiration card.

Details for my card I created up above.

The Designer Series Paper strip is from Share What You Love Specialty Designer Series Paper.  The Razzleberry Strip is embossed with the Softly Falling Embossing Folder.

The tag and the background was stamped with the Timeless Textures stamp set.  I sponged around the edge with White Craft Ink and distressed the edges.  The little sprigs were diecut from the Botanical Tags Thinlits cut from Mossy Meadow card. The circle is stamped with images from the Botanical Bliss stamp set.  I swirled around a couple of loops of Linen Thread behind the circle. 

So certainly different. Whether you like it or not just remember that the catalogue can be a great source of inspiration to create your next card.

Thanks for visiting today,

Jenny