cards, Cards by Mail, Catalogues

SIMPLY MARBLEOUS WITH AMAZING SILHOUETTES!

Another card with the Amazing Silhouettes Stamp set. Lots of other new products on this card too – The splatter from the Stripes & Splatter 3D Embossing Folders and the Simply Marbleous paper from Sale-A-Bration.

I also used the Ornate Layers Dies. I forget about these dies sometimes but this particular rectangle one fits the tree so well.

The Amazing Silhouettes stamp set is in the new Mini Catalogue. Have you checked the details for this month’s Class By Mail using this set? Head back a post or 2 and you can catch the details.

The Simply Marbleous Designer Series Paper is a free choice for Sale-A-Bration with your qualifying orders over $90 AUD.

In Australia? Shop in my store now -> HERE. Please use the Host Code – NR7MK2VR

Or contact me directly and I can help you with your order.

Happy Stamping,

Jenny

cards, Catalogues

LIFE IS BEAUTIFUL – SPOTTY BACKGROUND

I wanted to share this card with you today using the Life Is Beautiful stamp set found in the 2020 Holiday Catalogue.  It is a sweet one.

This card was one we created in class a few weeks ago.  I found the idea on Pinterest BUT I didn’t save it so I don’t know the original creator so sorry about that.

I love the idea of using the “dots” in the set as a background.  These dots give a Bokeh effect too which is cool.  That is where there is different tone to the stamps, so  a light and dark effect.

I used Calypso Coral, Bumblebee and Granny Apple Green.  The words are from the Well Written Dies. It’s all layered on to a mat using the Ornate Layers Dies.

You can see the Life Is Beautiful set -> HERE in my store. 

In Australia? You can order there or contact me directly and I will help you out. If ordering online please use the Host Code: TAWWBMRC

Thank You for your order.  I appreciate each and every one.

Happy Stamping,

Jenny


Blog Hops, cards, Catalogues, Christmas

CHRISTMAS IN JULY BLOG HOP!

Today I am hopping along for Christmas in July with a great group of crafters.  There is some amazing talent in this group and I am honoured to be joining in.

For the Blog Hop we are featuring products from the new Holiday Catalogue beginning on August 4th.  I am excited to start creating with these products.  I know we may not feel too much like Christmas yet but once you start creating with these fantastic products you will quickly get in the mood.

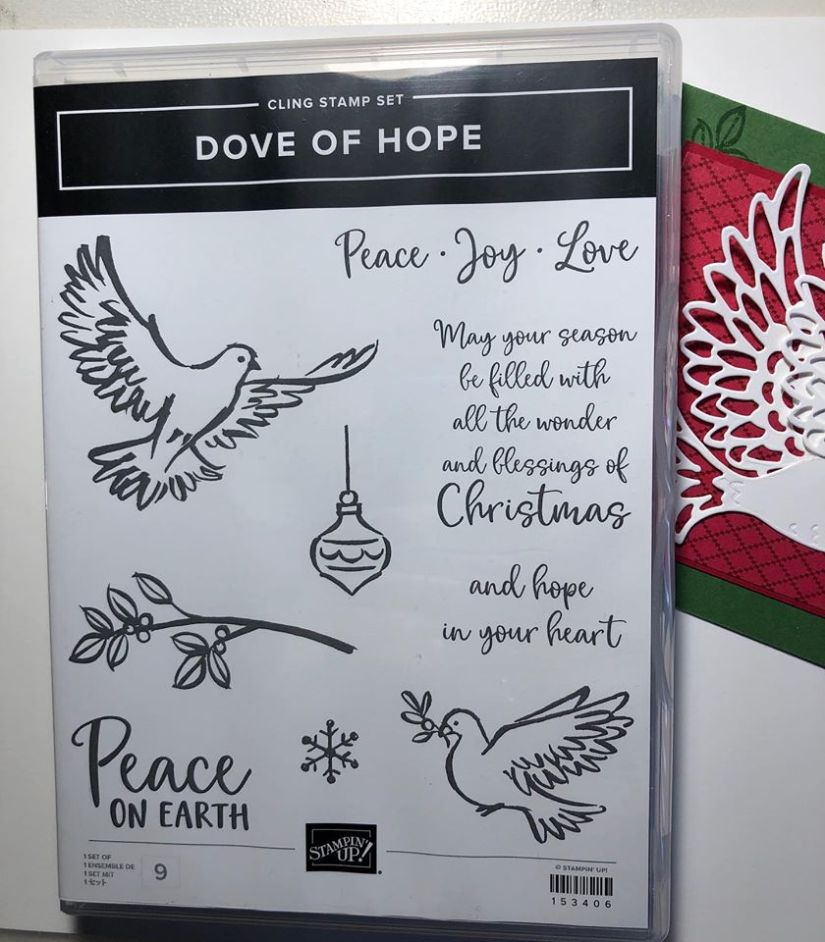
For the Blog Hop today I am using the Dove Of Hope Bundle which has the gorgeous stamp set and dies.  I made 2 projects to share with you today.

The first card is a more simple design.  The dove is diecut with Whisper White card and it really shows off the crispness of the dove as well as the little embossed details.  Don’t you love the detail in the wings??

To complete the card I used a piece of the ‘Tis the Season Designer Series Paper adhered on to a Real Red card mat.  The leaves were stamped over the Garden Green card base in Garden Green ink.  For the sentiment it was stamped in black on to white card and then punched with the Timeless Label Punch. 

The next card is a stepped up version.

The red card mat was diecut with one of the Ornate Layers Dies with piece of the ‘Tis the Season Designer Series Paper added.

On this dove I diecut it with some of the Plush Poinsettia Specialty Paper.  This paper is gorgeous and has flocked designs on vellum There are 3 different designs in the pack.  I went for this “flourish” style.  I wasn’t sure how it would work.  I did find that some of the flocked pattern was flattened but you still get the pattern on the dove.

The sentiment this time was heat embossed in gold on to white card and punched with the Timeless Label Punch.  To add a little extra shine I cut a small strip of Gold Foil and flagged the end to go under the sentiment.

Now you are off to continue your Hop.  I hope the links work for you. 🙂

CONTINUE THE HOP NOW.  Click on the “Click here” below.

Powered by Linky Tools

Click here to enter your link and view this Linky Tools list…

If you are in Australia and need your own copy of the Holiday Catalogue (of course you need to), then drop me an email at jghayward@yahoo.com and I can drop one in the mail for you.

The Dove of Hope and all the other gorgeous products will be available to order from August 4th. Head to my store -> HERE.

Thank you for your order.

Jenny

cards, Techniques

WEDNESDAY’S WOW! #101- CREATING DEPTH WITH COLOURED IMAGES!

Wednesday’s WOW #101.  Today I wanted to show you a little tip with colouring your images and how to create depth.

Firstly though.  Last Wednesday I had a little Giveaway.  Congratulations to Lynne C for winning the Little Ladybug Stamp set.  I will be in touch with you soon.

Back to our WOW!

I recently created this card with the retiring Accented Blooms set.  I wanted to give this a little ink up one more time before it retires.  It’s been a while since I have played with it.

I coloured it with the Stampin’ Blends.  I cut the white card with the Stitched Rectangles Dies But I added a little “new” with the Ornate Layers Dies by cutting the Calypso Coral card mat.

But this is what I wanted to show you.  You can give the appearance of depth to your image in a very simple way. Take a closer look below.

When I finished colouring I outlined the image with a lighter colour Stampin’ Blends.  This one I used the Light Pool Party.  I have used Light Smoky Slate at times too and even Petal Pink.  It just depends on the look you want.

I hope you try that trick next time you colour your images.

Thanks for visiting me.

Have an awesome day wherever you are.

Jenny

cards, Catalogues

ORNATE THANKS CARD WITH FANCY SENTIMENT!

Another card for you today with the Ornate Thanks stamp set and the Ornate Borders Dies.

The stripe paper is from the Best Dressed Designer Series Paper (DSP).

TIP: Adhere the flowery border behind the piece of DSP and then on to the white card before trimming.  Then you can trim it to size neatly.

The white card is embossed with the Ornate Floral 3D Embossing Folder for some texture.

If you take a look at the sentiment box.  The white card with the heat embossed sentiment is diecut with the stitched rectangle from the Ornate Layers Dies.  Check the ends though??  I diecut part of one of the frames from the Ornate Layers Dies from Silver Foil and then adhered it then behind the sentiment box for a little fancy edge.  Try it yourself.  🙂

What do you love most in the Ornate Garden Suite? I’m sure you know by now how much I love the dies. 😀

I hope you are doing ok in your part of the world. Keep safe.

Jenny x

Order any of the Ornate Garden products now in my store and delivered straight to your door wherever you are in Australia. Head -> HERE.

Receive a 12 Project Tutorial Bundle Free with your orders.  Tutorials not necessarily contain Ornate Garden Projects.

Also receive a little card and gift to say Thanks.  

Thanks so much for your order.


cards, Catalogues

ORNATE THANK YOU CARD!

This was the first card I made with the new Ornate Garden Suite of products.  The dies are just so detailed – and gorgeous.  Have I said that before today?? 😉

The floral edge is so pretty.  The sentiment from the Ornate Thanks Stamp Set is heat embossed in Silver Embossing Powder.  This sentiment piece is diecut with one of the Ornate Layers Dies. 

See those little stems sticking out from under the edge of the sentiment piece?  These are extra little diecut pieces cut from the floral border die that I have used on this card. Don’t throw them out.  They are such great additions to your card.

I finished the card off with a little White ribbon bow.

This is the Ornate Thanks Bundle below.  You can get either the stamp set or the die set on their own too.

There are lots of lovely delicate Diecuts in the Ornate Borders Dies.  I think  you these are a great addition to your collection.  You will certainly use them a lot!

Have a happy, sunshiny day wherever you are.

Jenny

cards, Stampin' Up!, Techniques

WEDNESDAY’S WOW! #99 – ORNATE LAYERS DIES + STITCHED RECTANGLES DIES!

Wednesday’s WOW! #99 (Can you believe we are that far!).  Today I wanted to show a little discovery I have made.  Maybe you have noticed already.  I have been using the new Ornate Layers Dies a lot lately and I discovered that some of the Stitched Rectangles Dies fit with these new Ornate Layers Dies.

Check them out.

There are 3 different rectangles that fit the Ornate Layers Dies.  How cool is that! You can layer them up.  The stitching that you would get on the white card mats from the Stitched Rectangles Dies will give you that extra texture for your cards.

So if you have got the Stitched Rectangles Dies already be sure to pull them out when you get the Ornate Layers Dies and layer them up.

Have fun creating with them.

Next WOW! is our BIG #100.  I might just have to have a Giveaway for this milestone.

What would you like to see me show you? Drop me a comment to let me know.

See you again soon,

Jenny

See the Ornate Layers Dies in my store now -> HERE. 

cards, Catalogues

ORNATE POPPY THANK YOU CARD!

Playing with the Ornate Garden products last week. I teamed them with the Poppy Moments Dies.

I had a piece of the Peaceful Poppies Designer Series Paper left over so adhered that on the card base.

The sentiment from the Ornate Thanks set was stamped in black on white card that had been diecut with one of the Ornate Layers Dies.  Then stamping the “my friend” on Blushing Bride card to punch out with the Classic Label Punch.

The poppies were created using the Poppy Moments Dies and layered on the card.

See the Gold Gem?? Some new bling is available in the Ornate Garden Suite of products.  Gotta love gold shiny bling.

The Ornate Garden products are now available in store.  See them now -> HERE.

Have a great week ahead,

Jenny


3D projects, Catalogues, Stampin' Up!, Tutorials

ORNATE GIFT BASKET – TUTORIAL AND/OR KIT AVAILABLE!

It’s Easter Fast approaching.  This sweet basket might be just the thing for your Easter treats or you could use if for any occasion.

I can provide you with the project kits to make your own or you can get the tutorial on it’s own.  Or grab the kit and the Tutorial for Free.

You will have to be quick to get the kit in time for Easter though. Order by this Sunday for it to arrive in time.

The kit and tutorial will be available for a couple of weeks otherwise though if you are not in a hurry.

Create your own gift Basket Kit Options:

  • Purchase the Tutorial                                           $2.50
  • **Purchase the Kit and the Tutorial                    $ 7.50
  • Additional kit (each)                                             $ 5.00
  • Receive the Tutorial Free with an order over $50.00

Email me at jghayward@yahoo.com to order your kit/tutorial.  Payment via paypal or bank transfer.

International visitors can order the tutorial.  The kit can only be ordered by Australian residents.

** to have the kits to create by Easter weekend please order the kit by Sunday 5/4.     Postage an additional $2.50  Pick up available.

Have a great day,

Jenny

cards, Catalogues, Stampin' Up!, Videos

ORNATE GARDEN AND BEST DRESSED TOGETHER FOR A FAST ACTION CARD!

I was playing around just recently to put this card together.  I decided to film a video creating it to show the process I go through sometimes in creating a card. So not to bore you too much I sped the video up – with my lovely daughter’s technical skills. I have still much to learn in this area.  😉

When I make a card there is often a lot of deliberation and shifting things and uncertainty until it comes together.  I’m sure you find that too.

For this card I had a plan.  I always sketch the plan out first for a card.  I had already stamped and coloured the perfume bottle from the Dressed To Impress stamp set.  That was left over from another project.  I wanted to use some of the new Ornate Garden Suite that I had.

I have used the Ornate Borders Dies and the Ornate Layers Dies.  The paper is from the Dressed To Impress Designer Series Paper.  I also used the Ornate Floral 3D Embossing Folder.

So check the quick video out.

Do you like these super quick videos?  Would you like to see more of them?  I will see what my editor can do. 🙂

Here is the finished card for you.

Have a great day,

Jenny

The Ornate Garden Suite is now available in store now -> HERE.