cards, Catalogues

IN THE TROPICS DAISY!

I had this idea in my head for a little while and thought I would give it a try. I have to say it didn’t work out as well as I had imagined. But, … I’m going to show anyway.


When I first saw the pineapple top in the In The Tropics Dies I wondered if it would make a grassy clump. That idea could work with the Daisy Lane set or similar.

After I cut the “grass” I sponged the ends with the Old Olive ink.

The patterned paper is from the Best Dressed Designer Series Paper pack.

The sentiment is from the Itty Bitty Greetings set and was cut with the Stitched So Sweetly Dies.

What do you think of this idea? Yay or Nay?

I’m keeping this brief today. Our computer has died so doing this on the IPad and Phone. I’m adaptable right. 😆 So apologies roday for the standard of the post.

Thanks for visiting me.

Jenny

3D projects, cards, Stampin' Up!

DAISY LANE GIFT CARD HOLDER!

I can now share this project with you as I know it has been delivered.  I recently had a request for a Gift Card for one of my customers.  It was ordered by her Sister In Law who contacted me.  Of course one doesn’t provide just a Gift Card.  It must be dressed up.  So here is the Gift Card packaging.

It’s just a simple style.  I will share more about that further below.  The front is decorated with daisies.  2 large Daisies were stamped and punched with the Daisy Punch.  2 smaller Daisies were stamped and punched with the Medium Daisy Punch.  They were all layered together and curled up a little.  A Clear Gem was added in the centre.

The leaves were punched with the Leaf Punch.  See the leaf?  I ran a score line down the centre of the leaf and folded it slightly.  This adds a little dimension to your leaf.

The Sentiment is from the Itty Bitty Greetings.  I stamped it on a little strip of white card and sponged the edges with the Petal Pink ink.

The paper is from the Magnolia Lane Designer Series Paper.

This is the inside of the holder.  I stamped some of the fern leaves inside.

The colours look very different in the photos to each other. I can say they are both the same one but the lighting changed effecting the colour of the holder.

To make your own:

Cut your card to 10.5cm x 15.5cm.  Score at 6cm and 13cm.

4 1/8″ x 6 1/8″.  Score at 2 3/8″ x 5 1/8″

I stapled the small flap down but you could adhere it with strong tape.  Be sure the tape is not too wide so you have enough room for the card to fit. Decorate it as you like.  Card mat for the front  and paper piece is slightly smaller on each layer (4mm or 1/8″).

Hope that helps.

Are you in need of a Gift Card?  Maybe for yourself (because it is the perfect gift for you) or it is for a friend or family.  You can order it to any value.  I have Christmas Gift Cards too so keep that in mind as Christmas approaches.

Thanks for visiting,

Jenny

Uncategorized

DAISY LANE SMILE!

Another Daisy Lane card for you today.  Just a bit of stamping and punching a few daisies out but it is a very simple card.  The stripey paper from the Bird Ballad Designer Series Paper works well with it I think.  I went through my stack of current paper to see what would be best.

Here is the card.

Stampin' Up! Daisy Lane Smile card

The dots in Pool Party over the card are from the Birthday Backgrounds stamp set. Stamp the daisies (the large and the small one) in Calypso Coral on white card and punch them out with the Daisy Punches. You will need 4 small ones and 2 larger ones.  You use 2 daisies for each daisy flower.  I added some Gold Gems in the centres of the daisies.

You can get a pack of these Gold Gems or the silver ones as the free gift for this week.  Here are the details how to order your Daisy Lane Bundle, (or any other products).

THIS WEEKS SPECIAL ONLY:

Order the Daisy Lane Bundle and receive a pack of Clear or Gold Faceted Gems free. (your choice of colour).  Great for the centres for your daisies.

Plus you will also receive 3 project tutorials from the projects that we will be making in our Daisy Class this week. (You can see those in an earlier post).


The Daisy Lane Bundle is available in my store now -> HERE.

Please use the Host Code: H2BBRFTE

or Order from me directly.

Thanks for visiting me. Have an awesome weekend.  I hope there is some stamping in the picture for you this weekend.
Jenny


cards, Catalogues

SIMPLE AND AVID DAISY LANE!

I wasn’t sure about these cards and I’m still not but you know I am showing you anyway because sometimes things don’t always go right.

For these 2 cards I wanted to use the Daisy Lane to make a card for #simplestamping which is a big focus of Stampin’ Up! at the moment but then step it up a little for a Casual or avid stamper.  

Firstly to define the two.  Simple stamping is for those just starting out with limited supplies and putting together a card with card, ink and stamps.

A Casual stamper is one who likes to make a card semi-regularly you might stay.  They are starting to collect a few more supplies and is using more involved steps and techniques.

An Avid Stamper who is one that you could say is “obsessed”.  They collect all the tools and stamps and will create very regularly.

Who do you say you would be??

We have a card more for the simple stamping first.

This card is not quite one layer.  There is the Rich Razzleberry card base and Petal Pink card mat.  The sentiment is from the Beautiful Day stamp set with the little flourish from A Big Thank You.  So there is more than one stamp set that you would normally use on a simple card for someone who has very limited supplies.

We have the next one which is for the Casual/Avid stamper. 

This one has a couple of more layers.  Using the same stamp sets though.  Adding the extra elements gives it a little more detail.

I hope you like them. As I said I am still not sure about them and the lighting is not great but there they are for you.

Have a great day,

Jenny


3D projects, Catalogues, Tutorials

WEDNESDAY’S WOW! #73 – DAISY LANE TEA BOX!

I have a sweet little Daisy Box for you for Wednesday’s WOW! #73.  You could use this to gift Tea Bags or some small chocolates.  I have the Tutorial below.

It doesn’t take long at all to make.  I used the Magnolia Lane Designer Series Paper for the strip around it.  The daisies were stamped from the Daisy Lane set and punched with the Daisy Punch and the Medium Daisy Punch.  I did 2 of each and layered them together.  The leaves were punched with the Leaf Punch.  If you check the leaves closer I scored along the centre and then curled them up a little.  This gives them a little dimension.

Here is how to make your Box.

Tea Bag Box

NB: Measurements are in both Metric and Imperial.  (apologies in advance for the 16th” measures).

Cut card to 19cm x 14cm (7 1/2″ x 5 1/2″).

Score card at 8cm and 11cm on the 19cm side . (On the 7 1/2″  side score at 3 1/8″ and 4 5/16″)

Score card at 3cm and 11cm on the 14cm side. (On the 5 1/2″ side score at 1 3/16″ and 4 5/16)

Cut Designer Series Paper piece at 6cm x 28cm (2 3/8″ x 11″).

To assemble the box.  Fold and score on all the lines.  Cut up on the small score lines on the long sides of the card.  See below.

Assemble the box by firstly adding adhesive to the 2 small tabs placing it on the outside of the tab. Fold up and bring one of the side panels over to adhere on to the tab.  Do this on both sides of the box.  Add adhesive along the outside of this long tab and then adhere the other long tab down on to this. This forms your box.

Place adhesive, (I use Tombow Multipurpose Adhesive) along the back of the paper strip and wrap around the box and adhere down. Decorate as you like.

***

Hopefully that makes sense.  I was a little time pressed today to get the full photos together.  If you need more information, drop me a comment and if you would like a video then let me know.

Enjoy making the box.

Jenny

THIS WEEKS SPECIAL ONLY:

Order the Daisy Lane Bundle and receive a pack of Clear or Gold Faceted Gems free. (your choice of colour).  Great for the centres for your daisies.

Plus you will also receive 3 project tutorials from the projects that we will be making in our Daisy Class this week. (You can see those in an earlier post).


The Daisy Lane Bundle is available in my store now -> HERE.

Please use the Host Code: H2BBRFTE

or Order from me directly.

cards, Catalogues

FLIRTY DAISIES!

This week I am sharing some Daisy cards with you using the Daisy Lane Bundle.  

I am sharing this card with you first.  I am not sure about it still but, well … I am still putting it out here as it may inspire someone – in some way.

We are just keeping it simple with this one with a little stamping of the daisies in Flirty Flamingo and Rich Razzleberry.

Just one stamped and punched daisy on one of the daisies to highlight it.  Add a little Clear Faceted Gem to the centre.

Sometimes you can just do simple right. 🙂

I will share more daisies with you again next post,

Jenny

cards, Catalogues, Stampin' Up!

DAISY LANE CLASS – OR TO GO!

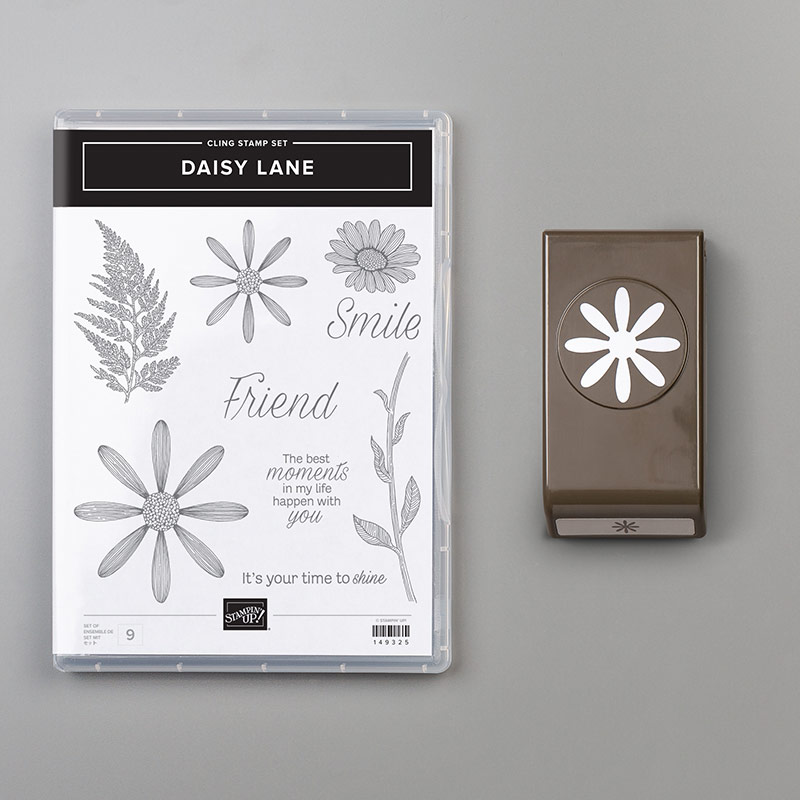
The Daisy Lane Bundle is a great new stamp and punch set in the 2019 Catalogue.  The Daisy Punch from the previous catalogue co-ordinates so well with it too.

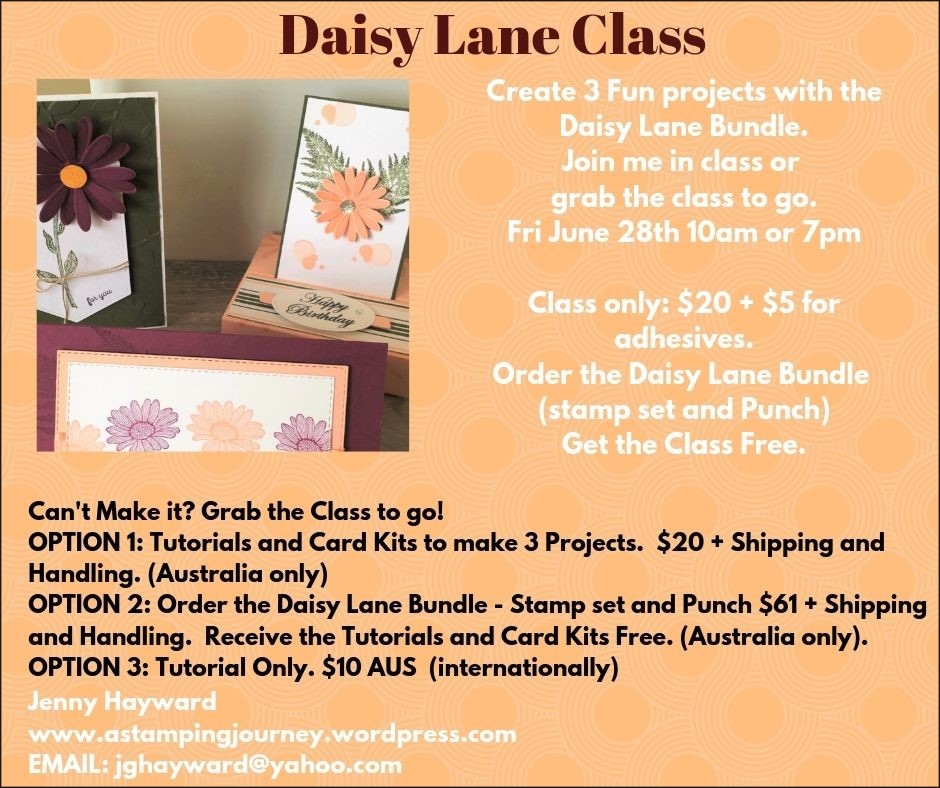
We are going to have some fun with it in class this week.  Never fear if you can’t make it.  You can get the Class-To-Go or buy just the tutorial. 

Here are all the details.

Make your choice.

Just to summarise here are the options.

DAISY LANE CLASS

Friday 28th at 10am or 7pm

1) Class Only – $20 (+ extra $5 for adhesives).

OR

2)  Get the Class Free when you order the Daisy Lane Bundle (stamp set and Medium Daisy Punch) $61 + Shipping and Handling.

CLASS TO GO 

1) Tutorial + Card Kit for 3 projects – $20

2) Order The Daisy Lane Bundle and receive the tutorial and card kits Free. $61 AUS + Shipping and Handling.

3) Tutorial Only $10

PLEASE RSVP BY 26TH JUNE


The Daisy Lane Bundle is available in my store now -> HERE.

Please use the Host Code: H2BBRFTE

or Order from me directly.

THIS WEEKS SPECIAL ONLY:

Order the Daisy Lane Bundle and receive a pack of Clear or Gold Faceted Gems free. (your choice of colour).  Great for the centres for your daisies.


I will be sharing lots of Daisy projects this week so stay tuned.

Jenny


Blog Hops, cards, Catalogues

STAMPING AROUND THE WORLD JUNE BLOG HOP – DAISY LANE!

It’s time for another exciting Blog Hop with Stamping Around the World Team.  You might have come from Linda’s Blog HERE or starting on my blog.  Either way.  Enjoy seeing all the amazing projects from Demonstrators around the World. 

Each month the team all contribute tutorials to send out as a Thank You for  when you order with any one of us.  That’s pretty exciting – and I can tell you these projects have been pretty amazing AND they are exclusive too so you won’t see them anywhere else.  I am honoured to be a part of it.  

The idea with these Blog Hops is to share a project with you with products we have used in our Tutorial for the month.  I have used the new Daisy Lane Bundle.  

Today I have 2 cards using the Daisy Lane stamp set and the Medium Daisy Punch.  I have also used the larger Daisy Punch.

The layout for the cards was based on the Freshly Made Sketches #339.  I thought it was a great way to use the paper. On these cards I used the Mosaic Mood Specialty Designer Series Paper.

It’s great way to show off the both side of the paper.  The Designer Series Paper needs to be square and to be the width of the white card mat whatever size you choose to make the card in.  These are standard card sizes.  See the measurements below.

Card Measurements:

Card Base: Mint Macaron 14.8cm x 21cm Scored at 10.5cm (5 1/2″ x 8 1/2″ Scored at 4 1/4″)

Soft Suede Card Mat: 10.1cm x 14.4cm (4 1/8″x 5 3/8″)

Whisper White Card Mat:  9.7cm x 14cm (4”x 5 1/4″)

Designer Series Paper:  9.7cm x 9.7cm (4″x 4″).

Cut the DSP diagonally and flip one side.  For these cards I used 2 different prints in the pack and actually swapped one half with the other as I thought the colours worked better together.

See the cards close up

I have punched 2 flowers of each size and layered them together.  The flowers were stamped in Soft Suede. and I used the Gold Faceted Gems in the centre of the flowers.
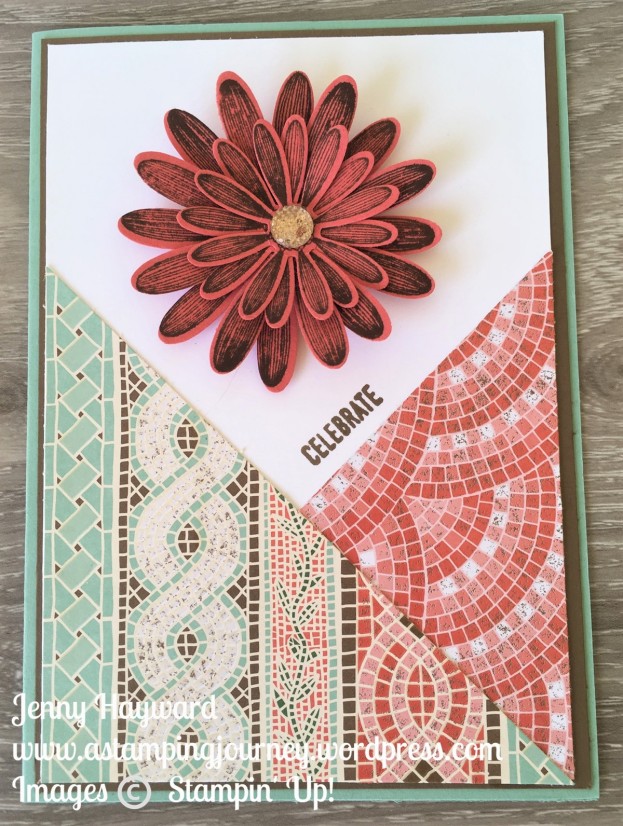
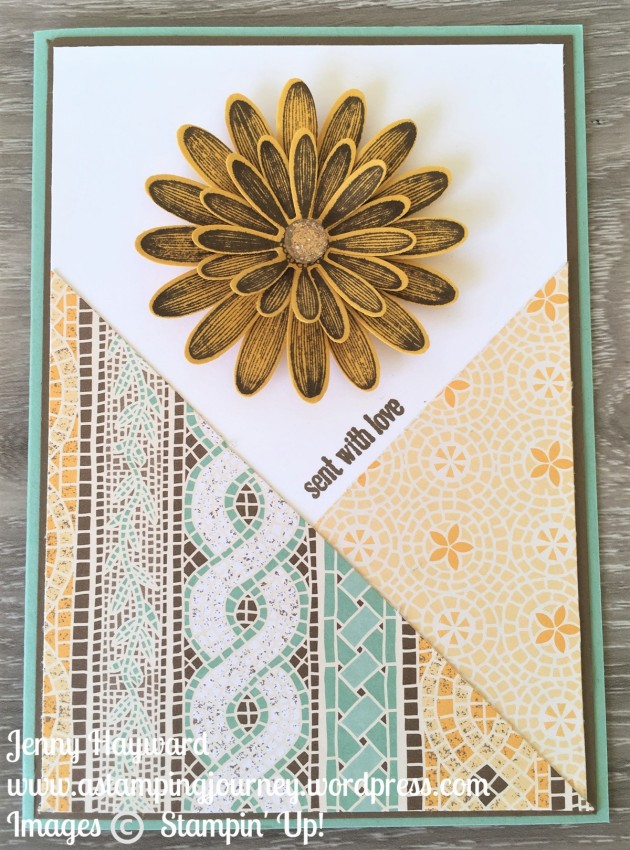
The sentiments are from the Itty Bitty Greetings stamp set.

Now the Daisy Lane Bundle is in store now -> HERE for $61 AUS When shopping in store please use the Host Code: H2BBRFTE

If you have the Daisy Delight set and the larger Daisy Punch then this is a great compliment to them and will really extend your creating so you can make the layered daisies in both sizes.  You can grab those in my store too if you haven’t already got them. With your qualifying orders you will get the Tutorial bundle with 12 projects that I will send out to you.

Now you can head off on the hop again and head to Jo Anne’s blog HERE or follow the arrows.  If you get lost follow the list below.


Eva Pottsova (Crafting with Angels)

Rebecca-Jo Unwin (Rebecca-Jo Unwin)

Stefanie Pletscher (The Crafty Medic)

Donna Gray (Stamping with Donna G)

Sue Allen (Sue Allen Simply Craft)

Linda Handford (Stampin by the Beach)

Jenny Hayward (A Stamping Journey)

Jo Anne Hewins (Luv 2 Create)

Lori Mueller (Stampin’ Dreams)

Margriet Siekman (Creatief met Marsie)


Thanks for visiting. Enjoy hopping! 🙂

Jenny