cards

SPRINKLES AND CHERRY ON TOP!

Don’t you love that title!!! What else can I say really.  I have had some fun making up some cute projects with the ‘Sprinkles of Life’ stamp set and the ‘Cherry on Top’ Paper Stack.  These are the first ones I made the other day and thought I would share them with you.

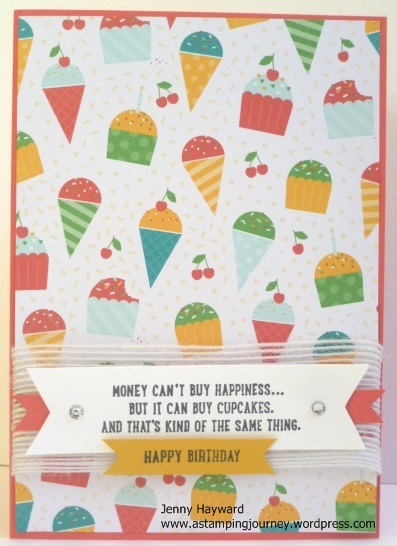
This first one I just layered some of the ‘Cherry on Top’ DSP onto a Watermelon Wonder Card base.  The images are so cute you really don’t need much more.  Although I did deliberate a lot with this…. and I really am not too sure about it, but anyway first play!!  I added some of the White Jute ribbon and then stamped one of the greetings from the ‘Sprinkles of Life’ set and flagged the ends on the white card. The “Happy Birthday” I cut with the Bitty Banners Framelits.  It looked a bit bare so I added a little banner of Watermelon Wonder card under the white banner.  A little bling to finish.  OK, still not sure …..Thoughts???
P1160801

For this card I used a different pattern in the ‘Cherry On Top’ DSP stack.

P1160804

I stamped the greeting in black onto a piece of Whisper White Cardstock which I had punched the top with the Scallop Tag Topper punch.  Then I stamped the cone in Tip Top Taupe.  The ice-creams were stamped separately on scrap card. I will tell you how I coloured the ice-creams.  I stuck the ice-cream stamp on the block with the image facing down on the block (so upside down). I inked up the stamp in Watermelon Wonder and stamped it off first gently onto scrap paper and then on to white card. So it was a little lighter in colour. Then I cleaned the stamp, put it on the block the correct way and stamped it over the already stamped image.  I then did the same with the Cucumber Crush colour.  Then punched them both out with the Tree Builder punch. I was blog hopping the other day and came across this idea and now I can’t remember who it was sorry but how clever!!!

To finish the card I added a bow from the Watermelon Wonder Dotted Lace Trim. This is such gorgeous soft lace.  It is hard to see but I added a little sparkle with the 2-way Glue pen and Dazzling Diamonds to the bottom of the ice-creams.

This Sprinkles Of Life set is so cute AND the great thing is that $3 from every set sold will be donated to Ronald McDonald House.  How awesome!!! Here is the set.

Sprinkles of life

I know you will just want to get this set – not just because it is cute but because it is for such an awesome cause.  Stay tuned for more details on how you can support Ronald McDonald House.

Enjoy your day wherever you may be,

Jenny

3D projects, Stampin' Up!

BOHEMIAN TOTE!!

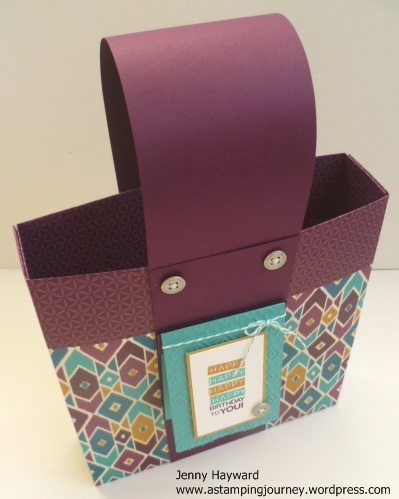
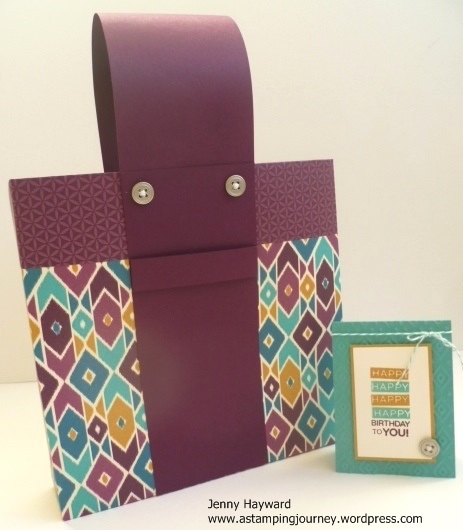
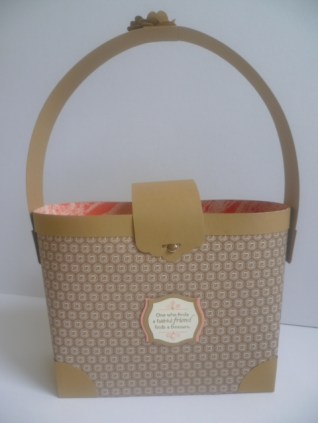
I have been playing around with the new Bohemian Designer Series Paper (DSP).  I really like the colours and the funky patterns.  Totes are all the go at the moment and I wanted to create a new Tote.  It is not a particularly new design using 2 sheets of the DSP but I thought I would change it up a bit.  Plus I added a little tab to hang your gift card off. I hope you like this one 🙂

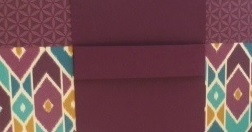
P1160789       P1160791


P1160795

Would you like to make one?  Here are the instructions in metric and imperial.

BOHEMIAN TOTE

2 Sheets of 12×12 Designer Series Paper (DSP) I have used the Bohemian DSP

Handles: 2 pieces of 20.5cm x 8cm (8” x 3 1/8”) co-ordinating cardstock

1 piece of 28cm x 8cm (11” x 3 1/8”) co-ordinating cardstock

Card Tab on Handle:   2cm x 10cm (¾” x 4”) co-ordinating cardstock

Inside Base:   4.8cm x 20.2cm (1 7/8” x 8”) co-ordinating cardstock

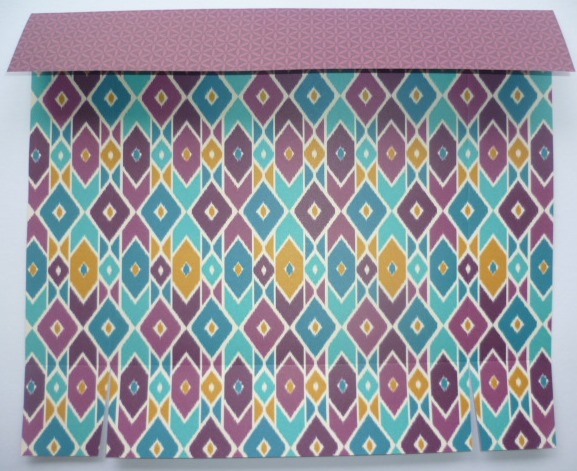
  1. On each piece of DSP score your sheets at 5cm (2”) on each side. Fold on each of the score lines.
  2. Cut up on the small score lines at the bottom of each piece of DSP.

P1160761


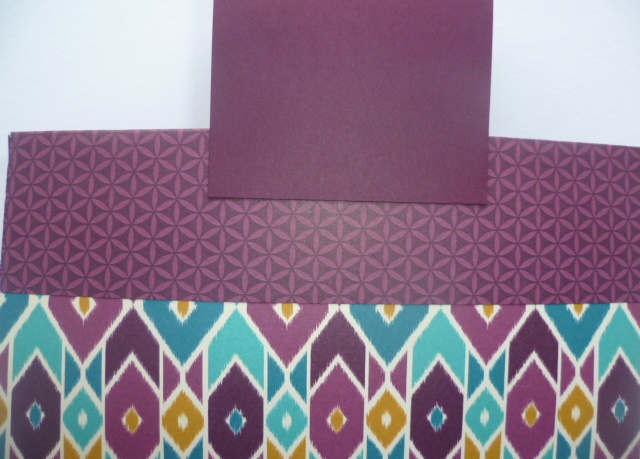
  1. Add adhesive to the 2 small bottom tabs on one sheet of the DSP on the outside. Adhere this to the inside of the long bottom tab.
  2. Place this assembled piece on to the second piece of DSP which has the right side facing down.

P1160763


  1. Add adhesive to the bottom small tabs on the second DSP sheet and assemble on to the bottom of the first piece. Add adhesive to the long side tabs on the inside of the second sheet of DSP. Adhere this to the first piece.  Add adhesive to the long bottom tab of the second sheet of DSP and fold up on to the first piece.  So it is like wrapping the second sheet onto the first sheet. (The piece at the bottom would be the front of the bag so just check to see what print you want showing).
  2. On the 28cm x 8cm (11”x 3 1/8”) piece for the handle, place adhesive at each end of the handle ON THE UNDERSIDE. Adhere on the outside of the bag near the top.
  3. Take one end of this handle piece and adhere to the top of the bag on the outside of the bag. Adhere the other end to the other side of the bag on the outside of the bag.

P1160765

  1. Take one piece of your 20.5cmx8cm (8”x 3 1/8”) cardstock and place adhesive on the back of this piece. Line up the top edge of the piece with the top edge of your bag positioning it over the handle piece. And adhere on to the front of the bag.  Repeat with the other piece adhering this to the back of your back.  NOTE: If you wish to add brads to your bag for decoration ADD THESE FIRST.  (Just so you don’t see the back of them inside the bag).

P1160766

  1. Fold on the score lines of the small card tab and unfold.  Add adhesive to the ends (on the side facing up). Fold over the piece again and adhere this piece to the front of your bag.

P1160796


  1. Add your piece of cardstock base to the inside of the card. This provides some extra strength.

Decorate the bag as you like.

——————-

Card to hang on the front measures 20cm x 7.5cm. Score at 10cm.

7 ½” x 3”. Score at 3 ¾”

P1160798

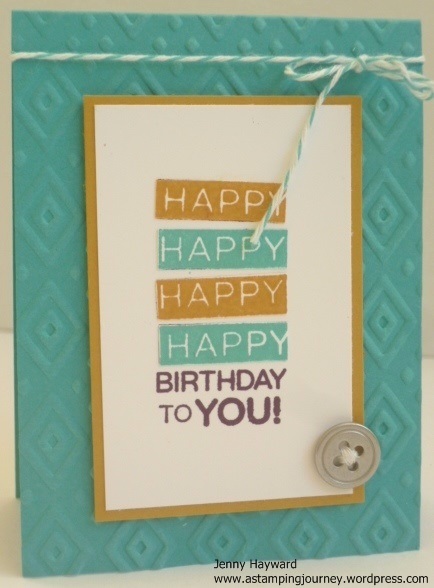
For my card I used the Boho Chic Embossing Folder on the front of the Bermuda bag card.  The Happy Birthday is from ‘Amazing Birthday’. I stamped it first onto Whisper White Cardstock in Blackberry Bliss and then again twice on scrap card with Bermuda Bay and Delightful Dijon.  I cut 2 of the “HAPPY’s” out of each colour and adhered them over the top of the Blackberry Bliss greeting. The Whisper White piece was matted on to Delightful Dijon and the whole piece was raised up with dimensionals.  I wrapped around some Bermuda Bay Baker’s Twine and added a silver button that I had sewed with white sewing thread.  This complemented the silver buttons on the bag.


I hope you like this version of the Tote Bag.  It’s a good size for those larger gifts.  Enjoy making them.

Have a happy weekend.  I hope it’s a crafty one for you.  It’s a long weekend here so I hope there is some time to create this weekend.

Jenny


Catalogues, Stampin' Up!

THE 2015 STAMPIN’ UP! CATALOGUE IS HERE!

The excitement has been building over the last few weeks and there has been lots of sneak peeks shown on so many blogs and social media.  The wait is over!  The 2015 Stampin’ Up! Catalogue is now available.

2015_AnnualCatalog_en-AU

I will add the link in the right hand column but you can head over HERE now and see the Catalogue Online.  Whoo Hoo! Grab your cuppa and some paper so you can start making your wish list.  If you are someone who likes to have their own copy of the catalogue and you haven’t got one yet, then ASK ME FOR ONE!!! (Australian residents only!).  I will drop one in the post for you.

I am not going to ramble on today because I know you have important things to do – like read a catalogue!!!  🙂  But I will say that FOR TODAY ONLY ALL 3 CATALOGUES ARE AVAILABLE TO ORDER FROM – the 2014-15 Stampin’ Up! Catalogue, the Occasions Catalogue and the new 2015-16 Stampin’ Up Catalogue.

I am placing an order tonight so if you know what you want already and planning to order online (by 8pm) (HERE) then please use the Hostess Code:     2FBF4JF9

Join in June

Some exciting news though too before you go.  If your wish list is loooooong!!!!! Believe me I think it will be.  Then Join Stampin’ Up! during June and receive 2 additonal stamp set for FREE! Exciting!

Pay $169= $235 of products + 2 extra stamps set + Pay no shipping!  You do the Maths 🙂

Ask me for more information or you can join Online HERE now! It doesn’t matter where you live in Australia. I welcome you to my team. 🙂

Now on to “Operation Wish List” 🙂

Jenny

3D projects, Tutorials

LARGE TOTE BAGS ARE ALL THE RAGE!!!

You  might have seen lots of little Tote Bags around the internet???  They are great little gift bags to give those special gifts to others.  A few years ago now I created a larger Tote Bag as many of them were great for card sizes or small gifts but if you have a larger gift THEN a larger Tote is needed right???  The Totes I shared way back then continue to be a huge hit on my blog and they have a large number of repins on Pinterest every week.  SO, if you have missed it, I thought I would show you these again. I have another type of bag in the process at the moment and when I finally get to create them I will share that too.

So here is my Tote bags for you that you can make to give that special larger gift.  (maybe a top or scarf or LOTS of chocolates!!!). 😉

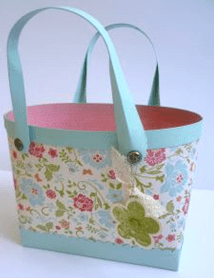
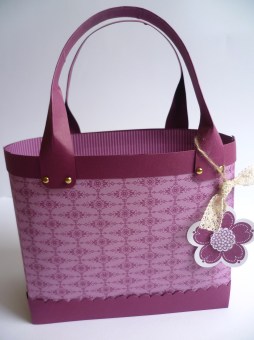
new tote                  P1030185

You can find the tutorial to make these in this post HERE.

A little while after making these I decided it was time for an update.

P1110769

You can find this Tote in this post HERE.  I followed the original tutorial with a few modifications.

I would love to see your versions so send me a photo. If you make one then don’t forget to give credit.  🙂

Have a great weekend,

Jenny

cards, Catalogues

‘HEY VALENTINE FISHIES’

The excitement is building for the new catalogue to start.  Not long now folks!  But we still have an Occasions Catalogue AND the current catalogue to see and I still have some projects that I haven’t shown you yet.  So let me show you these cute little fishy cards.

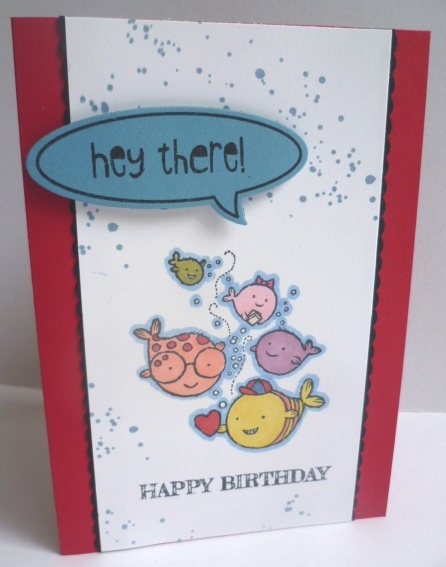
These are from the set ‘Hey Valentine’.  I stamped these some time ago and coloured them with the Blendabilities.  Yes that’s how long they have been sitting unfinished on my desk.  I wasn’t sure how to put them together.  Recently I pulled them out again and made the cards.

P1160430

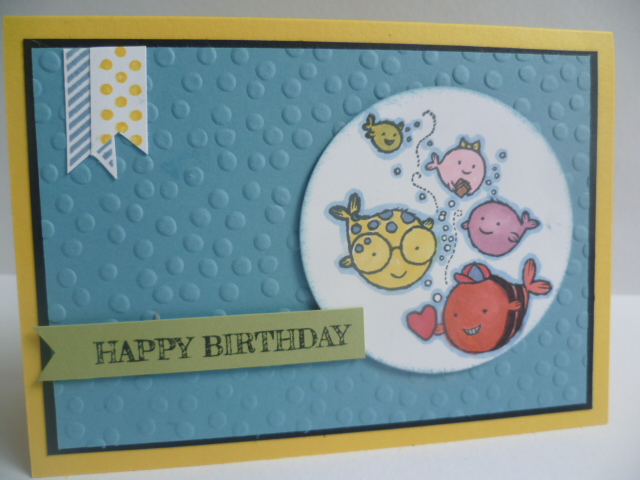
This card was loosely based on the Clean and Simple sketch #283.  You can see that here.   The sentiment is from ‘From the Herd’ and the banners are from ‘Perfect Pennants.

P1160434

On this card I used ‘Gorgeous Grunge’  for the dots in the background.

This set is not just for your Valentine’s cards.  Otherwise you would only use this set once a year, but where is the value in that!!! These images are just so cute for any time of the year for the young kiddies.  I cut the greetings off most of the stamps in the set to make them more versatile or you could mask the greeting if you didn’t want to cut them off.

You can see another card I made with this set Here.

I have to show you this cute set.

valentine

Now you only have a couple of weeks to buy this set (June 2nd) so don’t delay.  It is $42.95 Wood or $30.95 Clear mount.  You can message me to order OR order Online HERE.

I am waiting (im)patiently for my preorder to arrive.  Hopefully today, fingers crossed.  Hope you have a Happy Day 🙂

Jenny

cards

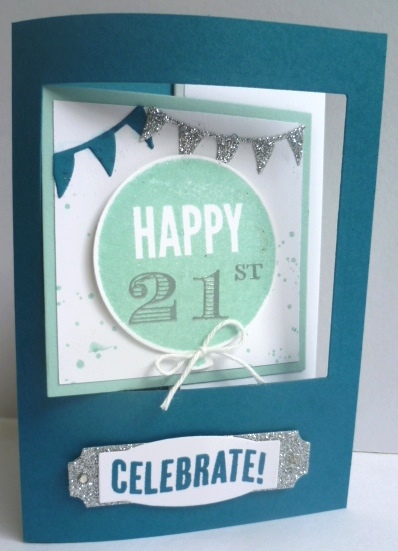
HAPPY 21ST WITH CELEBRATE TODAY!!

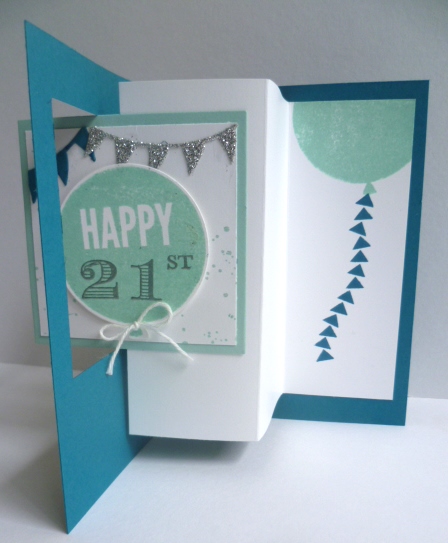
Yesterday was my niece’s 21st Birthday.  I can now show you her card since it is safely delivered. The pressure was on to do something different – and spectacular.  I came across this Pop Out Swing card by Julie Davison.  You can see that card HERE and the instructions are there too for you to make your own.

Here is my card using ‘Celebrate Today’ and the Balloon framelits.

P1160425

It took a little bit until I was happy enough with the swing and I think it is a card that you personally give to someone to show them how it works rather than sending it them in the mail.

Here is the front of the card.  The greeting was cut using the ‘Project Life – Cards and Labels’ die. A little glimmer always goes down well on a card too. 🙂  I cut the square from the centre of the front of the card using the Squares Framelits.

P1160423

You can’t tell by the photo but I heat embossed the 21st with silver embossing powder.  It gave it a nice shine. The 21st is from the set ‘Memorable Moments’ (soon to be retiring – have you got that set yet???).

I think it was well-received.  Happy 21st Megan. x

I hope you are having a wonderful weekend,

Jenny

cards

SHELTERING TREE!!

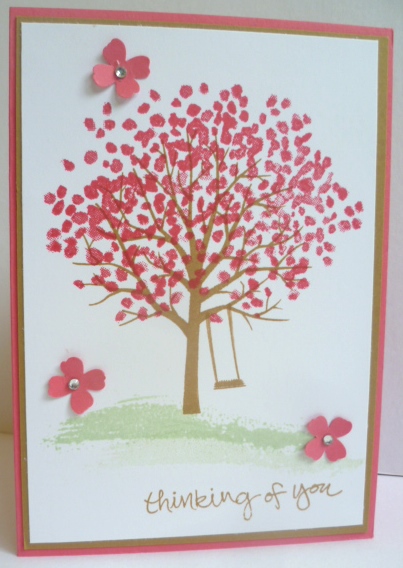
I have had a little time this week to play with this set ‘Sheltering Tree’.  I have seen so many great cards with it that it was time that I joined in!

P1160356

There are some cute little images in this set and it is fun to put together.  This first one was inspired from these cards Here.  I made this card a standard size though. This is using Strawberry Slush and Pistachio pudding inks and the card mat is Baked Brown Sugar.  (I only have a few weeks left to indulge in these colours so I think I will be trying to make the most of them!!).

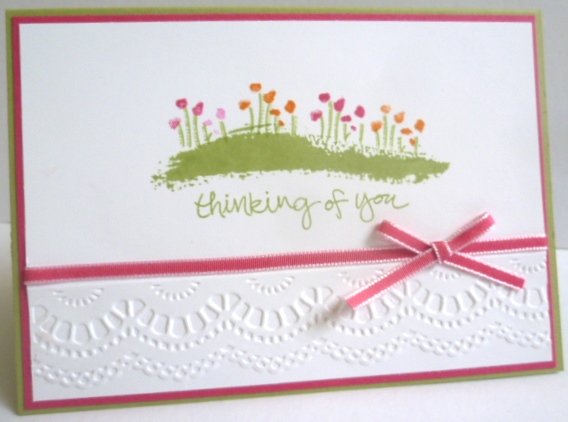
This next card was a fun one to make.  I CASED this card off a friend but for my card I added the Delicate Designs Folder along the bottom edge giving it a little texture.  I stamped the little flower stems and flower heads.  These line up together so well.  The flower heads were stamped alternately in Melon Mambo and Pumpkin Pie.

P1160362

I think you just have to get this set.  It is such fun and there are so many different ways to use them. I will have some more play soon BUT there is less than 3 weeks to our Stampin’ Up! South Pacific Convention AND I have still yet to start swaps.  I hope to over the weekend but then I have been saying that all week!!! So stay tuned on that venture 🙂

Jenny

cards, Sale-A-Bration

THE END OF SALE-A-BRATION 2015!

I can’t believe how quickly the past few months have gone with Sale-A-Bration.  There has been so many great products that are going to be sadly missed.  What has been your favourite???  I have already mentioned a few of my favourites with ‘Lotus Blossom’ and ‘Big Day’.  Then we had some fantastic new additions. Sadly not much time to play with them but the papers were gorgeous.

Here are some projects to share with you courtesy of Stampin’ Up! I don’t know who the original creators are so I do apologise but these showcase some of the gorgeous products we have enjoyed during Sale-A-Bration.

lighten my life

‘You Brighten My Day’ stamp.  We do always have something to be thankful for and today I am thankful for my wonderful customers and my team for a great Sale-A-Bration.

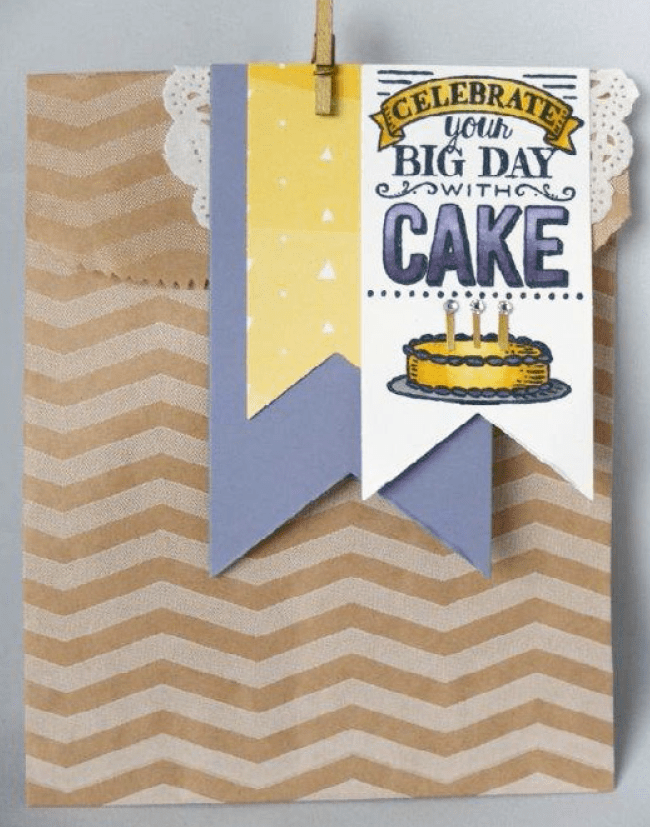
big day bag

Great gift bag with ‘Big Day’.

lotus

The lovely ‘Lotus Blossom’.

boxes

The fantastic ‘Irresistibly Yours’ Designer Series Paper.  This looks stunning in gold!

So have you got your free Sale-A-Bration products yet?? You only have hours to go, so make sure you get them in to your Demonstrator.  I will be adding my last orders in a few hours time so be quick!! I can ship anywhere in Australia.

Tomorrow is another day with a great new special and we can look at the Occasions Catalogue which has been a little neglected lately.

Thanks for visiting,

Jenny

Sale-A-Bration

CELEBRATE SALE-A-BRATION!!

As we approach the end of Sale-A-Bration I am having a LONG weekend of celebrating.  From Friday 27th – Sunday 29th I am sending out some fun projects to my Newsletter subscribers.  I can’t wait.  Here is a little sneak of the first project going out tomorrow.

P1160281 - Copy

Are you on my newsletter list??? Drop me a message and I can add you so you can be included in this special celebration.

Jenny