cards

BIRTHDAY BLOSSOMS IN BERMUDA BAY!!

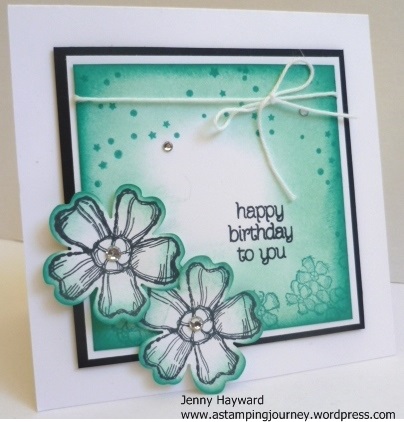
I thought I would get back to sharing the cards I made at our stamping weekend a few weeks ago. This one I think is one of my favourites.  First off, Andrea CASED the card on Pinterest with a few changes.  We all loved it and had to copy although I changed mine a little too. Here is the card.
P1170030

This is a 10cm x 10cm card (4″x4″).  On a piece of white square (I think it is about 6.1cm x 6.1cm).   I sponged in towards the centre of the card in Pool Party.and then sponged the edges in Bermuda Bay.  I stamped the small blossoms from ‘Birthday Blossoms’ in Bermuda Bay. Check out the stamping spots/stars at the top of the card piece.  Can you tell what I used??  This is from the stars in the ‘Celebrate Today’ set.  The greeting from ‘Circle of Spring’ is stamped in Black StazOn.

I tied around some Whisper White Baker’s Twine. Then the sponged card piece was layered on another piece of white and then on a piece of Basic Black.  The flowers are stamped in Black StazOn and punched out with the Pansy Punch.  I then sponged the edges of these in Bermuda Bay.  They were raised up with dimensionals and I added some Adhesive Rhinestones to the centres of the flowers and then added a couple on the card.

I hope you like????  🙂

Have a great weekend.  Sadly, I didn’t receive my preorder today from the upcoming Holiday Catalogue. Not that I have a lot of time to stamp this weekend.  SIGH! I guess I have some other stamps to work with if I do. I can’t wait to get my new Christmas goodies.  I tell you, you are going to L.O.V.E. it.  September 1st is the day so stay tuned but I am mailing out Holiday Catalogues in the next couple of weeks so let me know if you would like your own.

Stop by and visit again soon,

Jenny
cards, Stampin' Up!

SPRINKLES OF LIFE FOR RONALD MCDONALD HOUSE CHARITIES!

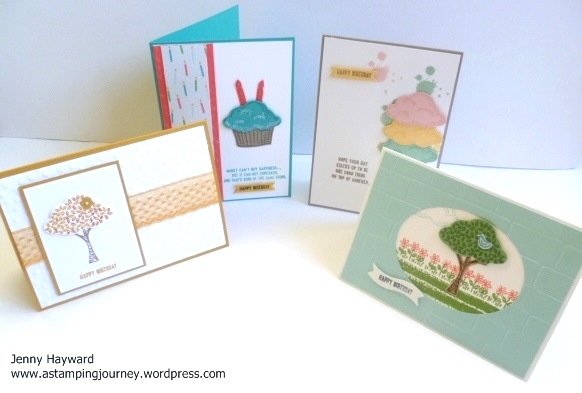
Today I had my Ronald McDonald House Charities Fundraiser. Thanks everyone who came today.  It was a lot of fun.  We played some fun games with a guessing competition plus a coin toss for some great Stampin’ Up! prizes.Of course there was some stamping. We made 4 cute cards so I thought I would share the cards we made today.

P1170135

I will share each of them with you. Once again sorry for the lighting of the cards.  I think I need to check my camera settings!!! 🙂

P1170138


Firstly, this one in Delightful Dijon.  This was actually the last card I made.  I was wanting to make 4 different cards showing many ways you can use this set.  I really didn’t know what to do but just wanted the tree on it’s own.  I will just tell you a little trick with the leaves on the tree.  I inked the leaves in Delightful Dijon and then used the Cherry Cobbler marker to “thump” on the leaves.  That is just tapping the stamp with the thick end of the marker onto the stamp to pick up some of the Cherry Cobbler colour on the leaves.  The rest of the card was fairly straight forward and using some of the gorgeous Delightful Dijon Dotted Lace Trim.

This next card. (terrible lighting!).  This card was inspired by a card by Patty Bennett. Colours are Bermuda Bay for the base card.  The strip of card on the left is Watermelon Wonder with a banner from Cherry on Top Designer Series Paper

P1170137

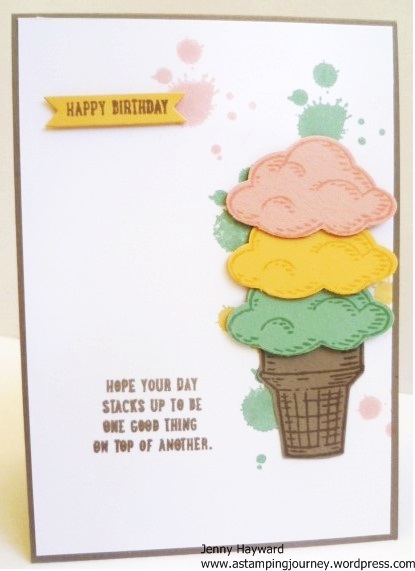
This one was CASED from one of my stamping friends Rachael Lewsley – Thanks Rachael 🙂  I love the splodges from Gorgeous Grunge. Colours are Tip Top Taupe for the cone and then Mint Macaron, So Saffron and Blushing Bride for the “icecream scoops”.

P1170061

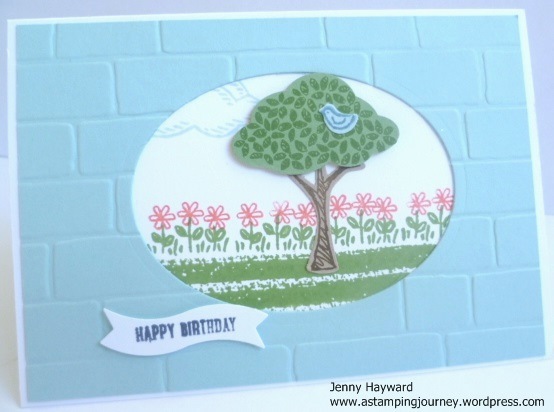
This one was CASED from Chiaki on Stampingpro.com.  Base card is Whisper White thick cardstock.  I cut the oval in the centre of the Pool Party card and then embossed with the Brickwall Embossing Folder. The scene is stamped on the white card base.  The stripes for the grass are stamped using the ‘Work of Art’ set.  I added the greeting by stamping in Memento Black and then cutting it using the Itty Banners Framelits.

P1170141

I have shared a lot of cards using this ‘Sprinkles of Life’ set all week. Have you liked the projects??? There are so many ways of using this set.  It is incredible.

Now I am extending my special bundle offer for the stamp and punch until Monday.  

Purchase the ‘Sprinkles of Life’ set + Tree Punch for $64.  That is 10% off the combined price.

This is not available as a Bundle in the catalogue. You need to order this directly from me. This is not available through my Online Store.  Australian residents only. 🙂

Thanks for looking.  I hope you are enjoying your weekend??

Until next time,

Jenny


cards, Classes

SPRINKLES OF LIFE CONVENTION CASE!

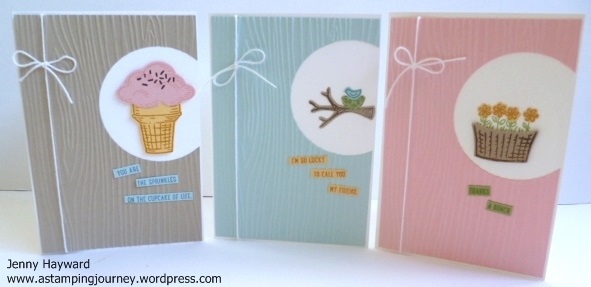
These 3 cards I have made using ‘Sprinkles of Life’ set have been CASED from an onstage presentation at the South Pacific Stampin’ Up! Convention back in early May.  It seems so long ago now. I loved the idea of them so I have wanted to make them for a while.  Here they are and then I will tell you about them.

P1170146

Each of them have the same layout and they show a number of ways you can put the different elements together.  On my cards I have used the Woodgrain Embossing Folder and instead of a strip of Designer Series Paper or similar on the original I tied around some Whisper White Baker’s Twine. What do you think?? Cute??

Thanks for stopping by. Tomorrow is my big Fundraiser for Ronald McDonald House Charities using this set.  I will stop by and share the cards we will make later tomorrow.

Have a great day,

Jenny 🙂

cards, Stampin' Up!

STACKS ON WITH SPRINKLES OF LIFE!

This was a a fun card I made a couple of weeks ago at our stamping weekend – and using ‘Sprinkles of Life’.  I couldn’t wait to show you it.

P1170057

Do you like lots of scoops on your ice-cream?? 🙂

How about some more!

P1170059

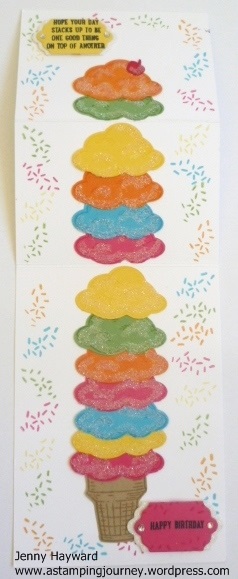
Hehe!! The card lifts up. Look at all those colourful ice-cream scoops.  I don’t really know what you call this type of fold – Fold out top card??? I found the idea for it on Pinterest and thought the ‘Sprinkles of Life’ set would be great for this.

It is very simple to make.  Cut your sheet of card in half vertically and score in half and then on one side score in half again.  Then fold on the score lines so a “v” shape is at the top – if that makes sense. I hope I have explained it clearly. Then you can decorate the card how you like.  When assembling the card I didn’t really know how many “scoops” I would need and how many colours so I just kept adding to it.  I layed them all out without sticking them down and rearranged them several times.  I didn’t want to have 2 of the same colour when you fold it up. Once I had that sorted it gently slid them off the card and stamped around the edge with the “sprinkles” and then adhered each scoop on top of the icecream cone.

Of course we had to have the bling.  I used Dazzling Diamonds with 2 way glue on each scoop. What a sparkly mess that was!  The sentiments were stamped and then cut with the ‘Lots of Labels’ Framelits. I added a Dazzling Diamond label underneath each of the sentiment labels. Then finished it off with adhesive rhinestones.

You could try this type of card with lots of different images.  See how you go.

Have a great day,

Jenny


cards, Techniques

A FUN STAMPING WEEKEND!

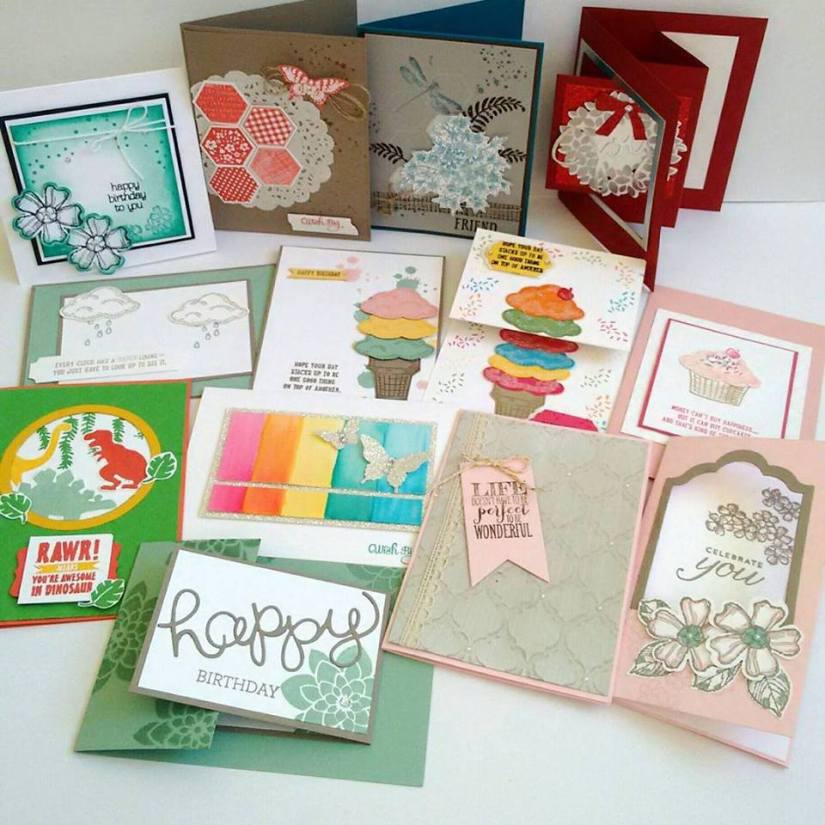
Don’t you love it when you can get away with your stamping buddies and stamp to your heart’s content.  Bliss!!!  So fun to share ideas and inspire each other and laugh and have fun.  I thought I would show you the results of my weekend of stamping.  Well actually it was a little less than a weekend as I arrived mid Saturday morning.  I am showing you them all in a group now but over the next couple of weeks I will show you them individually.

card weekend

Such a variety! It was good fun to try some new techniques and play with some new sets.  I do hope you like them.  Stay tuned for some upcoming posts on these ones.

Have a great day and I hope you can get creative today,

Jenny


3D projects, Stampin' Up!

‘AWESOMELY ARTISTIC GIFT BAG’

When I was at the South Pacific Convention back in late April (yes that long ago!!), I had a play with the Gift Bag Punch Board.  This is a new punch board in the catalogue.  I am sure by now you have seen lots of fun bags and boxes using this new tool.  I haven’t got one but I recently assembled the bag I made. I wasn’t sure how I was going to finish it off I guess that is why it took so long. 🙂 I thought I would show you the finished result.

I used my favourite set ‘Awesomely Artistic’.  Check it out!

P1160882

I stamped the blossoms and the “dotty” strip in Soft Sky on to the Soft Sky Bag base.  The sentiment frame was stamped in Smoky Slate on Smoky Slate card with the greeting stamped in Tangerine Tango.  This was cut with the Project Life Framelits.  The dragonfly was stamped in Tangerine Tango and fussy cut.  I had to add some Silver Metallic Thread loops.  I only just received that thread THAT DAY! Whoop!  I tied off the bag with the White Cotton Ribbon.

Check out a close-up of the thread loops.

P1160885

Hope you like it?  If you do a quick search for the Gift Bag Punch Board you can find lots of different ways of using this board.  If you check out on Pinterest there will be LOTS more ideas. 🙂  Check out the Stampin’ Up! Youtube video below to see how easy it is to use.  (If you receive this blog post by email you might need to go directly to my blog post to view the video.  Sorry.  Sometimes the video links get missed)

Thanks for checking out my ‘Awesomely Artistic’ bag.

Have a great day,

Jenny

cards, Classes, Stampin' Up!

A SHELTERING TREE SESSION!

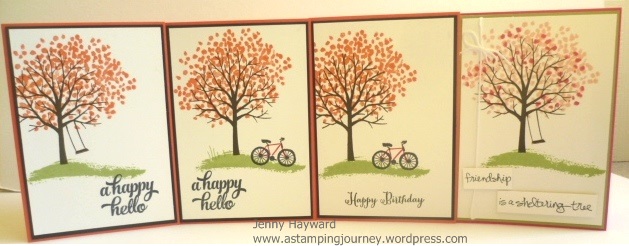
One day last week I pulled out my ‘Sheltering Tree’ stamp set.  I cut up some Whisper White card front pieces to size and stamped away.  It was such fun.  I haven’t had a stamping session like that for a long time and with the way my cardmaking endeavours were going for days before that I was pleased how they worked out.

It was fun to put together all the little images in the set.  There were so many different combinations.  I could have stamped for hours but there was some thing called dinner and housework that stopped me! Who do they have eat!!

I then assembled them all into cards the other day. Here is the finished result.  I made a few of each so I had some cards on hand although I will say that a number of them have already been sent on their way to some special people.

P1160899

I will show you them individually.

P1160903

P1160904

P1160905

P1160906

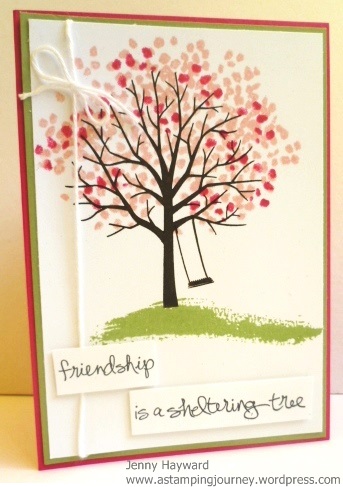
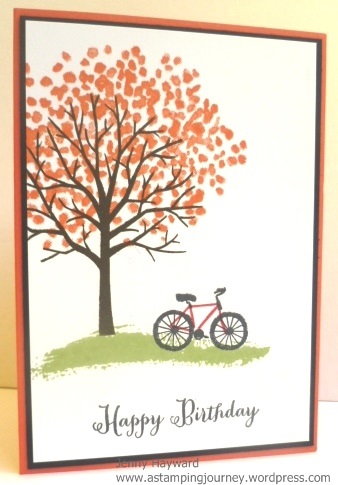
Card bases were Tangerine Tango or Melon Mambo with a Basic Black or Pear Pizzazz card mat. Greetings were from ‘Remembering Your Birthday’ or ‘Tin of Cards’ if the greeting wasn’t from the ‘Sheltering Tree’ set.

Thanks for stopping by today. I hope your day is a happy one.  🙂 🙂 🙂

cards, Classes, Stamp A Stack At Home, Stamp At Home Kits, Workshops

WATERCOLOR WINGS STAMP A STACK BY MAIL!

This Friday is my next Stamp A Stack Class.  If you are local I would love to see you.  Here are the details.  But if you can’t be here then read on further.

STAMP A STACK CLASS THIS FRIDAY

Friday 26th June Stamp A Stack.  10am or 7.30pm

RSVP Thurs. 25th  Cost: $15  BYO: Scissors and Adhesives.

*****THIS WEEK IS “BRING A FRIEND” WEEK *****

Bring a Friend I haven’t met and you get 2 FOR THE PRICE OF 1!

Of course you can come without a friend. 🙂

Here are the cards we will make.

P1160913      P1160916

I know that life is busy for many people or because of distance some people can’t make it so I have now made the class available by mail FOR YOU!!

STAMP A STACK CLASSES AVAILABLE BY MAIL  (Australian residents only)  

$15  + SHIPPING

Receive card kits for class cards to make in your own time.  Includes card pieces to make 6 cards (3 each of 2 different designs).  Card cut to size and includes ribbon/thread. You provide the stamps, inks and adhesives.  Embossed pieces can be done on request. Stamped images cannot be included as per Stampin’ Up! policy.

Stamps  – Substitute your own or order the stamps in addition + SHIPPING.

Stamps used:

Watercolor Wings – Photopolymer set (139424) $45

OR    Buy the Bundle which includes the Bold Butterfly Framelits (140232)  $62.75

The 2nd card uses the set ‘Birthday Blossoms’ ( W) (139167) $47.00 OR (C) (139471) $33.00

So now you don’t have to feel you miss out.

Please RSVP for the class ASAP or comment that you will like to join the Stamp A Stack by Mail.

cards, Stampin' Up!, Techniques

FAUX SHAVING CREAM BUTTERFLY!

A little while ago I shared the Faux Shaving Cream technique with you.  I showed everyone at our team meeting this week so beforehand I played around with a few other stamps using this technique.  I thought I would show you the card I made.

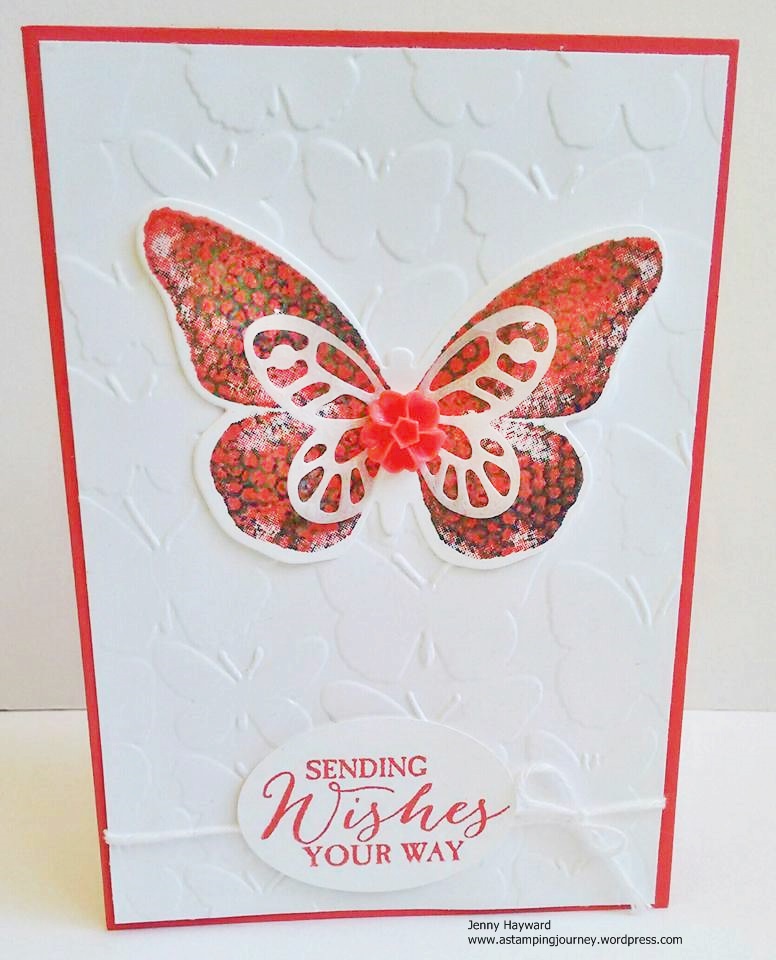
2nd faux shaving cream

There is quite a few new products on this card. Can you spot them??

I have used the set ‘Watercolor Wings’ and the butterfly was cut with the new Framelits, Bold Butterfly.  I have used 2 of the new Incolors Watermelon Wonder and Cucumber Crush.  (I also used Pacific Point for this technique too).  The other stamp I used to create the honeycomb effect was from Butterfly Basics. The White card is embossed with the lovely new embossing folder ‘Fluttering’.  How gorgeous is this folder??  The greeting I have used here is from ‘Butterfly Basics’ which continued from our recent Occasions Catalogue.  See the centre of the butterfly?  I cut the smaller butterfly with the Bold Butterfly Framelits from regular old baking paper! How cool!  In the centre of the butterfly I added a Watermelon Wonder In Color Blossom Accents. I was really happy how this turned out.  You really have to play with a few different ink colours and different stamps to see what effect you get.

If you missed the post showing the Faux Shaving Cream Technique and want to have a go yourself, you can find that tutorial post HERE on my blog.

Thanks for visiting today.  I hope you have a wonderful weekend. 🙂

Jenny

cards, Catalogues, Stampin' Up!, Workshops

2015 CATALOGUE LAUNCH MAKE AND TAKES!

I thought I would show you the Make and Takes we made at my launch last weekend.  I shared some of the fun in an earlier post.

Firstly, we made a bookmark showing the new Incolors and using the cute new set “Sprinkles of Life”.

The top of a strip of Whisper White (5cm x 21cm) was punched with the Scallop Tag Topper Punch. One of the greetings was stamped in Memento Ink at the top.  How cute is this saying?? Right at the bottom the cone was stamped in Tip Top Taupe and then each ice-cream scoop stamped in a different colour.  There is a matching punch which we could have punched out the scoops but to keep it simple and quick they were just stamped directly on to the card.  Everyone could choose their colour of the new Incolor Dotted Lace Trim.

P1160820

Now for the card. I changed my mind a few times with what we do leading up to this.  This card was inspired by a few cards I had seen on Pinterest.  Once again, each guest could choose their own colour.

This is using the set ‘I Think You’re Great’. The scallop lines were stamped in Delightful Dijon (or what they chose). The “hi” cloud was stamped in their matching base card colour and hand cut.The flowers were punched from Watermelon Wonder card using the small flower punch in the Itty Bitty Accent Punch Pack. A little bling and some white twine finished it off.  Now of course it’s nice to have a matching envelope.  So with the new Envelope paper we could make one using the Envelope Punch Board.

P1160860

For some guests who didn’t like the “hi” on their card they could make an alternative in their chosen colour with the “Happy Birthday” from ‘Remembering Your Birthday’ set.  It was nice to have a matching envelope to go with it too. 🙂

P1160813

Sorry if you missed my launch last weekend, I know for some people distance is an issue 😦  If you would like me to share some fun projects with you and your friends, why not invite me to come to your place and we can have some fun stamping together.  If you are further afield, then you can have a Catalogue Party yourself.  Collect some orders from your friends and send them to me.  I can have the orders sent back directly to you – and the bonus you still earn all the exciting little hostess benefits yourself.  You can check off some of those items on your Wish List – and get them for Free!! Do it!  🙂

Thanks for stopping by today.  It’s nice to have you visit me from near and far.  Have a wonderful day xx