cards, Catalogues

ANOTHER HELLO LADYBUG CARD!

I have another card for you today with the Hello Ladybug stamps and the Ladybug Builder punch.
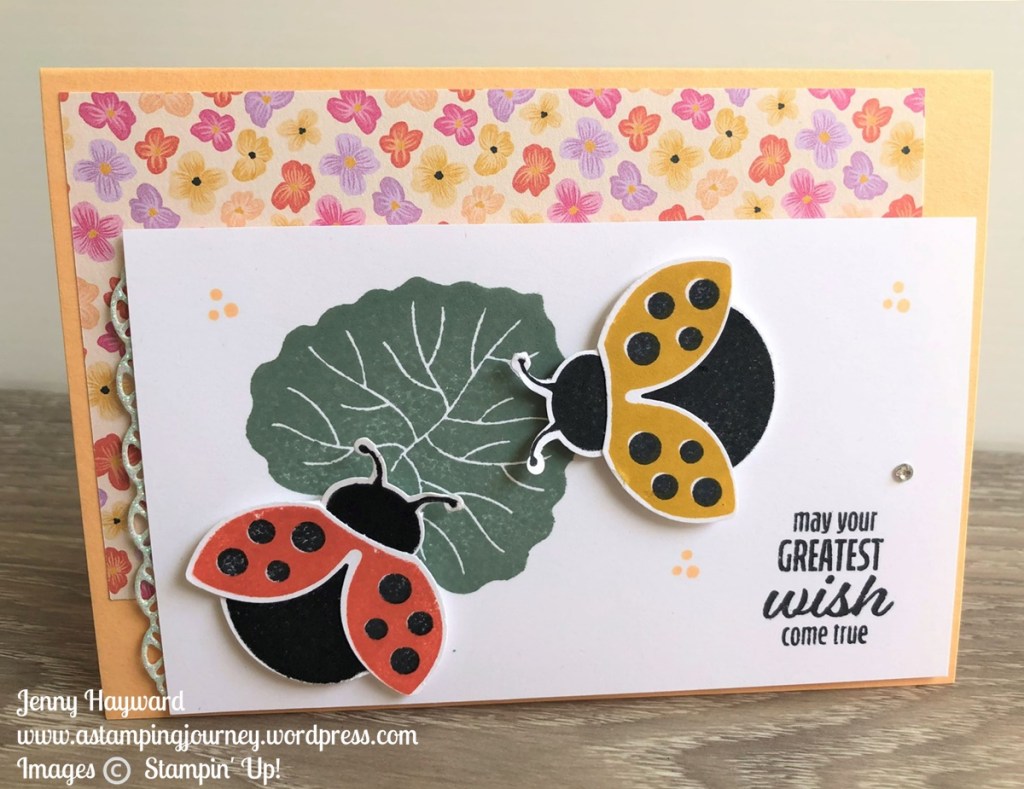
I will say I meant to position the white card up a little higher but I stuck it down and realised – and it was stuck!!

I used the Pansy Petals Designer Series Paper too. It was a sweet pattern for these Ladybugs stamped in Bumblebee and Calypso Coral.

The diecut edge under the white is from the Nature’s Thoughts Dies. The sparkly paper is the Supple Shimmer Paper.

You can see the Hello Ladybug stamps and dies (Price is $56.50 AUD) in my store now -> HERE.

If you need help with your order please don’t hesitate to contact me. If ordering online at that link please use the Host Code: 9JUM9XCP.

These Ladybugs are going to fly off now.

Have a great week,

Jenny

cards, Stampin' Up!, Techniques, Videos

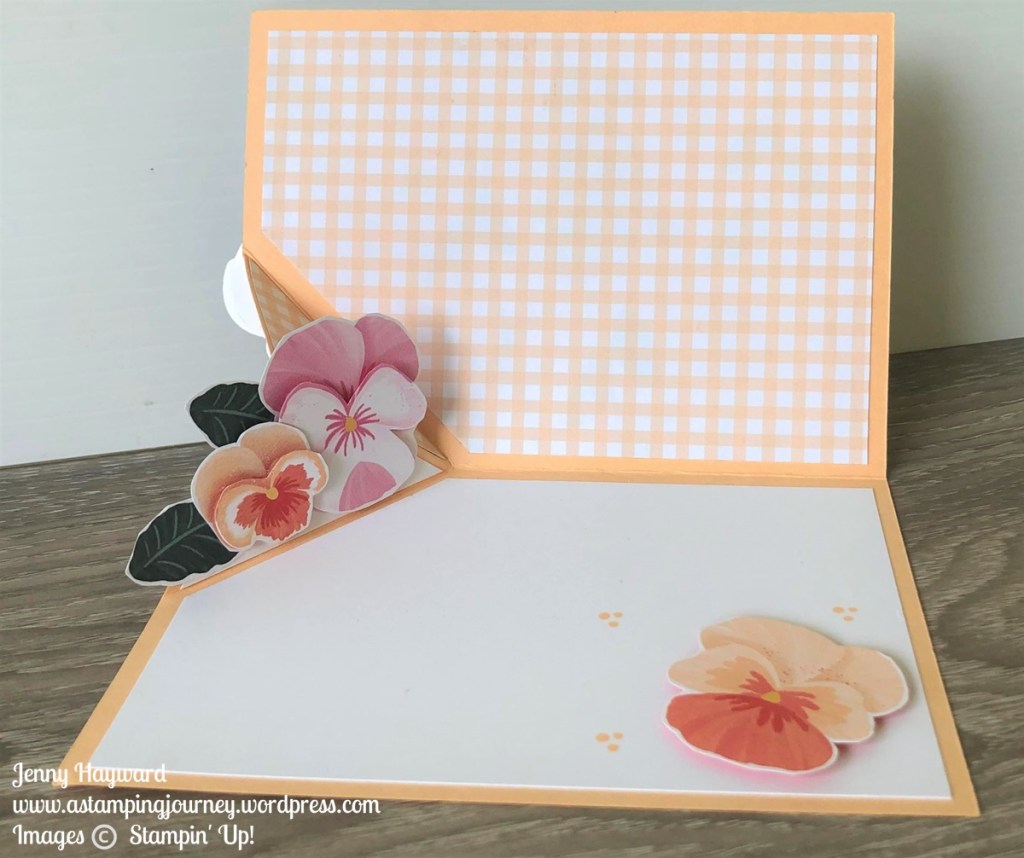
TRY AN ANGLED/CORNER POP OUT FOLD CARD + VIDEO!

Today’s video is an Angled or Corner Pop Out Fold card. I have seen these around a bit recently and wanted to try one myself. They are a lot easier than you think.

Catch the video now. If you received these blog updates via email the video won’t show so head to the blog directly or head to Youtube now.

What do you think? Have you made one of these cards before?

Create your own Angled/Corner Pop Out Fold Card

Base card: 14.8cm x 21cm Score at 10.5cm 5 1/2″ x 8 1/2″ Score at 4 1/4″

White Card: Front – 10.1cm x 14.4cm 4 1/8″ x 5 3/8″

Inside – 9.7cm x 14cm 4″ x 5 1/4″

Designer Series Paper: Front – 9.7cm x 14cm 4″ x 5 1/4″

Inside – 9.7cm x 14cm

Follow along with the video to see how to score and fold the card. You can decorate it how you like to.

Share with me when you have created your own. I would love to see it.

Have fun!

Jenny

In Australia and need some supplies? Head on over to my store and shop now -> HERE or contact me directly.

cards, Stampin' Up!

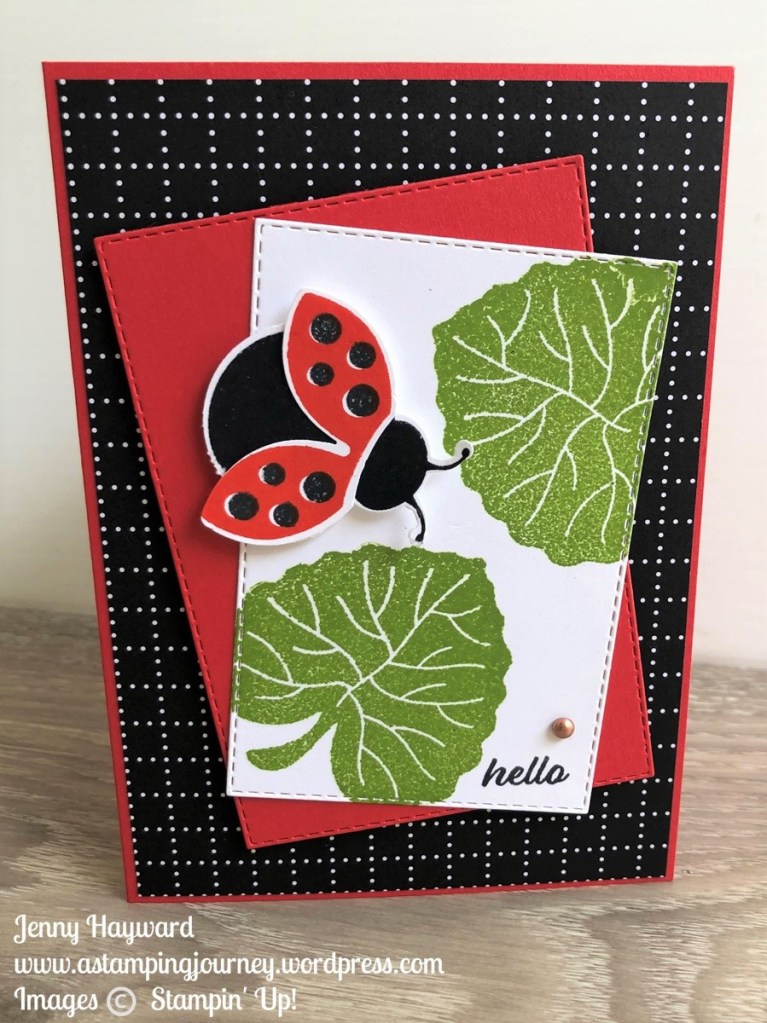
STAMPIN’ UP! HELLO LADYBUG POPPY PARADE!

I have another Hello Ladybug card for you today. I think the ladybug in Poppy Parade just POPS against the black.

The black and white paper is from the All Together Designer Series Paper. While this paper has “hands” on one side I find the other side so versatile for creating other projects.

You can see the All Together Paper -> HERE.

Check out the Hello Ladybug with the Ladybug Builder Punch -> HERE.

To order any of the great Stampin’ Up! and you are in Australia you can Head ->HERE. Please use the Host Code: 9JUM9XCP.

Or contact me directly and I can help you with your order.

Happy Stamping,

Jenny

cards, Classes, Stampin' Up!

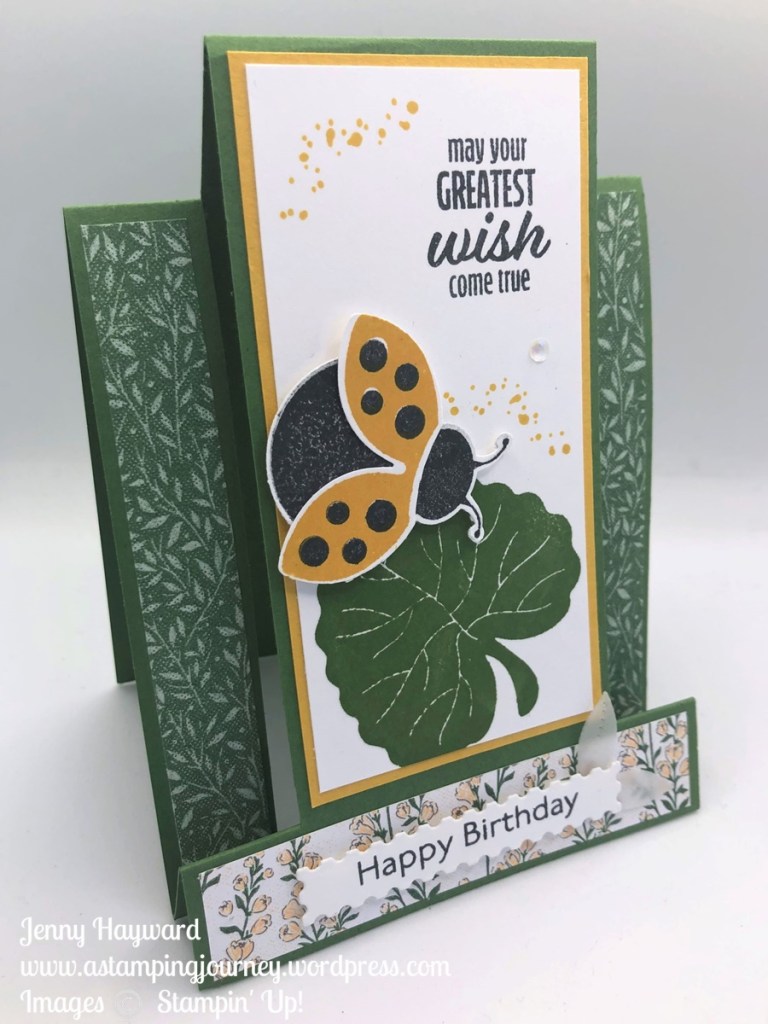
HELLO LADYBUG SIDE STEPPER CARD!

Sharing a card from my last class with you. Everyone loved it and I thought you might like it too.

This is a Side Stepper Fold card. We used the Hello Ladybug stamps and punch. I always love seeing yellow ladybugs. We used the Heart and Home Designer Series Paper with it.

I have made several of these in the past. I shared the template and instructions way back and dug up the post to share it with you again.

See how to create your own Side Stepper card -> HERE. It was some time ago so I do apologise for the quality of the template. The instructions in that post are for metric but check at the top of the post there is a link for imperial measurements.

Have fun creating one.

There is still some time for Sale-A-Bration. Don’t miss out on picking up your free gift with your orders over $90 or $180.

Head over to my store now -> HERE. If you need some help please don’t hesitate to contact me.

Have a great day,

Jenny

cards, Catalogues, Stampin' Up!

MISTY MOONLIGHT CLOUDY RAINBOW CARD!

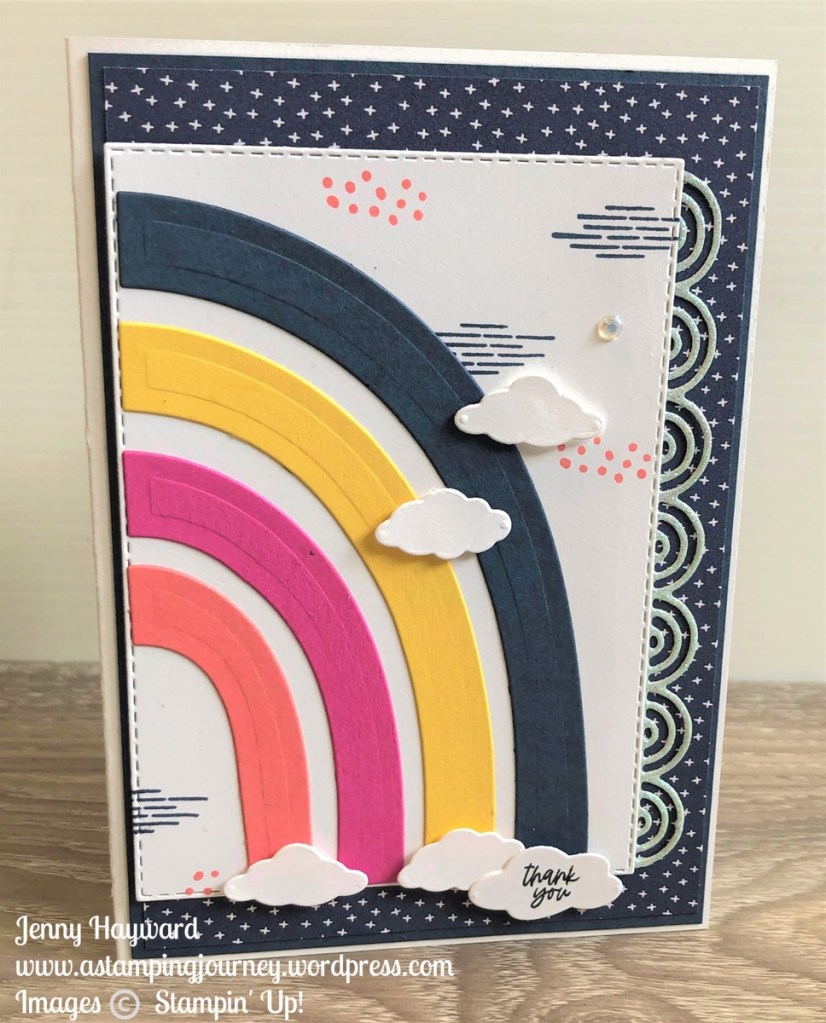
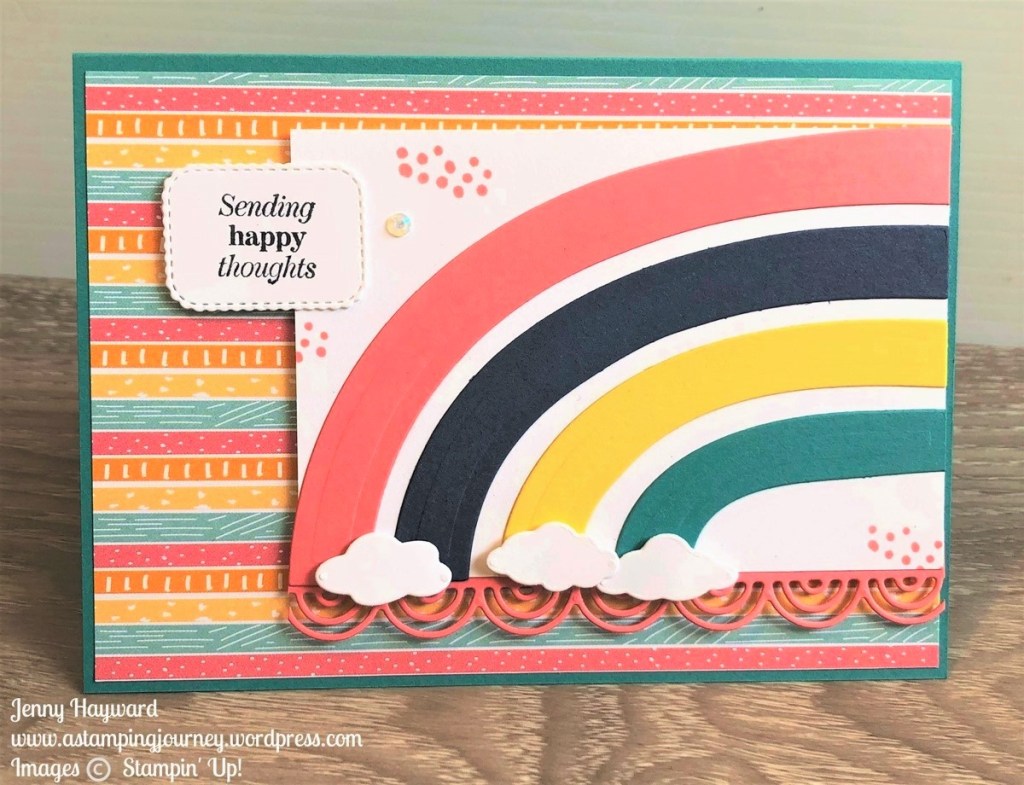
Another card with the Rainbows of Happiness Bundle and the Sunshine and Rainbows of Happiness Designer Series Paper.

I love that the little Thank You sentiment fits in one of the diecut clouds.

The paper is one of the free choices for Sale-A-Bration. We have another 2 weeks (in Australia) to get this paper with your orders over $90. I hope you don’t miss out on it. It’s such bright, happy paper. I love that it co-ordinates so well with the Rainbows of Happiness Stamps and Dies.

You can see the Sunshine and Rainbows Paper -> HERE.

See the Rainbows of Happiness Bundle -> HERE.

To order in Australia?? Contact me directly or head to my store at the links above. Please use the Host Code: AFHWZJKK

Happy Stamping,

Jenny

cards, Catalogues, Classes, Stamp At Home Kits, Stampin' Up!

NEW HORIZONS CLASS BY MAIL

REGISTRATIONS END THIS WEEK.

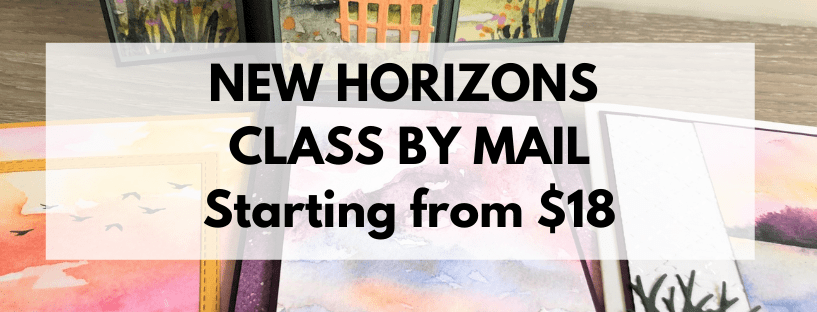
Join in the New Horizons Class By Mail.

Create the cards in your own time at home. 

Receive all the materials for 4 gorgeous simple cards (including 1 Fun Fold).

INCLUDES: Materials for the 4 cards.  Use your own Stamps and inkpads or choose to purchase the ones used.

(Ink used is Bumblebee and Pale Papaya. Also, Memento Black).

COST:  Choose your option.

1. $18 (plus postage of $3.30)

Includes: Card kits for 4 cards plus ½ pack of the New Horizons Paper plus 1/3 pack of Pebbles Enamel Shapes

2. $61.06 (plus $9.55 for postage)

Includes all of Option 1 Plus On The Horizon Stamp set.

3. $110.40 (plus $9.55 for postage)

Includes all of Option 1 Plus On The Horizon Bundle (stamp set and Horizon Dies.

REGISTER: Please register and pay by the RSVP date.  Payment by Bank Deposit or cash if local.

RSVP: Friday 25th February.  Class Kits will be sent out early March.

Email me on jghayward@yahoo.com or drop me a text on 0439 844574.

I look forward to sharing these projects with you.

Jenny

cards, Catalogues, Sale-A-Bration

A FLATTENED RAINBOWS OF HAPPINESS CARD!

I’m putting this card out there. Is it just me?? I feel that this rainbow is a bit flat. I added them the wrong way. But I thought I would show you anyway. Maybe it’s near the top of the rainbow?? Maybe it’s just so cloudy you can’t see it all? Is there a wrong way? Maybe I’m overthinking it …

I used the Brilliant Rainbows Dies with the Sunshine and Rainbows Designer Series Paper. I do love the pretty paper though with it’s fun colours and patterns.

The sentiment is from the Many Messages Stamp set.

You can see the Rainbows in my store -> HERE.

And check the Sunshine and Rainbows Paper -> HERE. This paper is a free choice for Sale-A-Bration with orders over $90 in Australia.

You can stop by my store above to order. Please use the Host Code: AFHWZJKK

Thank You for your order. I do appreciate it. If you would like me to help you with your order please contact me.

Have a sunshine-y day,

Jenny

cards, Catalogues, Sale-A-Bration, Stampin' Up!

SPARKLY RAINBOW CARD WITH THE RAINBOWS OF HAPPINESS BUNDLE!

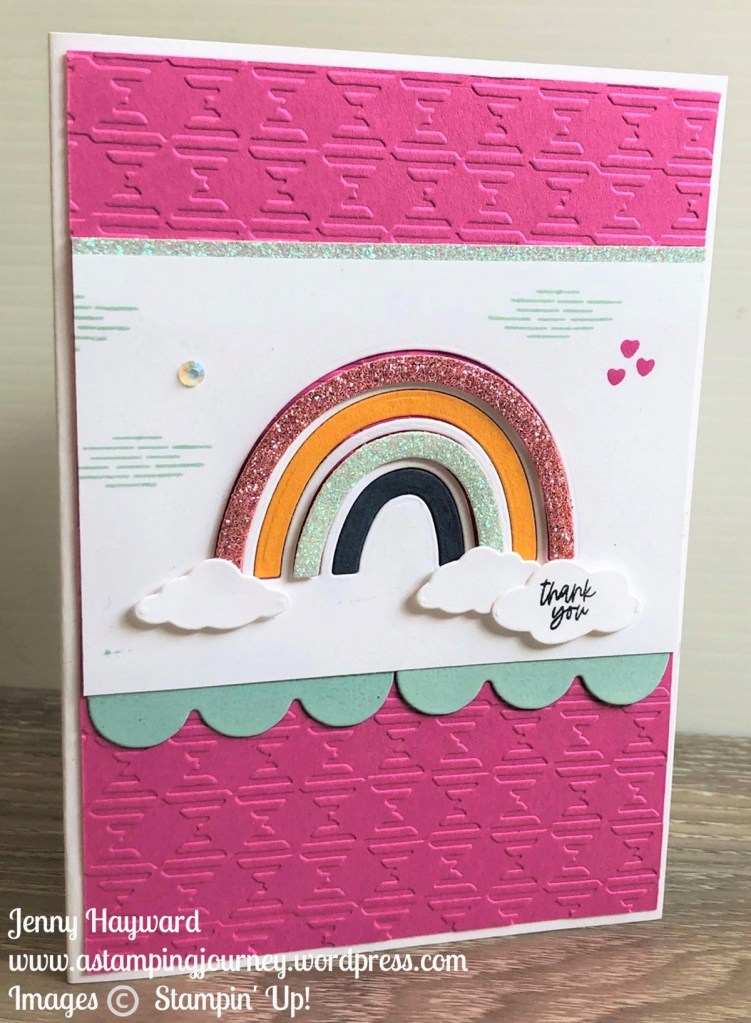
Another card for you today with the Rainbows of Happiness Bundle. This is another one I shared in the recent video.

I think the Supple Shimmer Paper adds a special sparkle to the card.

The curvy edge can be created with ones of the dies in the Rainbows Dies set. What about the Gingham Embossing Folder though? Have you noticed that in the catalogue?

See 5 Ways with the Rainbows of Happiness Bundle in the video now on Youtube -> HERE.

If you are in Australia and would love some fun rainbows or sparkle in your life, you can shop in my store -> HERE. Please use the Host Code: AFHWZJKK

Or you can contact me directly. I would love to serve you.

Have a great week,

Jenny
cards, Catalogues

WEDNESDAY’S WOW! #132 – A DETAILED BORDER DIE CREATES A BACKGROUND!

Wednesday’s WOW! #132 – You can create a cool background with a detailed border die. What a great way to extend your dies. It does take a little time and is a little fiddly but the effect is so cool.

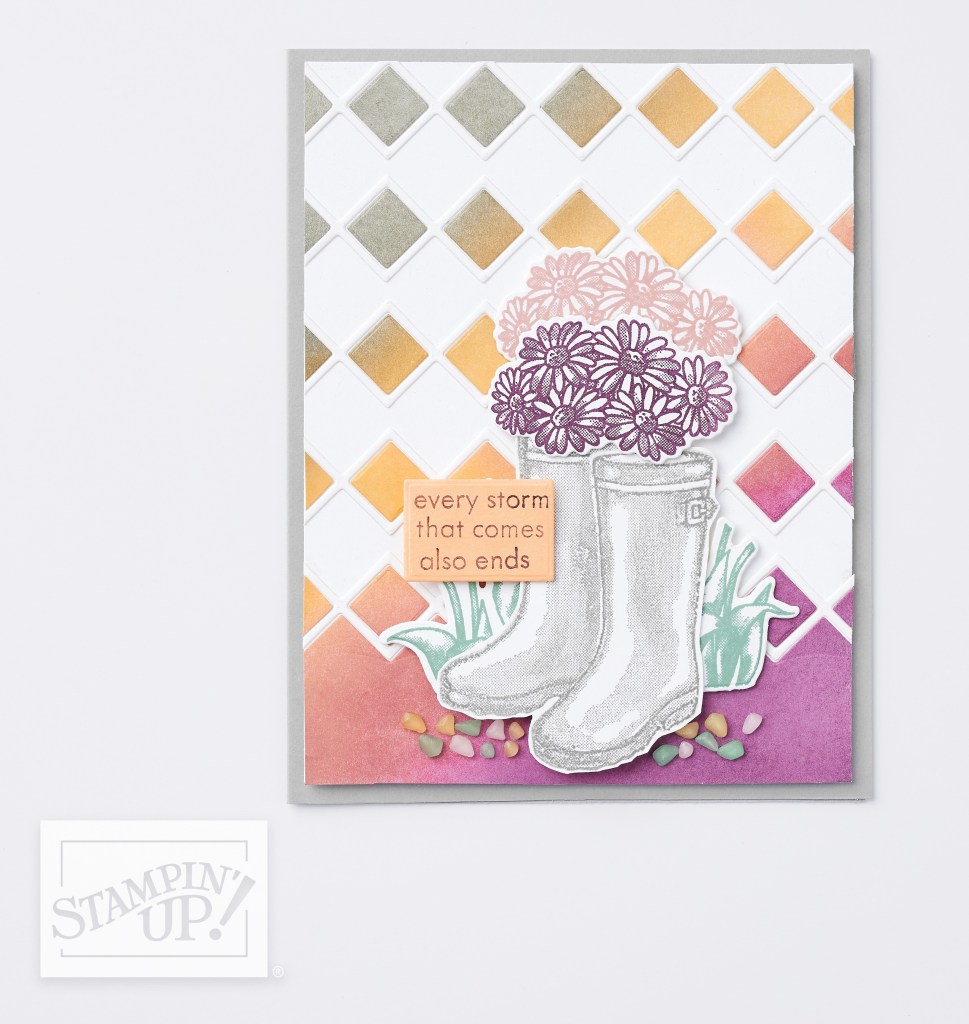
You can see the effect in this card below. (This card is created by Stampin’ Up! artists). Also note the rainboots have been stamped in reverse stamping which I am not going to address in this post today.

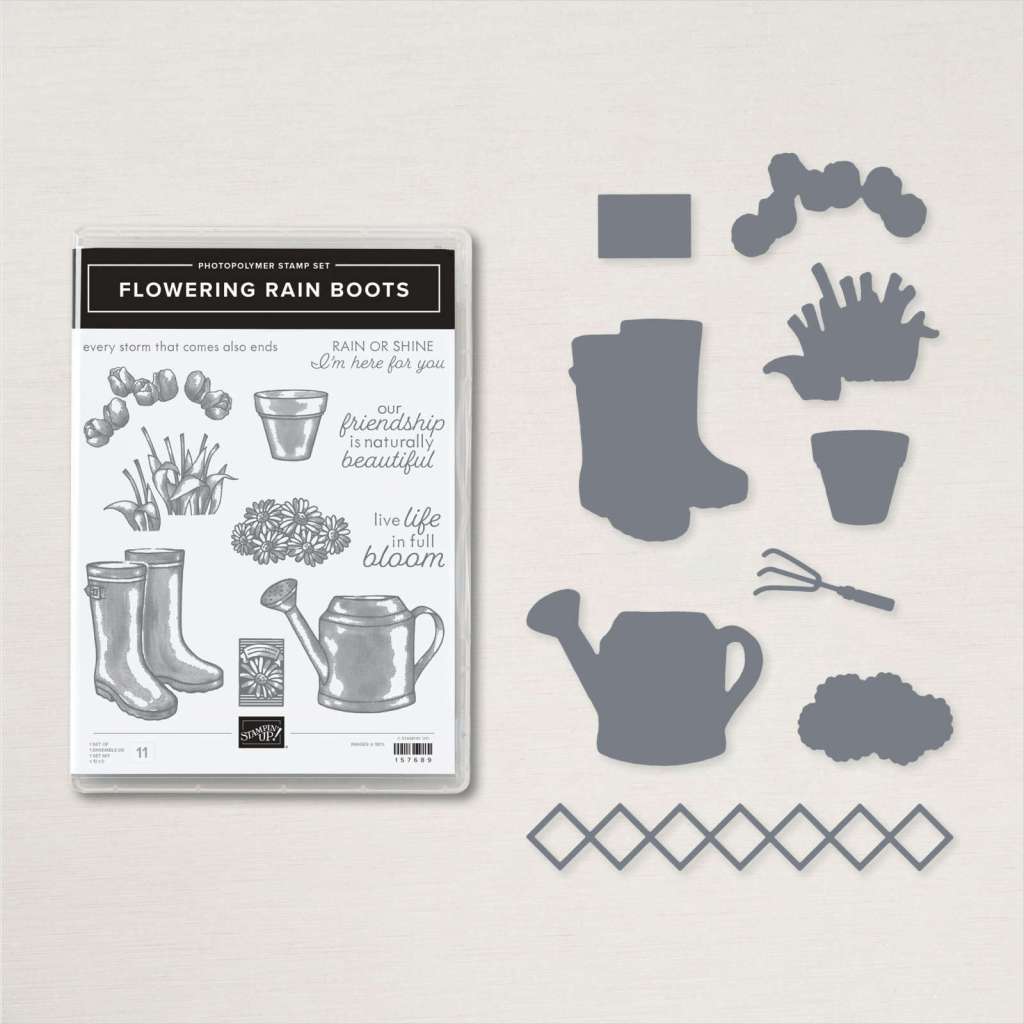
See the white background. This is actually created by the thin diamond strip die from the Rainboots Dies shown below.

How do you create such a cool background effect?

NOTE: This particular sample has been diecut just in white and then white card has been coloured with the Blending Brushes and inkpads.

Here is a simpler way.

You will diecut several of these dies out for the rows on the card. Firstly in white card. 5 was used on this card but check for the card you are creating. Then diecut the strip again in other colours. You can use individual colours for the centres. BUT…

There is an even easier effect – Diecut the detailed die strip in a piece of patterned paper.

Once all the pieces are diecut then assemble the card. Adhere the white diecut strips to a white card base. (You can adhere it straight to your card base but I think assembling it separately gives you some “control”). It might be helpful to lay out all the coloured diecut diamonds separately beside your card. Once you are happy with the layout then adhere each diamond inside the strips. This does take time but how effective is the end result. If you use the adhesive sheets this will also make it easier.

This method is call the Diecut Inlay Technique.

You could try this with any detailed die strip you have. Check them out and see what you can do.

Need to order and in Australia?

Head to my store -> HERE. Please use the Host Code: AFHWZJKK

Or contact me directly and I can help you with your order.

Have a great day,

Jenny

cards, Catalogues, Sunday Suites

SUNDAY SUITES – SWEET TALK!

Today’s Sunday Suites let’s check out the Sweet Talk Suite. With Valentine’s Day coming up this is a good time. We don’t really celebrate Valentine’s Day that much here in Australia but there are some hidden gems there so don’t dismiss it.

Check out the Sweet Talk Suite.

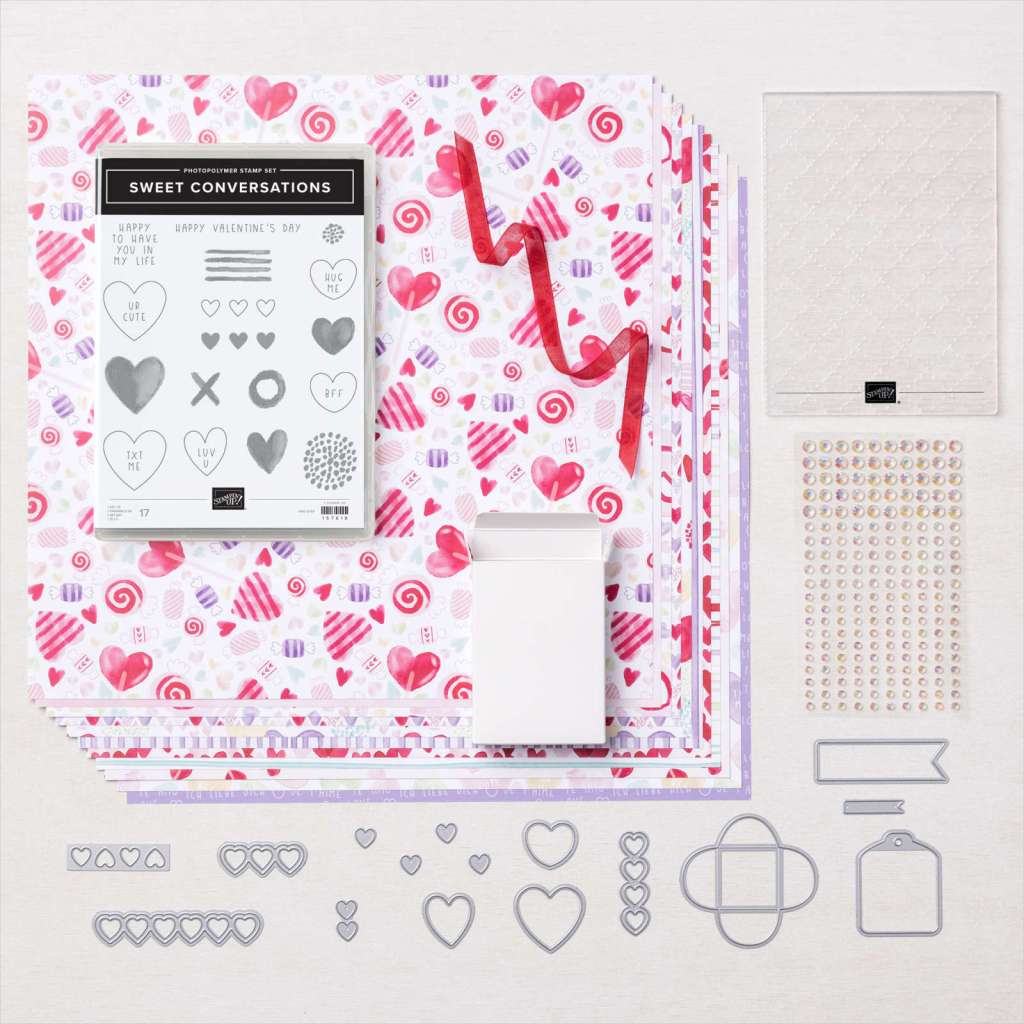
The Sweet Talk Suite Includes:

  • The Sweet Conversations Bundle (stamps and dies)
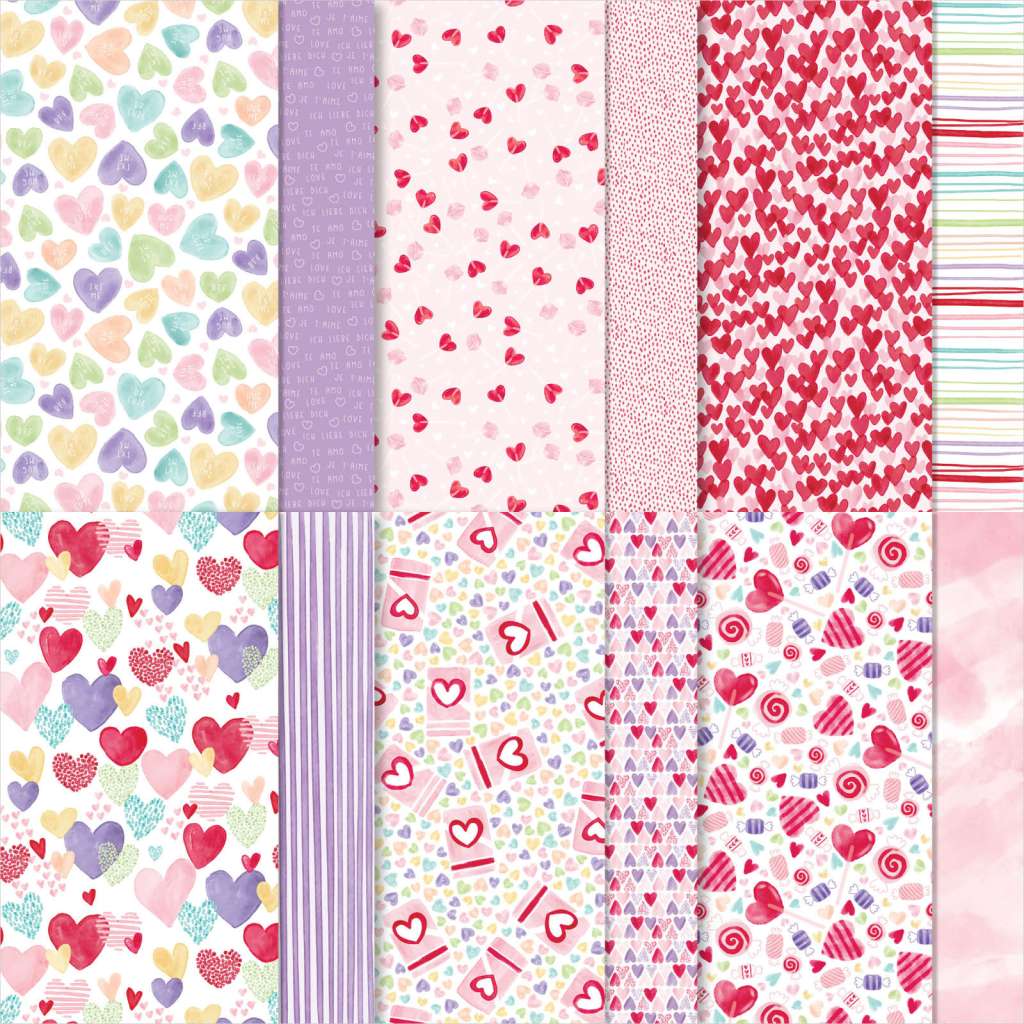
  • The Sweet Talk 12″x12″ (30.5cm x 30.5cm) Designer Series Paper
  • Real Red Faux Linen Ribbon
  • Iridescent Rhinestone Basic Jewels
  • Sweet Little Boxes (10 Boxes 3 1/2″ x 2 1/2″ x 5/8″, 8.9cm x 6.4cm x 1.6cm)
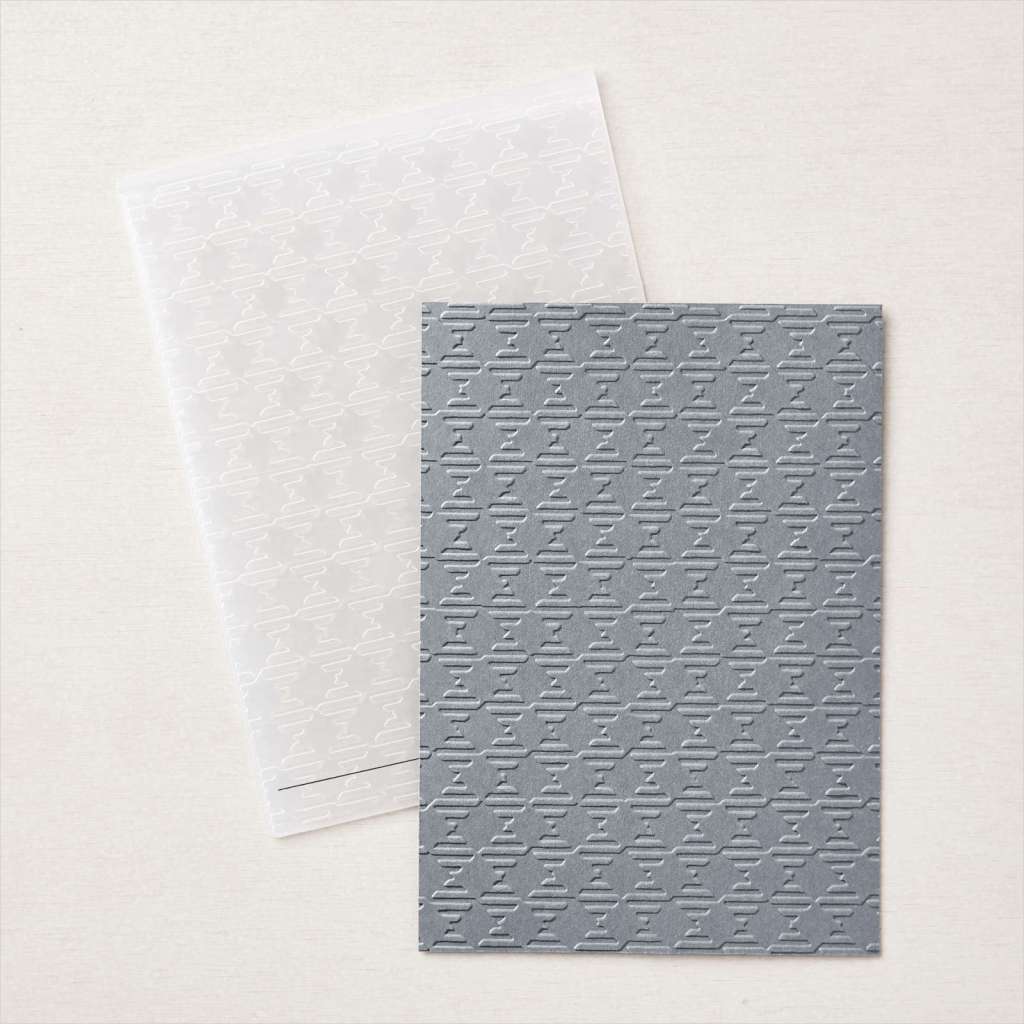
  • Gingham Embossing Folder

Look closer at the Sweet Conversations Bundle.

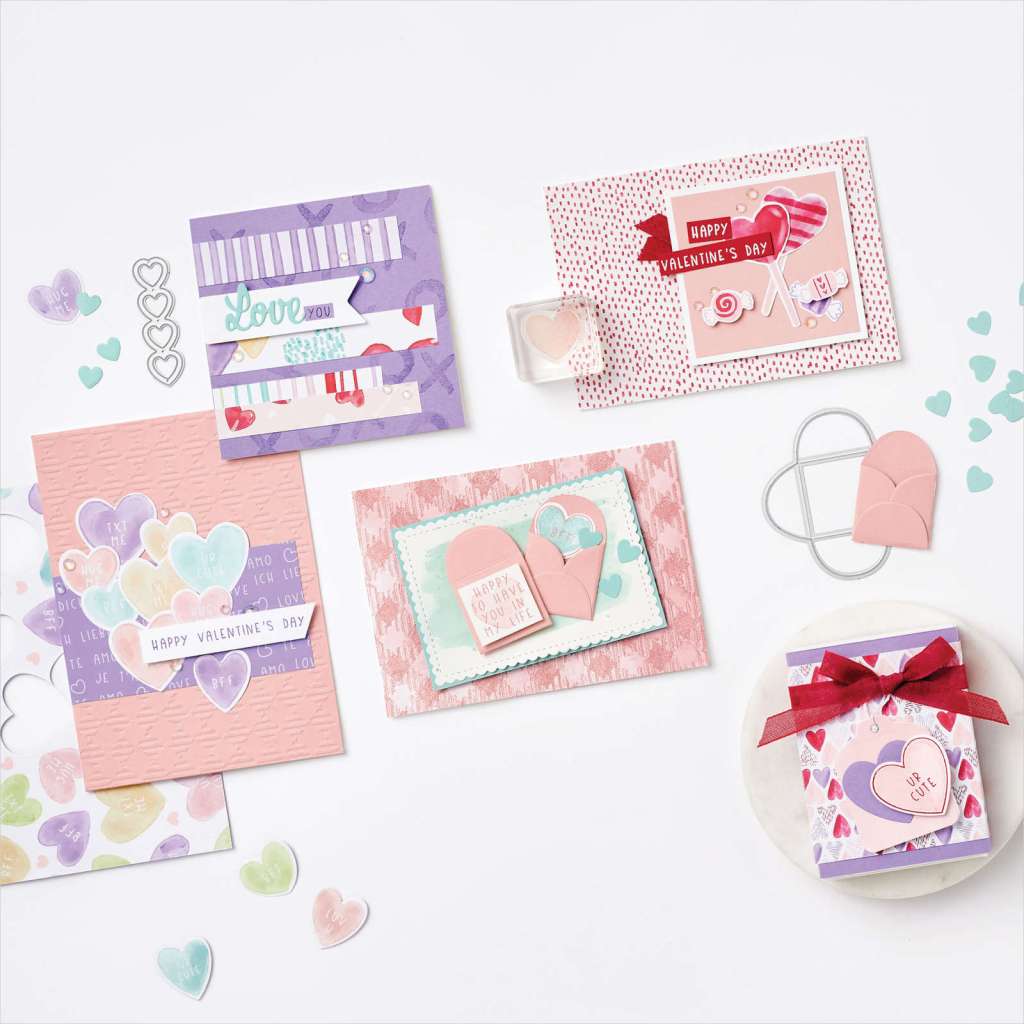
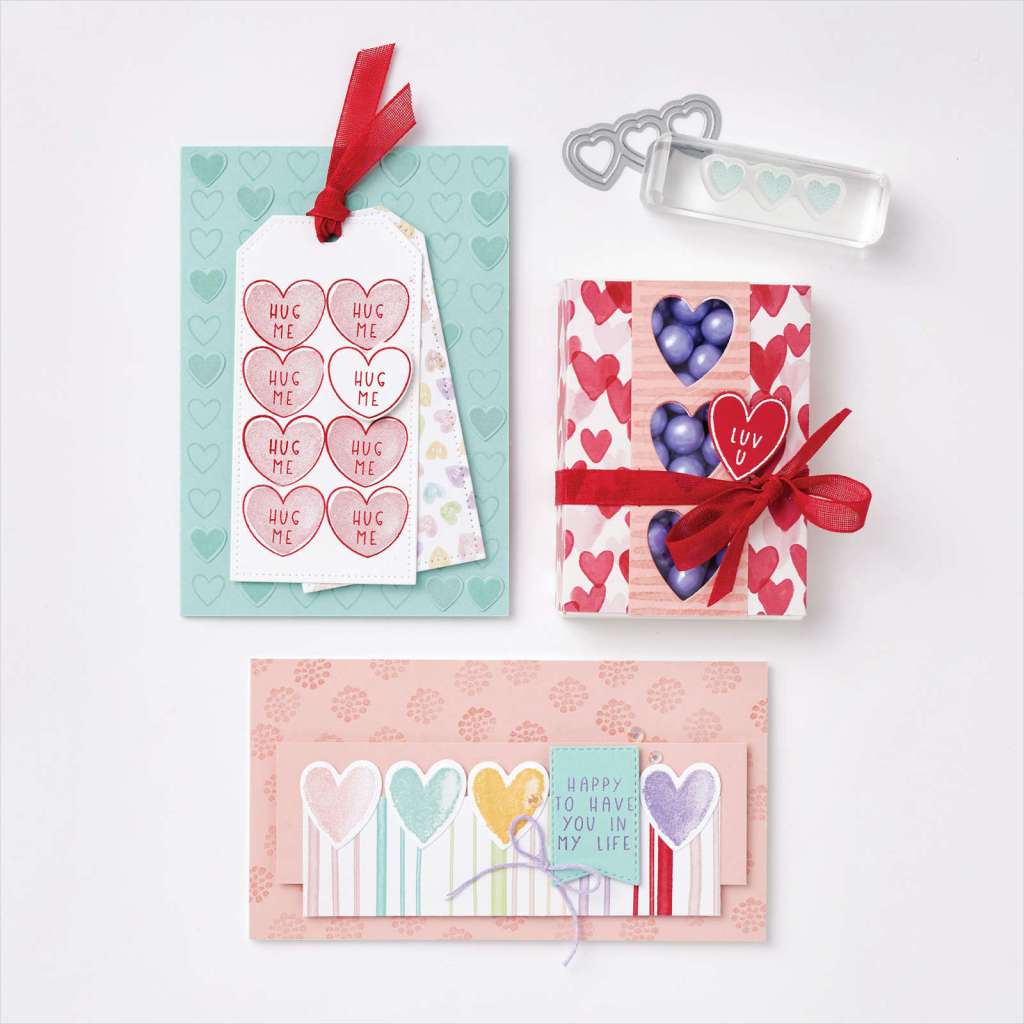
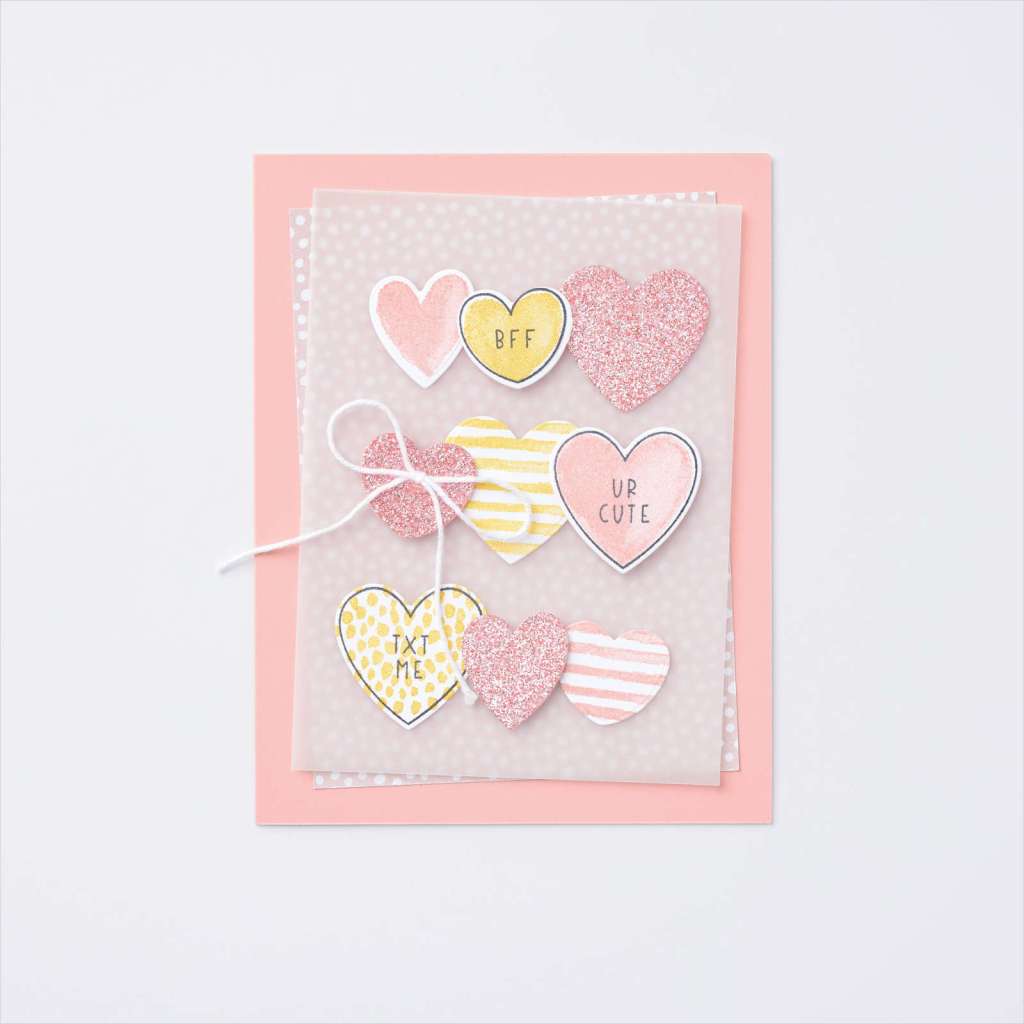
Don’t those hearts with the words on them remind you of those little lollies (candy) that you could get. They had lots of cute messages on them. The Dies have a mini envelope die which is really cute. You could use the heart dies on any occasion card.

The Sweet Talk Desiger Series Paper has “heart” patterns on one side and on the other side has pretty patterns. They can be used for any occasion.

How pretty are the colours? They are Blushing Bride, Granny Apple Green, Highland Heather, Petal Pink, Pool Party, Real Red, So Saffron

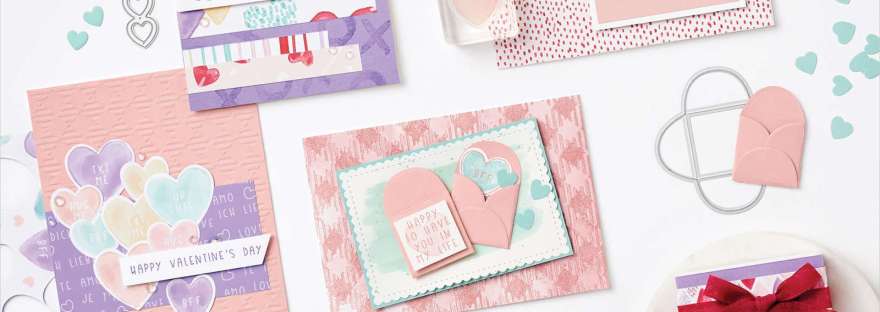
The Gingham Embossing Folder is such a great folder for any occasion card. Great for the masculine cards particularly don’t you think? You can see it used in some samples below.

The Iridescent Rhinestone Jewels are so sparkly. I have used them a lot already on projects.

What about some samples? (created by Stampin’ Up! artists)

Don’t dismiss the Sweet Talk Suite. Be sure to catch some of those hidden gems in there.

You can see the Suite in my store now -> HERE. When ordering please use the Host Code: NR7MK2VR

Or contact me directly.

Have a great Sunday,

Jenny