3D projects, Christmas, Classes, Stampin' Up!

LAST CLASS OF THE YEAR WITH A SPECIAL LUMINARY!

It’s the last class of the year THIS FRIDAY.  We have a special project to make.  This Luminary was inspired by a few I have seen on Pinterest so I thought it would be nice to finish off the year with.  How about it?? Are you local in Wollongong?  Come and join us.  Here are the details.

Friday 4th December – 10am or 7.30pm.  End of year Christmas. 
Come along for a fun time of celebrating and stamping. We have a special project for our last class – and maybe some surprises.  Cost: $15 BYO:Scissors and adhesives.  PLEASE RSVP by Wed. 3rd December. (Thurs. am the latest).  🙂
RSVP ASAP TO RESERVE YOUR SEAT!!!
3D projects, cards, Christmas, swaps

TEAM CHRISTMAS SWAPS!

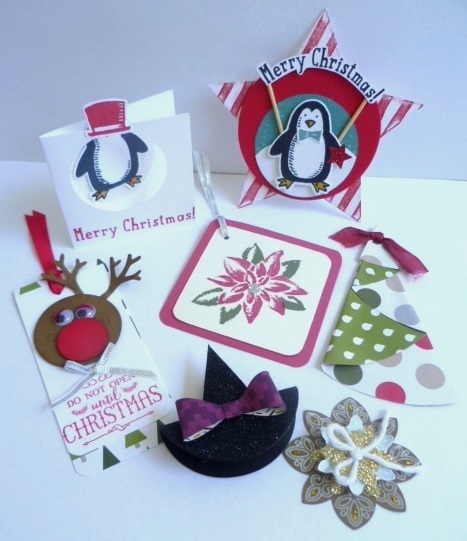
I thought I would show you the swaps I received from last week’s team meeting.  There are some really cute ones here.  I think Tags were very common 🙂  They are great to use as tags or add them to cards.

P1170689

Sorry for the lighting.  Sigh! Must do something about this BUT you can get the idea anyway.

Now the cute little penguin card in the back does have a head.  Sorry about the photo.  The penguin is stamped on the inside of the card and a circle window is punched on the front with the hat on the front.  It is so cute.  I love all these ideas. Thank you to all the clever demonstrators in the Inky Fingers Team.  Nice to share ideas.

I will show you my swaps.  Once again – tags! Now that wasn’t the theme but funny how it works out.

P1170686

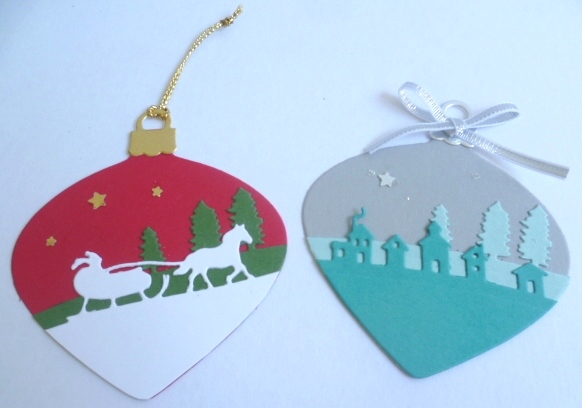
I CASED the red one from Pinterest and made up the other in Smoky Slate, Pool Party and Bermuda Bay.  These use the ‘Sleigh Ride’ Edgelits.  For the red one I punched out stars from Gold Foil using the Star Border punch.  The Smoky Slate one I have punched out one star in Silver Foil. Then I added some Dazzling Details for a sparkle but you really can’t see that well sorry.

I better get going. Our internet is being switched off soon to transfer it over to the new NBN network.  Hopefully it is not too long offline.  I think my kids are going to die!!!!! 😉

Thanks for visiting.

Jenny

cards

COLOURED CHRISTMAS CUTIES!

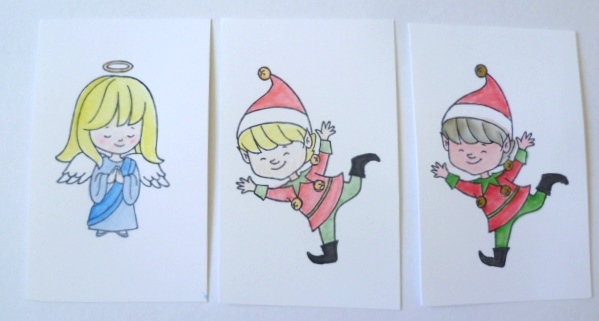
I shared my cute angel card a few posts back.  If you missed that you can head to that post HERE. The day I made that one I coloured a few images from this ‘Christmas Cuties’ stamp set.  I was in the mood for colouring!  I am not a colourer usually (is that even a word??) but sometimes it’s relaxing just colouring away. That must be why colouring books are such the rage now. Anyway, back to these cards. Firstly I will show you the images as I coloured each one with a different medium.  Then I will show you the cards.
P1170427

The angel (the one shared in a previous post) is coloured with watercolour pencils.  The middle elf is coloured with watercoloured pencils.  The next elf is coloured with the aquapainter and inkpads.(Don’t look too closely at the colouring!). As you can see though you end up with a different intensity of colour.  I will show you the finished cards now and I will show you one coloured with the Stampin’ Write markers too.

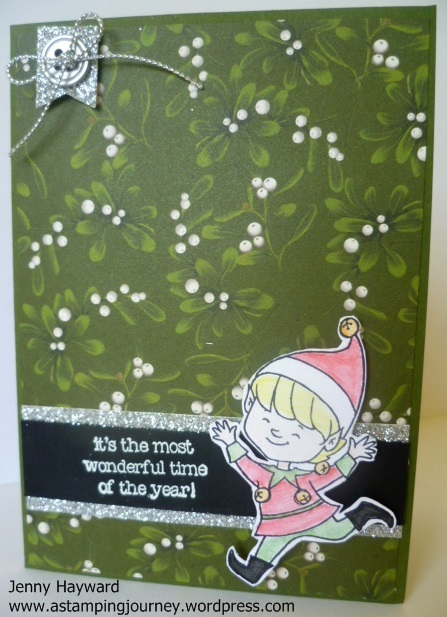
The watercoloured pencil elf.
P1170557

The base card is Mossy Meadow and I have adhered a piece of ‘Home for Christmas’ DSP to the base.  The rest of the card was made up of “bits” left lying on my table. The greeting I decided not to use on a previous project. I had heat embossed it in White Embossing Powder.  I added some Silver Glimmer Paper behind it.  Then I raised up my little elf on this.  It was a bit plain at the top so I punched out a scrap of Silver Glimmer Paper with the little Banner punch.  I added a silver metal button and some silver cord.  I kinda liked this cute card. 🙂

The next one coloured with the Aquapainter and inkpads.

P1170559

I embossed a piece of white card with the Stylish Stripes Embossing Folder and added this to a Real Red Card base. Then I simply layered a red and a white oval and raised up my little elf with dimensionals.  The greeting is cut from silver foil sheets from the ‘Christmas Greetings’ Thinlets. What a happy chappy he is!  I thought I would add a little dazzle and add some Dazzling Diamonds to his hat.

P1170561

Now I will show you another card I made a bit earlier than these cards.  This card was made for a recent Stamp A Stack and was inspired by one on Pinterest.  On this elf I coloured him with the Markers. The colour is a bit more intense.

P1170439

That’s all for my little Christmas cuties.  Check out these cute images. They are available for $40 wood or $30 clear mount.  You can order them directly through me or at my store HERE.

cuties

Thanks for visiting today.  I hope you can have some fun colouring soon too.

Stop by and visit again soon,

Jenny

cards, Catalogues, Christmas, Classes

DELICATE ORNAMENTS ON BERRIES AND BOUGHS!

I was playing around with some left-over Stamp A Stack kits the other week.  I just made a quick card up with one of the kits left.  I thought you might like to see it.

P1170418

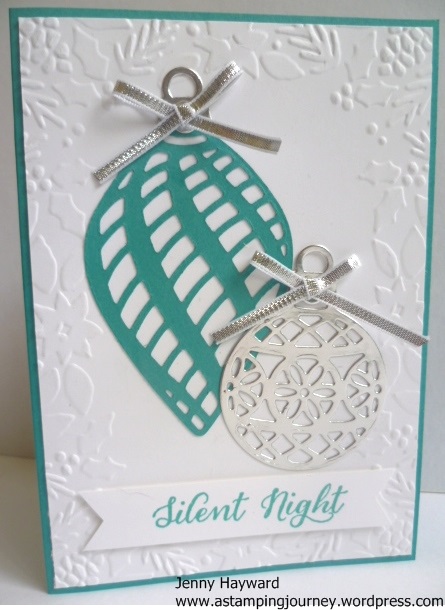
The card base and the large ornament is in Bermuda Bay. I embossed the white card with the ‘Boughs and Berries’ Embossing Folder. On this card I added another ornament from the ‘Delicate Ornaments’ Thinlets cut from the Silver Foil Sheets to give a little sparkle.  The greeting is from the ‘Wonderland’ stamp set. A little Silver Ribbon finishes it off.

Thanks for visiting today.  I hope you have a wonderful day,

Jenny

cards, Catalogues

JINGLE ALL THE WAY FOR CHRISTMAS!

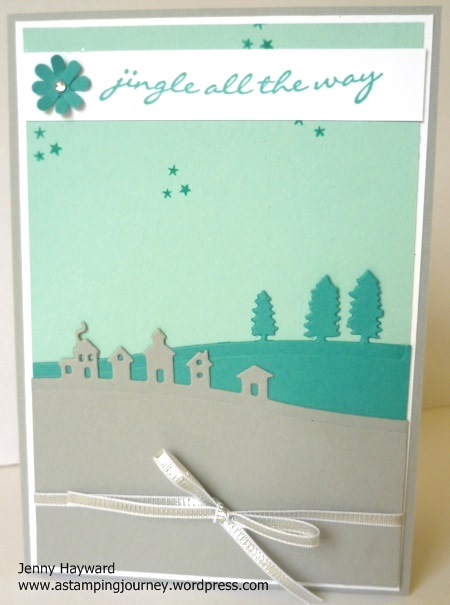
When I received my preorder of Holiday Catalogue goodies a month or 2 ago this was the first card I made.  I went searching on Pinterest for some inspiration.  This card was almost CASED from shawnstamps.com.  I have just discovered his blog.  I like his style.  Take a minute to pop on over and check out his clever creations.

Anyway, back to the card.  I liked the colours he used and the way he used the ‘Sleigh Ride’ Edgelits Dies. I teamed my card with the ‘Jingle All the Way’ set.

P1170193

I have used Pool Party, Bermuda Bay and Smoky Slate.  The card base is Smoky Slate.  I added some Silver Ribbon on my card and stamped some stars from the ‘jingle All the Way’ set in Bermuda Bay in the sky. The greeting was stamped on some scrap white card.  I really should have flagged the end.  I had stuck it down by the time I realised.  I did try and lift it but……. Best to leave it alone I think.  The little embellishment was made with the Festive Flower Punch.  I had just received that punch and was playing around with it.  It was sitting on my desk so I just grabbed it and made it.   Not sure whether it was meant to be a flower or a snowflake.  Anyway,  it filled the spot.  I added a Rhinestone to the centre.  It looks OK.  What do you think???

You can get the stamp set and the Edgelits Dies as a Bundle and save 15%.  Gotta love that!   Wood – $59.50 AUS   Clear – $51.75 AUS.

Here is the stamp set.  It has a quite a few cute little images with 4 greetings.

jingle

Have a good week.  I am in the middle of a big project.  I might share it later.

Until next time.

Jenny