I have had so much fun with the Sending Cheer Bundle. It is such a great bundle of stamps and dies.
With this one I have used the Joy of Christmas Designer Series Paper. The holly type print and the red Gingham print. They work so well with it.
And notice the stocking – when you diecut the stocking top run it through an Embossing Folder for added texture. I used one of the Basics Embossing Folders.
The Sending Cheer stamps and dies are leaving. I am a bit sad about that. Also the paper is going too. So if you want them you best get yourself together and grab them before they leave.
If you are in Australia and need to order then head over to my store -> HERE. Please use the Host Code ZRU4QJVE
If you have followed me along for a while you may know that I am not big on colouring. I find it hard and I know I need to work on it BUT when there is a stamp set that I don’t have to colour I’m all over it. 🙂
I love the new Translucent Florals Bundle that is in the upcoming Mini Catalogue starting on September 6th.
With the stamps you get colour gradients just by stamping. No need for colouring. And there are some really lovely, versatile sentiments in the set.
I have been playing with it a bit these past few days and I will show you more but for today this is one of the cards I have created with it.
There is the stamp set and the co-ordinating dies for it.
What do you think? Is this your type of stamp set??
You will be able to see it in the new Mini when it comes out on Wednesday. And if you are in Australia and haven’t got a Mini Catalogue yet then drop me a comment or email to request one and I can get one out in the mail to you.
If you need to order supplies and especially grab some of the great products coming in the Mini Catalogue then I would love to help you.
If you are in Australia you can contact me directly on 0439 844574
OR
shop in my store -> HERE. Please use the Host Code: PGECWEG9
Wednesday’s WOW! #151 – Flagging your Ribbon ends.
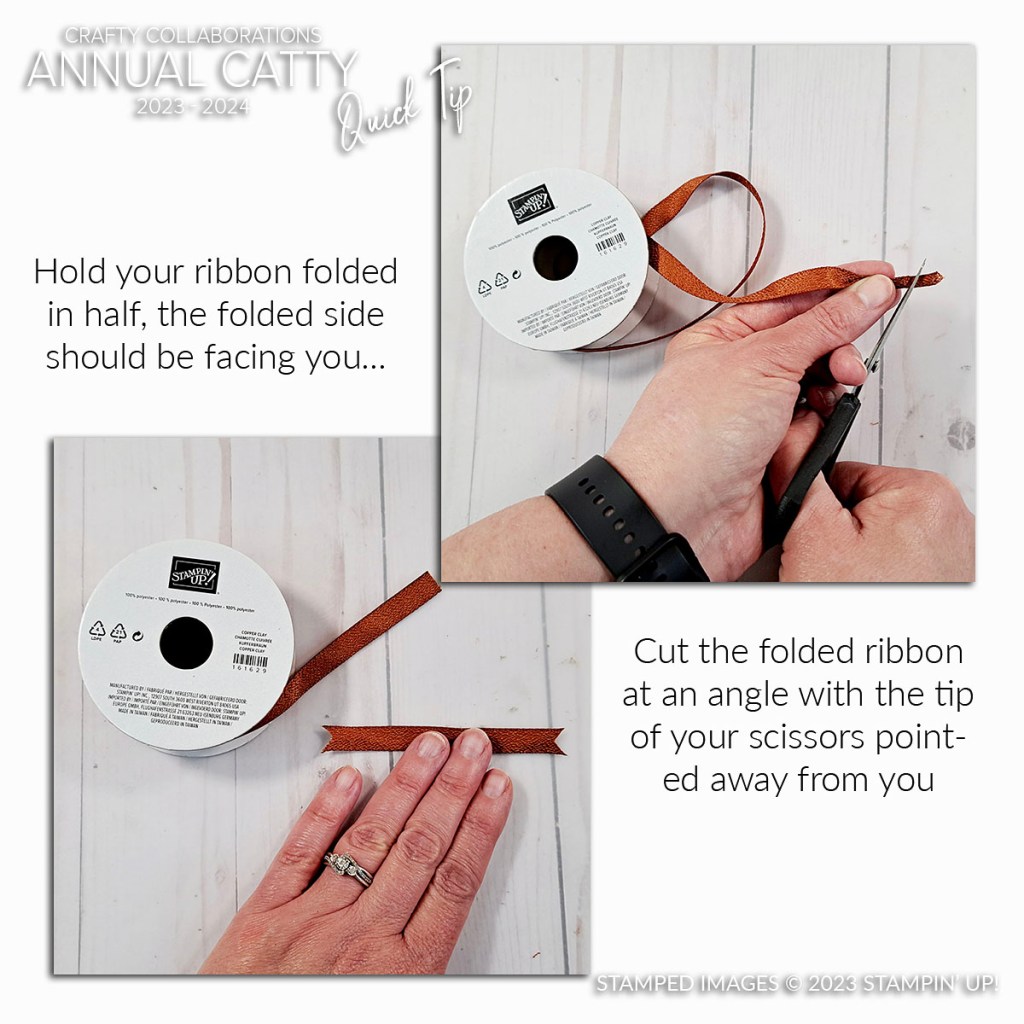
Do you like to flag the ends of your ribbon? Flagging is cutting the ends to a ‘V’ Point. Don’t try and cut the points individually. They never turn out even…
Here is a tip for you to “flag” those ends. Fold the sides of one of the ends of the ribbon together in half and make one snip to a point. The longer part – the point is towards the end of the ribbon. It makes them cut so much easier.
Hope this helps you.
Happy Crafting,
Jenny
Need some supplies and you are in Australia?
You can head to my store -> HERE Please use the Host Code: R663PWDW.
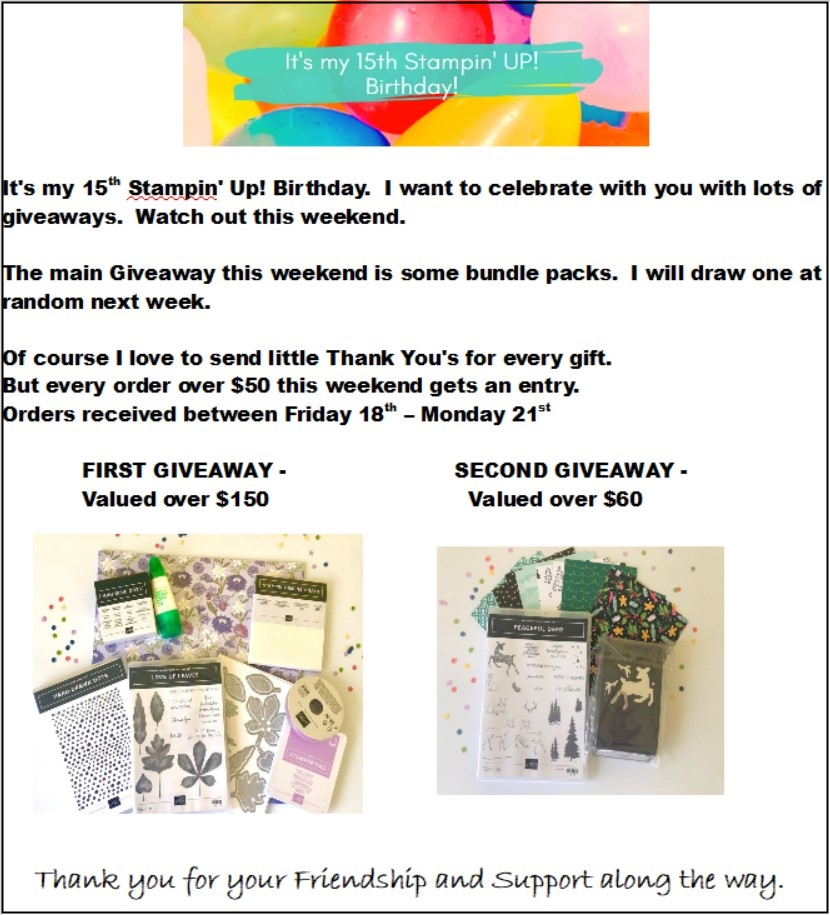
This weekend I am celebrating my 15th Stampin’ Up! Birthday. I really can’t believe that. That is a lot of cards and inky adventures in that time. It’s been a wild ride!
I so love to share my creations with you and (hopefully) inspire you in some way.
Thank You for following me along whether it’s been a short time or way back years ago. I appreciate you.
For my Aussies I have a Giveaway this weekend to celebrate. Well actually there are a few Giveaways and Gifts happening on my Facebook page. (You can head there to check them out if you like).
This weekend I have 2 Bundles of products to give away. Here are the details.
To take part Place an order with me either through my store or Directly with me. I will pick someone at random next week.
IN AUSTRALIA? Shop in my store -> HERE. Please use the Host code: R663PWDW
Or contact me directly on 0439 844574 or Email: jghayward@yahoo.com
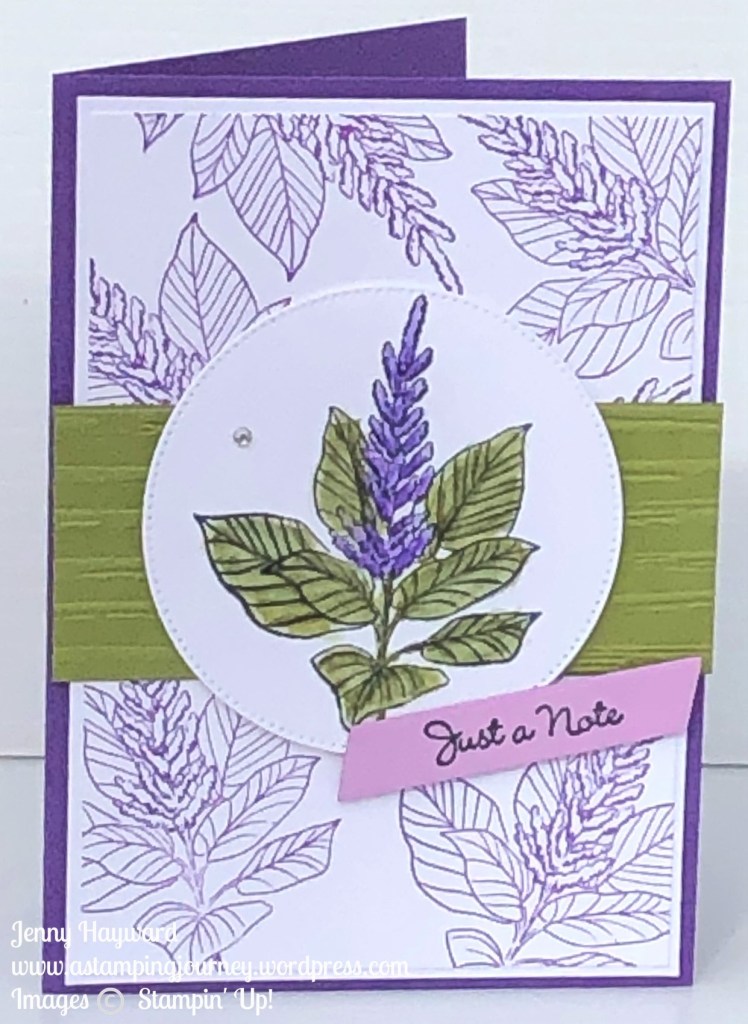
I’m sharing this card with you today but I can tell you it nearly didn’t happen. I coloured the flowers from the Everlasting Beauty stamp set – and I hated it! I tossed it aside and that was my crafting done for the day. Do you ever feel like that??
The next day I picked it up. I still didn’t love it but thought maybe I could do something with it. So I finished the card and actually it wasn’t so bad. So here it is.
The flowers were coloured with the Stampin’ Blends. And the flowers were stamped in Gorgeous Grape on White card to create a background. The Old Olive card strip was embossed with the Stripes and Splatters 3D Embossing Folder. The sentiment is from the Go-To Greetings Stamp Set.
So I thought I would share – if you feel discouraged with a card firstly, don’t be hard on yourself. If need be step away from it, put it aside. Later maybe come back with fresh eyes and see that it may not be too bad. And really aren’t we our worst critic.
Have a Happy day and Be Kind to yourself.
Jenny
If you need some supplies and you are in Australia stop on by my store -> HERE or contact me and I can help you out. And take note of the 15% off Sale tomorrow (Wednesday).
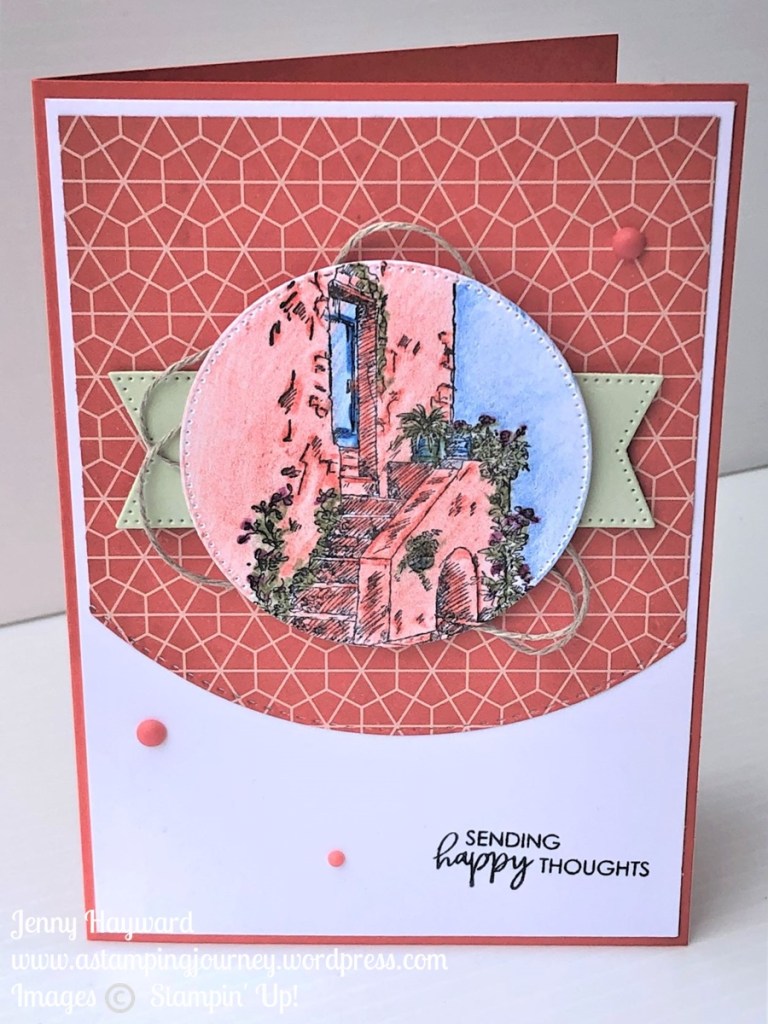
I have another card from my recent play with the InTheCountrystampset that is available as one of the Sale-A-Bration choices with your orders over $90 AUD.
I coloured this with the Watercolour Pencils like the last one I shared. If you missed that card just head back a couple of posts.
I wanted to go for a different layout with this card and diecut the image with a large circle from the StylishShapesDies. And also cut the piece of DSP with the curved die from the AroundTheBendDies.
I will share another card with this set so watch out for that soon.
Do you need some of these new products? I would love to serve you.
Head to my store -> HERE. Please use the Host Code: RCWF4TJP.
OR contact me directly and I would love to help you.
You can create a very easy Z Fold card with the Tea Boutique Cards and Envelopes. Simply score the front of the card in half. Turn the card inwards then fold the card back on itself on the fold.
Add a strip of the Tea Boutique Designer Series Paper inside the card. Then on the front add a tea cup and flowers on a diecut rectangle from the Scalloped Contours Dies.
What do you think? It’s very quick and easy to create.
The Tea Boutique is a great collection of products.