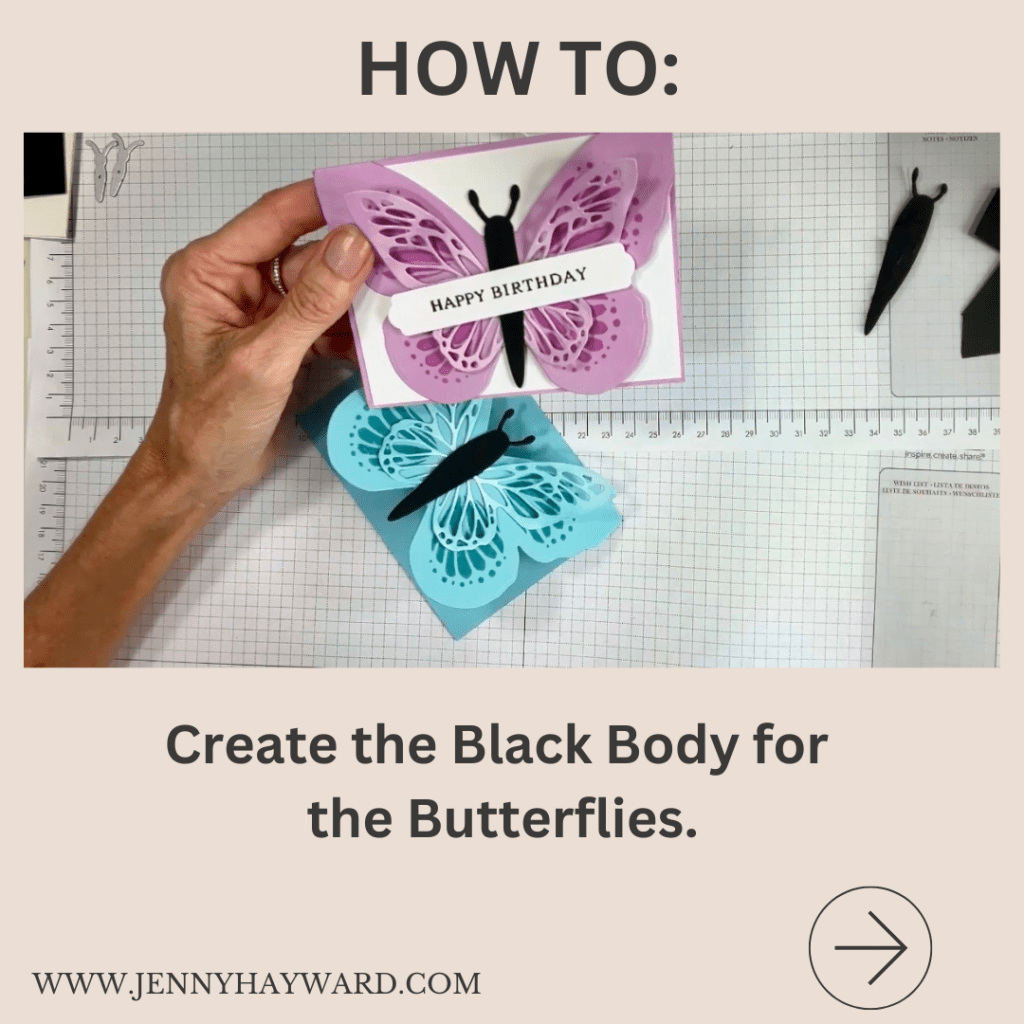
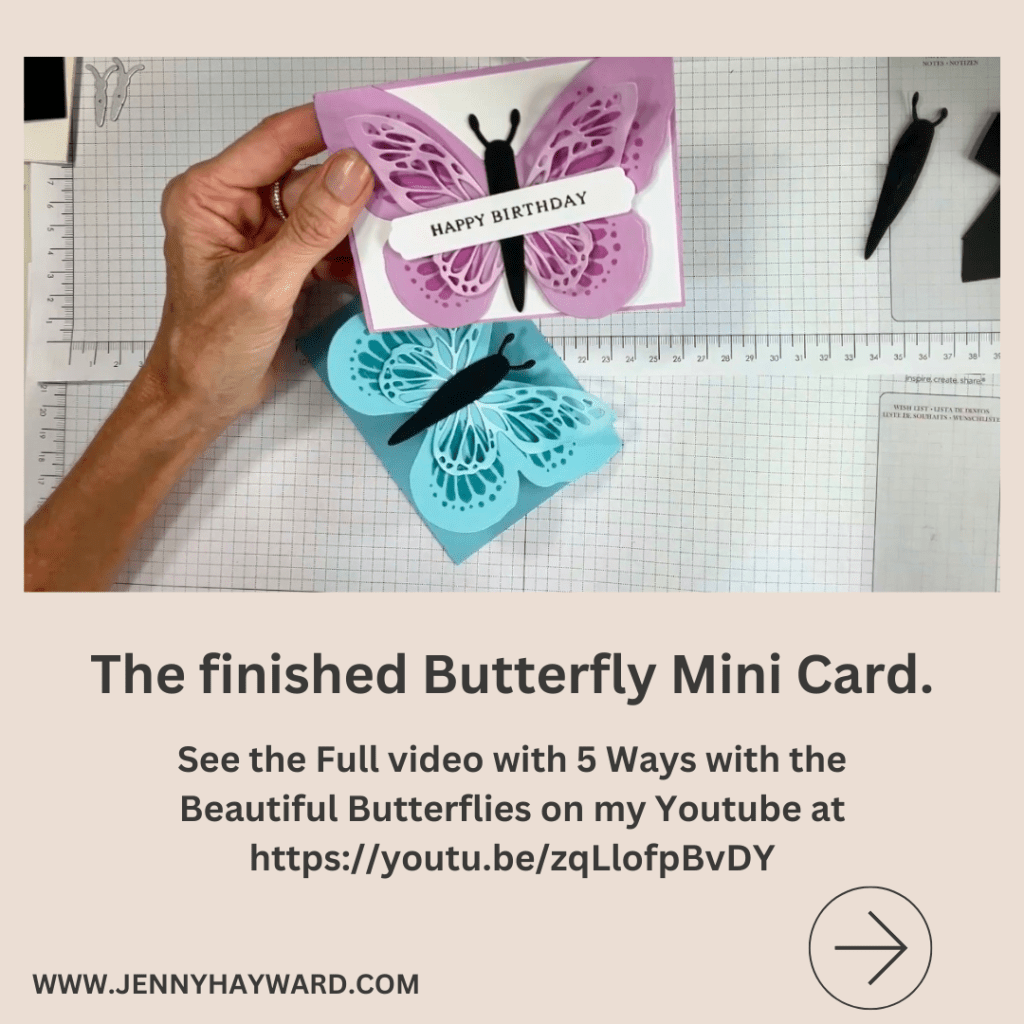
I have been sharing the Beautiful Butterflies. They are gorgeous. I recently shared a video of 5 Ways with the Beautiful Butterflies. You can head back a post or 2 to see that.
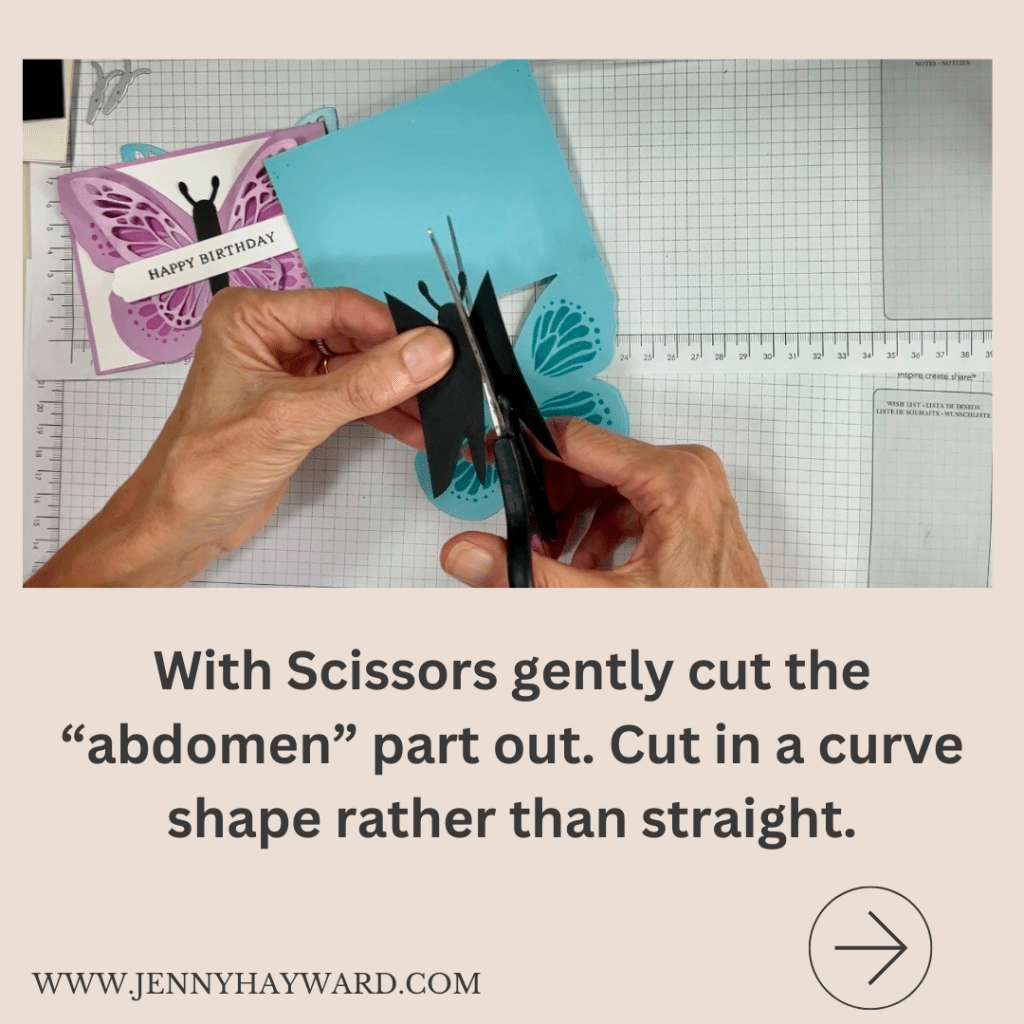
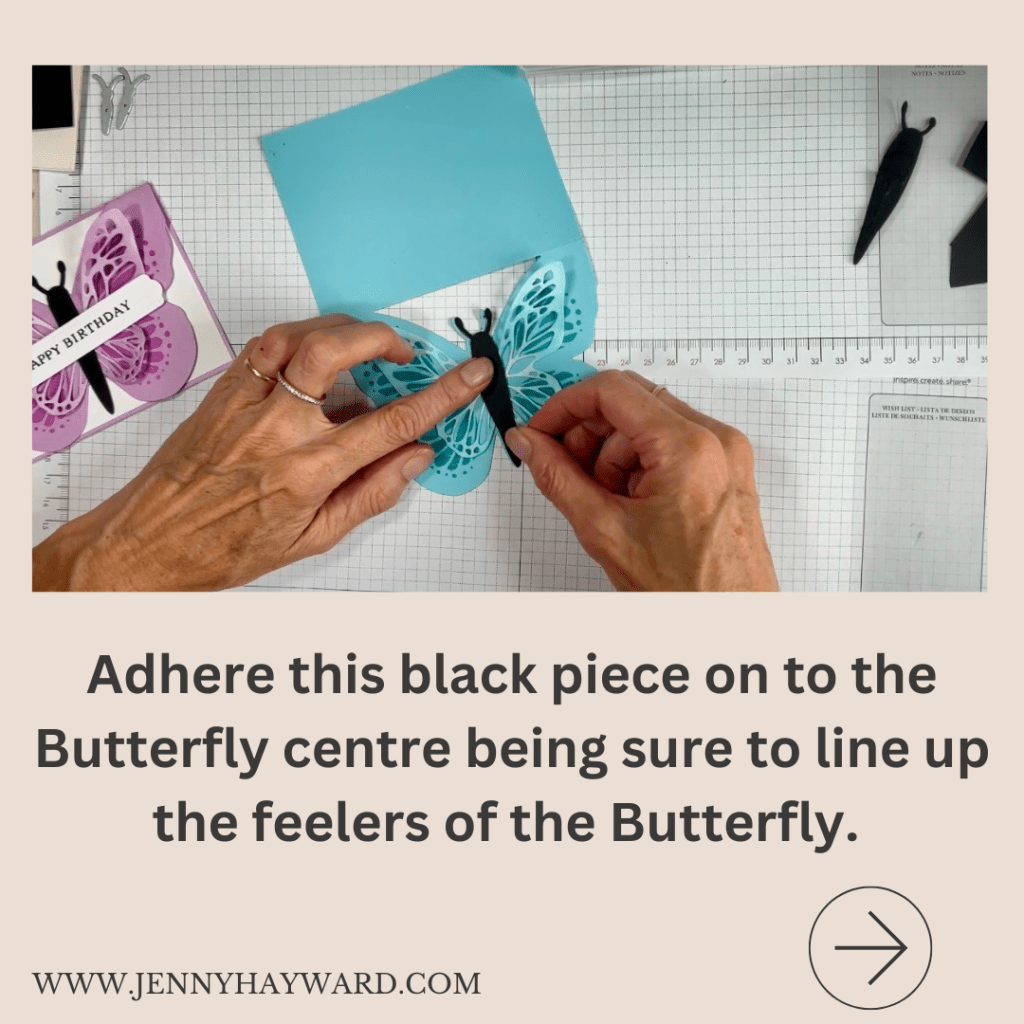
But how did I create the Black centre of the Butterfly. Let me show you below. (If the images don’t show head to the blog directly to view them).
I hope you find this helpful when you create with the Beautiful Butterflies.
Happy Crafting,
Jenny
Are you in Australia and need crafting supplies yourself? I would love to help you out. Head to my store -> HERE. Please use the Host Code: 32KKQAX6
Or Contact me Directly.
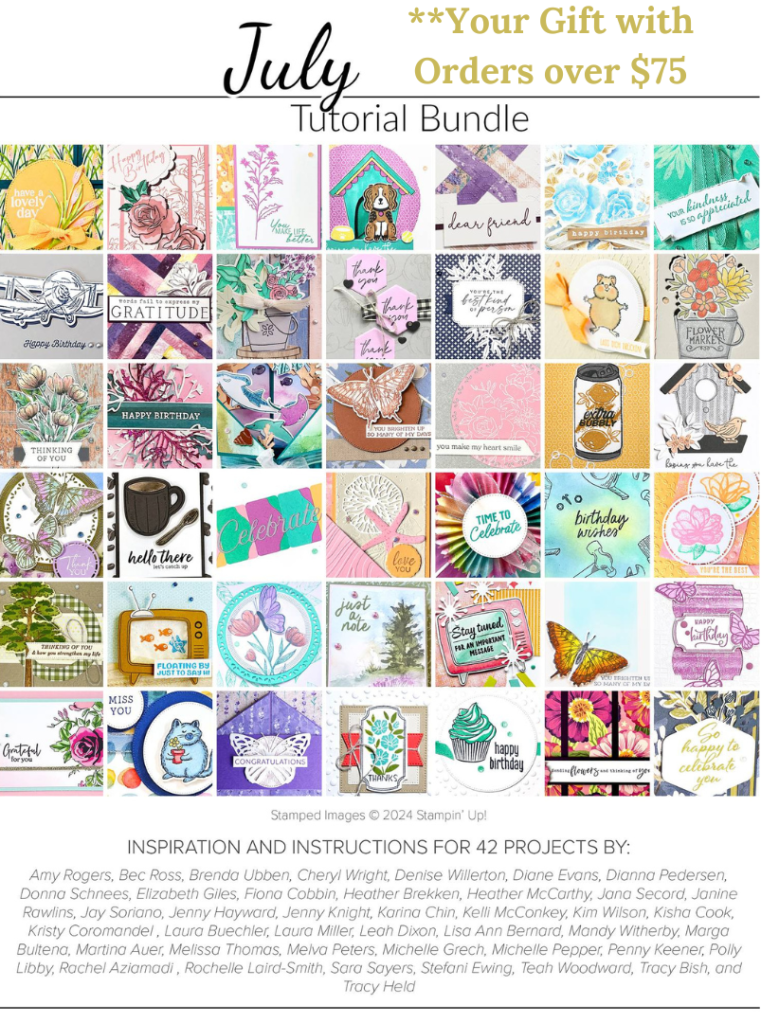
Don’t miss out on the bonus Sale-A-Bration gifts you can choose from with your orders over $100 or $200 AUD.
Wednesday’s WOW! #164 – Creating a masked background.
Here’s a technique for you to try sometime. You can create a masked frame and add colour to the centre area.
To do this use the Masking Paper to add strips around the edge of your card leaving a rectangle or square shape in the middle. Using the Brayer or the Blending Brushes roll (or brush) over your ink. Try different colours to create a coloured background.
Once you are done gently remove the masking paper and stamp over your images. Stamping them in black ink will really highlight them against the background. Then it is a matter of adding a simple greeting.
Hope you get to try this out in your crafting soon.
Happy Crafting,
Jenny
Bonus Days are happening now. Receive a $9 voucher now to redeem in August when your orders are over $90.
Need supplies and you are in Australia? Head to my store -> HERE. Please use the Host Code: JTRANKN3
Or contact me directly and I can help you with your order.
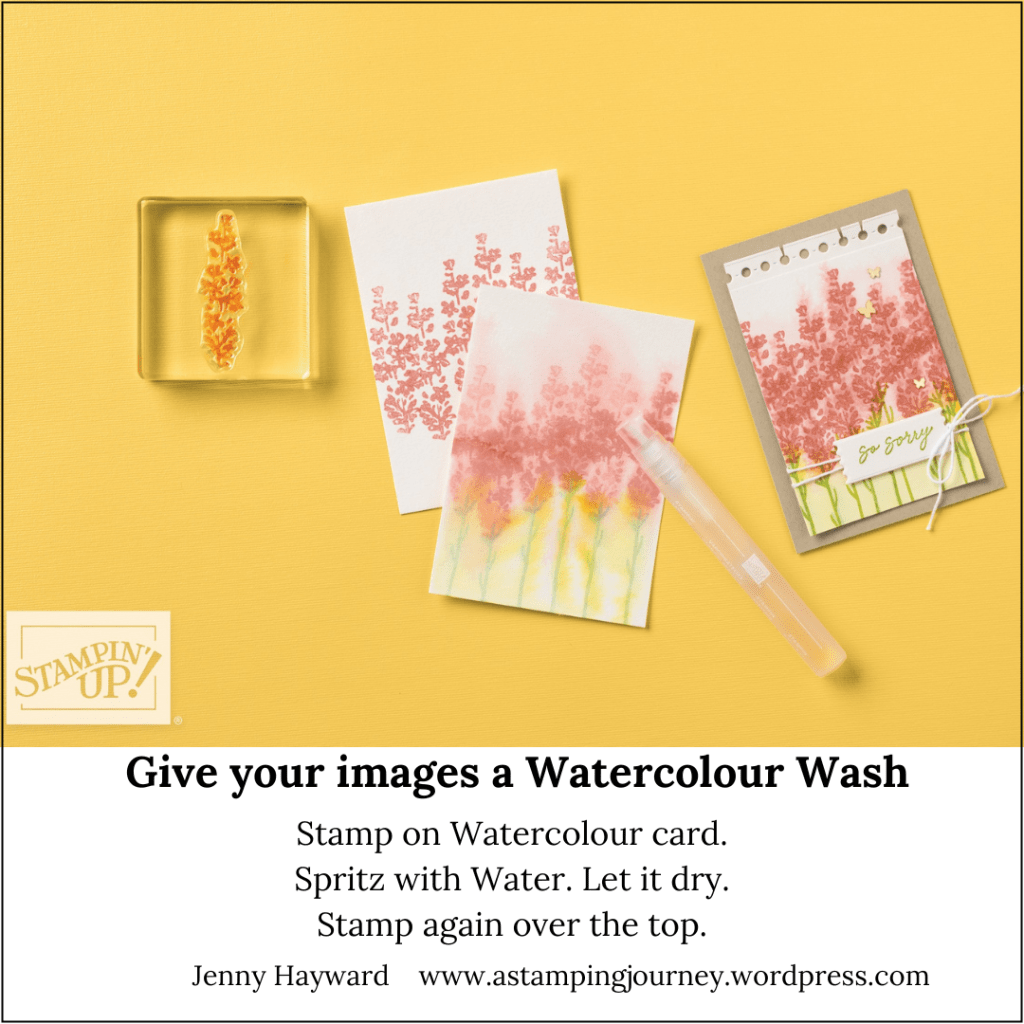
Wednesday’s WOW! #163 – A Watercolour Wash on your images.
You might have tried Watercolour Washing over your card to create a background, but have you tried giving your stamped images a wash? It creates a really soft look.
Stamp your image on to Watercolour Paper. This one uses the Painted Lavender stamp set. Spritz over the image lightly with water. Allow to dry for a short time. Then stamp over the washed area again with the same image. You will get a mottled look with a wash in the background. It looks really lovely.
Hope you get to try it out. I have added this image below so you can save it to try later.
Happy Crafting,
Jenny
In Australia and need supplies? I would love to serve you.
Head to my store -> HERE. Please use the Host Code: JTRANKN3
OR contact me and I can help you out.
Don’t forget it’s Bonus Day. When you order over $90 in one order you will receive a $9 bonus voucher to redeem in August.
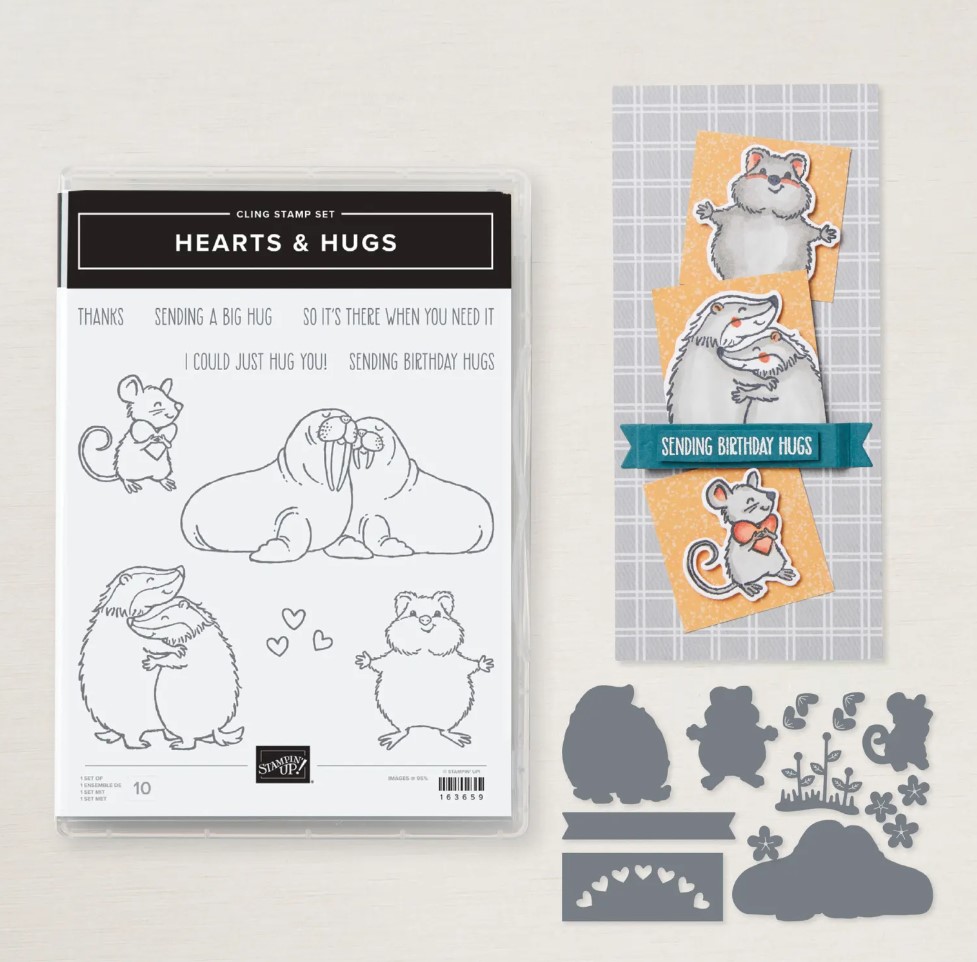
You might have seen the cute Hearts and Hugs Bundle around? It’s a sweet one. So today – let’s check it out for Sweet Sunday.
This one is a bright, cheery, heart flower hug for you. (That’s a mouthful isn’t it!).
This card is created by Stampin’ Up! Artists but there are some features I just love – and it might inspire you with some ideas for your next project.
Use a mini heart punch to create flowers. Add some additional flowers and leaves too.
On the white card sponge a little ink to create a background.
Instead of just a card mat to lay your feature piece on, cut strips of card and emboss them before adding the pieces evenly on your card base. And give those edges a little sponge to help highlight them.
Are there ideas you could use?
This is the Hearts and Hugs Bundle. (It is reduced this month too which is a bonus savings).
Wednesday’s WOW! #162 – Use Your Catalogue for Inspiration.
Do you struggle with creating sometimes?
You can find so much inspiration with the projects in the catalogue.
Copy them as they are.
Give them a twist in direction.
Change the colours.
Use a different stamp set or other products.
I was looking for ideas for the Unbounded Beauty Suite and came across this card on page 53 of the catalogue. Then changed it a little for my card.
I created a larger frame and added a sparkly leaf spray with the In Color Glimmer Specialty Paper. I used a piece of the Unbounded Beauty Designer Series Paper for the mat behind the white card. The sentiment is from the Simply Said Stamp set.
So next time you are stuck with inspiration, pull out your catalogue.
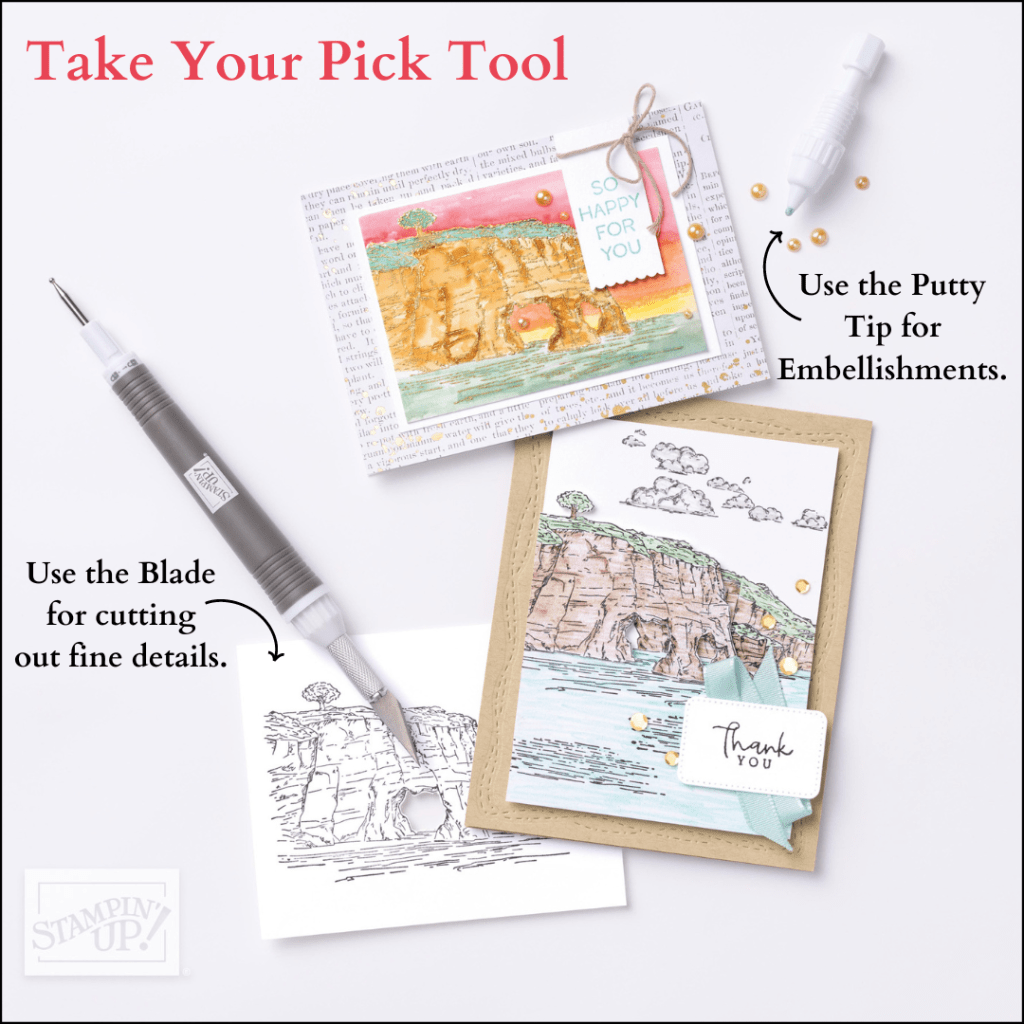
Do you love the Take Your Pick Tool? It’s like a Swiss army knife for crafters. 🙂
Wednesday’s WOW! #160 – Let’s look at just some of the features of the Take Your Pick Tool.
About the Take Your Pick Tool:
It is a Multipurpose Pickup and Precision tool simplifies some of the fiddly crafting tasks.
The Tacky Putty end easily picks up sequins, paper accents, and other small objects; twist to dispense more putty. There is also a Putty Refill that you can replace on the tool when you run out. AND TIP: Don’t sit there fiddling and twisting the end when you are not noticing. Ask me how I know …
The other end has 2 changeable, double-ended tips with paper piercer, mini spatula, small stylus, and large stylus. See I said it was a the Swiss Army Knife.
Here is the Take Your PickTool plus the extra Attachments.
There is the Take Your Pick Die Brush attachment. This will help remove those tiny little diecuts from the dies when diecutting.
There is also the Take Your Pick Crafter Tips. These tips include:
The Hobby Blade for precision cutting.
A Double-Ended Pick Tip for piercing or removing pieces from intricate die cuts.
And a Rotary Perforating Tip for cutting perforated patterns.
These tips fit onto the Take Your Pick Tool to give you even more crafting tools to work with! Simply remove a tip from the tool and insert a different tip for the task you need.
What a versatile Tool! It certainly makes some of those crafting tasks that much easier.
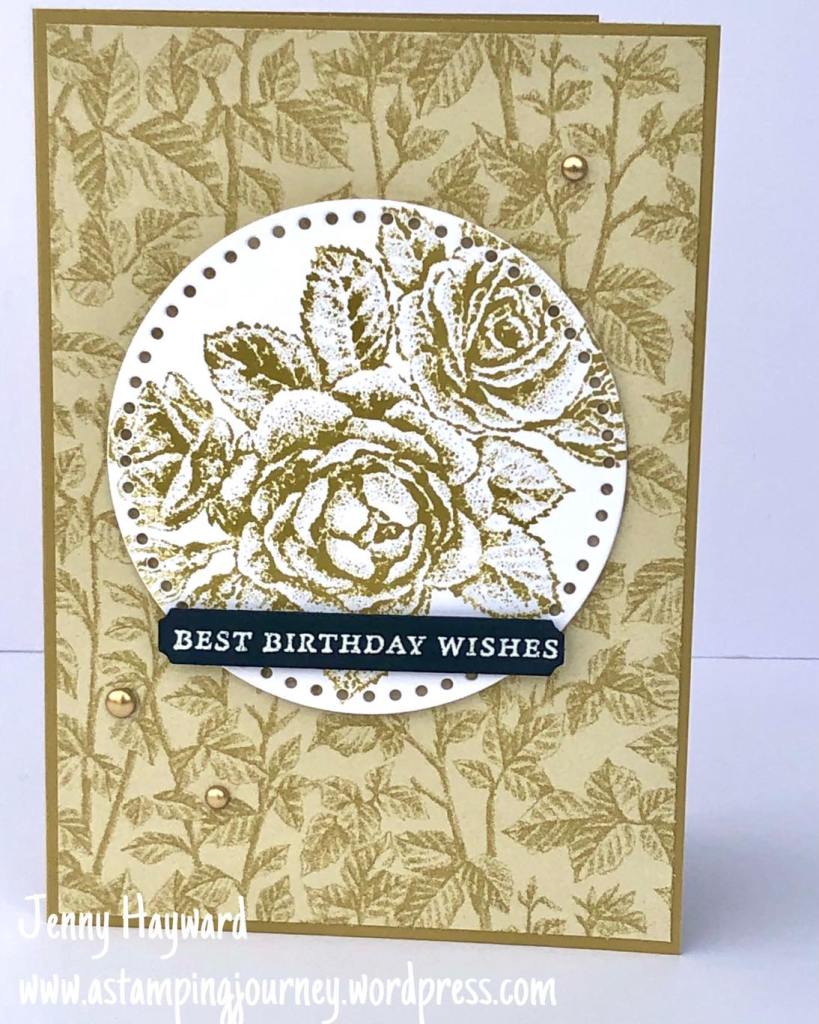
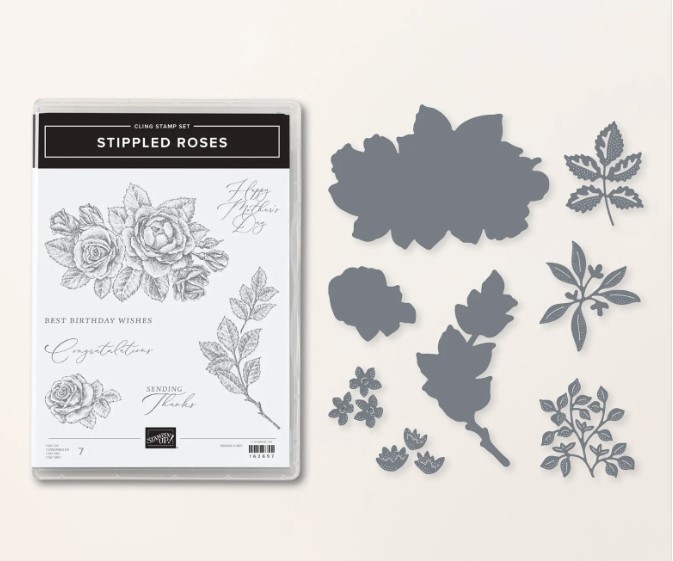
I’m not a great lover of colouring. I do try and I know practice makes perfect right. I have been playing with the Stippled Roses stamps and dies.
One of the cards I created is a simple card stamping the rose and no colouring. The detail in the stamp makes it so easy to just showcase this lovely bloom.
I have stamped it in Wild Wheat. Really I wasn’t too fussed on this colour when it first came out BUT… I have used it so much.
The paper mat behind the rose is the Softly Stippled Paper which is available as a Free gift for Sale-A-Bration with orders over $90 AUD. There are so many lovely prints in this pack.
Do you struggle with tying bows on your cards?? I get a groan every time in class when I say we have bows to do.
Here’s a tip that might help you.
Wrap the ribbon around a block or you could try an inkpad. These are a little more sturdier to tie the ribbon which helps. Tie your bow then snip the ribbon at the back. Then you can add the the ribbon to the card by tying the ends around the back.
Give that a try. I hope it helps you.
Happy Crafting,
Jenny
Need to order some crafting supplies? Head to my online store -> HERE. Or you can contact me directly.
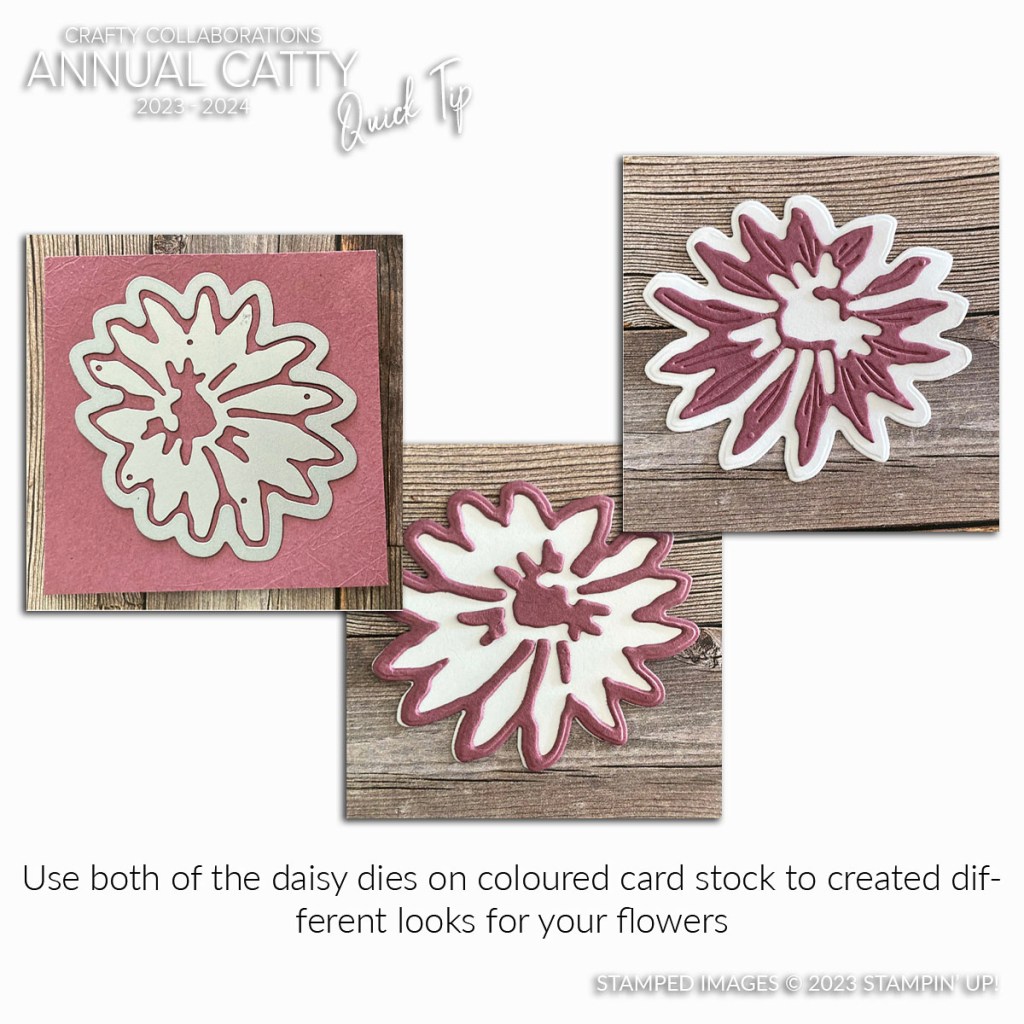
Wednesday’s WOW! #156 – Use both Daisy Dies at the same time for different coloured flowers.
This is a great effect. If you don’t have the Daisy Dies you could use any layering flower dies.
How it works? Layer the dies together on one coloured card and diecut out. Diecut again on a different coloured card. This works well with white and another colour.
Swap over the different shapes and layer them together for a different look.
Try it out with what you have.
For more tips be sure to stop by often. Especially for our Wednesday’s WOW! You can search for other tips I have shared in the past by doing a search in the tags. There could be lots of helpful tips for your crafting.
Happy Crafting,
Jenny
Need some help with your crafting or to order?
I would love to help you out. Contact me directly
OR you can head straight to my store -> HERE. Please use the Host Code: DGASD34B
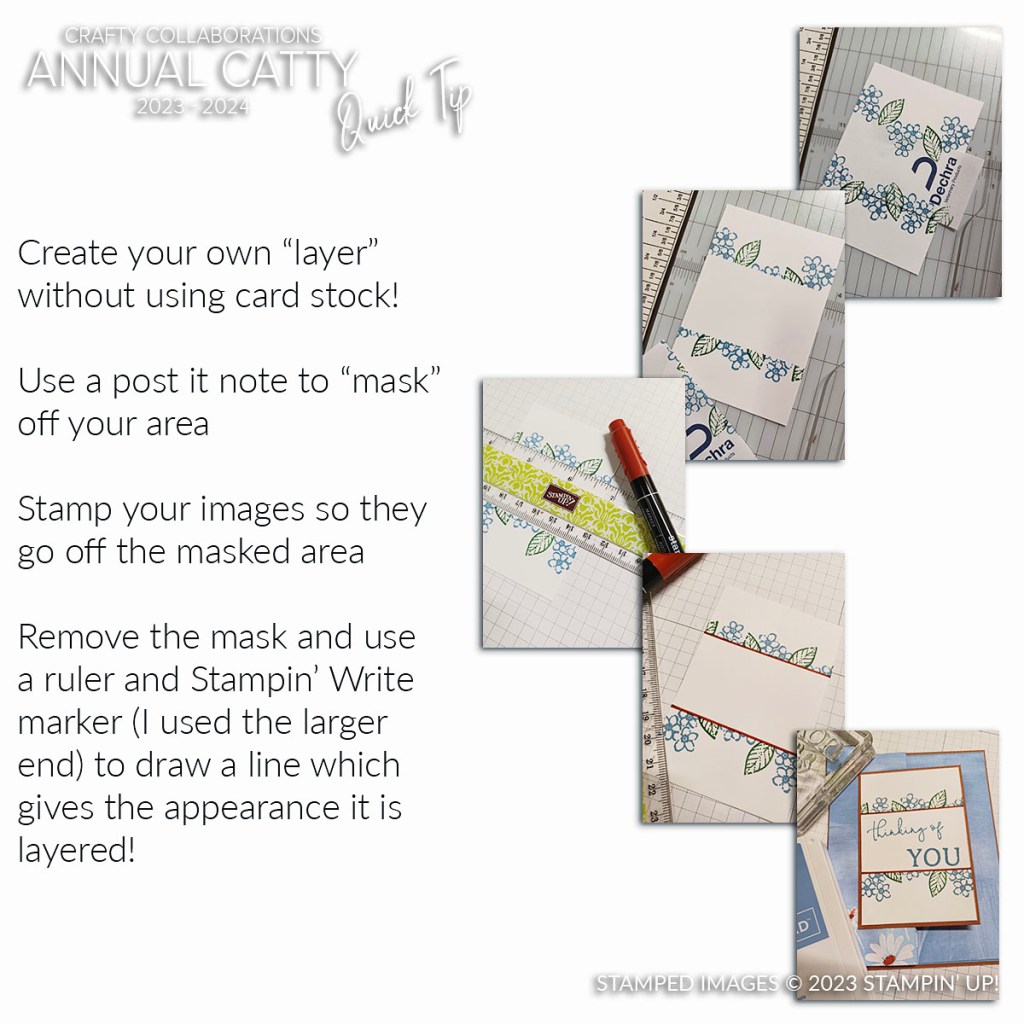
Wednesday’s WOW! #155 – Create a layered look with Masking.
Here is a way to create a great effect on your One Layer cards (as in just a card front) by giving the look of layers using a mask. See how.
To create the look firstly use a post it note to mask off an area. You can position it across ways or even at an angle.
Stamp your images so they stamp over the edge of the masked area on to the card. Remove the mask. You could leave it as it is and stamp your greeting BUT to give the look of a layer. Use a ruler and Stampin’ Write Marker (Thick Tip) and draw a line. This highlights the section.
What do you think? How about trying this on a project and see how it looks.
Happy Wednesday.
Jenny
Need some supplies and you are in Australia? I would love to serve you. You can head to my store and shop Online -> HERE. Please use the Host Code: DGASD34B