3D projects, cards, Convention, Masculine, Stampin' Up!, swaps

CONVENTION SWAPS!

I have finally had a chance to go through my swaps and take photos.  I thought you might like to see them. There are some great ideas. I have grouped them to help you see them.  If you would like a closer view of one or to know about it more then let me know.

Butterflies are always popular!

P1160588

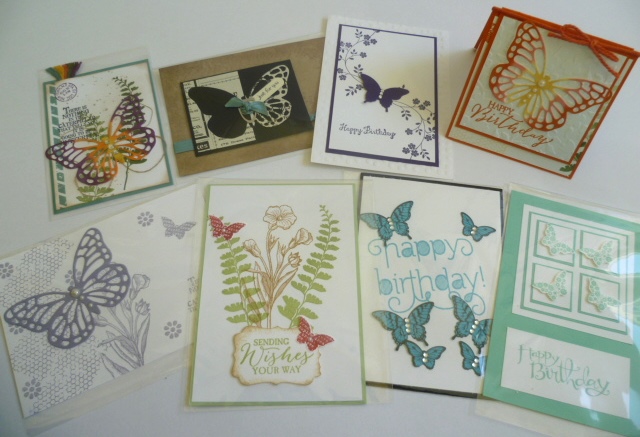
Flowers of all types!

P1160590

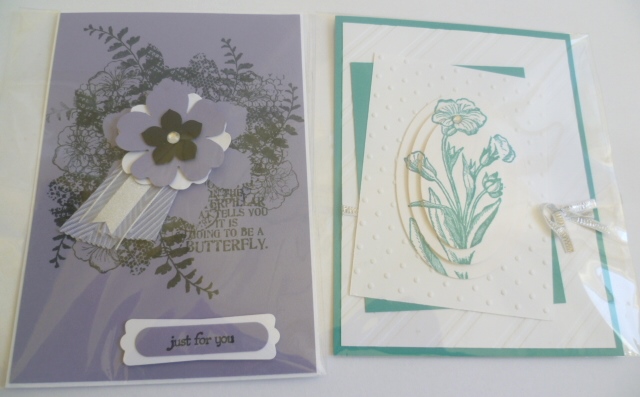
I took photos of these next 2 separately to show you as I liked these ideas.

On the left is a collage card.  I have been wanting to try one of these.  One on the right is a triple layer stamped card using ovals.  It looks great!  (I will give this one a go too).

P1160592

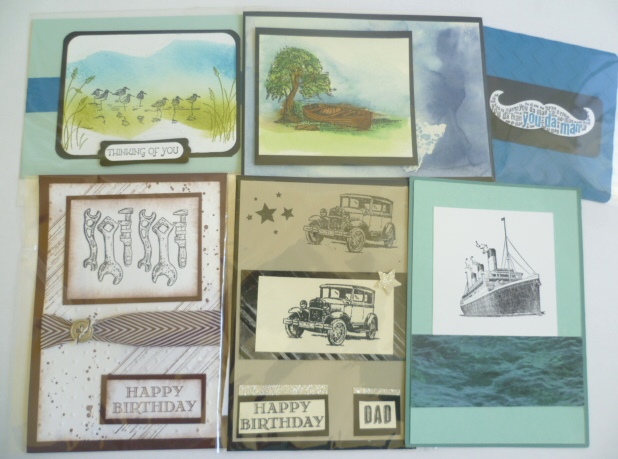
A variety of cards here.

P1160596

Some ideas for the men!

P1160597

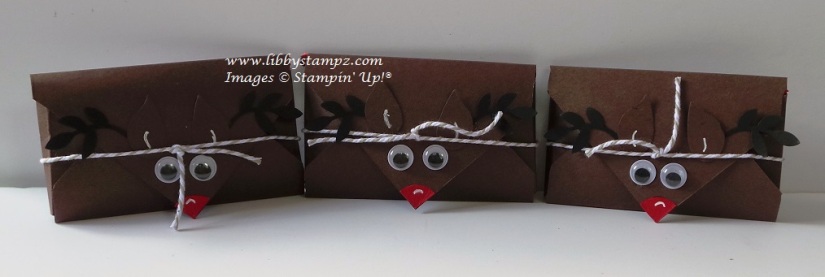
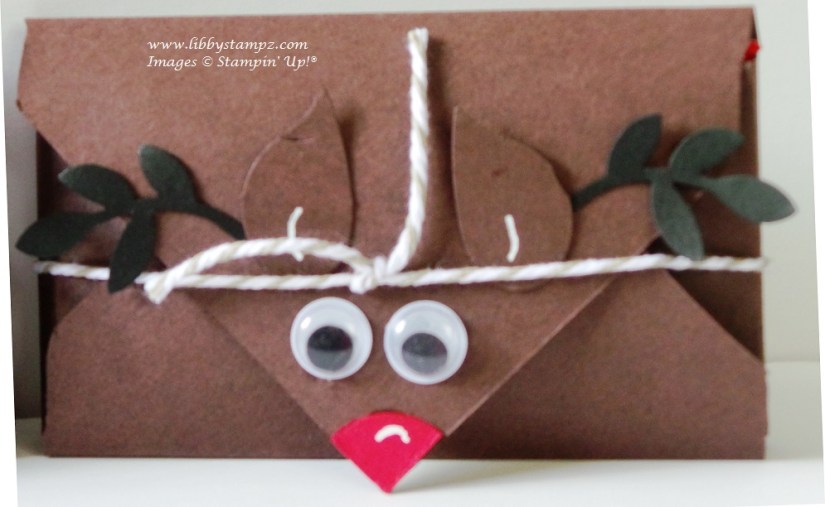
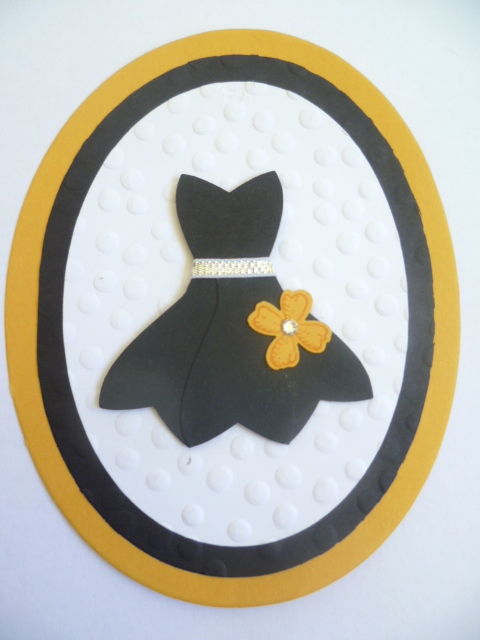
These are gift card holders, tea bag holder and little tags.  Check out the black dress.

P1160600

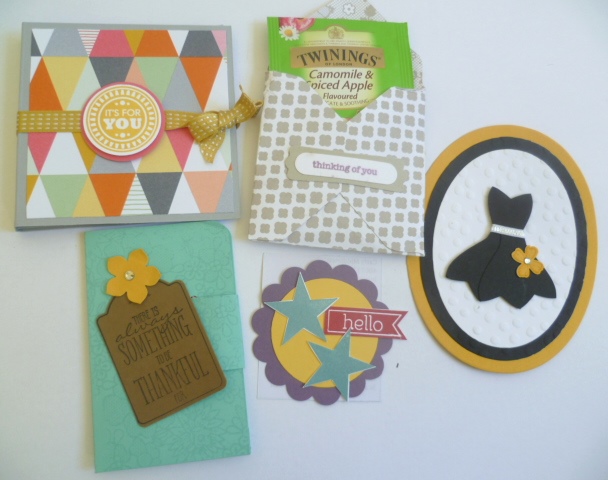
I had to take a close-up of the dress.  It is using the Bow punch.  How clever!

P1160602

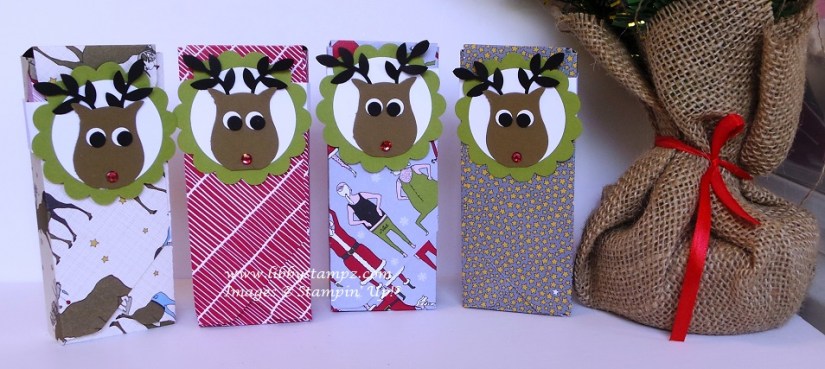
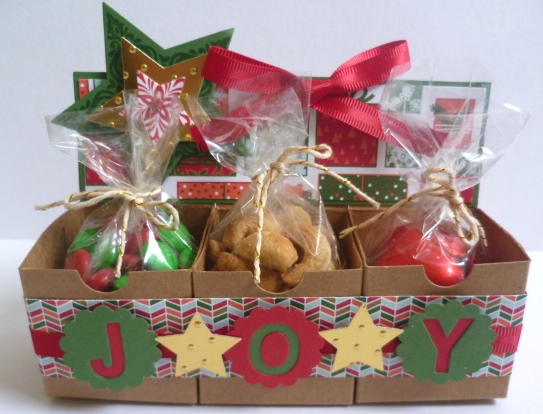
Some little treat holders. Very cute!

P1160605

Tags and bookmarks

P1160608

There you go.  Thanks to those people who swapped with me. There are some great ideas for you to try.  What is your favourite??  What will you try first?? I think I will need to grab my bow punch and try the dress out.

Thanks for stopping by today.  Join me again soon,

Jenny

3D projects, Christmas

12 WEEKS OF CHRISTMAS – WEEK 12!!

Latte 12 weeks Header

Can you believe it.  It’s Week 12!! Where have those weeks gone??  They have certainly flown by. Today’s project is brought to you by Libby.  She has some quick and easy gift giving ideas.  They are so cute. 🙂

Christmas is only one week away and if you are looking for some quick stocking stuffers these projects will fit the requirements.

All you really need for these projects is the Envelope Punch Board and a few punches including the Scallop Tag Topper Punch.

Project 1 – Candy Cane Treat Box

candy cane treat

These little pouches are quick and easy to make with the Scallop Tag Topper Punch, some Jiggle Eyes, ribbon, Blendabilities ( to colour the Rhinestones) and some Candy Canes of course. They easily fit 2 Candy Canes inside and could fit more if you wanted or some other treats. If you don’t want to give sweets, it would fit some coloured pencils inside or other small gifts.

Project 2 – Reindeer Poop (M & Ms Peanuts)

reindeer poop

This little treat is made using the Envelope Punch Board, some Jiggle Eyes, the Bird Builder Punch, ½” Circle Punch and the White Signo Uni-Ball Gel Pen for highlights.

reindeer poop close-up

It fits 1 small packet of M & Ms inside quite neatly and on the back I have adhered the Reindeer Poop Poem (available in the pdf).

Project 3 –Maltesers Pouch

Malteaser pouch

This treat uses the Envelope Punch Board again. It’s a pouch with a Belly Band and fits 1 of the Merryteasers in it. It would also fit individual chocolates such as Freddo Frogs, Caramello Bears, and Santas etc.

malteaser pouch - single


Of course we have a bundle for you.

Latte Girls Week 12 Bundle –

Just $90 plus postage. (RRP $101.85 + postage). Save over $10!

Bundle 1

Or Upsize your bundle and get the Santa & Co DSP as well for the special Latte Girls price of $105 + postage (RRP $120.80 + postage).

Bundle 2

Remember you will need to contact me to get this bundle at these prices as it’s exclusive to the Latte Girls 12 Weeks of Christmas Design Team! 

Do you want the written tutorial? No worries – simply comment here with your email address and I’ll send you a copy!

Thanks for stopping by today.  Enjoy creating these cute treat pouches.

Jenny


3D projects, Christmas

12 WEEKS OF CHRISTMAS – WEEK 4!

Latte 12 weeks Header

We bring you another Christmas project this week for our 12 Weeks of Christmas – and today it is my turn to share a project.  I do hope you like it.  Today I have a Tiny Treat Gift Holder for you.

P1140690This little Treat Holder will fit a variety of treats all together for you to give someone special this Christmas.  Really it is just so simple.  I have used 3 of the Tiny Treat Boxes available in the Holiday Catalogue.  These are a bargain at $11.95 (AUS) for 24 boxes.  They are so cute and there are so many different ways you can use them.  This would be a really cute gift to give someone as a little extra or for those “Hard to buy for” people.

For this I have adhered 3 of the boxes together with Sticky Strip and then decorated them using the Nordic Noel Designer Series Paper.  I have added some stars from the Bright and Beautiful stamp set and cut with the Star Framelits. Additional stars were cut from Gold Foil Sheets with the smallest Stars Framelits.  The gorgeous Red Satin Ribbon finishes the box off.  Of course, you can decorate these boxes however you like.  Fill some Cellophane bags with treats and tie them off.  I used the Gold Twine for this.

If you would like a detailed tutorial to create this project then just drop me a message or email.  If you need any products to create the project then let me know or you can order directly at my Online Store Here.

And of course, we have a special bundle for you this week to help you create this project. These are the items you will receive in your Bundle AND receive 10% off!  

Bundle Price is $44.80 plus Shipping and Handling.

I hope you like today’s project.  I would love to see your version when you create it so make sure you drop me a photo.
 
Happy Christmas creating!!
 
Jenny 
3D projects

CHOCOLATE TREE!!

Ok, one more Christmas creation before New Year.  I just really wanted to show you this one. I found the tutorial for these recently on Brenda’s blog here.  It is really clever. Just after I saw this I found the Kisses and Mini Hershey bars at a local discount store.  I was so excited because they are really hard to come by here and YAY! now I could make them!!

Here is my Chocolate Tree.

P1070495

Here is a view from the top.

P1070496

Do you like it? Once you get the folding right for the triangles in the middle they are really easy.  They would make a really nice gift to give at Christmas.  A bit late for this year but maybe file the idea away for next year!!!

Wishing you a Very Happy 2013.  Stay safe as you celebrate.  I want you all to be healthy and well for another year of creating and sharing.

See you next year!

Jenny x


glitter-graphics.com

3D projects, Stampin' Up!

BOX WEEK – BOX #3

This gift box today is an idea that has been around the blog world for years.  I thought I would give it a Christmas touch.

P1070312

P1070282-1

This gift box is known as a Sour Cream Box or as we know it downunder as a Sunny Boy Box.  You can find the instructions here.  They are just too easy!

I have created a medallion using the Simply Scored from Gumball Green card.  The greeting is from “More Merry Messages and coloured with Markers.  It was then punched out with the 3/4” circle punch.  I cut a strip of the Cherry Cobbler Tulle and wrapped around some cotton thread in the middle to gather it up.  This was all adhered together and added to the box with Dimensionals.

Thanks for stopping by for Day 3.

See you again tomorrow.

Jenny

3D projects

BOX WEEK – BOX #2

Here is a little pocket for your Christmas treats.  This is using the Petite Pocket Die again.  I found this idea for the Sparkly flap from Dawn here.

P1070317

The DSP is from the Candlelight Specialty pack from the Seasonal Mini.  I have cut circles with the Die to create the circle tie-downs and wrapped twine around them.  I cut the flap again from the Silver Glimmer Paper.   I think it is quite classy!

This is just the right size for a Chocolate treat or as a money holder – or even a Gift Card 😉

Thanks for stopping by today.  See you tomorrow.

Jenny

3D projects

BOX UP YOUR CHRISTMAS!

Christmas is fast-approaching whether we like it or not.  How are your plans coming along??  Why not join me next week for my ‘BOX WEEK’.  Each day starting on Monday I will share a different Gift Box for you.  I hope this might help you for Christmas.  So you don’t miss any make sure you have subscribed to my blog.  Just click on the link in the Right Hand column.  I can’t wait to share these boxes with you.  They have been a lot of fun creating them.

Here is a bonus one for you to get you started.  Don’t we all love this little Owl?  Why not a Christmas Owl! I have added him on a Treat box using the Scallop Envelope Die.  You can’t see the top view but I cut 2 of the Envelopes, cut off about 1/2″ on the bottom flaps and then adhered the 2 together.  I turned back the Scallop Envelope Flap and adhered them down.  This is just a good size for a small chocolate or little treat.

P1060559

See you on Monday for Day 1 of ‘Box Week’.

Jenny

cards

HAPPY VALENTINE’S DAY!!

Wishing you all a Happy Valentine’s Day.  I thought I would stop by and show you a quick Valentine’s Treat Holder.  You could use this for any special occasion with a Chocolate treat or Gift card perhaps.

The original design was from Angie from her 12 weeks of Halloween found here.  I think this is cute (if I can say that!).  The paper measures 25cmx14cm.  Score the long side at 12.5cm.  Fold your paper in half with the fold on the left hand side.  Add Sticky Strip to the bottom edge and right hand side and adhere together.  Too easy!! You can crimp the bottom if you like.  Of course, you can make this to any size for your treat or Gift Card.

I have used the set “You are Loved”.  It finally found ink this week after sitting on my shelf for a couple of months.  I inked the heart with Crumb Cake and sponged over with Chocolate Chip on parts of the image.  (It is a bit hard to see).  I went over the bird with the Real Red Marker. This was mounted on a Crumb Cake mat.   The paper is from the Brights Paper Stack.  The Crumb Cake strip was run through my crimper and I wrapped some Crumb Cake Taffeta Ribbon around the strip.  The sentiment is from “Teeny Tiny Sentiments” with a little heart punched out from the 2-step Owl Punch.  I punched a  half circle from the top of the holder with the 1 3/8″ circle punch to make it easier to pull the treat out!!

I hope you have a special day with the loved ones in your life.  🙂

See you again soon,

Jenny xx