I am married to Glenn and we have 2 adult children: Josh and Carlie. I live in the Northern Suburbs of Wollongong; just south of Sydney, NSW Australia.
I joined Stampin' Up! in August 2008. I'm having a great time playing with ink and paper and sharing my creations with you.
Thank you for visiting me in my corner of the blogosphere. I hope I inspire you along the way. I hold regular classes and workshops in my studio in East Corrimal and offer classes and tutorials by mail. I hope I can share stamping with you and your friends soon.
Take a look around. If I can help you with any of the gorgeous Stampin' Up! products please don't hesitate to ask me.
Happy creating,
Jenny
Some more cards today from our Team Shoebox Swap. Really we have some amazing talent in our Inky Fingers Team.
Today I will share the cards using the Rooted in Nature Bundle.
This one below is using a number of different patterns from the Nature’s Poem Designer Series Paper. I like how the words are cut apart.
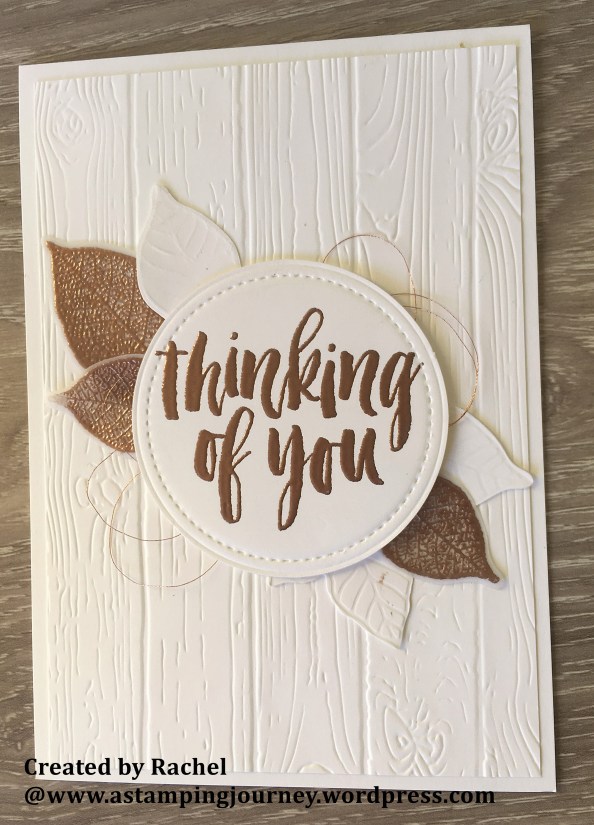
This one below is just gorgeous. A white card mat is embossed with the Pinewood Planks Embossing Folder. I hadn’t seen this folder used before. I like it. You should see those leaves in real life. They are heat embossed in Copper on to Vellum. So nice. The other leaves are embossed with one of the leaf embossed dies in the Nature’s Roots Framelitsset. The sentiment is heat embossed in copper too. This is such a striking card.
I hope you like these ones. Yes still more to come. It was a busy day at our team meeting. 🙂
I have another group of photos to share with you today from out Team Stamp day a couple of months ago. We all created a card in the Shoebox Swap for each person to create. I showed you some lovely ones yesterday. (Head back to the last post if you missed it).
This is a mix of different cards.
I haven’t used Sheltering Treeset in a while. After stamping the tree on the white Diecut oval, then stamp the small “dots” in the set in different colours over the branches. We used Tranquil Tide, Pineapple Punch (I think), Grapefruit Grove, and Lovely Lipstick. There was a purple colour created but that was from mixing the Lovely Lipstick and the Tranquil Tide I think. The white card piece was backed on to a diecut black oval that was cut in half.
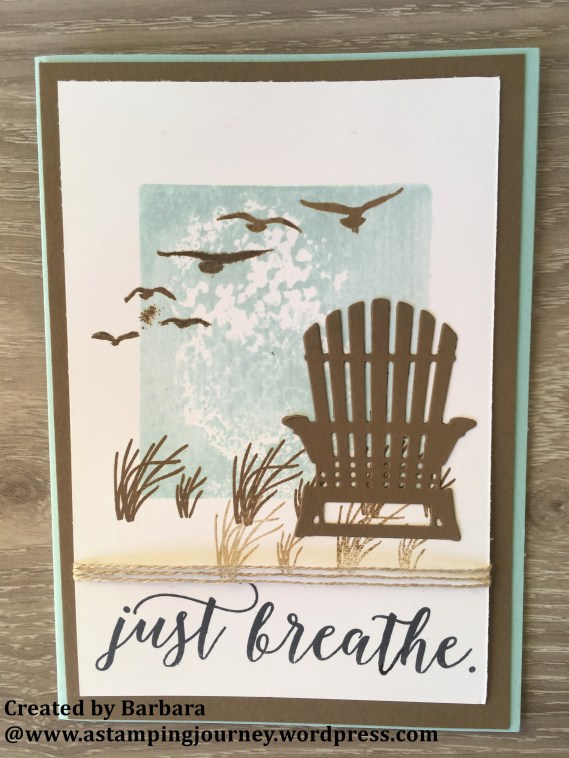
The next one below uses the High Tideset and the cool seat from Seasonal Layers Thinlits. The sentiment is from Colorful Seasons. To create the background on the card, ink the clear block in the Pool Party inkpad. Lightly spritz it with water and stamp on to the Shimmery White cardstock. The reeds are stamped in Soft Suede and then stamped off again on the card to make it lighter. This was repeated a couple of times.
This next one is using the Coffee Cafestamp set and the Coffee Cups Framelits. The card was distressed a little with some sponging with Soft Suede ink. This was a fun card to create.
Quite a few weeks back I mentioned a team stamp day I went to and we had a Shoebox swap. I said I would share the cards we made. It has taken some time to get back to them with lots of other exciting things happening. Over the next few days though I will share them with you.
Firstly, if you are not sure what a Shoebox swap is: Each person makes a card and then makes up kits for that card for the number of people that will be there at the event. We had 13 people come along for that team day. I have already shared my card I made for it some weeks ago. You can see that card -> HERE.
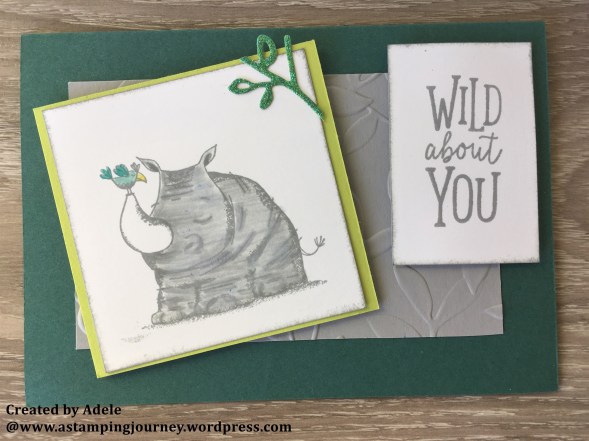
The Animal Outingset was a popular stamp set to use for that day. I will show you these cards today. I won’t give you specific details on the cards. I think for the most part they are straight forward.
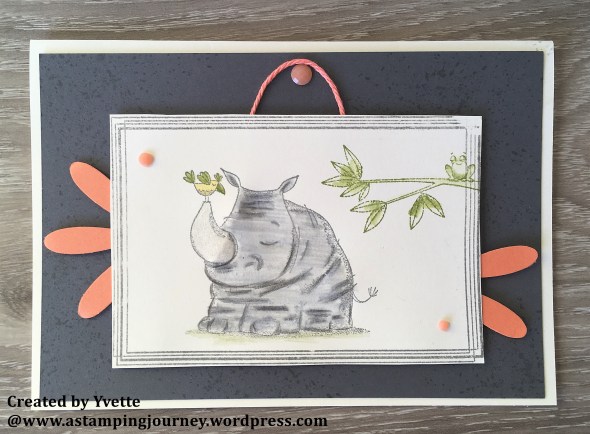
All the Rhinos were coloured with the Blender Pen which I don’t normally use to colour.
The curvy pieces of card sticking from under this card below is actually a piece of Grapefruit Grove card punched with theDaisy Punch. The Daisy is then cut and sections adhered under the stamped piece. The background on the Basic Gray card is stamped with one of the stamps from the Waterfront set I think it was.
The background strip on the card below was stamped with the Waterfrontstamp set too I think. The colours used for this was Mossy Meadow, Old Olive and Smoky Slate. I drew “dashed” lines with Black Marker on the stamped card piece with the Rhino to create a frame around him.
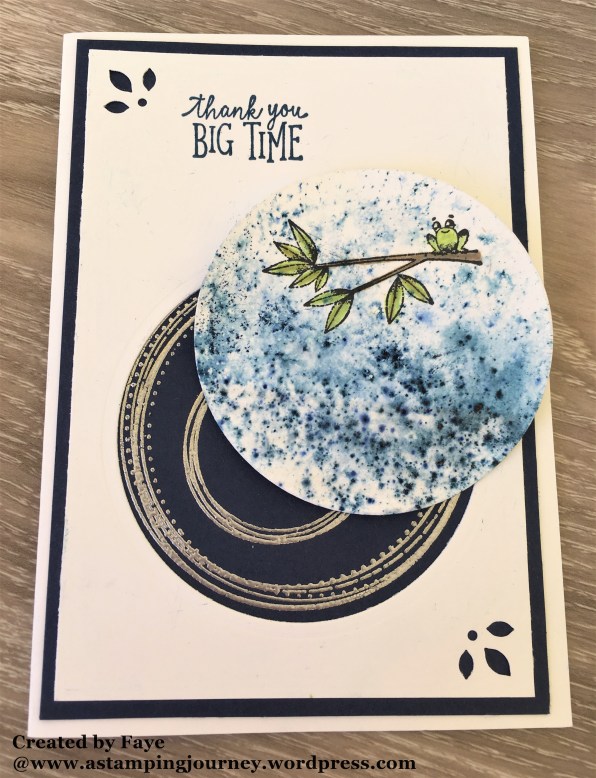
This one below has a lot of different steps to it which I will explain below.
The circles were stamped in versamark using the Stamparatusto position them and then heat embossed. I think there was a template to cut the circle from the white card (which was shimmery White card) to be sure it was in position. On the circle off-cut the little frog on a tree was stamped in black Stazon and coloured with the Watecolor Pencils I think. It was coloured after the next step though. The circle was sprinkled with Brushos Crystals and then misted with water. The corners were punched with the Detailed Trio punch.
I will be back tomorrow with some other great projects from the team day. Stay tuned.
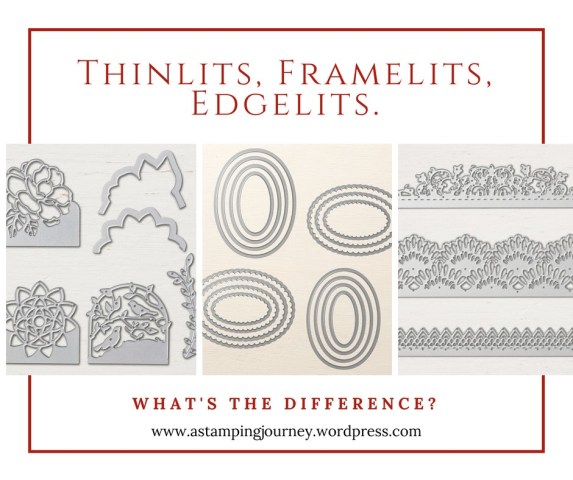
There are a number of different types of dies in the Stampin’ Up! Catalogue. Do you know the difference between them? That’s what Wednesday’s WOW! #34 is looking at today. Let’s check them out.
THINLITS VERSUS FRAMELITS VERSUS EDGELITS
Just a note too: You will find that many of the Stampin’ Up! Die sets contain Thinlits, Framelits and Edgelits.
What are they though?
Thinlitsare usually the more detailed dies consisting of intricate designs and words. There are also Thinlits dies to create some 3D boxes or bags. The detailed dies include ejection holes so you can remove the paper easily. I would recommend using the Big Shot Die Brush or the Paper Piercer.
For example, Botanical Tags Thinlits shown below.
Or the Window Box Thinlits
Framelits have an open centre and are like a frame. They can be placed over stamped images to cut the shape or used on their own.
Layering Ovals.
Wood Crate Framelits
Many of the Stampin’ Up! Die sets contain both Thinlits and Framelitsas seen in the Eclectic Layers Thinlits set below.
Most Framelitscan cut materials such as card, paper, vellum, fabric and other light materials.
Edgelitscan cut the image to create a detailed border as in the Delicate Lace Edgelitsbelow.
They can also cut the outline of the detailed Thinlits such as the Detailed Floral Thinlitsbelow.
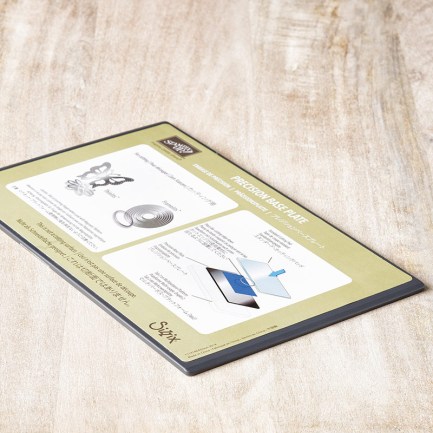
While discussing the Thinlits and Framelits? Should you use the Precision Plate?
The Precision Plate is designed to get the best cut with the more detailed Thinlits so they are crisp and sharp. They should not be used with Framelits or less detailed Thinlits as they may warp the dies.
To use the Precision Plateyou will replace this with the bottom Cutting Plate in your Big Shot.
See it in action in the video below. (If you receive this blog update by email and the video is not showing then head directly to the blog post by clicking on the title at the top).
Information from Stampin’ Success Quarter 2 2016. Stampin’ Up! Publication and the Stampin’ Up! online store.
I hope you have found this helpful. I know I did when I was looking in to it.
OK, last one in this series of 5 Ways with Paper. Have you been inspired by them? Hope so anyway. 🙂
Today’s card in inspired by this card from Julie’s Stamping Spot.
I liked the strips and having the contrast card on it. I changed mine around a little. I think I will use this idea more often. I do love that Tranquil Tide colour though too.
The Crumb cake strip is embossed with one of the Petal Pair embossing folders.The sentiment is from the Southern Serenade.
TO CREATE YOUR OWN:
You can make the strips any size but I will tell you the measurements of mine. I like the different widths of the strips.
Whisper White card mat is 9.5cm x 13.8cm (3 3/4″ x 5 3/8″)
Strips measure: Left – 4.5cm x 13.4cm (1 3/4″ x 5 1/4″)
Centre – 3cm x 13.4cm (1 1/9″ x 5 1/4′)
Right – 1.5cm x 13.4cm (5/8″ x 5 1/4″)
Thanks for stopping by today. Be sure to drop a comment occasionally. I love to hear what you think and where you are from.
Don’t forget though there is only one week left of the Designer Series Paper Sale where you can choose 1 free pack when you purchase 3.
Today – DAY 4 of “5 WAYS WITH PAPER”. What have you thought so far??
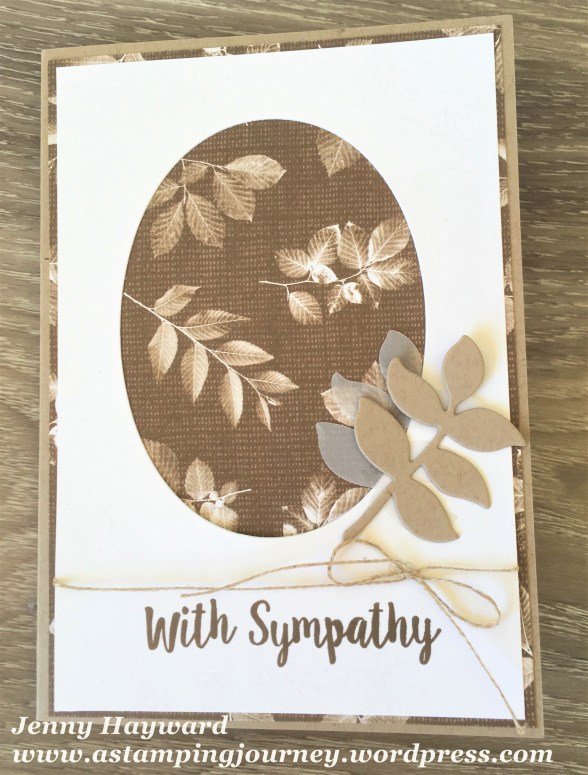
Today’s card – why not feature the paper! With all the beautiful prints you can use them just as they are.
This lovely print from Nature’s PoemDesigner Series Paper is so detailed with the veins of the leaves. I decided to make a Sympathy card with this paper. Good to always have on hand sadly.
It’s a very simple layout with a window highlighting the paper. The leaves are from the Seasonal Layers Thinlits. I cut one from Crumb Cake and one from Vellum. The sentiment is from the Better Together set.
Last one tomorrow. Hope you will tune in. I have had fun creating with the papers. I should do more of it. How about you?
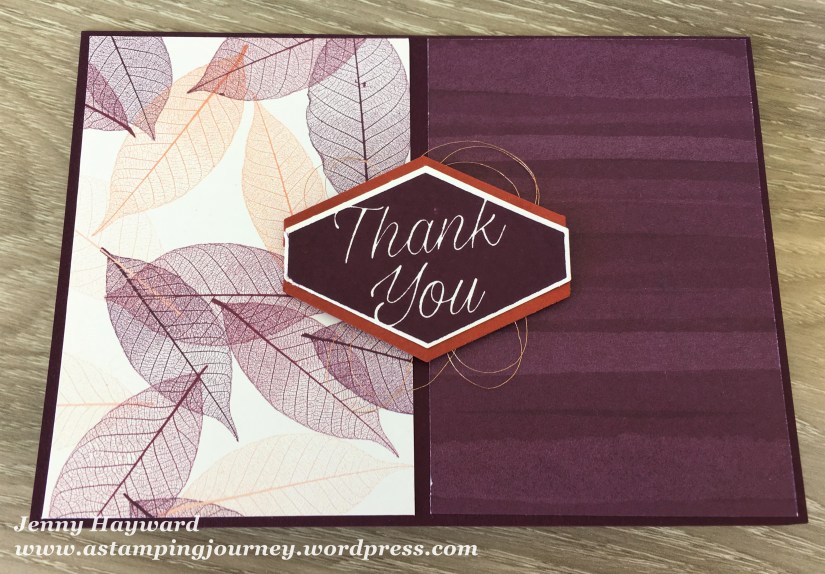
Today’s card #3 using your paper is such an easy card. This card was inspired by one some time ago by Barbstamps, even before Pinterest. I had it filed away for a while with lots of other ideas.
I have used the Nature’s Poem Designer Series Paper.
TO CREATE YOUR OWN
Take a piece slightly smaller than your card base. Cut it in half. Flip one side over and adhere the pieces on to your card base. Really it is that simple. You could cut it in 2/3 – 1/3. Position the card in landscape or portrait orientation. So many different ways. You get to see both sides of the gorgeous Stampin’ Up! patterns.
Decorate your card as you like to. For this one I stamped the sentiment from Accented Blooms and punched it out with the Tailored Tag Punch. I punched a second label out from Cajun Craze card. Cut it in half across ways and adhered that behind the stamped one to show an edge top and bottom. Easy! I went a little wild with the Copper Thread. 🙂 Raise your sentiment off with Dimensionals and you are done. This makes a great masculine card even.
Thanks for visiting. Stay tuned for tomorrow as I have another card for you. Don’t forget to #usethat paper you have around.
I have talked a bit about paper lately and sharing some great ways to use it. I am in the middle of sharing 5 Ways to With Paperduring this week. We are just taking a little commercial break today.
This month we have the special promotion of Buy 3, Get one Free. For today’s Wednesday’s WOW! #33 I thought we would take a closer look at all these beautiful papers. It’s hard to see with the tiny images in the catalogue. So let’s meet them i this video below. (If you receive these blog posts by email and you don’t see the video, please click on the blog title above to go straight to the blog post).
What’s your favourite? I still love the Nature’s Poem paper and I mentioned about the beautiful Petal Promenade paperrecently. It’s so hard to choose.
So just quickly, here is the deal again. This month Buy 3 packs of paper and get a fourth one free.
It’s a great deal and you can grab these this month. Head to my store -> HERE to grab them. Please use the Host Code this week: 3B6A2PJ6
Thanks for visiting. Back with more great ways to #usethatpapertomorrow.
Day 2 of 5 Ways With Paper. I have another great card to share with you using your lovely paper.
This card was inspired by one by Lisa Pretto on inkbigacademystamps.
I have used the Share What You Love Specialty paper again – because it is so gorgeous!
TO CREATE YOUR OWN
On your base card adhere a piece of co-ordinating card slightly smaller than your base.
Cut your pieces of paper. You can make them any size you like of course but to give you the measurements I have used:
Top Left piece measures 8cm (width) x 9.5cm (length) or 3 1/8″ x 3 3/4″.
Bottom Right piece measures 8cm (height) x 7cm (width) or 3 1/8″ x 2 3/4″.
Decorate as you like. I cut a decorative label from the Stitched Labels Framelits. The sentiment is from the One For Allset. I sponged around the edge of the white oval with Old Olive. The little Razzleberry flower is cut from the Seasonal Layers Thinlits. It needed something underneath the label. I played around with a few different options but I wasn’t happy with them. In the end I went with a strip of Rich Razzleberry card that I had flagged both ends.