cards, Stampin' Up!

SWEET SUGARPLUM THOUGHTFUL BRANCHES!

The delivery of my Thoughtful Branches bundle arrived today as I was creating. I had been waiting with anticipation for this set so I was excited. I had been deliberating what to make next so it arrived just in time!

I had been pinning ideas on Pinterest, so I could have CASED some but I wanted to see what I could create.  So here is what I made.
image

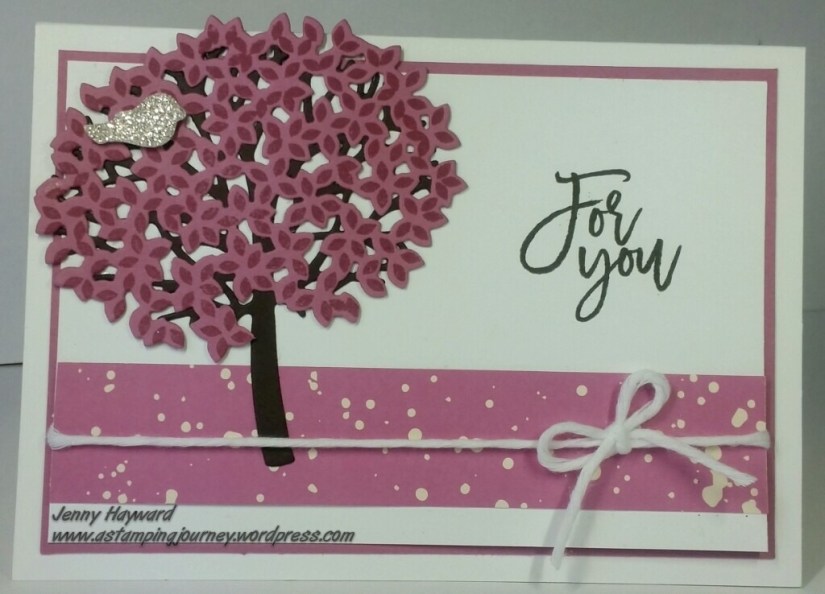
The Designer Series Paper is from the Playful Palette paper stack. The tree is cut from Early Espresso. I stamped the leaves in Sweet Sugarplum on the cardstock then cut it out with the Thinlits. The sentiment is stamped in Early Espresso and then matted it on Sweet Sugarplum. I tried several colour card bases but then settled on the Thick Whisper White card base. I think that was the right choice. Before I assembled the card I wrapped around Thick White Baker’s Twine. I think I should have gone with the thinner white though. Too late then though 🙂 It needed a little sparkle to finish so I cut the little birdie from Glimmer Paper.

There are so many elements in the stamp set and the Thinlits so it is very versatile. I think you would get lots of use from these making cards for different occasions. If you haven’t seen the set you can check them out in the previous post.

The bundle is $90.75. Of course you can get them individually but you can save 10% by buying the bundle. You can order this bundle from me. When you order from me You will also receive a PDF of some bonus projects PLUS receive double the VIS (loyalty) Points.

I am looking forward to creating more with these so stay tuned.

Jenny

Classes, Stampin' Up!

THOUGHTFUL BRANCHES BUNDLE FOR A LIMITED TIME!

Stampin’ Up! have released an exclusive Stamp set and Thinlits Bundle available for a limited time.  The ‘Thoughtful Branches Bundle is a beautiful set and available for a limited time from 2nd – 31st August.

Thoughtful Branches Header

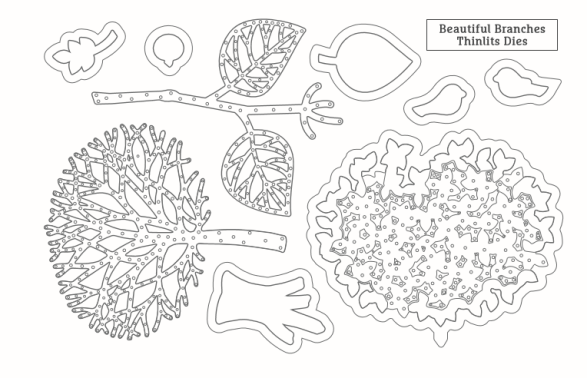
Thoughtful Branches Thinlits

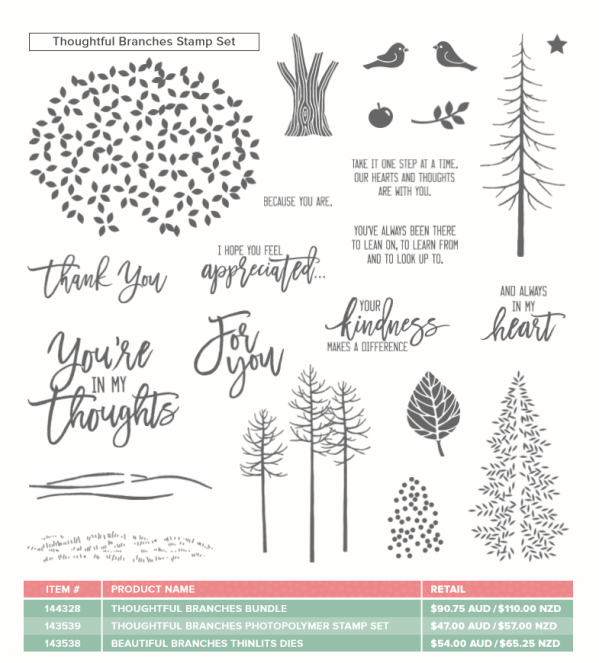
Thoughtful Branches Stamp set

Isn’t this a gorgeous bundle?  The beautiful font in the sentiments will add some elegance to your cards. This is such a versatile bundle with the stamps and the Thinlits making cards for so many occasions. Imagine what you could create with this set!

You can buy the stamp set and the Thinlits separately but why not save 10%. The Bundle price is $90.75.

**BONUS** –

Receive a PDF of some bonus projects PLUS

Receive 2 VIS (Loyalty) points when you purchase this from me. 

You can order this Bundle directly from me OR through my store.  Order HERE at my store. I can ship to anywhere in Australia.

I will be holding a class showcasing this set on the 13th August so mark the date down now.  I will try and offer it by mail too so check back soon.

Jenny

cards, Stampin' Up!, Techniques, Tutorials

BABY BEAR COLOURS!

I have shown you a couple of ‘Baby Bear’ cards now but I realised I hadn’t shown you the Colour Cards for the bears that I made up some weeks ago.  You might have seen some similar around your blog travels but I thought I would make some to show my ladies coming to my classes so they can see the difference.

Just a couple of notes before you see the colour cards.

~If you are not sure already, when I mention stamp the colour off, it means to ink up the stamp and lightly stamp on some scrap paper to lighten the colour.

~Each of the stamps in the ‘Baby Bear’ set have numbers. You will notice the more solid stamp has #1 next to it, the next more patterned stamp is #2, the more detailed pattern is #3.  You might find that some people stamp in reverse order so the darker colour first which would be #3 and then work backwards to the lighter colour  Play around yourself to see what you feel more comfortable with and what way gives you the better effect.  I found going from #1 with the lighter colour up to #3 with the darker one to be work fine.

~When I note the number below the colour card that denotes the number on the stamp. eg. #1 is the numbered 1 stamp.

~When stamping the bear some people have said they have had trouble lining up the bear for each stamp.  What I found that helps is when you ink up and go to stamp the 2nd stamp, I line the inked image up with the stamped one by lining up it’s bottom and then lining up the ears.  I have found that helps a lot. Hope it might help you.

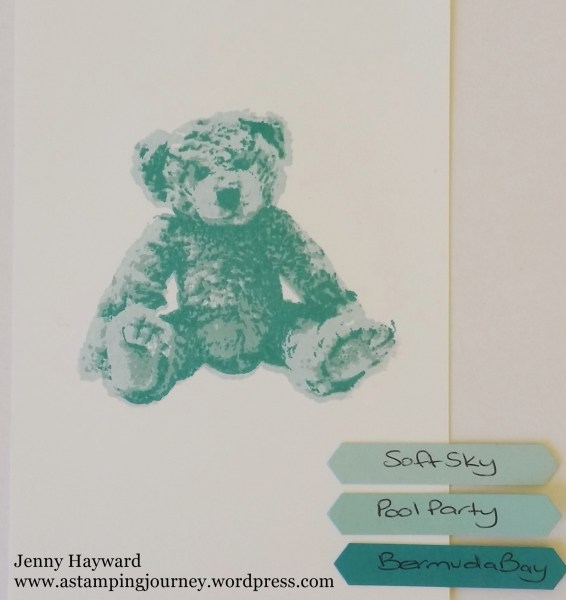
bermuda bay

#1 Soft Sky, #2 Pool Party, #3 Bermuda Bay.

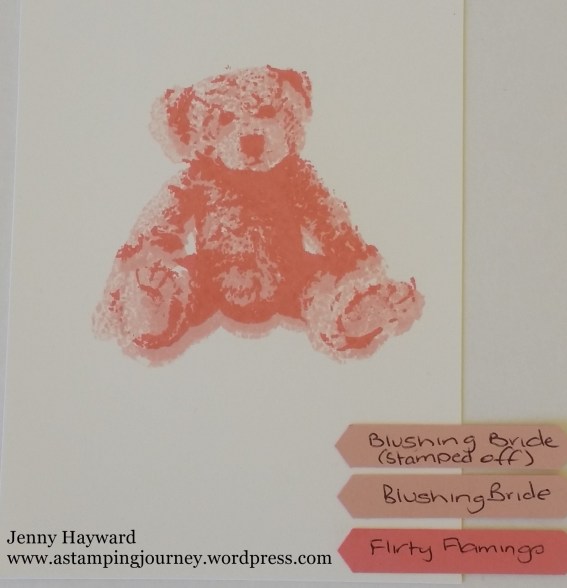
blushing bride

#1 Blushing Bride (stamped off first), #2 Blushing Bride, #3 Flirty Flamingo.

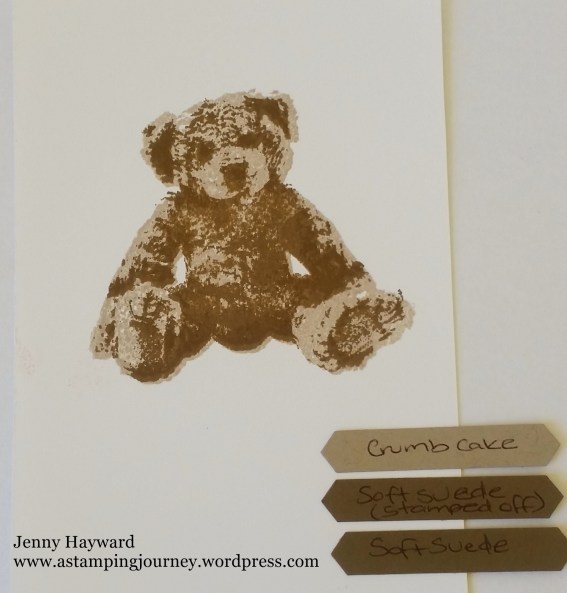
soft suede

#1 Crumb Cake, #2 Soft Suede (stamped off first), Soft Suede.

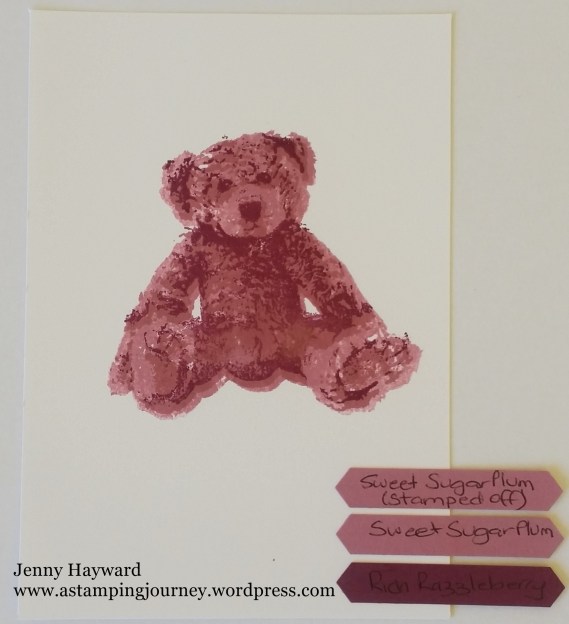
sweet sugarplum

#1 Sweet Sugarplum (stamped off first), #2 Sweet Sugarplum, #3 Rich Razzleberry.

————

You can play around with all different colour combinations.  What colours have you done? I would love to know.

I do love this bear.  It is very cute and I love the detail of it’s fur.

Thanks for visiting me today.

Jenny

cards, Catalogues, Classes, Stampin' Up!

BABY BEAR THANKS!

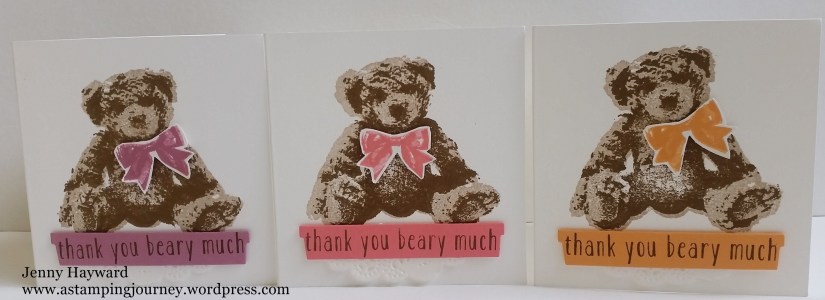
I can’t believe I forgot to show you these cute little cards! I made a few of these for Thank You cards for the lovely people who ordered at my Catalogue Launch last month  Who can resist that cute Baby Bear???  🙂

Catalogue Launch Thanks

These are very simple little 10cm x 10cm cards (4″x4″).  This cute set is a 3 step stamp set. To stamp the bear I used Crumb Cake for the 1st stamp, Soft Suede for the 2nd stamp and stamped off first on scrap paper before I stamped, then Soft Suede for the 3rd stamp, stamping without stamping off.

The sentiment is actually 2 stamps.  I lined them up together on the clear block and inked the stamp and stamped on scrap paper a few times to test that they were lined up straight. making any adjustments as I needed. Then I stamped them on different scraps of the new Incolor card in Soft Suede ink.  The one on the left is Sweet Sugarplum, the middle is Flirty Flamingo and the right one is Peekaboo Peach.  I cut the sentiment with the Hearth and Home Thinlits.  Before I added them to the card with Dimensionals. I added a little piece of Paper Doily under the bottom edge.  These ones are the retired ones.  I still have yet to get the new ones.

The bows are 2 stamps.  I inked the first stamp (the more solid one) in the colour and then stamped it off on scrap paper first before stamping on white card. Then inked the other stamp up and stamped in full strength (without stamping off).  I cut these out and raised them up with the Dimensionals.

Do you think these are “beary” cute?? 🙂

Thanks for visiting.  Have a great weekend.

Jenny

Classes, Stampin' Up!

SALE DAY IS COMING – BUY ONE GET ONE FREE STAMPIN’ UP! PRODUCT!

I have loads of retired Stampin’ Up! Products so it’s time for my ANNUAL BOGO SALE!

BOGO

This has been popular in the past. After all, it’s like getting Stampin’ Up! at 50% off!!

HOW DOES IT WORK?

All my stamps and Big Shot items are priced at near Catalogue price. Other items are reduced. Choose your purchases and then you receive the same value of brand new product FREE!!!! How good is that!

WHEN IS THIS EXCITING EVENT HAPPENING?

Saturday 6th August 2.30pm – 4pm at my Studio, East Corrimal.  So if you are a local Wollongong-ite then come along.  Tell your friends even if you can’t come. (If you don’t know where I am, then message me and I can tell you my address).

I have stamps, ink, paper, cardstock, punches, Framelits and Embossing Folders for the Big Shot and lots of ribbon and bits and pieces.  There may even be a few bargains to clear out!! So come along.

Don’t forget  – Share the event and tell your friends.

See you there.

Jenny

Classes, Stampin' Up!

ARE YOU IN WOLLONGONG? COME FOR A CARD CLASS!

If you live in Wollongong come and join us for this week’s Card Class.  Alternatively get the card kit. (see below).

We have a Stamp A Stack this Friday making 6 cards. You will make 2 each of 3 different designs and everything is prepared for you.  Here are the details.

DATE:  Friday 29th July  10am or 7.3opm

COST: $15 if you have your own adhesives.    $20 to use mine.

PLEASE RSVP: by Thursday 28th by phoning or emailing me (or leaving a comment).

Here is a sneak peek of the cards.

SAS 29_7 - Copy

I look forward to seeing you there.  They are fun. 🙂

Can’t make it but would love to make the cards? Why not get the kit.

Cost is $15 for all materials.  Does not include stamped images.  You can substitute the stamps or order them separately. Leave a comment or email me.

Jenny

cards, Challenges, Stampin' Up!

A COLOUR CHALLENGE AND FMS SKETCH CHALLENGE!

I had some ‘ME’ time stamping today.  It’s not often I do that as I am always preparing for classes or making cards for others.  So I indulged!!! 🙂

I really like joining in on challenges.  It extends your creativity and makes you think a bit. I saw the Freshly Made Sketches the other day and thought I wanted to have a go at it. Then I saw the new Colour Challenge on Pootles.  So I knew that they were my starting point.

I will show you my card, then I will go through some of the thought processes behind it.

So for Sam’s Colour Challenge this week it was Sweet Sugarplum, Soft Sky and So Saffron. Lovely subtle colours but I would never have thought to put them together. Thanks Sam! That’s what a challenge is for right. 😉

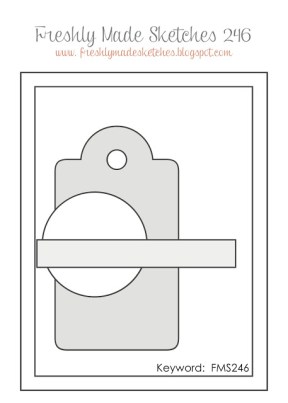
Here is the Sketch for Freshly Made Sketches #246.

FMS Final 246-001

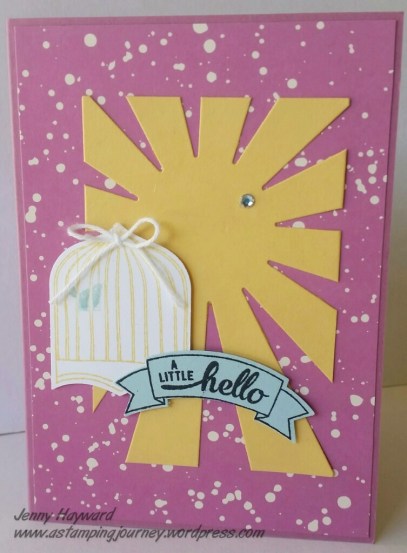
This was the card I created.

Sunburst challenge for FMS

Let me tell you how I got to this point.

I already had the colours to use (sometimes that is half the battle!) and I had a sketch. Sketches really give you a plan to work with.  From there I went through my stamps to see what might work with these colours.  They were nice pastel colours so I thought flowers or butterflies.  I pulled out some of those sets and then found my Badges and Banners set. I wondered if this might work??

I then pulled out the cardstock for these colours and pulled out the DSP, ribbon and other embellishments I had.  I loved the Sweet Sugarplum paper in the Playful Palette DSP. I inked up the birdcage image in the stamp set in So Saffron.  I wiped off the ink on the bird with the Blender Pen and then coloured it with the Soft Sky inkpad using the Blender Pen again.  It wasn’t as bright as I would have liked after I stamped it.  I did go over it with the Soft Sky marker to lift it up.  I punched it out with the Best Badge punch.

The sentiment was stamped in Memento on Soft sky and punched with the Duet Banner punch.  The big question was what to make the tag shape behind the images from the sketch?? I pulled out a few of my Framelits and sized them up but they just weren’t working.  Then I saw the Starburst Thinlits.  Why not think outside of the box – or the shape??  I cut the starburst shape from the So Saffron.  It was a little big for what was needed.  I used the Layering Square Framelits.  I used my largest straight square and lined it up over the Starburst to get the right position.  When I cut it I just rolled it through in the Big Shot to just before the end of the frame, then rolled it back so it wouldn’t cut the end. Then I turned the Framelit and card piece.  Lined the card with the Square Framelit again and rolled it through stopping before it came to the end again. Then I had a rectangular shape.

It was a very quick case of just sticking it together. I finished the card off with a bow from White Baker’s Twine and an Adhesive Rhinestone.  So these colours could work together. 🙂

If you want to have a go at these challenges.  You can see the Freshly Made Sketch #246 HERE and go to Sam’s blog at Pootles HERE for the Colour Challenge (check out her other amazing creations while you are there!).

Thanks for visiting me,

Jenny

cards, Stampin' Up!, Techniques

SCALLOP EDGE BORDER WITH THE BEST BADGE PUNCH!

I have just posted about my tags I made for team swaps and then I realised I hadn’t told you about the scallop edge on the tags.  Never mind you get a second post from me. 🙂

Just to show you the tags again and have a look at the scallop edge at the bottom.

swirly tags

It’s a bit hard to see in this photo but maybe this photo is a little clearer.

swirly tags _2

I recently discovered that you could create a scallop edge using the Best Badge punch.  I loved that idea and maybe I bought the punch just for that reason. 😉

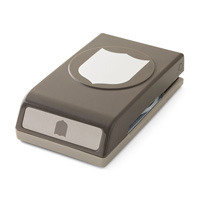
This is the punch if you haven’t noticed it in the catalogue.

best badge punch

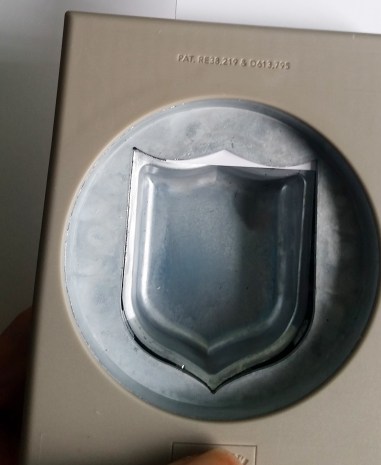
So how do you create the scallop edge with it??  Well, I haven’t got a video for you but I have some photos to help you.

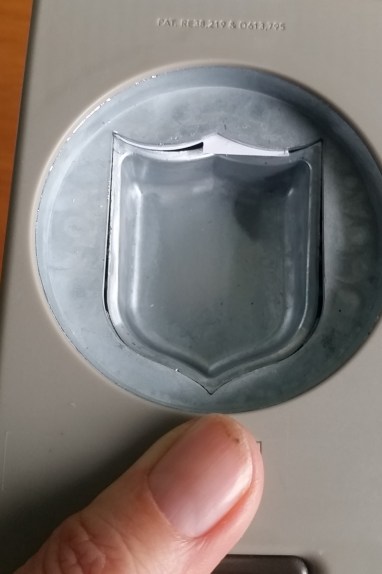
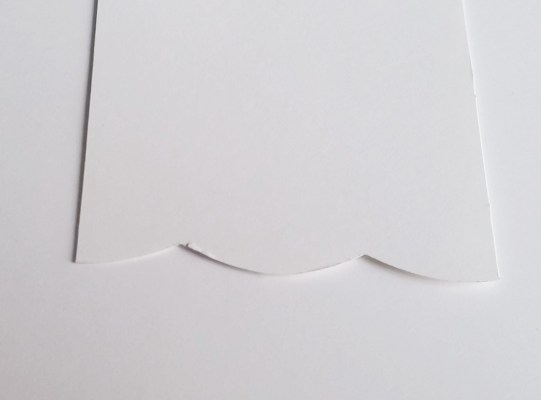
Firstly, with the scallop edge of the badge punch line the bottom curves of the scallops up with the bottom edge of the cardstock and then punch.

Scallop edge

Move the punch along the cardstock so you line up the last scallop you punched with the scallop on the punch.  Then line up the bottom of the curve on the next scallop with the bottom edge of the cardstock like you have done previously.  Then punch.

scallop edge 1

Continue moving along the length of your piece of card.  This particular one was only narrow so there are not too many scallops to punch but it gives you an idea.

scallop edge 2

Does that help?? I hope so.  It’s great when you can get more use from your punch than what you originally thought.

Thanks for visiting me again.

Jenny

cards, Stampin' Up!, swaps

PINWHEEL TAGS TEAM SWAPS!

I have been on a roll with the Pinwheels lately using the Swirly Bird set.  I needed to make some swaps for our team meeting last night so I decided to make up some quick tags with them.  WELL….. That was the plan.  These tags took hours.  Nothing was going right yesterday.  I was getting ink everywhere, I was cutting things wrong!!! Do you have days like that?  Anyway, I got them done.

swirly tags

I made a few variations of them and a number of each. For the colours on the Pinwheels they are from left: Wild Wasabi and Emerald Envy; Sweet Sugarplum and Peekaboo Peach; Blushing Bride and Peekaboo Peach; Sweet Sugarplum and Elegant Eggplant.  I used some scraps of the Playful Palette DSP stack too.  (I am on a mission to use all of my DSP!).

The white card measures 13cm x 5cm (5 1/8″ x 2″) but you can make them any size you like.  These will fit on a card front to make a full card.  I rounded the tops with the Corner Punch.

The sentiments are from ‘Thoughtful Banners’.  I punched them out using the Classic Label Punch.  It’s cool that you can punch them different ways to create different effects. I coloured the Rhinestones with a black sharpie.

I got there in the end.  I hope you like them.  🙂

Jenny

Christmas, Stampin' Up!

CHRISTMAS IN JULY – AND IT’S ALL ONLINE!

Christmas in July 2016

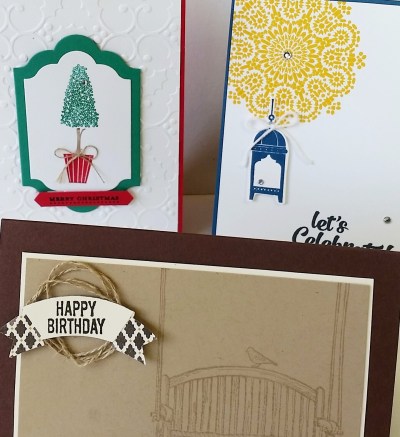
Christmas in July starts tomorrow.  Here is a taster of the projects I am sharing.

collage for Christmas in July

It’s all happening online so you can join in from anywhere – and it’s free! Here are the details for you to join up.

Christmas in July runs from 19th – 22nd July. 

Each day I will be sharing a Christmas project that I hope will inspire you.  We will have time to chat if you are around via Facebook and have some fun.  I will have some great specials through the week too.

There are 2 different ways to follow along. 

1) This will run through a Facebook group.  Please Click HERE to ask to join.  Invite friends of yours to join in too.

2) Not on Facebook? You can receive the projects by email. (address in right tab bar near the top) Please email me to ask to join in and I will send you an email each day with the project and the special. You will just miss out on the chatting.

So come and join in!

Jenny